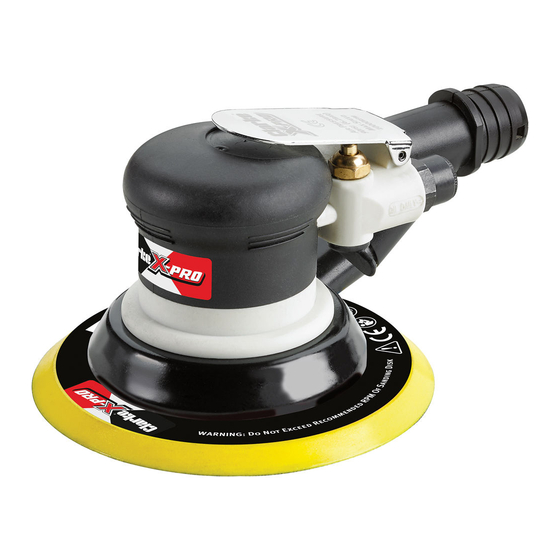
Summary of Contents for Clarke X-PRO CAT 160
- Page 1 PALM SANDER MODEL NO: CAT160 PART NO: 3120174 OPERATING & MAINTENANCE INSTRUCTIONS ORIGINAL INSTRUCTIONS GC0217...
-
Page 2: Specification
INTRODUCTION Thank you for purchasing this CLARKE Palm Sander. Before attempting to use this product, please read this manual thoroughly and follow the instructions carefully. In doing so you will ensure the safety of yourself and that of others around you, and you can look forward to your purchase giving you long and satisfactory service. -
Page 3: General Safety Rules
GENERAL SAFETY RULES CAUTION: FAILURE TO FOLLOW THESE PRECAUTIONS COULD RESULT IN PERSONAL INJURY, AND/OR DAMAGE TO PROPERTY. WORK ENVIRONMENT 1. Keep the work area clean and tidy. 2. Dress appropriately - Do not wear loose clothing or jewellery. Tie long hair out of the way. -
Page 4: Sander-Specific Safety Rules
14. This air tool should be serviced at regular intervals by qualified service personnel. 15. Avoid damaging the air tool by applying excessive force of any kind. 16. Always maintain the air tool with care. Keep it clean for the best and safest performance. - Page 5 It is an EEC requirement that a dust extraction facility be provided on power tools, however, due to the nature of the tool, some of the dust produced will be forced into the surrounding atmosphere and will not be collected. TRANSPORTATION 1.
- Page 6 - free finish on various surfaces prior to painting or varnishing the finished surface. Your sander should include the items above. Any damage or deficiency should be reported to your CLARKE dealer immediately. Parts & Service: 020 8988 7400 / E-mail: Parts@clarkeinternational.com or Service@clarkeinternational.com...
-
Page 7: Compressed Air Requirements
• A typical air line layout is shown above. If an automatic in-line filter/ regulator is used, it will keep the tool in good condition but should be regularly checked & topped up with oil. Clarke air-line oil should be used, and the lubricator adjusted to approx 2 drops per minute. -
Page 8: Before Use
BEFORE USE WARNING: COMPRESSED AIR CAN BE DANGEROUS. ENSURE THAT YOU ARE FAMILIAR WITH ALL PRECAUTIONS RELATING TO THE USE OF AIR COMPRESSORS AND A COMPRESSED AIR SUPPLY. FITTING A SANDING DISC 1. Select the disc to be used which MUST be 150mm diameter with hook and loop backing. -
Page 9: Operation
CONNECTING THE DUST COLLECTION TUBE & BAG 1. Push the dust collection tube onto the waste outlet. 2. Use the string to tie the dust collecting bag onto the smaller end of the tube. 3. The dust bag should be emptied regularly:- do not wait until it is completely full. -
Page 10: Disconnecting The Air Supply
3. Failing this, the tool should be disassembled, thoroughly cleaned, dried and reassembled. You may prefer to take the tool to your CLARKE dealer if internal maintenance is required. 4. If the sander becomes sluggish and the air supply is of good quality, it may be necessary to replace worn or damaged parts. -
Page 11: Troubleshooting
Your Clarke air tool has been designed to give long and trouble free service. If, however, having followed the instructions in this booklet carefully, you encounter problems, take the tool to your local Clarke dealer. -
Page 12: Abrasive Discs
STORAGE If the tool is to be stored, or is idle for longer than 24 hours, run a few drops of Clarke air-line oil into the air inlet and depress the trigger in order to lubricate the internal parts. When not in use, the sander should be disconnected from the air supply and stored in a dry place out of the reach of children. -
Page 13: Declaration Of Conformity
DECLARATION OF CONFORMITY Parts & Service: 020 8988 7400 / E-mail: Parts@clarkeinternational.com or Service@clarkeinternational.com... -
Page 14: Parts List
PARTS LIST No Description No Description Main Housing Sanding Pad Head Cover Trigger Washer Trigger Hinge Pin Bearing Trigger Valve Bolt O-Ring Rear Plate Cushion Rotor Rotor Blade O-Ring Cylinder Plunger Front Plate Dust Tube Connector Bearing O-Ring O-Ring Muffler Mounting Ring Dust Connector item 1 Spindle... -
Page 15: Parts Diagram
PARTS DIAGRAM Parts & Service: 020 8988 7400 / E-mail: Parts@clarkeinternational.com or Service@clarkeinternational.com...


Need help?
Do you have a question about the X-PRO CAT 160 and is the answer not in the manual?
Questions and answers