Advertisement
Quick Links
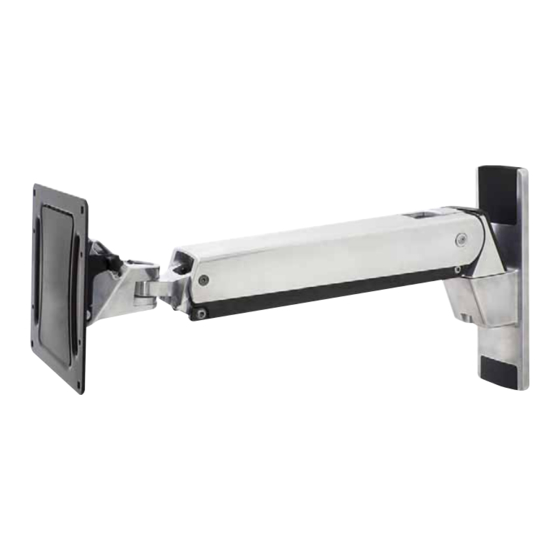
Interactive TV ArmVHD
www.ergotron.com |
USA: 1-800-888-8458
888-45-255-W-01 rev. J • 09/19
MAXIMUM WEIGHT CAPACITY
|
Europe: +31 (0)33-45 45 600
CAUTION!
70 LBS
31.8 KG
|
|
China: 400-120-3051
Japan: japansupport@ergotron.com
User Guide
CAUTION!
MAXIMUM SCREEN SIZE
60+"
1 of 18
Advertisement

Related Manuals for Ergotron 45-304-026


Summary of Contents for Ergotron 45-304-026
- Page 1 User Guide Interactive TV ArmVHD CAUTION! CAUTION! MAXIMUM WEIGHT CAPACITY MAXIMUM SCREEN SIZE 60+" 70 LBS 31.8 KG www.ergotron.com | USA: 1-800-888-8458 Europe: +31 (0)33-45 45 600 China: 400-120-3051 Japan: japansupport@ergotron.com 1 of 18 888-45-255-W-01 rev. J • 09/19...
- Page 2 CONTENTS Part Quantity Description Wall Plate Arm/Wall Plate Hardware Wall Plate Covers Rear Arm Cover CFT Arm 200x200 VESA Monitor Plate Spider Adapters Screws/Hardware For Flat Panel 697-613-00 Wall Kit 697-688-00 Part Quantity Description Part Quantity Description Philips screws M4 x 15mm Lag Bolts M8x80mm Philips screws M4 x 30mm Round Washers M8...
-
Page 3: Tools Needed
CAUTION! CAUTION! TOOLS NEEDED MAXIMUM WEIGHT CAPACITY MAXIMUM SCREEN SIZE Tools Needed 60+” Herramientas necesarias Outils requis Benötigte Werkzeuge Benodigde gereedschappen 70 LBS Strumenti necessari Potrzebne narzędzia 31.8 KG Potřebné nástroje Szükséges eszközök Απαιτούμενα εργαλεία Ferramentas necessárias Nødvendigt værktøj Tarvittavat työkalut Verktyg som krävs Instrumente necesare Необходими... -
Page 4: Mounting Considerations
Placement of Arm on the Wall 1. MOUNTING CONSIDERATIONS: • Wall Mount Bracket MUST be attached to a stud or solid concrete. DO NOT attach this product to hollow wall or any other confi guration. • Make sure Arm will have desired unobstructed range of motion: up-down, side-to-side, in-out (see section RANGE OF MOTION). •... - Page 5 Wood Stud Mount 7/32 x 2.75" 5.5mm x 70mm 13mm Deepsocket 5 of 18 888-45-255-W-01 rev. J • 09/19...
- Page 6 Solid Wall Mount 3/8 x 2.75" 9.5 - 10mm x 70mm 13mm Deepsocket 6 of 18 888-45-255-W-01 rev. J • 09/19...
- Page 7 65mm Washer 16mm Bearing Spring Disc 25mm Washer 13mm Deepsocket NOTE: Part# P-H must be concave face down for proper assembly. 7 of 18 888-45-255-W-01 rev. J • 09/19...
- Page 8 200mm (7-7/8”) 100 x 200 200 x 200 200mm (7-7/8”) 200 x 300 200 x 400 600mm (23-5/8”) 400mm (15-3/4”) 300 x 300 300mm (11-13/16”) 300 x 400 400 x 400 600 x 400 400mm (15-3/4”) 300mm (11-13/16”) 300 x 200 400 x 200 8 of 18 888-45-255-W-01 rev.
- Page 9 200mm (7-7/8”) 100 x 200 200 x 200 200mm (7-7/8”) WARNING! PLEASE SELECT THE PROPER SCREW LENGTH FOR YOUR FLAT PANEL BY HAND TIGHTENING TO CHECK YOUR FLAT PANELS THREAD DEPTH. 9 of 18 888-45-255-W-01 rev. J • 09/19...
- Page 10 300 x 200 200 x 300 300 x 300 200 x 400 300 x 400 400 x 200 400 x 400 600 x 400 200mm 600mm 400mm 400mm 300mm 300mm 10mm 10 of 18 888-45-255-W-01 rev. J • 09/19...
- Page 11 B / C / D WARNING! PLEASE SELECT THE PROPER SCREW LENGTH FOR YOUR FLAT PANEL BY HAND TIGHTENING TO CHECK YOUR FLAT PANELS THREAD DEPTH. 11 of 18 888-45-255-W-01 rev. J • 09/19...
- Page 12 12 of 18 888-45-255-W-01 rev. J • 09/19...
- Page 13 It is important that you adjust this product according to the weight of the mounted equipment as described in the following steps. Any time equipment is added or removed from this product, resulting in a change in the weight of the mounted load, you should repeat these adjustment steps to ensure safe and optimum operation.
- Page 14 Lift – Up and down Elevación (arriba y abajo) Ajustement en hauteur : bas et haut Höhenverstellung – rauf und runter Verstel in hoogte – Omhoog en omlaag Sollevamento – Su e Giù Lyft – upp och ned リフト(上下) 升降(上下) 높이...
- Page 15 Lift – Up and down Elevación (arriba y abajo) Ajustement en hauteur : bas et haut Höhenverstellung – rauf und runter Verstel in hoogte – Omhoog en omlaag Sollevamento – Su e Giù Lyft – upp och ned リフト(上下) 升降(上下) 높이...
- Page 16 13mm Deepsocket 16 of 18 888-45-255-W-01 rev. J • 09/19...
- Page 17 CAUTION! The bottom nut will turn during adjustment of the top nut; DO NOT apply any tool to the bottom nut. Serious damage to the Arm may occur if these instructions are not followed. PRECAUCIÓN La tuerca inferior gira mientras se ajusta la tuerca supe- rior;...
- Page 18 Inclinazione – Avanti ed Indietro Vinkla – framåt och bakåt チルト (前後) 倾斜(前后) 기울기 – 앞/뒤로 Learn more about ergonomic computer use at: www.ergotron.com/ergonomics For Warranty visit: www.ergotron.com/warranty For Service visit: www.ergotron.com For local customer care phone numbers visit: http://contact.ergotron.com www.ergotron.com |...
Need help?
Do you have a question about the 45-304-026 and is the answer not in the manual?
Questions and answers