
Related Manuals for Kramer VS-84UT


Summary of Contents for Kramer VS-84UT
- Page 1 USER MANUAL MODELS: VS-88UT 8x8 HDMI/HDBT Matrix Switcher VS-84UT 8x4 HDMI/HDBT Matrix Switcher P/N: 2900-300582 Rev 6 www.kramerAV.com...
-
Page 2: Table Of Contents
Contents Introduction Getting Started Overview Typical Applications Controlling your VS-88UT Defining the VS-88UT and VS-84UT Mounting VS-88UT Connecting VS-88UT and VS-84UT Connect the VS-88UT Matrix Ports Connect the VS-84UT Matrix Ports Connect the Controller Ports Connecting the Audio Inputs and Outputs... -
Page 3: Introduction
Kramer Electronics Ltd. Introduction Welcome to Kramer Electronics! Since 1981, Kramer Electronics has been providing a world of unique, creative, and affordable solutions to the vast range of problems that confront the video, audio, presentation, and broadcasting professional on a daily basis. In recent years, we... -
Page 4: Overview
European Advanced Recycling Network (EARN) and will cover any costs of treatment, recycling and recovery of waste Kramer Electronics branded equipment on arrival at the EARN facility. For details of Kramer’s recycling arrangements in your particular country go to our recycling pages at www.kramerav.com/support/recycling. -
Page 5: Room Controller Configuration Via K-Config
Kramer Electronics Ltd. • HDMI Support – Deep color, 3D, 7.1 PCM as specified in HDMI 2.0. • Kramer reKlocking™ and equalization technology – Rebuilds the digital signal to travel longer distances. Advanced and User-friendly Operation • Advanced EDID management per input. -
Page 6: Typical Applications
Kramer Electronics Ltd. • For VS-84UT: ▪ 6 HDMI and 2 HDBT inputs. ▪ 4 balanced stereo audio inputs or 8 microphone inputs (selectable) as well as 4 unbalanced stereo inputs. ▪ 2 HDMI and 2 HDBT outputs. ▪ 4 IR ports for HDBT tunneling. -
Page 7: Defining The Vs-88Ut And Vs-84Ut
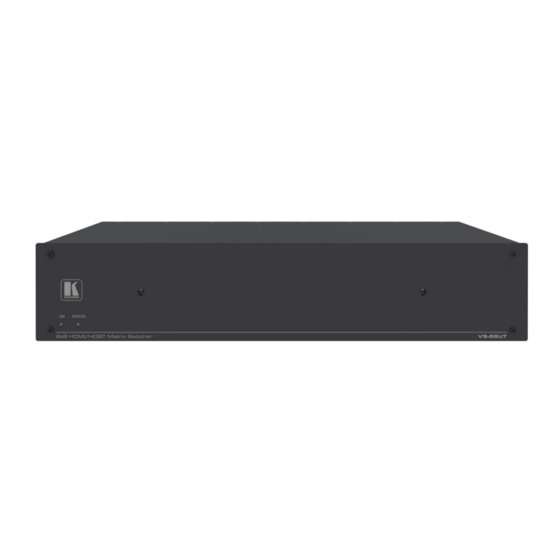
Kramer Electronics Ltd. Defining the VS-88UT and VS-84UT This section defines the VS-88UT and VS-84UT. Figure 1: VS-84UT 8x4 HDMI/HDBT Matrix Switcher Front Panel Figure 2: VS-88UT 8x8 HDMI/HDBT Matrix Switcher Front Panel Feature Function ON LED Lights when receiving power. - Page 8 Kramer Electronics Ltd. Figure 3: VS-88UT 8x8 HDMI/HDBT Matrix Switcher Rear Panel Figure 4: VS-84UT 8x4 HDMI/HDBT Matrix Switcher Rear Panel Feature Function Room Controller Functionality IR IN 1 3.5mm Mini Jack Connect to an external IR receiver (1 and 2).
- Page 9 6, 7 and 8) via HDBT inputs 5, 6, 7 and 8 respectively. Jack VS-84UT: connect to an external IR sensor to send IR signals (7 and 8) via HDBT inputs 7 and 8 respectively. VS-88UT: connect to an external IR emitter to receive IR signals (5 and 6) via HDBT outputs 5 and 6, respectively.
- Page 10 HDBT ports and the controller. RESET Recessed Button Press briefly to restart the system. Press for about 5 seconds to reset settings to factory default values and then restart the system. VS-88UT – Defining the VS-88UT and VS-84UT...
-
Page 11: Mounting Vs-88Ut
Kramer Electronics Ltd. Mounting VS-88UT This section provides instructions for mounting VS-88UT. Before installing, verify that the environment is within the recommended range: • Operation temperature – 0 to 40C (32 to 104F). • Storage temperature – -40 to +70C (-40 to +158F). -
Page 12: Connecting Vs-88Ut And Vs-84Ut
An HDMI source (for example, a Blu-ray player) to the HDMI IN 8 HDMI connector ▪ A transmitter (for example, the Kramer TP-590Txr) to the HDBT IN (8) RJ-45 port You can enable one of each HDMI and HDBT input pair (5, 6, 7 and 8) via the embedded web pages (see Setting Input HDBT/HDMI or HDBT Input Port Parameters on page 39). - Page 13 HDBT IR IN 8 (5 to 8) 3.5mm mini jack to a room controller (for example, the Kramer RC-74DL) to control a peripheral device, such as Blu-ray player that connects to the transmitter that is connected to HDBT IN (8).
-
Page 14: Connect The Vs-84Ut Matrix Ports
▪ An HDMI source (for example, a Blu-ray player) to the HDMI 6 IN connector ▪ A transmitter (for example, the Kramer TP-590Txr) to the HDBT IN (8) RJ-45 port 2. Connect the audio sources: ▪ An audio source (for example, the laptop audio output signal) to the AUDIO INPUT 1 balanced stereo analog audio 5-pin terminal block connector (1 to 4) ▪... - Page 15 HDBT IR IN 8 (7 to 8) 3.5mm mini jack to a room controller (for example, the Kramer RC-74DL) to control a peripheral device, such as Blu-ray player that connects to the transmitter that is connected to HDBT IN (8).
-
Page 16: Connect The Controller Ports
VS-84UT Rear Panel Connect the Controller Ports To connect the VS-88UT/VS-84UT Controller as illustrated in the example in Figure 5/Figure 1. Connect an IR sensor to IR IN 1 3.5mm mini jack (1 to 2) For example, point an IR remote controller to the IR sensor to control a device that is connected to a controller port. -
Page 17: Connecting The Audio Inputs And Outputs
The following are the pinouts for connecting the audio outputs to balanced or unbalanced stereo audio acceptors: Figure 9: Connecting the Output to a Figure 10: Connecting the Output to an Unbalanced Balanced Stereo Audio Acceptor Stereo Audio Acceptor VS-88UT – Connecting VS-88UT and VS-84UT... -
Page 18: Connecting To Vs-88Ut Via
1. Click Start > Control Panel > Network and Sharing Center. 2. Click Change Adapter Settings. 3. Highlight the network adapter you want to use to connect to the device and click Change settings of this connection. VS-88UT – Connecting VS-88UT and VS-84UT... - Page 19 (TCP/IPv4) depending on the requirements of your IT system. 5. Click Properties. The Internet Protocol Properties window relevant to your IT system appears as shown in Figure 13 Figure Figure 13: Internet Protocol Version 4 Properties Window VS-88UT – Connecting VS-88UT and VS-84UT...
- Page 20 To control several units via Ethernet, connect the Master unit (Device 1) via the Ethernet port to the Ethernet port of your PC. Use your PC provide initial configuration of the settings (see Connecting VS-88UT via the Ethernet Port on page 16). VS-88UT – Connecting VS-88UT and VS-84UT...
-
Page 21: Using The Web Pages
Kramer Electronics Ltd. Using the Web Pages The Web pages let you control the VS-88UT via the Ethernet. Before attempting to connect: • Perform the procedures in (see Connecting VS-88UT via the Ethernet Port on page 16). • Ensure that your browser is supported. - Page 22 3. Enter the User Name and Password (Admin, Admin by-default) and click OK. The Routing Settings page appears. Figure 18: VS-88UT Routing Settings Page with Navigation List on Left Figure 19: VS-84UT Routing Settings Page with Navigation List on Left VS-88UT – Using the Web Pages...
- Page 23 Kramer Electronics Ltd. 4. Click the desired Web page or click the arrow to hide the navigation list. Figure 20: Routing Settings Page – Navigation List Hidden VS-88UT – Using the Web Pages...
-
Page 24: Globally Muting Video And Audio Signals
Kramer Electronics Ltd. Globally Muting video and audio signals The Global Mute system is a unique feature that mutes all the video and audio signals to enable easy integration of the audio system with public alarm systems used for alarms or other public messages. -
Page 25: Defining Global Settings
Kramer Electronics Ltd. Defining Global Settings Use the Presets & Settings page to set video timeouts, define ports, configure PoE on HDBT, ports and save and load presets. To set the video timeouts: 1. In the Navigation pane, click Routing Settings. The Routing Matrix page appears (see Figure 18). - Page 26 Kramer Electronics Ltd. ▪ 5V power off when the signal is lost. ▪ Switching to the last video input signal after the manual override video input signal is lost. 5. Click Close. The following table defines the timeout values and conditions:...
- Page 27 Figure 23: VS-88UT Global Settings Window – Switchable Ports Tab ▪ VS-84UT: For audio input ports 1 to 4, select either ANALOG or MIC input. The changes are immediately reflected the Routing Settings page. Figure 24: VS-88UT Global Settings Window – Switchable Ports Tab 5.
- Page 28 Kramer Electronics Ltd. To set configure PoE power support on HDBT ports: 1. In the Navigation pane, click Routing Settings. The Routing Matrix page appears. 2. Click Global Settings (on the top left side). The Global Settings window appears. 3. Click the PoE tab. The PoE configuration tab appears.
- Page 29 Kramer Electronics Ltd. ▪ VS-84UT: Click one radio button on each PO line to select the ports supporting PoE. You can select one port on each PO line (for example HDBT 7 input for PO line 1 and HDBT 4 output for PO line 2).
- Page 30 Kramer Electronics Ltd. To load or save a preset (the current device settings): A preset saves the device configuration, excluding Network settings, EDID files and Maestro configuration. 1. In the Navigation pane, click Routing Settings. The Routing Matrix page appears.
-
Page 31: Routing Vs-88Ut Ports
Kramer Electronics Ltd. Routing VS-88UT Ports This section describes how to basically route an A/V input to any of the outputs. By default, input and output ports are set to audio-follow-video. The Routing Matrix page displays the current routing status. For example, in... -
Page 32: Defining Port Settings
Kramer Electronics Ltd. Hover over a port to view its switching status (HDMI 3 audio and video inputs are routed to HDMI 1 and HDMI 2 outputs): Figure 30: Routing Settings Page – Viewing the Switching Status In the same way, you can route all the port types in the matrix if connected by a routing button. - Page 33 Kramer Electronics Ltd. Setting Input HDMI Port Parameters VS-88UT has four HDMI (1 to 4) inputs and VS-84UT has six HDMI (1 to 6) inputs (as well as two HDMI outputs). The green indication indicates a valid signal on the input.
- Page 34 Kramer Electronics Ltd. Viewing and Routing A/V Signals Separately To view the video and audio signals separately: • Click Routing Settings page. The Routing Matrix page opens. • Click beside the input port name. • The HDMI port line displays the status of each signal separately.
- Page 35 Kramer Electronics Ltd. Figure 34: Routing Settings Page – Separate Audio Routing Routing A/V Signals in the Audio-Follow-Video and Breakaway Modes By default, all the outputs are set to the Audio-Follow-Video mode (AFV) mode . When routing an input to an output or only a video signal to an output, both audio and video signals...
- Page 36 Kramer Electronics Ltd. – • Click to close the separate-signals view. The audio icon appears under the HDMI 3 output. Figure 36: Routing Settings Page – Routing in the AFV Mode Once you toggle back to (AFV) the audio signal is immediately routed to the HDMI 3 output.
- Page 37 Kramer Electronics Ltd. Once the AFV is back on, the input 2 audio signal follows the video signal. Figure 39: Routing Settings Page – A/V Signal Sources in the AFV Mode Changing HDMI Input Port Settings To define the HDMI port: 1.
- Page 38 Kramer Electronics Ltd. ▪ Set the Step-in outputs to which the video signal will be routed in case the step-in button is pressed on the is input. 4. Click Save. Selecting the HDMI Input Follower When selecting a follower to the input signal, this follower is routed together with the input signal, to the selected output.
- Page 39 Kramer Electronics Ltd. Click the HDMI 1 output to see the settings page, and view the routing status: Figure 43: Routing Settings Page – HDMI 1 Output Routing Status The routing status fits the settings on the HDMI 1 input.
- Page 40 Kramer Electronics Ltd. In the AFV mode, whenever HDMI 1 is routed to an output the audio source will be ANALOG AUDIO 2: Figure 46: Routing Settings Page – Routing HDMI 1 Routed to Several Outputs For the HDMI 1, HDMI 2, HDMI 3 and HDBT 5, ANALOG AUDIO 2 is the audio source.
- Page 41 Kramer Electronics Ltd. In the breakaway mode, when routing the HDMI 1 input to HDMI 2 output, ANALOG AUDIO 2 is still the audio source: Figure 48: Routing Settings Page – HDBT 6 Output Routing Status Click to return to the AFV mode. When routing the HDMI 1 input to HDMI 2 output, the audio source is ANALOG AUDIO 2 once again.
- Page 42 Figure 51: VS-88UT Port Settings – HDBT Input Ports • For VS-84UT, the HDBT port line displays the status of each signal separately. The following example shows that the HDBT 7 input (both audio and video signals) is routed to HDMI 1 and HDMI 2 outputs.
- Page 43 Kramer Electronics Ltd. Changing HDBT/HDMI and HDBT Port Settings To define the HDBT/HDMI HDBT port: 1. Click Routing Settings page. The Routing Matrix page opens. 2. Click HDBT (HDMI is described in Changing HDMI Input Port Settings on page 35).
- Page 44 Kramer Electronics Ltd. ▪ Check/uncheck HDCP Support. ▪ Check/uncheck Force RGB. ▪ Check/uncheck Force 2LPCM. ▪ Set Extra Range to ON or OFF. ▪ Select Followers drop-down boxes for AUDIO, RS-232, IR, and USB signals. The selected port signals will now follow the video signal (see...
- Page 45 Kramer Electronics Ltd. Selecting the HDBT Input Followers When selecting a follower to the input signal, this follower is routed together with the input signal, to the selected output. When routing HDBT signals, you can define AUDIO, RS-232, IR, and USB signals to follow the video signal.
- Page 46 Kramer Electronics Ltd. When setting the HDBT 6 output to the breakaway mode, upon the next routing step (for example, HDBT 6 routed to HDBT 6, the routing status will remain the same (except for the video signal): Figure 57: Routing Settings Page – HDBT 6 Input to HDBT 6 Output Routing Status In the following example MIC 1 is set as the audio follower for input HDBT 5: Figure 58: Routing Settings Page –...
- Page 47 Kramer Electronics Ltd. The HDBT 5 output routing status shows MIC 1 as the source: Figure 60: Routing Settings Page – HDBT 6 Output Routing Status In the breakaway mode, when routing the HDBT 6 input to HDBT 5 output MIC 1 is still the audio source: Figure 61: Routing Settings Page –...
- Page 48 Kramer Electronics Ltd. Setting Analog Audio Input Port Parameters VS-88UT has eight stereo analog audio inputs: 1 to 4 are balanced inputs and 5 to 8 are unbalanced inputs. Each of the balanced analog inputs (1 to 4) can also function as microphone inputs (MIC 1 to MIC 8);...
- Page 49 Kramer Electronics Ltd. Setting the Input Volume To set the input volume: 1. Click The volume slider window appears. 2. Set the volume (set to 0dB by default). Figure 64: Port Settings –Setting Analog Audio Level 3. If required, click to mute the input.
- Page 50 Kramer Electronics Ltd. 2. Perform the following actions, as required: ▪ Change the Port Label name. ▪ View the Routing Status. ▪ Set the Volume. 3. Click Save. Setting the Port to Analog Input or Two Microphones To set a port to function as an analog input or as two microphone inputs: 1.
- Page 51 Kramer Electronics Ltd. To set a MIC port to function as an analog input: 1. Click next to one of the MIC ports. 2. Set MIC 1 (for example) to ANALOG AUDIO 1. Figure 68: Port Settings – Selecting MIC to ANALOG AUDIO ANALOG AUDIO 1 is restored: Figure 69: Port Settings –...
- Page 52 Kramer Electronics Ltd. Changing the Microphone Port Settings To change the MIC Port settings: 1. Click MIC. The following window appears: Figure 70: Routing Settings Page – Input MIC Settings Each setting (ANALOG or MIC) retains the switching state (followers are specific for the defined port).
- Page 53 Kramer Electronics Ltd. Setting the HDMI and HDBT Output Parameters VS-88UT has six HDMI outputs (1 to 4 and 7 to 8) and two HDBT outputs (5 to 6); VS-84UT has two HDMI outputs (1 to 2) and two HDBT (3 to 4) outputs.
- Page 54 Kramer Electronics Ltd. Changing the HDMI Output Port Settings To set the HDMI output port: 1. Click HDMI. The following window appears: Figure 72: Routing Settings Page – Output HDMI Settings (Scroll down to view all inputs) 2. Perform the following actions, as required: ▪...
- Page 55 Kramer Electronics Ltd. Changing the HDBT Output Port Settings To set the HDBT output port: 1. Click HDBT. The following window appears: Figure 73: Routing Settings Page – HDBT Output Settings (Scroll down to view all inputs) 2. Perform the following actions, as required: ▪...
- Page 56 Kramer Electronics Ltd. Auto Switching Feature For HDMI and HDBT outputs set Auto Switching to Manual (the default), Priority or Last Connected. In both Last Connected and Priority modes, when the input signal sync is lost (but the cable is not...
- Page 57 Kramer Electronics Ltd. Priority and Last Connected settings are indicated in the Routing Settings page as follows: • The priority order numbers appear under output HDBT 6. • Last Connected (LC) appears under outputs HDMI 3 and HDBT 5 (where input HDMI 3 was removed from the Last Connected list) Figure 76: Routing Settings Page –...
- Page 58 Kramer Electronics Ltd. To set an audio output: Click the audio icon ( Use the slider to set the audio volume, or click the below to mute the audio output. Figure 78: Audio Settings Setting RS-232 and Step-in Routing You can set HDBT ports to either RS-232 data tunneling or Step-in modes via the RS-232 Routing Matrix page.
- Page 59 Kramer Electronics Ltd. Figure 79: Routing Settings Page – RS-232 Routing Click RS-232 1 on Inputs or Outputs to view the RS-232 routing status and change the port label (see also Changing HDMI Input Port Settings on page Changing the HDBT Output Port Settings on page 53).
- Page 60 Kramer Electronics Ltd. Setting and Routing IR Ports IR commands can be routed between HDBT inputs, HDBT outputs, IR inputs (5 to 6) and IR outputs (5 to 8). To route IR commands, click a white routing button within the matrix. For example, to route IR...
- Page 61 Kramer Electronics Ltd. To route USB data: • Click a white routing button within the matrix. For example, to route USB data between input HDBT 6 and USB Type-A1 hub, click the routing button connecting them in the matrix: Figure 81: Routing Settings Page – USB Routing Click an input, output or USB heading to view the USB routing status and other settings.
-
Page 62: Managing Edid
Kramer Electronics Ltd. Managing EDID The EDID page lets you read the EDID from: • Any of the inputs. • Any of the outputs. • The default EDID. You can also load a customized EDID file from your PC. The selected EDID can be copied to the selected input/s. - Page 63 Kramer Electronics Ltd. 2. Select the EDID source (for example, one of the inputs). If you are reading EDID from an output, make sure that that output is connected to an acceptor. Figure 83: EDID Management Page – Select an EDID Input (Read From) 3.
- Page 64 Kramer Electronics Ltd. 4. Click COPY. The Input 2 EDID is copied to the selected inputs. Figure 85: EDID Page – EDID Copied The following message appears: Figure 86: EDID Management Page – EDID Copy Success 5. Click OK. To read the EDID from the default EDID: 1.
- Page 65 Kramer Electronics Ltd. To load a customized EDID file: 1. In the Navigation pane, click EDID. The EDID Management page appears. 2. In the File area click …. 3. Select the EDID file. 4. Select the input/s (or all the inputs) to which the EDID is copied.
-
Page 66: Controlling Devices Via The Controller
Kramer Electronics Ltd. Controlling Devices via the Controller You can control a large number of peripheral devices via the VS-88UT room controller section (VS-88UT-RC) via Kramer K-Config 3. See Room Controller Functionality on page 6. Use the Controller page to: •... -
Page 67: Room Controller Configuration Via K-Config 3
Kramer Electronics Ltd. Room Controller Configuration via K-Config 3 Download the latest version of K-Config 3 from our website at www.kramerav.com/downloads/VS-88UT. If you are new to K-Config 3, go to www.kramerav.com/downloads/VS-88UT to download the K-Config 3 user manual. In order to access... - Page 68 Kramer Electronics Ltd. Figure 89: Controller Page – K-CONFIG Project 6. Connect the VS-88UT to your PC (via Ethernet). 7. Click Connect in K-CONFIG. The following message appears: Figure 90: Controller Page – Login 8. Type-in the VS-88UT webpage password for ADMIN (Admin, by-default).
-
Page 69: Controlling Devices
Kramer Electronics Ltd. Figure 91: Controller Page – Writing to the Device 11. Click Yes. This process may take a few minutes to complete. 12. Refresh the VS-88UT webpage. 13. In the Navigation pane, click Controller. The Log in window appears: Figure 92: Controller Page –... - Page 70 Figure 93: Controller Page – Device Menu In this example, the Device menu list shows the room controller section (VS-88UT-RC), an auxiliary device (Kramer RC-74DL) and a virtual device. 2. Click next to VS-88UT-RC to view the devices connected to the room controller: Figure 94: Controller Page –...
- Page 71 Kramer Electronics Ltd. 3. Click a device to control it, for example, VS-81SIDN: Figure 95: Controller Page – Controlling a Peripheral Device 4. Expand the command types: Figure 96: Controller Page –Peripheral Device Available Commands The list of all the configured commands appears on the right-side of the page.
- Page 72 Kramer Electronics Ltd. Controlling an Auxiliary Device To control an auxiliary device: 1. In the Controller page, click Devices. 2. Click an Auxiliary device (RC-74DL). The Device menu appears: Figure 97: Controller Page – Controlling an Auxiliary Device 3. Click a room-controller device-button.
- Page 73 Kramer Electronics Ltd. Controlling a Virtual Device To control a virtual device: 1. In the Controller page, click Devices. The Device menu appears: 2. Click a virtual device on the list (for example, VDevice with Knob). The virtual device appears: Figure 98: Controller Page –...
-
Page 74: Activating Macros
Kramer Electronics Ltd. Activating Macros Macros include All Off and All On buttons (configured in K-CONFIG) to easily activate or deactivate the controlled room with the press of a button. 1. In the Controller page click Macros. The Macros window appears: Figure 99: Controller Page –... -
Page 75: Scheduling Macros
Kramer Electronics Ltd. Scheduling Macros Scheduled tasks lets you schedule All on/All Off macros throughout the week. 1. In the Controller page click Scheduled Tasks. The Scheduled Tasks window appears: Figure 100: Controller Page – Scheduled Tasks 2. Hover over a day and time Figure 101: Controller Page –... - Page 76 Kramer Electronics Ltd. 3. Click The Add Macro window appears: Figure 102: Controller Page – Adding a Scheduled Task 4. Select a Macro (All On or All Off), set the exact activation time and click Add. The scheduled macro appears in the table: Figure 103: Controller Page –...
-
Page 77: Setting The Date And Time
Kramer Electronics Ltd. Setting the Date and Time Set the date and time in one of the following methods: • Manually • From a PC clock • From a server address by clicking the IP address of the clock source, the time zone and checking DST if you are on Daylight Saving Time. -
Page 78: Configuring Device Automation
Note that all the ports, actions and triggers that are relevant to VS-88UT are included in the Kramer Maestro, as well as ports, actions and triggers that are relevant to other Kramer devices. The Panel tab in the Automation page is currently unavailable. - Page 79 Kramer Electronics Ltd. 2. Configure the ports, actions, scripts and triggers as described in the Kramer Maestro User Manual. Once the triggers are defined the trigger activates the scripts configured in the automation page. For example, when using the Scheduling trigger, you can activate a series of actions following a preset schedule.
-
Page 80: Changing The Device Settings
Kramer Electronics Ltd. Changing the Device Settings The Settings Web page shows the device details such as name and firmware version and also enables performing the following functions: • Clicking Restart to restart the device. • Resetting to Factory Default Parameters on page 78. -
Page 81: Setting Authentication
Kramer Electronics Ltd. 2. Click Factory reset. The following message appears: Figure 107: Settings Page – Factory Reset Message 3. Click Yes and follow the online instructions. Setting Authentication By default, the Web pages are secured (username and password are both: Admin). - Page 82 Kramer Electronics Ltd. 3. Type the password and click Save. The device settings page no longer shows the authentication details: Figure 109: Password Settings Page –Security Deactivated To access Web pages using the password: 1. In the Navigation pane, click Settings. The General tab in the Settings page appears: 2.
- Page 83 Kramer Electronics Ltd. 3. Click Ok and add the password details. Figure 111: Settings Page – Security Activation Message 4. Click Save. The following message appears: Figure 112: Settings Page – Password Updated 5. Click OK. VS-88UT – Changing the Device Settings...
-
Page 84: Changing The Ethernet Settings
Kramer Electronics Ltd. Changing the Ethernet Settings The Communication tab shows the device details, such as IP Address, Mask, MAC address and so on, and enables changing them. To change the Ethernet settings: 1. In the Navigation pane, click Settings. The General tab in the Settings page appears. -
Page 85: Performing Firmware Upgrade
Kramer Electronics Ltd. To set parameters when DHCP is set to ON: 1. In the Navigation pane, click Settings. The General tab in the Settings page appears. 2. Select the Communication tab. 3. Take note of the Device Name (you will need it later). -
Page 86: Setting The Date And Time
Kramer Electronics Ltd. 4. Click OK. Wait for completion of the upgrade process: Figure 116: Device Settings Page – Firmware Upgrade Process 5. Wait for the device to restart. Setting the Date and Time To set the time and date: 1. -
Page 87: Viewing The About Page
Kramer Electronics Ltd. Viewing the About Page VS-88UT About page lets you view the Web page version and Kramer Electronics Ltd details. Figure 118: About Page VS-88UT – Viewing the About Page... -
Page 88: Technical Specifications
Kramer Electronics Ltd. Technical Specifications Inputs Matrix VS-88UT 4 HDMI On female HDMI connectors 4 HDBT/4 HDMI On RJ-45/female HDMI connectors (Selectable) 4 Unbalanced Stereo On 3.5mm mini jacks Audio 4 Balanced Stereo On 5-pin/3-pin terminal block connectors Audio/8 Balanced Mic... - Page 89 Kramer Electronics Ltd. Ports Controller 1 K-NET 5mm Mini-jack On a 4-pin terminal block connector (For Learning). 1 RS-485 On a 3-pin terminal block connector 4 RS-232 On 3-pin terminal block connectors 8 Relays On 2-pin terminal block connectors (36V AC or...
-
Page 90: Default Communication Parameters
5.4kg (11.9lbs) approx. Accessories Included Power cord Optional For optimum range and performance use the recommended USB, Ethernet, serial and IR Kramer cables available at www.kramerav.com/product/VS-88UT Specifications are subject to change without notice at www.kramerav.com Default Communication Parameters RS-232 Protocol 3000... -
Page 91: Protocol 3000
Kramer Electronics Ltd. Protocol 3000 Kramer devices can be operated using Kramer Protocol 3000 commands sent via serial or Ethernet ports. Understanding Protocol 3000 Protocol 3000 commands are a sequence of ASCII letters, structured according to the following. • Command format:... -
Page 92: Protocol 3000 Commands
Note that this protocol is the same for VS-84UT except for the number of inputs and outputs. For example, in the Display command output can be set from 1 to 8 for VS-88UT and from 1 to 4 for VS-84UT. Function Description Syntax Parameters/Attributes Example Protocol handshaking. - Page 93 Kramer Electronics Ltd. Function Description Syntax Parameters/Attributes Example EDID-AUDIO Set audio capabilities for COMMAND The following attributes comprise the Set HDMI IN 1 audio EDID. #EDID-AUDIOinput_id,audio_format<CR> signal ID: capabilities for EDID (LPCM – Output number input_id 2CH): FEEDBACK 1 – Input 1 #EDID-AUDIO1,1<CR>...
- Page 94 Kramer Electronics Ltd. Function Description Syntax Parameters/Attributes Example – OFF/ON (not case sensitive) state GLOBAL-MUTE EMERGENCY mode: COMMAND Set GLOBAL-MUTE On: mute all the #GLOBAL-MUTEstate<CR> #GLOBAL-MUTEON<CR> VIDEO/AUDIO outputs. FEEDBACK This command is ~nn@GLOBAL-MUTEstate<CR><LF> designed to be triggered by the REMOTE MUTE...
- Page 95 Kramer Electronics Ltd. Function Description Syntax Parameters/Attributes Example – Input/Output stage HDCP-STAT? Get HDCP signal status. COMMAND Get the output HDCP-STATUS 0 – Input #HDCP-STAT?stage,stage_id<CR> of IN 1: Output stage (1) – get 1 – Output #HDCP-STAT?0,1<CR> FEEDBACK the HDCP signal status of –...
- Page 96 Kramer Electronics Ltd. Function Description Syntax Parameters/Attributes Example – String of up to 15 machine_name NAME Set machine (DNS) COMMAND Set the DNS name of the name. #NAMEmachine_name<CR> alpha-numeric chars (can include device to room-442: hyphen, not at the beginning or end) #NAMEroom-442<CR>...
- Page 97 Kramer Electronics Ltd. Function Description Syntax Parameters/Attributes Example – Network ID–the device network NET-DHCP? Get DHCP mode. COMMAND Get DHCP mode for port 1: #NET-DHCP?id<CR> interface (if there are more than one). #NET-DHCP?1<CR> For Backward Counting is 0 based, meaning the...
- Page 98 Kramer Electronics Ltd. Function Description Syntax Parameters/Attributes Example PORTS-LIST? Get the port list of this COMMAND The following attributes comprise the Get the ports list: machine. #PORTS-LIST?<CR> port ID: #PORTS-LIST?<CR> ▪ – <direction_type> FEEDBACK The response is o IN ~nn@PORTS-LIST[<direction_type>.<port_type>.<port_index>,...
- Page 99 Kramer Electronics Ltd. Function Description Syntax Parameters/Attributes Example X-AFV Set output audio follow COMMAND The following attributes comprise the Set the HDMI output 1 to audio video mode. #X-AFV<direction_type>.<port_type>.<port_index>.<signal_t signal ID: follow video mode: ▪ – <direction_type> ype>.<index>,mode<CR> #X-AFVOUT.HDMI.1.VIDEO This is an Extended .1,ON<CR>...
- Page 100 Kramer Electronics Ltd. Function Description Syntax Parameters/Attributes Example X-AUD-ONLY Set audio only mode, COMMAND The following attributes comprise the Set HDMI OUT 3 to audio only: where a black pattern is #X-AUD-ONLY<direction_type>.<port_type>.<port_index>.<sig signal ID: #X-AUD-ONLYOUT.HDMI.3. ▪ – <direction_type> shown and Audio is nal_type>.<index>,mode<CR>...
- Page 101 Kramer Electronics Ltd. Function Description Syntax Parameters/Attributes Example X-AV-SW- Get auto-switch mode. COMMAND The following attributes comprise the Get auto switch mode for MODE? #X-AV-SW-MODE?<direction_type>.<port_type>.<port_index>.< signal ID: HDMI OUT 1: ▪ – This is an Extended <direction_type> signal_type>.<index><CR> #X-AV-SW-MODE?OUT.HDMI Protocol 3000 command.
- Page 102 Kramer Electronics Ltd. Function Description Syntax Parameters/Attributes Example X-MIC-TYPE Set microphone type. COMMAND The following attributes comprise the Set MIC 3 type to condenser: #X-MIC-TYPE<direction_type>.<port_type>.<port_index>,mic_ port ID: #X-MIC-TYPEIN.MIC.3,co ▪ – This is an Extended <direction_type> type<CR> ndenser<CR> Protocol 3000 command.
- Page 103 Kramer Electronics Ltd. Function Description Syntax Parameters/Attributes Example X-MUTE? Get mute ON/OFF state COMMAND The following attributes comprise the Get the mute ON/OFF state on on a specific signal. #X-MUTE?<direction_type>.<port_type>.<port_index>.<signal signal ID: a specific signal: ▪ – <direction_type> _type>.<index><CR> #X-MUTE?OUT.HDMI.4.VID This command is EO.1<CR>...
- Page 104 Kramer Electronics Ltd. Function Description Syntax Parameters/Attributes Example X-PATTERN? Get selected pattern on a COMMAND The following attributes comprise the Get the selected pattern on a specific output signal. #X-PATTERN?<direction_type>.<port_type>.<port_index>.<sig signal ID: specific output signal: ▪ – <direction_type> nal_type>.<index><CR> #X-PATTERN?OUT.ANALOG_ This command is AUDIO.1.AUDIO.1<CR>...
- Page 105 Kramer Electronics Ltd. Function Description Syntax Parameters/Attributes Example – These are predefined X-PORT- group_name Select ID from selectable COMMAND Select ID 2 from selectable SELECT ports group. #X-PORT-SELECTgroup_name,selected_id<CR> groups names, related to a specific ports group: product. (e.g., IN.AUDIO.1 or #X-PORT-SELECTIN.AUDIO...
- Page 106 Kramer Electronics Ltd. Function Description Syntax Parameters/Attributes Example X-PRIORITY? Get auto switching input COMMAND The following attributes comprise the Get the auto switching input signals group priorities #X-PRIORITY?<direction_type1>.<port_type1>.<port_index1>. output signal ID (suffix 1) and input signals group & priorities per per output.
- Page 107 Kramer Electronics Ltd. Function Description Syntax Parameters/Attributes Example X-SET- Set followers list for a COMMAND The following attributes comprise the Set HDMI 1 audio signal and FOLLOWERS given input signal. #X-SET-FOLLOWERS<direction_type1>.<port_type1>.<port_inde primary signal ID (suffix 1) and HDBT 7 IR signal to follow x1>.<signal_type1>.<index1>,[<direction_type2>.<port_type2...
-
Page 108: Result And Error Codes
Kramer Electronics Ltd. Result and Error Codes Syntax In case of an error, the device responds with an error message. The error message syntax: • ~NN@ERR XXX<CR><LF> – when general error, no specific command • ~NN@CMD ERR XXX<CR><LF> – for specific command •... - Page 109 Electronics products, this product must be insured during shipment, with the insurance and shipping charges prepaid by you. I f this product is returned uninsured, you assume all risks of loss or damage during shipment. Kramer Electronics will not be responsible for any costs related to the removal or re- installation of this product from or into any installation.
- Page 110 SAFETY WARNING Disconnect the unit from the power supply before opening and servicing For the latest information on our products and a list of Kramer distributors, visit our Web site where updates to this user manual may be found. We welcome your questions, comments, and feedback.
Need help?
Do you have a question about the VS-84UT and is the answer not in the manual?
Questions and answers