
Related Manuals for nilan Compact S Series


Summary of Contents for nilan Compact S Series
- Page 1 Installation instruction CTS 602 by Nilan Compact S Version: 10.00, 18-12-2015 Software-version: 2.31...
-
Page 2: Table Of Contents
Contents Contents ............................2 Figure table ............................ 2 Before starting ..........................4 Electrical connection ........................5 Installing Compact S ........................6 Condensation drain/water trap ......................9 Water connection .......................... 10 Supplementary heating element DHW ..................10 Duct connection ..........................11 Electrical heating element ...................... - Page 3 Figur 18: The "Restart" Menu ....................... 23 Figur 19: The "Preset" Menu ......................24 Figur 20: The "Manual" Menu ....................... 25 Figur 21: The "Modbus" Menu ...................... 26 Figur 22: The "Datalog" Menu ....................... 27 Figur 23: Air Filter change ......................29 Figur 24: Safety Switch .........................
-
Page 4: Before Starting
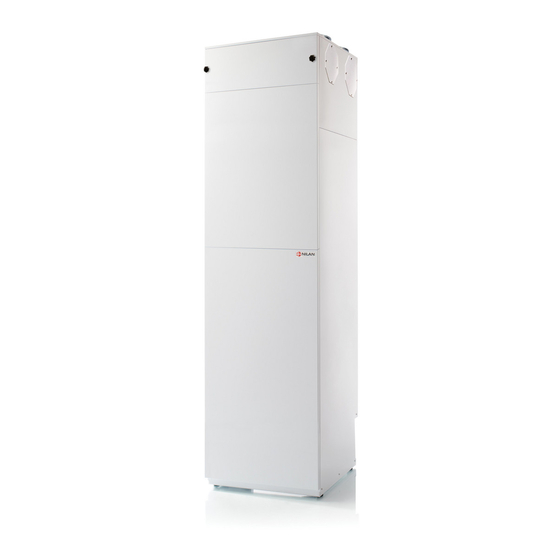
Installation instructions (this manual) Operating instructions for CTS 602 controls Wiring diagram Should you have any questions on how to operate the system, contact your nearest Nilan dealer, www.nilan.dk/dealers who you can find at Compact S is a heat recovery ventilation system with a capacity of up to 330m /h at 100Pa exter- nal counter pressure. -
Page 5: Electrical Connection
Electrical connection All wiring (power supply, safety circuit breaker, etc.) must only be fitted by a qualified electrician. The system must be connected in accordance with the accompanying wiring diagram. The system is supplied with a 1 m test cable for the CTS 602 control panel. The control panel must be connected to the CTS 602 controls using twisted pair cable type 2x2x0.25mm (max. -
Page 6: Installing Compact S
Installing Compact S When installing the unit, it is important to take future service and maintenance into ac- count. There should be a minimum clearance of 602mm in front of the unit, measured from the Compact S front panel. ... - Page 7 Figur 3: Sketch of Compact S The unit is shipped with all 4 spigots on the top. The metal plan and the spigots can be moved. Page 7 of 33 Subject to alterations...
- Page 8 Explanation temperature sensors: T1: Fresh air T4: In the counter flow heat exchanger T5: Condenser T6: Evaporator T7: Inlet air after the electrical heating surface. (T2 is change to T7, by mounting Heating surface) T10: Exhaust. The temperature is shown in the ”Show data”...
-
Page 9: Condensation Drain/Water Trap
Condensation drain/water trap Compact S is supplied with 20mm condensation outlet (PVC, GF fittings). The unit is also equipped with built-in water trap. The condensation outlet must be led frost-free with a steady decline of at least 1 cm/m to the nearest drain. -
Page 10: Water Connection
Water connection The inner tank surface is enamelled and the tank is equipped with a sacrificial anode. All connectors have 3/4” threads, with the exception of the anode access which is a 5/4” sleeve. All water pipes are connected to the bottom of the unit. If required, hot water circulation can be established by fitting a non-return valve to the recirculation connector of the tank after inserting a 80cm long circulation pipe (optional accessory) into the tank. -
Page 11: Duct Connection
Duct connection Ducting and fittings with rubber seals of tightness class B are recommended. It is also advisable that all duct connections to Compact S be made with approx. 1m of soundproofed flex tube in order to dampen sound emission. Ducting should be cut to length using a hacksaw or angle grinder and laid in accordance with the design drawing. -
Page 12: Electrical Heating Element
Electrical heating element Electrical heating surface should be installed in the ducting (Ø160/Ø200). When retrofitting an elec- trical heating surface it should be activated in the CTS 602 control panel. (HEATING SURFACT) Power supply of the Electrical heating element must be installed by an authorized elec- trician. -
Page 13: Start-Up And Configuration Of Cts 602 Controls
Start-up and configuration of CTS 602 controls Startup Once all connections have been checked, check that the tank is full of water. To do so, open the hot water tap. Open ceiling valves, ensuring that valve cone is level with front edge. CTS 602 configuration This section describes the SERVICE menu of the CTS 602 controls. -
Page 14: Activating The Service Menu
Activating the SERVICE menu Press and hold and ENTER simultaneously for 10 seconds. The SERVICE menu can then be accessed. Press repeatedly until SERVICE appears on the display. Press ENTER to activate the SERVICE menu. It is then possible to scroll through the SERVICE menu options using the p buttons. -
Page 15: Figur 10: The "Inlet Heating" Menu
Inlet heating In the ”Inlet heating” menu it is possible to activate and de-activate the heating surface in the inlet air and to set the regulation time. On the CTS602 control panel, press: - ESC to return to the previous menu - p to scroll upwards or downwards through the menus or to adjust the setting of an activated menu option - ENTER to activate a menu option... -
Page 16: Figur 11: The "Hotwater" Menu
Hotwater The ”Hotwater” menu enables you to activate and de-activate the electrical heating element in the hot water tank. When the heating element is set to ON, a ”w” will occur in the main menu, when the heating ele- ment is in use. AUTO ”... -
Page 17: Figur 12: The "Air Quality" Menu
Air quality In the ”Air quality” menu it is possible to choose between 3 types of regulation: Humidity, Humidity + CO or OFF. On the CTS602 control panel, press: - ESC to return to the previous menu - p to scroll upwards or downwards through the menus or to adjust the setting of an activated menu option - ENTER to activate a menu option - ENTER to confirm a menu option setting... -
Page 18: Figur 13: The "Air Exchange" Menu
Air exchange The AIR EXCHANGE menu allows four ventilation steps (air quantities) to be set. Individual values for inlet and exhaust can be set for each ventilation step. A minimum ventilation step for inlet air and minimum and maximum steps for exhaust air can also be set. - Page 19 Defrost The DEFROST menu determines the mode of system operation while the evaporator surface and the counter flow heat exchanger in the exhaust air flow is being defrosted. Options that flash are indicated by ” ” On the CTS602 control panel, press: - ESC to return to the previous menu - p to scroll upwards or downwards through the menus or to adjust the setting of an activated menu option...
- Page 20 Temp. control The temperature sensor to be used to control the system is selected in the TEMP. CONTROL menu. It is also possible to stipulate a minimum temperature at which the system is to be stopped to prevent further cooling of the building if the primary heating system has cut out for some reason. Options that flash are indicated by ”...
-
Page 21: Figur 16: The "Inlet Control" Menu
Inlet control The inlet control menu makes it possible to set the time in which the compressor has to be shut off before restart. Parameters in the INLET CONTROL menu should only be set by experienced control technicians. On the CTS602 control panel, press: - ESC to return to the previous menu - p to scroll upwards or downwards through the menus or to adjust the setting of an activated menu option... -
Page 22: Figur 17: The "Room Control" Menu
Room control The ROOM CONTROL menu allows the room temperature controller to be set. Options that flash are indicated by ” ” Parameters in the ROOM CONTROL menu should only be set by experienced control technicians. On the CTS602 control panel, press: - ESC to return to the previous menu - p to scroll upwards or downwards through the menus or to adjust the setting of an activated menu option... -
Page 23: Figur 18: The "Restart" Menu
Restart The RESTART menu allows the system to be set to restart automatically in connection with high or low pressure faults. Fire alarms can be acknowledged automatically in connection with fire drills/testing. A condition for acknowledgement is that the fire thermostat input has returned to normal state. Options that flash are indicated by ”... -
Page 24: Figur 19: The "Preset" Menu
Preset The PRESET menu allows default factory settings to be stored. RESTORE menu allows you to reload a copy of the installation setup. By keeping the ESC + key pressed for 5 seconds a new menu item RESTORE appear, this is then acceptable / activated by pressing the ENTER Options that flash are indicated by ”... -
Page 25: Figur 20: The "Manual" Menu
Manual The MANUAL menu allows system functions to be tested manually. Options that flash are indicated by ” ” On the CTS602 control panel, press: - ESC to return to the previous menu - p to scroll upwards or downwards through the menus or to adjust the setting of an activated menu option - ENTER to activate a menu option - ENTER to confirm a menu option setting... -
Page 26: Figur 21: The "Modbus" Menu
Modbus Options that flash are indicated by ” ” On the CTS602 control panel, press: - ESC to return to the previous menu - p to scroll upwards or downwards through the menus or to adjust the setting of an activated menu option - ENTER to activate a menu option - ENTER to confirm a menu option setting - OFF switch off the controls... -
Page 27: Figur 22: The "Datalog" Menu
Datalog The datalog interval is set via the menu SERVICE - DATALOG INTV at between 1 and 120 minutes. If 0 / OFF is selected, logging is not periodical, but only on events and alarms. • Temperatures are logged in Celsius, in whole degrees, in order to minimise the log file size. •... - Page 28 Fault finding If problems arise during operation, please check the following before calling the service centre. Check whether the alarm LED on the front of the CTS 602 control panel is flashing. If so, investi- gate the cause of the alarm and remedy the fault. If necessary, contact your local service centre. For details of alarms and how to reset them, please refer to the operating instructions for the CTS 602 controls.
-
Page 29: Figur 23: Air Filter Change
Maintenance At least every 3 months: The filters should be cleaned and renewed when needed. Usually the filters need to be renewed once every 3 month. The filter guard in the CTS 602 control can be used in order to make sure that the filters are checked. -
Page 30: Figur 24: Safety Switch
Once a year: The sacrificial anode must be checked to ensure that monitoring of the anode is intact. o The wire “yellow/green” is dismantled at the anode. This produces the “ALARM 70” (LED flashing) o The wire “yellow/green” is reassembled at the anode. “ALARM 70” disappears (LED not flashing) The hot-water tank can corrode if the anode is left unchanged. - Page 31 Energy saving The auxiliary heating element should be cut off and only be used at very large hot-water demands. Please see CTS 602 directions The ventilation speed should not be set higher than necessary. Avoid hot-water circulation. Spread out the bathing times as the Compact S needs 6-7 hours to heat the 180L water. Insulate the ducting as prescribed.
-
Page 32: Figur 25: Accessories/Spare Parts
Accessories / spare parts Accessories / spare parts Type Antal Nilan varenummer Compressor (heat pump)( electrical) 0,9kW 764131 Compressor (heat pump)( electrical) 2,0kW 76431 Sensor for relative humidity (Humidity sensor) 23997 Sensor for CO in the air (CO -Sensor) 239995... - Page 33 Recycling of this HVAC equipment Up to 98 % of this equipment can be recycled. Please contact your local authority for information on disposal and recycling of heat pumps. This heat pump contains the refrigerant R134a, which may be harmful to the environment if not handled properly.
Need help?
Do you have a question about the Compact S Series and is the answer not in the manual?
Questions and answers