Table of Contents
Advertisement
Advertisement
Table of Contents

Related Manuals for SHOWTEC Explorer 575 Wash MKII


Summary of Contents for SHOWTEC Explorer 575 Wash MKII
- Page 1 Explorer 575 Wash MKII ORDERCODE 40192...
- Page 2 For more information: iwant@showtec.info You can get some of the best quality, best priced products on the market from Showtec. So next time, turn to Showtec for more great lighting equipment. Always get the best -- with Showtec ! Thank you!
-
Page 3: Table Of Contents
Showtec Showtec Explorer 575 Product Guide ™ Warning.................…...……………..…………………………….…………. Safety-instructions………………………………………………………………………………………………………. Operating Determinations.…………………………………………………………………………………………… Rigging.…………………………………………………………………………………………………………………… Return Procedure……………………………………………………………………………........Claims……………………………………………………………………………............Description................…...………………………………………….………… Features and Overview ………………………………...….……………….………….……….……….……………. Backside…………………………………………………...…...….……………….…………………...……………….. Installation................…...…………………………………………………..… Installing the Lamp ............…………………………………………………….……… Lamp Adjustment.…............………………………………………….………..……… Set Up and Operation..............……..……………………………………………. One Explorer ................……………………………………………………. Multiple Explorers................……………………………………………… DMX-Protocol…...........……………………………………………………………………….. Control Panel….....……........……………………………………………………………….. -
Page 4: Warning
Save the carton and all packing materials. In the event that a fixture must be returned to the factory, it is important that the fixture be returned in the original factory box and packing. Your shipment includes: • Showtec Explorer 575 Wash MKII with cable 1,25m • Bottom Plate and safety cable •User manual... - Page 5 If your Showtec device fails to work properly, discontinue use immediately. Pack the unit securely (preferably in the original packing material), and return it to your Showtec dealer for service. For adult use only. Movinghead must be installed out of the reach of children. Never leave the unit running ...
-
Page 6: Operating Determinations
OPERATING DETERMINATIONS This device is not designed for permanent operation. Consistent operation breaks will ensure that the device will serve you for a long time without defects. The minimum distance between light-output and the illuminated surface must be more than 2 meters. The maximum ambient temperature t must never be exceeded. - Page 7 The Explorer can be placed on a flat stage floor or mounted to any kind of truss by a clamp. Mounting a clamp to the underside of the Explorer moving head 1) Clamp 2) Safety-cable 3) Eye bolt 4) Mounting plate Improper installation can cause serious damage to people and property ! Connection with the mains Connect the device to the mains with the power-plug.
-
Page 8: Return Procedure
Return Procedure Returned merchandise must be sent prepaid and in the original packing, call tags will not be issued. Package must be clearly labeled with a Return Authorization Number (RMA number). Products returned without an RMA number will be refused. Highlite will not accept the returned goods or any responsibility. Call Highlite 0031-455667723 or mail aftersales@highlite.nl and request an RMA prior to shipping the fixture. -
Page 9: Description
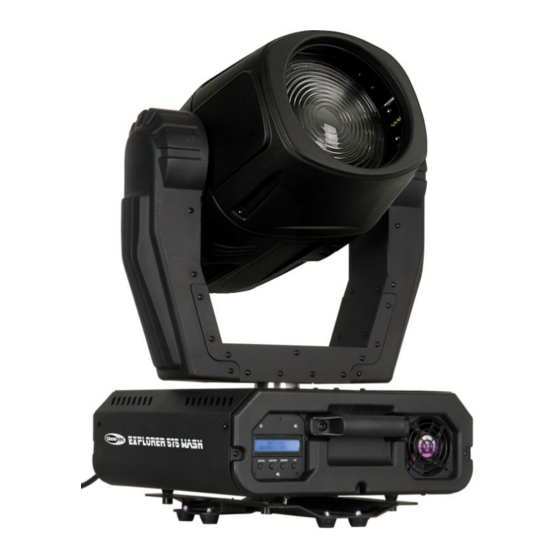
Description of the device Features The Showtec Explorer 575 is a moving head with high output and great effects. • 1 Colourwheel with 5 fixed colours as well as two CTC filters • Frost filter as well as a beam-shape (Banana-effect), which can rotate 180 degrees •... -
Page 10: Backside
Backside Fig. 2 DMX signal connector (OUT) DMX signal connector (IN) ON / OFF 7) Fuse T10A 250V... -
Page 11: Installation
Installation Installing the Lamp The Showtec Explorer 575 uses the MSR 575 (ordercode 80915P / 80915O) bulb as manufactured by all popular manufacturers. Use only the appropriate lamp for your unit. Note that, product versions that use other lamps, may be offered in the future. Check your product specification label for information. -
Page 12: Lamp Adjustment
Lamp Adjustment You can adjust the lamp’s position by turning the screws A, B, C. The lamp position is set in the factory. As the lamps, which can be used, differ from manufacturer to manufacturer, it can be necessary to readjust the position. The lamp must be readjusted e.g., if the light does not seem to be evenly distributed within the ray of light. -
Page 13: Set Up And Operation
Set Up and Operation Follow the directions below, as they pertain to your preferred operation mode. Before plugging the unit in, always make sure that the power supply matches the product specification voltage. Do not attempt to operate a 120V specification product on 230V power, or vice versa. One Explorer 1. - Page 14 Multiple Explorers Set Up DMX-Set up Fig. 6 Note : Link all cables before connecting electric power...
-
Page 15: Dmx-Protocol
DMX-Protocol Control Panel When the indicator light is on, means the Explorer is working. Fig. 7 A. Display D. Down Button B. [MENU] Button E. Up Button C. [ENTER] Button Control Mode The fixtures are individually addressed 001 – 512 on a data-link and connected to the controller. The fixtures respond to the DMX signal from the controller. -
Page 16: Stand-Alone Mode
Remotely controllable functions Shutter/Dimmer/Strobe The dimming (0-100%) is provided by a simple mechanical shutter unit. This unit may also be used for strobe effect (1-10 flashes per second). Stand-alone Mode The fixture can execute 2 pre-set programs. Use the MENU button to set the fixture to Auto_1 or Auto_2. The Explorer will now play its built-in program. -
Page 17: Menu Overview
Menu Overview... -
Page 18: Dmx Channels
DMX Protocol 16 Channels (Advanced) Channel 1 - Horizontal movement (Pan) Push the slider up, in order to move head horizontally (PAN). Gradual head adjustment from one end of the slider to the other (0-255, 128-center). The head can be turned by 530° and stopped at any position you wish. Channel 2 - Vertical movement (Tilt) Push the slider, up in order to move head vertically (TILT). - Page 19 42-55 Color 3 56-69 Color 4 70-83 Color 5 84-97 Color 6 98-111 Color 7 112-125 Color 8 126-139 Color 9 140-153 Color 10 154-167 Color 11 168-181 Color 12 182-195 Color 13 196-209 Color 14 210-223 Color 15 224-237 Color 16 238-251 Color 17...
-
Page 20: Channels (Basic)
DMX Protocol 13 Channels (Basic) Channel 1 - Horizontal movement (Pan) Push the slider up, in order to move head horizontally (PAN). Gradual head adjustment from one end of the slider to the other (0-255, 128-center). The head can be turned by 530° and stopped at any position you wish. Channel 2 - Vertical movement (Tilt) Push the slider, up in order to move head vertically (TILT). -
Page 21: Channel Settings
154-167 Color 11 168-181 Color 12 182-195 Color 13 196-209 Color 14 210-223 Color 15 224-237 Color 16 238-251 Color 17 252-255 Color 18 Channel 10 – Effect-wheel 0-49 Beam out 50-99 Lambency 100-255 Radiate Lambency clockwise Channel 11 – Zoom 0-255 Gradual adjustment Zoom from 28º... -
Page 22: Maintenance
3. Mechanically moving parts like axles, eyes and others may not show any traces of wearing. 4. The electric power supply cables must not show any damages or material fatigue. The Showtec Explorer 575 requires almost no maintenance. However, you should keep the unit clean. Otherwise, the fixture’s light-output will be significantly reduced. -
Page 23: Structure Of The Fixture
Structure of the Fixture... -
Page 24: Troubleshooting
Troubleshooting No Light, No Movement - All Products This troubleshooting guide is meant to help solve simple problems. If a problem occurs, carry out the steps below in sequence until a solution is found. Once the unit operates properly, do not carry out following steps. - Page 25 Problem Probable cause(s) Remedy No power to the fixture · Check that power is switched on One or more and cables are plugged in. fixtures are Primary fuse blown. · Replace fuse. completely dead. Fixtures reset The controller is not connected. ·...
-
Page 26: Product Specifications
Product Specification Model: Showtec Explorer 575 MKII Voltage: 240V-50Hz (CE) Power: 850W Fuse: 10A / 250V Dimensions: 470x360x675mm (LxWxH) Weight: 35,8 kg Operation and Programming Signal pin OUT: pin 1 earth, pin 2 (-), pin 3 (+) Set Up and Addressing: LED control panel...
Need help?
Do you have a question about the Explorer 575 Wash MKII and is the answer not in the manual?
Questions and answers