
Related Manuals for Pepperl+Fuchs Ecom Smart-Ex 02


Summary of Contents for Pepperl+Fuchs Ecom Smart-Ex 02
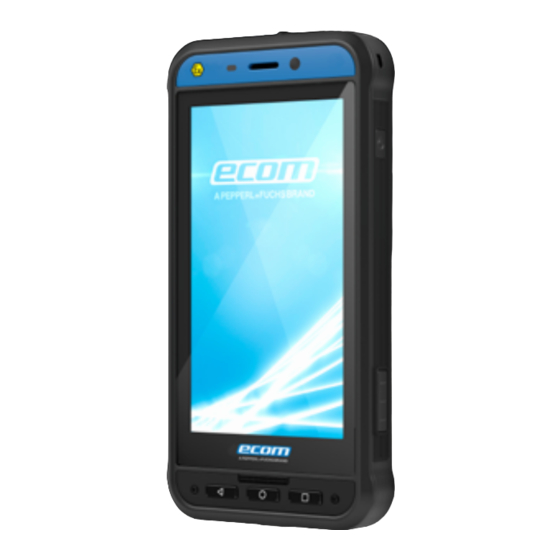
- Page 1 Digitalizing hazardous areas. Enabling connectivity. Enhancing mobility. Smartphone for use in Hazardous Areas Smart-Ex ® User Guide English...
-
Page 2: Legal Information
Copyright © 2019 Pepperl+Fuchs GmbH. PEPPERL+FUCHS RISK OF EXPLOSION IF BATTERY IS REPLACED and the ecom A PEPPERL+FUCHS BRAND logo are BY AN INCORRECT TYPE. DISPOSE OF USED trademarks of Pepperl+Fuchs GmbH. Other company and BATTERIES ACCORDING TO THE INSTRUCTIONS. -
Page 3: Table Of Contents
Legal Information Your ECOM Smart-Ex ® Switching On Setting Up Your Phone Phone Models and Support Information Need for a Google Account Phone Models Covered Managing Home Screen Network Services Home Screen Indicators ECOM Support Information Phone Operations Without SIM Card Use the Guide Effectively Changing the Wall paper Taking a Screenshot... - Page 4 Activating Aeroplane Mode Managing Calls Setting Up Tethering & portable hotspot Making a Call Setting Up Wi-Fi Hotspot Dialing a Number via Contacts Answering an Incoming Call Adding a Contact From Phone Screen Managing Phone Security Settings Viewing All Contacts from Phone Screen About Android Security Viewing Call History Managing Security Settings...
- Page 5 Downloading Media Files and Documents Déclaration d’exposition IC Accessing Gmail™ Google Calendar™ Radio Frequency (RF) Energy Alarm Radio Frequency (RF) Energy Clock Calculator Énergie Radioélectrique Voice Search Énergie Radioélectrique Frequently Asked Questions EU - Declaration of Conformity How to Enable VoLTE on my phone? EU - Declaration of Conformity What is Pocket mode? How can I activate Wi-Fi Calling (VoWiFi)?
-
Page 6: Phone Models And Support Information
Congratulations on the purchase of a ECOM Smart-Ex ® home screen This is the screen displayed when the 02 dual-SIM smartphone. This phone is a GSM/GPRS/ phone is in idle condition. EDGE/UMTS/VoLTE/ViLTE/VoWiFi enabled handset TOUCH & Touch and hold an item on the screen by and has an intuitive, feature-rich user interface, HOLD touching it and not lifting your finger until... -
Page 7: Menu Options
Options Commonly Used across Menu Items The following are common actions used across various menu items: back Displays the previous screen. Use the Left Selection Key to perform this function. Home Moves the current working application to the recent applications list/ background and displays home screen Recent... - Page 8 Please read and understand the following safety Use only ECOM Smart-Ex 02 approved ® guidelines before you use the phone. These guidelines charging equipment to charge your phone provide details to enable you to operate your phone and avoid damage to your phone. safely and conform to any legal requirements regarding the use of cellular phones.
- Page 9 The ECOM Smart-Ex 02 is water-proof ® and can be submerged to 2 metres for 30 minutes. Make sure to properly close the rubber cover of the charging connector and audio connector and the screws of the SIM card cover shall be tightened to avoid deposits of water drops on these connectors, when the phone is immersed in water.
-
Page 10: Safety Guidelines
SAR Information A minimum separation distance of 1.5 cm must be maintained between the user’s body and the device, The ECOM Smart-Ex 02 has been certified in ® including the antenna during body-worn operation to compliance with the Government’s requirements for comply with the RF exposure requirements in Europe. -
Page 11: Child Safety
the smartphone, place it at the ear opposite the smartphone for essential communications (e.g. medical pacemaker. If a minimum distance of 15 cm (6 inches) emergencies). Emergency calls may not be possible is kept between the smartphone and the pacemaker, in all areas, on all cellular networks, or when certain the risk of interference is limited. -
Page 12: Battery Usage Guidelines
Battery Usage 2. Connect to Phone The charging port is located in lower side of the ECOM Smart-Ex 02 phone comes with a removable ® phone, below the back cover. Insert the magnetic battery. For any battery related queries contact ECOM connector to the charging port, such that the customer support. -
Page 13: Verifying And Optimizing Battery Usage
Verifying and Optimizing Battery Usage Move Maps or Navigation apps to background when you are not using them. They use GPS (and thus more To check the battery usage status and also close some power) only when they’re running. applications to save battery power, select Settings > Set screen brightness to Auto and set a shorter Sleep Battery. -
Page 14: Getting Started
What Is In the Box ? Inserting the Nano-SIM Card and Battery The list of items in the ECOM Smart-Ex 02 phone box ® Step 1 are: To insert the nano-SIM ECOM Smart-Ex 02 phone ® card unscrew the two Battery pack Ex-BP S02 cover screws in a counter Wall charger... - Page 15 Step 3 STEP 2 Insert the battery into the battery slot in the prescribed STEP 1 order as shown in the illustration on the right. Step 4 Reattach the battery cover and screw down the two cover screws in a clockwise direction.
- Page 16 Alarm key Headset port Front camera Earpiece Power On/Off Volume Programmable key Multi function key Volume Display screen Multi function key Home key Loudspeaker Back key Recent Apps USB / Charger Port...
-
Page 17: Switching On
Switching On Press and hold the Power ON/OFF key located in the top corner in the right hand side for 2 seconds to Power ON the phone. When the phone is switched on, it tries to register with the network. After successful registration, the names of the service providers are displayed. -
Page 18: Managing Home Screen
Managing Home Screen After you complete the phone setup, the home screen is displayed. The home screen is the beginning point to access all the device’s features. The home screen can have multiple panels. The home screen includes, Time indicator Data Signal strength indicator Service indicator Battery charge indicator... - Page 19 To view the notifications, swipe your finger down Creating a Folder on the Home Screen from the top of the screen. Folders helps you to keep the icons in an organized fashion. To create folders, The System icons on the right displays the current 1.
-
Page 20: Home Screen Indicators
4G LTE Network connected Deleting an application icon from the home screen does not delete the application. You must go to the Applications panel and select the application to Roaming uninstall it. Home Screen Indicators EDGE network connected The icons displayed at the top of the screen provides information about the status of the device. -
Page 21: Phone Operations Without Sim Card
2. Select from one of the following Wall paper Icons Description collections Flight mode activated Photos: Includes photos captured using the phone camera, screen capture, downloaded and the photos synced from google account. Synced with the associated account such Wallpapers: Includes images that are pre-bundled as Google with the phone. -
Page 22: Taking A Screenshot
Taking a Screenshot You can take the screenshot of the current screen and it is stored in your phone’s gallery. To take a screenshot: Ensure that the image to be captured is displayed in the current screen. Press Power and Volume down button simultaneously. The screnshot is captured and stored in the gallery. -
Page 23: Keypad Functions
Keypad Functions The following table displays the various keys and the corresponding functions they perform: Keypad Operations Home - moves the current working application to the recent applications list/background. Recents - displays the recently accessed applications. Press this key to go back to the previous screen. -
Page 24: Managing Phone Settings
Language and Input Settings Text -to-speech Output Settings You can set the phone’s language to any language or The Speech engine is set to Text-to-speech.To english preferred language. change the Google Text-to-speech engine settings 1. From the Home or All Apps screen, tap Settings and install new language packs. -
Page 25: Power Saving Settings
surroundings. This also optimizes the battery power 4. You can also view and modify the following power consumed. management options: Wallpaper: Set the wallpaper for your home screen. Battery saver - Turn ON/OFF battery saver You can select from one of the following wallpaper automatically collections: Battery percentage - Display battery percentage... -
Page 26: Connecting A Pc Using Usb Connection
Connecting a PC Using USB Connection From the Home or All Apps screen, tap Settings ( Scroll down and tap About Phone. When the phone is connected to the computer via an ECOM certified USB cable, Charging this device via Managing Memory Utilized by Applications USB message is displayed in the Notification bar. -
Page 27: Optimizing Memory Usage
optimization, device admin apps and do not disturb access to applications. Optimizing Memory Usage You can optimize your phone’s memory by performing the following tasks: Uninstall apps that are not required. Delete unwanted files that are downloaded or created. Transfer files that would be required later to your computer. -
Page 28: Managing Wireless And Network Settings
Connecting to Wi-Fi Network Enable Advanced Settings to set the Proxy details and IP settings. Wi-Fi is a wireless network technology that can provide Internet access at distance upto 100 Feet, depending Editing a Network on the Wi-Fi router and surroundings, when you connect your mobile device to the wireless router. -
Page 29: Optimizing Data Usage
Pairing a Bluetooth Device Editing Bluetooth Device Settings To activate Bluetooth and pair your ECOM Smart-Ex® 1. Tap Settings icon ( ) located next to the 02 phone with other Bluetooth devices: preferred paired Bluetooth device. 1. From the Home or All Apps screen, tap Settings ( 2. -
Page 30: Activating Aeroplane Mode
5. Enable Mobile Data to access Internet using your Setting Up Tethering & portable hotspot mobile network. Using tethering and portable hotspot, you can share 6. Tap Data usage to set the mobile data usage limits. your device’s Internet connection with a computer or 7. - Page 31 1. Tap Hotspot and tethering located under Network Connecting to a VPN Network & Internet settings. 1. Tap the required VPN name from the list of VPN 2. Enable Bluetooth tethering. networks configured. 2. Enter the required credentials. Setting Up VPN Connection 3.
- Page 32 Internet settings. 3. Enable Mobile data to access the Internet using your mobile network. 4. Enable Roaming to have network connectivity when you are in a roaming network. 5. Set Data usage limit. 6. Select the preferred Network type. You can set it to either 2G only,3Gonly, 4G only, 2G/3G only, 3G/4Gonly, 2G/3G/4G.
-
Page 33: Managing Phone Security Settings
About Android Security 2. Tap Security & location. 3. Enable and modfiy required security settings. Android provides a multi-layered approach to the 4. Tap Screen lock and select one of the following security. options to configure phone: Prevent: Apps on Google Play are scanned None: Disables the phone lock. -
Page 34: Managing Credential Certificates
7. Enter the new PIN and re-enter the same value when asked. Tap OK. Managing Credential Certificates You can view, install, verify and manage the certificates installed in your phone. Tap Trusted Credentials under Encryption & Credentials, to view and verify the system and user certificates. -
Page 35: Location Access
Location Access Managing Accounts If you enable Google Location Service™, you can let You can link an existing Google Account to your phone your device access GPS, Wi-Fi networks, and mobile to organize and access your personal information from networks to estimate your location. any computer or mobile device. -
Page 36: Syncing Your Account
To remove any other type of account, tap Settings Configure Google Account Sync Settings - Accounts > account-name and tap the suitable To modify a single Google Account’s sync settings: Remove option. 1. Go to Settings ( ) > Accounts > Google. 2. -
Page 37: Managing Contacts
You can use the phonebook to maintain your contacts. Sending SMS/MMS It enable you to perform call,SMS, mms etc. 1. From Home or All Apps screen, tap Contacts ( 2. Scroll to the required contact and tap the Message To access the contacts, icon ( ), to open the message screen. -
Page 38: Copy To Phone
Copy to Phone Managing Phonebook Settings You can set the default Google account to save the 1. From Home or All Apps screen, tap Contacts ( contacts, select the list of contacts to be displayed or 2. Tap Options ( ) and Settings >... -
Page 39: Searching Contacts
Searching Contacts 1. From Home or All Apps screen, tap Contacts ( 2. Tap Search Contacts ( ) and enter the first few letters/numbers of the contact name/ phone number to be searched. All the contacts containing the search text are displayed. Deleting a Contact 1. -
Page 40: Managing Calls
Making a Call Icons Description From Home or All Apps screen, tap Phone ( Answer the call. The Phone screen with Recents ( ), Favourites ( Call history , Contacts ( ) is displayed. To dial a number use one of the following options: Disconnect the call. -
Page 41: Viewing Call History
Viewing Call History Activating Vibrate Mode In the Call settings screen, go to Sounds and From Home or All Apps screen, tap Phone ( vibration > Enable also vibrate for calls. Tap the Recents icon ( Setting Up Your Voicemail Deleting Call History 1. -
Page 42: Managing Fixed Dial Numbers
To view and edit quick responses, in the Call settings To block incoming calls from certain numbers, tap Call screen, tap Quick responses, tap the specific blocking > Add a number. response message to edit. Edit the message and tap Enter the phone number to be blocked and tap Block. -
Page 43: Call Waiting
To access call forward settings in the call settings screen, tap Calling accounts > select required service provider name and tap Call forwarding. Select one of the following call forward options: Options Function Always forward Forward all incoming calls to a pre-designated number. -
Page 44: Sending Messages
SMS and MMS are convenient and inexpensive means 5. You can add a multimedia attachment, share a of communication. You can send a text message to contact or attach a file as an attachment. To add an other people via SMS service. MMS allows you to send attachment, tap Attach ( ). -
Page 45: Deleting Messages
Tap Settings. Auto- Enable to download all MMS messages in View and edit the following settings: download home network Settings Description Auto- Default SMS Set the default messaging application. Enable to download all MMS messaged in download MMS when roaming network Set message notification for different profile roaming settings, message display options for... -
Page 46: Using The Keyboard
You can view and modify the keyboard, language and 3. Tap Virtual keyboard. dictionary setting using the Phone Settings. 4. Tap Gboard. 5. Tap Add-on dictionaries. under Dictionary. Keyboard Dictionaries The dictionaries for other languages that you can download to your device are displayed. To manage keyboard dictionaries, From the Home or All Apps screen, tap Settings Tap Languages &... -
Page 47: Installing And Using Android™ Applications
Google Play™ 2. Tap Grid view ( )to view the downloads. The downloads are displayed with the details such as Google Play™ provides access to different Android the size, downloaded date etc. applications that you can download on the go and use in your ECOM Smart-Ex 02 phone. -
Page 48: Alarm
2. To change the calendar view, choose Schedule, Clock Day, 3 Day, Week, Month from the top of the screen You can view the time of major cities in different time in a drop-down list. zones using Clock ( ). You also have the option to 3. - Page 49 To initiate the voice search, tap the microphone ( icon in the Google search bar. After you touch the Microphone icon ( ) or say OK Google, Google listens as you speak and initiates the search or action you describe. If voice search does not understand you, it lists some suggestions.
-
Page 50: Frequently Asked Questions
How to Enable VoLTE on my phone? How can I configure and use Speed dial? VoLTE services will work only if your service provider Speed dialling helps you to associate each numeric key with activates it. Please contact your service provider for VoLTE one of the frequently used contacts or phone number. -
Page 51: End User License Agreement
License PEPPERL+FUCHS, and, to the extent that the Software contains material or code of a third party, such third This wireless device, (the “Device”) contains party, shall be entitled third party beneficiaries of software owned by PEPPERL+FUCHS GmbH. these terms. The laws of Delaware, United States shall (“PEPPERL+FUCHS”) and its third party suppliers and... -
Page 52: Fcc Statement
Connect the equipment into an outlet on a circuit different Changes or modifications made to this equipment not from that to which the receiver is connected. expressly approved by PEPPERL+FUCHS GmbH for Consult the dealer or an experienced radio/TV technician compliance could void the user’s authority to operate the for help. -
Page 53: Déclaration De La Fcc
Déclaration de la FCC La sélection du code de pays est uniquement pourle modele non US et n’est pas disponible pour Cette variante Smart-Ex 02 ciblée pour la région Amérique tous les modèles US. Selon la reglementation de la du Nord est conforme à la partie 15 des règles de la FCC FCC, tous les produits Wi-Fi commercialisés aux (FCC ID: XAM500079GR01). -
Page 54: Radio Frequency (Rf) Energy
Radio Frequency (RF) Energy This device has been tested and meets the FCC and IC RF exposure guidelines when tested with the device This device is designed and manufactured not to exceed directly contacted to the body. the emission limits for exposure to radio frequency (RF) energy set by the Federal Communications Commission For this device, the highest reported SAR value for of the United States and Industry Canada. -
Page 55: Énergie Radioélectrique
Énergie Radioélectrique testé conformément aux méthodes et procédures spécifiées par les Normes IEEE1528 et Canada RSS 102. Cet appareil est conçu et fabriqué de façon à ne pas Ce dispositif a été testé et respecte les directives FCC et dépasser les limites d’émission pour l’exposition à IC sur l’exposition aux radiofréquences lorsqu’il est testé... -
Page 56: Eu - Declaration Of Conformity
EU - Declaration of Conformity Hereby, Pepperl+Fuchs GmbH declares that the radio equipment type Smart-Ex 02 is in compliance with ® Directive 2014/53/EU. The full text of the EU declaration of conformity is available at the following URL: www.ecom-ex.com. The use of WLAN band is restricted to indoor use only. -
Page 57: Index
Contacts Adding a contact from phone screen Add new contact Send message Aeroplane mode Credential certificates Alarm Android security Answering a call Data backup and restore Data syncing Configuring an account Backup data Manual Battery usage Deleting a contact Charging Deleting call history Improving battery life Deleting messages... - Page 58 Frequenctly called list Sending MMS message Mobile network Gmail Music player Google account Adding an account Deleting an account Optimizing data usage Syncing data Optimizing memory usage Google Search bar Optimizing power Home screen People Indicators Phone data encryption Home screen icons/folders Play store Adding to home screen Power Optimization...
- Page 59 Security settings WPS for router Sending SMS Sending SMS/MMS From Contacts Setting up your phone Sharing contact details SIM card Inserting SIM card SIM card lock SMS settings System icons Time and date settings Viewing call history Viewing contact details Viewing contacts from phone screen Viewing device details Voice Actions...
- Page 60 Pepperl+Fuchs GmbH prior written consent. The contents of this document are presented as they currently exist. Pepperl+Fuchs GmbH does not provide any express or tacit guarantee for the correctness or completeness of the contents of this document, including, but not restricted to, the tacit guarantee of market suitability or fitness for a specific purpose unless applicable laws or court decisions make liability mandatory.
Need help?
Do you have a question about the Ecom Smart-Ex 02 and is the answer not in the manual?
Questions and answers