
Related Manuals for Pepperl+Fuchs Ecom Ex-Handy 10


Summary of Contents for Pepperl+Fuchs Ecom Ex-Handy 10
- Page 1 Digitalizing hazardous areas. Enabling connectivity. Enhancing mobility. Feature Phone for use in Hazardous Areas Ex-Handy 10 User Guide English...
-
Page 2: Legal Information
RISK OF EXPLOSION IF BATTERY IS REPLACED PEPPERL+FUCHS and the ecom A PEPPERL+FUCHS BY AN INCORRECT TYPE. DISPOSE OF USED BRAND logo are trademarks of Pepperl+Fuchs GmbH. BATTERIES ACCORDING TO THE INSTRUCTIONS. Other company and product names may be trademarks... -
Page 3: Table Of Contents
What Is In the Box ? Your SIM Card Managing Personal, Account and Inserting the Nano-SIM Card System Settings Location Access Your ECOM Ex-Handy 10 Backup and Restore Data Switching On Managing Accounts Setting Up Your Phone Adding an Account... - Page 4 Managing Contact Settings Calculator Managing Phonebook Settings Voice Search Searching Contacts Deleting a Contact Frequently Asked Questions Why is my phone not powering on Managing Calls after inserting the SIM card? Making a Call How to Enable VoLTE on my phone? Dialing a Number via Contacts What is PTT call priority.
-
Page 5: Phone Models And Support Information
Congratulations on the purchase of a ECOM Ex-Handy HOME This is the screen displayed when the 10 feature phone. This phone is a GSM/GPRS/EDGE/ SCREEN phone is in idle condition. UMTS/LTE/VoWiFi enabled handset and has an Touch and hold an item on the screen by intuitive, feature-rich user interface, which allows you TOUCH &... -
Page 6: Menu Options
Options Commonly Used across Menu Items The following are common actions used across various menu items: Displays the previous screen. Use BACK the Left Selection Key to perform this function. Confirms an action. Use the Center key on applicable screens, to perform this function. - Page 7 Use only ECOM Ex-Handy 10 approved charging equipment to charge your phone and avoid damage to your phone.
- Page 8 The ECOM Ex-Handy 10 is water-proof and can be submerged to 2 metres for 30 minutes. Make sure to properly close the rubber cover of the charging connector and audio connector and the screws of the SIM card cover shall be tightened...
-
Page 9: Safety Guidelines
(W/kg). Asia, Australia and European union. Governments around the world have adopted The highest SAR value for the ECOM Ex-Handy 10 comprehensive international safety guidelines, RoW phone when tested by ECOM for use: developed by scientific organizations, for example, ICNIRP (International Commission on Non-Ionizing By the head is 0.489 W/Kg (10 g). -
Page 10: Personal Medical Devices
Personal Medical Devices Feature phones operate using radio signals, which cannot guarantee connection under all conditions. Feature phones may a ect the operation of cardiac Therefore you should never rely solely upon any feature pacemakers and other implanted equipment. Please phone for essential communications (e.g. -
Page 11: Battery Usage Guidelines
Insert the charger plug into a power outlet. DO NOT charge your ECOM Ex-Handy 10 inside hazardous areas and/or with any other cable and charger other than the provided ECOM certified charging cable and charger. Charging your ECOM Ex-Handy 10 with a di erent... -
Page 12: Verifying And Optimizing Battery Usage
cable/Charger and/or in a hazardous environment If you are using Wi-Fi, Bluetooth, or GPS, use the will compromise the intrinsically safe nature of the Quick Settings or Phone Settings to turn them o . device. Move Maps or Navigation apps to background when you are not using them. -
Page 13: Getting Started
What Is In the Box ? Inserting the Nano-SIM Card The list of items in the ECOM Ex-Handy 10 phone box Step 1 are: ECOM Ex-Handy 10 phone with rechargeable To insert the nano-SIM built-in battery card unscrew the two... - Page 14 Step 3 Reattach the SIM card cover and screw down the two cover screws in a clockwise direction. Please use the screwdriver Torx T8 provided with the device and ensure not to overtighten the screws.
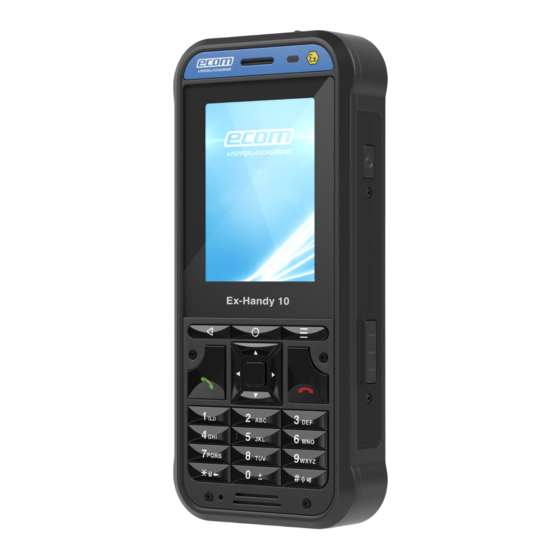
- Page 15 ECOM Ex-Handy 10 Phone Alarm key Receiver/ Earpiece Headset port Touch Display Power On/O Volume PTT key Camera Volume Home Back Key Options Navigation Keys Make Call/Accept Call Call End/Reject Press and hold to access voicemail Press and hold to lock the keypad...
-
Page 16: Switching On
Switching On Press and hold the Power ON/OFF key located in the top corner in the right hand side for 2 seconds to Power ON the phone. When the phone is switched on, it tries to register with the network. After successful registration, the name of the service provider is displayed. -
Page 17: Managing Home Screen
Managing Home Screen After you complete the phone setup, the home screen is displayed. The home screen is the begining point to access all the device’s features. The home screen can have multiple panels. To move between the home panels, press the navigation keys. The home screen includes, Wi-Fi Signal strength indicator Service indicator... - Page 18 The Status bar on the top of the display screen home screen to left or right. provides details about various notifications such as missed call, new messages, alarms, events and Creating a Folder on the Home Screen software updates. 1. Folders helps you to keep the icons in an organized fashion.
- Page 19 Deleting an application icon from the home screen Icons Description does not delete the application. You must go to the Applications panel and select the application to 4G LTE Network connected uninstall it. Home Screen Indicators Roaming The icons displayed at the top of the screen provides information about the status of the device.
-
Page 20: Phone Operations Without Sim Card
Changing the Wall paper Icons Description You can set an image or a photo stored in your phone as your home sceen wall paper. To change the wall Silent mode activated paper, Vibration mode activated 1. Tap and hold on the Home screen. Choose Wall papers option. -
Page 21: Keypad Functions
Keypad Functions Press to navigate in up, down, left The following table displays the various keys and the and right directions. corresponding functions they perform: NAVIGATION KEYS Keypad key Operations Press the required keys ( 1- 0) to Back - Opens the previous screens ALPHA- enter the desired phone number in the working sequence till the home... -
Page 22: Managing Phone Settings
Language and Input Settings Android keyboard (AOSP) - is enabled by default and can’t be disabled. You can set the phone’s language to any language or Phone keypad english preferred language. Google voice typing 1. From the Home or All Apps screen, tap Settings Jaanese IME 2. -
Page 23: Power Saving Settings
send message or can use for navigation using voice Ambient display: Activates the screen from sleep command in your own set language. mode, when there is a new notification. Display Settings Power Saving Settings Viewing Battery Life From the Home or All Apps screen, tap Settings To view the battery life when all the apps are running, Scroll down and tap Display. -
Page 24: Connecting A Pc Using Usb Connection
Quick Settings Connected as a media device, then the following two options are displayed: Quick settings helps to access the most frequently used settings from the status bar. Charge the device: Select this to charge your Drag down the status bar to access the Quick Settings. phone using USB charging. -
Page 25: Managing Memory Utilized By Applications
Managing Memory Utilized by Applications Transfer files that would be required later to your computer. The Apps screen allows you to optimize memory usage Delete o ine content on Google Play and stream it for all the applications. To view these settings, via a Wi-Fi or mobile network. -
Page 26: Managing Wireless And Network Settings
Connecting to Wi-Fi Network WPA/WPA2 PSK, 802.1x EAP. 3. Enable Advanced Settings to set the Proxy details Wi-Fi is a wireless network technology that can provide and IP settings. Internet access at distance upto 100 Feet, depending on the Wi-Fi router and surroundings, when you Editing a Network connect your mobile device to the wireless router. - Page 27 Use Bluetooth headphones for playing media file The device is displayed in the Paired device list. Pairing a Bluetooth Device To activate Bluetooth and pair your ECOM Ex-Handy 10 phone with other Bluetooth devices: 1. From the Home or All Apps screen, tap Settings ( 2.
-
Page 28: Optimizing Data Usage
Editing Bluetooth Device Settings 5. Enable Mobile Data to access Internet using your mobile network. 1. Tap Settings icon ( ) located next to the 6. Tap Mobile data usage to set the mobile data usage preferred paired Bluetooth device. limits. -
Page 29: Setting Up Tethering & Portable Hotspot
2. Enable Airplane mode located under Network & Setting Up VPN Connection Internet settings. Using a Virtual private network (VPN) connection, you can access websites and other resources within a Setting Up Tethering & portable hotspot secured local network, even when you are outside that Using tethering and portable hotspot, you can share network. -
Page 30: Connecting To A Vpn Network
Connecting to a VPN Network Managing Mobile Network You can view and modify your mobile service provider 1. Tap the required VPN name from the list of VPN settings. To view and modify your mobile network networks configured. settings, 2. Enter the required credentials. 1. -
Page 31: Managing Phone Security Settings
About Android Security 2. Tap Security & location. 3. Enable and modfiy required security settings. Android provides a multi-layered approach to the 4. Tap Screen lock and select one of the following security. options to configure phone: Prevent: Apps on Google Play are scanned None: Disables the phone lock. -
Page 32: Locking Your Sim Card
Tap Install from SD card to install certificates from Encryption takes an hour or more .You SD card if any. must start with a charged battery and keep your phone plugged in untill encryption is complete.If you interrupt the encryption process,you will lose some or all of your data. -
Page 33: Location Access
Location Access Backup and Restore Data If you enable Google Location Service™, you can let You can backup your phone data to one or more of your device access GPS, Wi-Fi networks, and mobile your Google Accounts using Android backup services. networks to estimate your location. -
Page 34: Deleting An Account
4. Complete the on-screen instructions. The account Configure Auto-Sync for all Apps is displayed under one of the following list: To enable auto-sync for all apps that are linked with Google Accounts shown under Settings > Users your account, & accounts > Google. 1. -
Page 35: Managing Contacts
You can use the phonebook to maintain your contacts. Sending SMS/MMS It enable you to perform call,SMS, mms etc. 1. From Home or All Apps screen, tap Contacts ( 2. Scroll to the required contact and tap the Message To access the contacts, icon ( ), to open the message screen. -
Page 36: Copy To Phone
Copy to Phone Set ringtone: Set a specific ringtone for the contact. 1. From Home or All Apps screen, tap Contacts ( Route to voice mail: Can route the contact to 2. Tap Options ( ) and Settings > Import, to import voice mail the contact to phone. -
Page 37: Searching Contacts
Export: Export contact to .VCF file or SIM card. You can also share all the contacts using Messages, E-mail, Google Drive or Bluetooth. Blocked Numbers: View blocked phone numbers. Searching Contacts 1. From Home or All Apps screen, tap Contacts ( 2. -
Page 38: Managing Calls
Making a Call Icons Description From Home or All Apps screen, tap Phone ( The Phone screen with Recents ( ), Favourites ( Answer the call. Call history , Contacts ( ) is displayed. To dial a number use one of the following options: Disconnect the call. -
Page 39: Deleting Call History
Deleting Call History Setting Up Your Voicemail 1. From Home or All Apps screen, tap Phone ( 1. From Home or All Apps screen, tap Phone ( 2. Tap the Call history icon ( 2. Tap Options ( 3. Tap Options ( 3. -
Page 40: Managing Calls
1. From Home or All Apps screen, tap Phone ( Options Function 2. Tap Options ( All voice calls or International voice 3. Tap Settings. Outgoing calls calls or International voice calls except 4. Tap Fixed Dialing Numbers under Call settings. home country. -
Page 41: Call Waiting
Forward when Forward calls when you do not answer unanswered incoming calls. Forward calls when your phone is Forward when switched o or is in out of coverage unreachable area. Call Waiting When call waiting is enabled and the phone is in conversation, the incoming number is displayed when you receive a call. -
Page 42: Sending Messages
SMS and MMS are convenient and inexpensive means message. MMS charges are applied based on the of communication. You can send a text message to operator. other people via SMS service. MMS allows you to send 7. You can add a multimedia attachment. To add messages by including multimedia content such as an attachment, tap Attach ( ). -
Page 43: Deleting Messages
3. Tap Settings. View and edit the following settings: Auto-download Enable to download all MMS MMS when Settings Description messaged in roaming network roaming Default SMS Set the default messaging application. Use simple Convert special characters to characters simple characters in SMS Set message notification for di erent profile settings, message Get SMS... -
Page 44: Using The Keyboard
You can view and modify the keyboard, language and 3. Tap Virtual keyboard. dictionary setting using the Phone Settings. 4. Tap Google Keyboard. 5. Tap Add-on dictionaries. under Dictionary. Keyboard Dictionaries The dictionaries for other languages that you can download to your device are displayed. 1. -
Page 45: Google Play
)located on the All apps applications that you can download on the go and use screen. in your ECOM Ex-Handy 10 phone. 2. Tap Grid view ( )to view the downloads. The downloads are displayed with the details such as Downloading Media Files and Documents the size, downloaded date etc. -
Page 46: Alarm
To access Google Calendar, Clock 1. Tap Calendar icon ( ) on All Apps screen. You can view the time of major cities in di erent time 2. To change the calendar view, choose Day, Week, zones using Clock ( ). - Page 47 To initiate the voice search, tap the microphone ( icon in the Google search bar. After you touch the Microphone icon ( ) or say OK Google, Google listens as you speak and initiates the search or action you describe. If voice search does not understand you, it lists some suggestions.
-
Page 48: Frequently Asked Questions
Why is my phone not powering on after inserting How can I activate text entry using physical key- the SIM card? pad? Your EX-Handy 10 will not power on if the SIM cover is Use quick settings to activate and deactivate physical not properly fastened. -
Page 49: Frequently Asked Questions
If there is any System update to be performed, your phone will communicate the server via Wi-Fi/Mobile data and upgrade the device OS. Wi-Fi is the preferred mode for download of update as mobile data incurs additional charges including roaming. How can I use the flash light settings? This setting helps you to restrict the accidental usage of flash light. -
Page 50: End User License Agreement
License PEPPERL+FUCHS, and, to the extent that the Software contains material or code of a third party, such third This wireless device, (the “Device”) contains party, shall be entitled third party beneficiaries of software owned by PEPPERL+FUCHS GmbH. these terms. The laws of Delaware, United States shall (“PEPPERL+FUCHS”) and its third party suppliers and... -
Page 51: Fcc Statement
Changes or modifications made to this equipment Reorient or relocate the receiving antenna. not expressly approved by PEPPERL+FUCHS GmbH Increase the separation between the equipment for compliance could void the user’s authority to and receiver. -
Page 52: Déclaration De La Fcc
Déclaration de la FCC Branchez l‘équipement à une prise sur un circuit di érent de celui auquel le récepteur est branché. Cette variante Ex-Handy 10 ciblée pour la région Amérique du Nord est conforme à la partie 15 des Consulter le fournisseur ou un technicien radio/TV règles de la FCC (FCC ID: XAM500080GR01). -
Page 53: Radio Frequency (Rf) Energy
measurement methods and procedures specified in This device is in compliance with SAR for general IEEE 1528 and IEC 62209. This equipment should be population /uncontrolled exposure limits in ANSI/IEEE installed and operated with minimum distance of 0 cm C95.1-1992 and Canada RSS 102 and had been tested between the radiator and your body. -
Page 54: Énergie Radioélectrique
Canada. Son utilisation est soumise à deux conditions: puissance le plus élevé à toutes les bandes de (1) Ce dispositif ne peut pas provoquer d‘interférences, et fréquences testées et placées dans l‘ensemble des (2) Ce dispositif doit accepter toutes les interférences positions simulant l‘exposition aux radiofréquences reçues, y compris les interférences susceptibles de contre la tête et près du corps, avec une séparation... -
Page 55: Eu - Declaration Of Conformity
EU - Declaration of Conformity Hereby, Pepperl+Fuchs GmbH declares that the radio equipment type Ex-Handy 10 is in compliance with Directive 2014/53/EU. The full text of the EU declaration of conformity is available at the following URL : www.ecom-ex.com. -
Page 56: Index
Adding a new network Editing a Wi-Fi network Adding a contact from phone screen 38 Forgetting a Wi-Fi network Add new contact WPS for router Aeroplane mode Contacts Alarm Android security Send message Answering a call Credential certificates Backup data Data backup and restore Battery Data syncing... - Page 57 Adding to home screen Music player Creating Folder in home screen Moving an icon/folder Removing from home screen Optimizing data usage Optimizing memory usage Optimizing power Keypad Accept/Send Back People Navigation keys Phone data encryption Keypad for ECOM EX-Handy 10...
- Page 58 Play store System icons Power Optimization Power saving settings Force stopping an application Tethering and portable hotspot Viewing battery life Time and date settings Quick responses Viewing call history Viewing contact details Viewing contacts from Restore data phone screen Ringtones Viewing device details Voice Actions Voice Search...
- Page 59 Pepperl+Fuchs GmbH prior written consent. The contents of this document are presented as they currently exist. Pepperl+Fuchs GmbH does not provide any express or tacit guarantee for the correctness or completeness of the contents of this document, including, but not restricted to, the tacit guarantee of market suitability or fitness for a specific purpose unless applicable laws...
Need help?
Do you have a question about the Ecom Ex-Handy 10 and is the answer not in the manual?
Questions and answers