Table of Contents
Advertisement
Available languages
Available languages
Quick Links
Advertisement
Table of Contents

Related Manuals for Audiotec Fischer HELIX D ONE


Summary of Contents for Audiotec Fischer HELIX D ONE
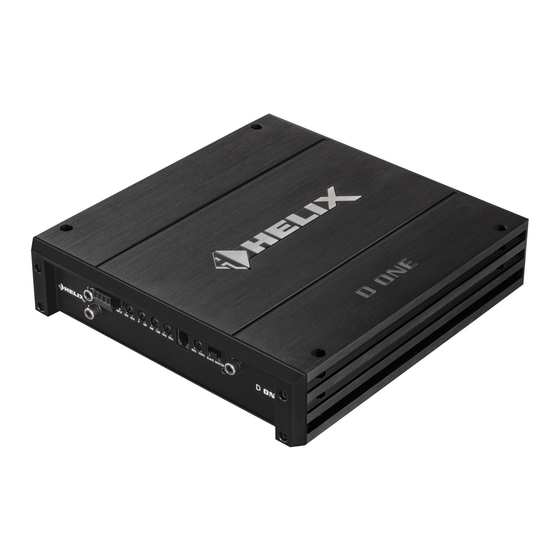
- Page 1 D ONE 1-Kanal Class D Verstärker 1-channel Class D amplifier...
-
Page 2: Herzlichen Glückwunsch
Verarbeitung und eine tigen HELIX Verstärkers. überzeugende Anwendung ausgereifter Technolo- gien aus. Audiotec Fischer setzt mit der HELIX D ONE neue Viel Freude an diesem Produkt wünscht Ihnen das Maßstäbe in puncto Preis-Leistungsverhältnis. Dabei profitieren Sie als Kunde direkt von unserer Team von mehr als 30-jährigen Erfahrung in der Forschung... -
Page 3: Anschluss- Und Bedienelemente
Anschluss- und Bedienelemente Line Input Subsonic Cinch-Eingänge Anschluss eines Regler zum Einstellen des Subsonicfilters Vorverstärkersignals. von 10 Hz bis 50 Hz. Highlevel Input Remote Hochpegel-Lautsprechereingang zum An- Eingang zum Anschluss der mitgelieferten schluss von Werksradios oder Radios ohne Fernbedienung zur Lautstärkeregelung. Vorverstärkerausgänge. -
Page 4: Line Input
Inbetriebnahme und Funktionen 1 Line Input 4 Phase Shift 2-Kanal Vorverstärkereingang zum Anschluss von Mit Hilfe dieses Reglers kann die Phase von 0° bis Signalquellen, wie z.B. Radios, die mit dem/den 180° eingestellt werden. Dies ermöglicht eine bes- Vorverstärkerausgang/-ausgängen bzw. Line Out- sere Ankopplung des Subwoofers an die Tieftonwie- puts der Signalquelle verbunden werden können. -
Page 5: Speaker Output
7 Remote Achtung: Bitte immer darauf achten das ein Ver- Eingang zum Anschluss der im Lieferumfang ent- stärker auf Master und der andere auf Slave ge- haltenen Fernbedienung. Mit Hilfe dieser Fernbe- schaltet ist. In diesem Modus liegt die Minimalim- dienung lässt sich die Lautstärke des Subwoofers pedanz bei 2 Ohm. - Page 6 Eingang muss nicht belegt werden, wenn der ne Querschnitt beträgt mindestens 10 mm². Einbau und Installation Die HELIX D ONE wird wie nachfolgend be- Achten Sie bitte auf eine korrekte Polung! schrieben an das Autoradio angeschlossen. Wenn Sie einen Anschluss verpolen, kann da- durch die Funktion des Verstärkers beeinträch-...
- Page 7 Der Wert der Sicherung errechnet sich aus der Schalter auf „Master“ stellen (siehe Seite 5, Punk 9; Master / Slave Modus). maximalen Stromaufnahme der gesamten Car- Hifi Anlage (D ONE = max. 60 A RMS bei 12 V 2. Stellen sie den Master / Slave Modus Schal- Bordnetz).
- Page 8 Konfigurationsbeispiele Parallelbetrieb Zwei Subwoofer mit einer Schwingspule (Single Voice Coil) oder ein Subwoofer mit Doppelschwingspule (Dual Voice Coil) werden parallel geschaltet. Hinweis: Die Parallelschaltung von zwei Schwingspulen führt zur Halbierung der Impedanz! Maximale Ausgangsleistung dieser Konfiguration: Zwei Subwoofer mit 1 x 4 Ohm entsprechen einer Zwei Subwoofer mit einer Schwingspule Gesamtimpedanz von 2 Ohm: 340 / 680 Watt...
- Page 9 Konfigurationsbeispiele für den Master / Slave Modus Verstärkeranschluss im Master / Slave Modus Master Slave Signal vom Radio Schalterstellung: Schalterstellung: (Cinch oder Highlevel) Master Slave Cinchkabel Lautsprecheranschluss im Master / Slave Modus Master Slave Ein Subwoofer mit einer Schwingspule (Single Voice Coil) Maximale Ausgangsleistung dieser Konfiguration: 1 x 4 Ohm: 645 / 1.290 Watt 1 x 2 Ohm: 910 / 1.820 Watt...
-
Page 10: Technische Daten
Technische Daten Leistung RMS / Max. Normalbetrieb Master / Slave Modus (Ein Verstärker) (Zwei Verstärker) - @ 4 Ohm ..............1 x 200 / 400 Watt 1 x 645 / 1.290 Watt - @ 2 Ohm ..............1 x 340 / 680 Watt 1 x 910 / 1.820 Watt - @ 1 Ohm .............. -
Page 11: General Instructions
D ONE amplifier To prevent damage to the unit and possible injury, The HELIX D ONE amplifier may only be installed read this manual carefully and follow all installation in vehicles which have a 12 Volts negative terminal instructions. This product has been checked for connected to the chassis ground. - Page 12 Connectors and control units Line Input Subsonic RCA inputs for connecting lowlevel line Control for adjusting the subsonic filter from signals. 10 to 50 Hz. Highlevel Input Remote Highlevel speaker inputs for connecting a Input for connecting the included cable factory radio or an aftermarket radio without remote control for volume adjustment.
- Page 13 Initial start-up and functions 1 Line Input phase shifts. 2-channel lowlevel line input to connect signal sourc es such as head units / radios / DSPs. Important: It is strictly forbidden to use the High- level Input and lowlevel Line Input at the same time. This may cause severe damage to the lowlevel line outputs of your head unit / car radio.
-
Page 14: Initial Start-Up And Functions
(max. distance from battery: 30 cm / 12”). this mode, they must be connected with a RCA / The HELIX D ONE is equipped with 2 x 30 Ampere Cinch cable (see page 14, item 10; Mono Cinch In- / fuses. -
Page 15: Installation
(this is located where ommended cross section: min. 10 mm² / AWG 8. Installation Connection of HELIX D ONE to the head unit / car radio: 3. Adjustment of the input sensitivity Attention: It is mandatory to properly adapt... - Page 16 Installation “Master” mode. All filter adjustments of the 5. Connecting the remote input amplifier which operates in “Slave” mode will The remote input (REM) has to be connected be deactivated. to the radio remote output if the amplifiers low- Examples of configurations can be found on level line inputs are used as signal inputs.
- Page 17 Parallel operation Two subwoofers with one voice coil (single voice coil) or one subwoofer with dual voice coil are connected in parallel. Note: The parallel connection of two voice coils will result in halving the impedance! Maximum output power of this configuration: Two subwoofers with 1 x 4 Ohms correspond to a total Two subwoofers with a single voice coil...
- Page 18 Example configurations for Master / Slave Mode Amplifier connection in Master / Slave Mode Master Slave Signal from the radio Switch setting: Switch setting: (RCA/Cinch or highlevel) Master Slave RCA/Cinch cable Speaker connection in Master / Slave Mode Master Slave One subwoofer with one voice coil (single voice coil) Maximum output power of this configuration:...
-
Page 19: Technical Data
Technical Data Output power RMS / max. Normal operation Master / Slave Mode (One amplifier) (Two amplifiers) - @ 4 Ohms ..............1 x 200 / 400 Watts 1 x 645 / 1,290 Watts - @ 2 Ohms ..............1 x 340 / 680 Watts 1 x 910 / 1,820 Watts - @ 1 Ohm .............. - Page 20 Audiotec Fischer GmbH Hünegräben 26 · 57392 Schmallenberg · Germany Tel.: +49 2972 9788 0 · Fax: +49 2972 9788 88 E-mail: helix@audiotec-fischer.com · Internet: www.audiotec-fischer.com...
Need help?
Do you have a question about the HELIX D ONE and is the answer not in the manual?
Questions and answers