Table of Contents
Advertisement
Advertisement
Table of Contents

Related Manuals for Gree GMV-36WL/A-T(U)


Summary of Contents for Gree GMV-36WL/A-T(U)
- Page 1 DC INVERTER SIDE DISCHARGE VRF Ⅱ FOR NORTH AMERICA...
-
Page 2: Table Of Contents
CONTENTS PRODUCT ..............................2 1 PRODUCT LIST ..............................2 2 PRODUCT FEATURES ........................... 2 3 SPECIFICATIONS ............................3 4 PRODUCT CAPACITY CORRECTION ......................4 5 PRINCIPAL OF OPERATION ......................... 6 CONTROL ..............................9 1 UNITS’ CONTROL ............................9 2 WIRED CONTROLLER ..........................12 3 REMOTE CONTROLLER .......................... - Page 3 DC Inverter Side Discharge VRF Ⅱ for North America PRODUCT...
-
Page 4: Product
2 Product Features 2.1 General introduction Gree DC Inverter Multi VRF System II is the latest generation of DC inverter units. One set of air-cooled outdoor unit can be connected with multiple direct evaporation indoor units that are of the same or different forms and capacity. This refrigerating system can directly provide air conditioning for one or more areas, and is applicable for residential and light commercial uses. -
Page 5: Specifications
DC Inverter Side Discharge VRF Ⅱ for North America The maximum length of connection pipe is 300m(984ft) (in total) and the farthest connection pipe between indoor and outdoor units can be 120(394ft) m’s long, which has extended the installation condition and reduced the limit of installation distance. (4)... -
Page 6: Product Capacity Correction
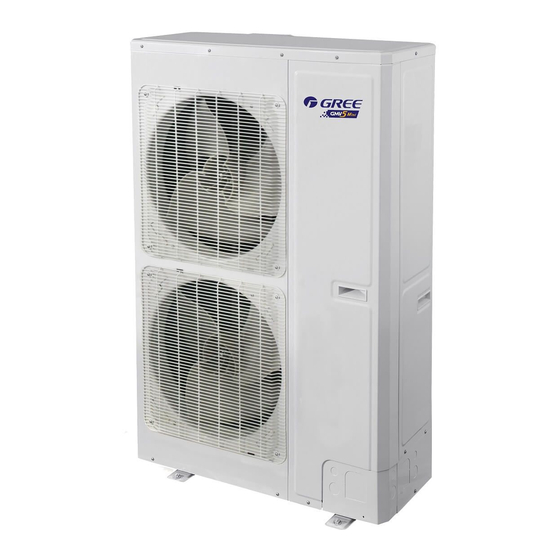
DC Inverter Side Discharge VRF Ⅱ for North America Model GMV-36WL/A-T(U) GMV-48WL/A-T(U) GMV-60WL/A-T(U) (WxDxH) inch 39_5/16×18×59_5/8 40_5/8×17×62_3/16 Compressor QXAS-F428zX050A LNB53FCFMC Water-proof level IPX4 IPX4 IPX4 Suitable climite Φ19.05 Φ15.9 Φ15.9 Φ3/4 Φ5/8 Φ5/8 inch Connectio Φ9.52 Φ9.52 Φ9.52 Liquid n pipe Φ3/8 Φ3/8 Φ3/8... - Page 7 DC Inverter Side Discharge VRF Ⅱ for North America components, systems and structure, etc. While the required capacity is set through the capacity DIP switch. Sheet of DIP Switch (5-bit DIP switch) Model Bit 1 Bit 2 Bit 3 Bit 4 Bit 5 GMV-36WL/A-T(U) GMV-48WL/A-T(U)
-
Page 8: Principal Of Operation
DC Inverter Side Discharge VRF Ⅱ for North America 4.3.3 Correction factor of pipe length and height difference Symbol description: Hp:Height difference in case indoor unit is below outdoor unit(m/feet); Hm: Height difference in case indoor unit is above outdoor unit (m/feet); L: Length of one-way equivalent pipe Below table shows the capacity variance ratio for 100% full load in standard working condition (thermostat setting is 16℃(61℉) for cooling and 30℃(86℉) for heating). - Page 9 DC Inverter Side Discharge VRF Ⅱ for North America In cooling, the low-temperature and low-pressure refrigerant gas from each indoor heat exchanger will be merged and inhaled by the compressor and then become high-temperature and high-pressure gas, which will later be discharged into outdoor heat exchangers.
- Page 10 DC Inverter Side Discharge VRF Ⅱ for North America CONTROL...
-
Page 11: Control
DC Inverter Side Discharge VRF Ⅱ for North America CONTROL 1 Units’ Control 1.1 Schematic diagram of units’ control Interpretation on the schematic diagram High pressure switch is used to identify system’s high and low pressure. When pressure is too high, the switch will break off and send a signal to main board. Main board will pass this signal to controller, where the error will be displayed, and stop unit from working. - Page 12 DC Inverter Side Discharge VRF Ⅱ for North America 1.2 Operation Flow Chart 1.2.1 Operation Flow Chart of Indoor Unit Cooling operation Heating operation Drying operation Operation procedure is the same as that of cooling operation Fan operation The EXV of the indoor unit closes in fan mode, so that there is no refrigerant flow in the refrigerant pipe of that indoor unit.
- Page 13 DC Inverter Side Discharge VRF Ⅱ for North America 1.2.2 Operation Flow Chart of Outdoor Unit Cooling operation Heating operation 1.3 Unit Control Functions 1.3.1Control functions of outdoor unit Include the following contents. Compressor capacity output. Compressor start-up control. Outdoor fan control. Defrosting control.
-
Page 14: Wired Controller
DC Inverter Side Discharge VRF Ⅱ for North America Heat Heating temperature compensation Anti-freezing Air swing Drainage pump 10) IDU EXV 11) Static pressure level 2 Wired Controller 2.1 Control panel... - Page 15 DC Inverter Side Discharge VRF Ⅱ for North America...
- Page 16 DC Inverter Side Discharge VRF Ⅱ for North America Button Graphics...
- Page 17 DC Inverter Side Discharge VRF Ⅱ for North America 2.2 Installation and removal 2.2.1 Installation dimensions 42.5 82.5 inch 4.41 0.87 0.11 0.13 0.20 1.67 1.57 3.25 2.2.2 Installation method Above is a simple installation method of wired controller. Please pay attention to the following: Before installation, disconnect power of the indoor unit.
- Page 18 DC Inverter Side Discharge VRF Ⅱ for North America Place the wired controller on wall and secure its back plate on wall with screw M4X25. Connect the 2-core twisted pair cable to terminal H1 and terminal H2. Tighten up the screws. Stick the cable in the slot that is left of the terminals and buckle the wired controller’s panel with its back plate.
- Page 19 DC Inverter Side Discharge VRF Ⅱ for North America Fig. 2.2.4.3 One wired controller controls multiple indoor units simultaneously. Fig. 3.6Two wired controllers control multiple indoor units simultaneously.
-
Page 20: Remote Controller
DC Inverter Side Discharge VRF Ⅱ for North America 3 Remote Controller Remote controller YAP1F Button name and function introduction Button name Function ON/OFF Turn on or turn off the unit TURBO Set turbo function MODE Set operation mode Set up&down swing status I FEEL Set I FEEL function Switch temperature displaying type on the unit’s display... - Page 21 DC Inverter Side Discharge VRF Ⅱ for North America X-FAN Set X-FAN function SLEEP Set sleep function CLOCK Set clock of the system TOFF Set timer off function Set timer on function Set left&right swing status Set fan speed Set temperature and time Remote controller YV1L1 Button name Function...
-
Page 22: Monitoring Software
This will not only improve the productivity, but also reduce cost on human resources, property and management. Gree Commissioning Tool Kits can monitor and control the 2nd generation of Gree Multi VRF. User can monitor and control units by monitoring the computer. This software is an efficient tool for the intelligent air conditioning management as well as installation and after-sales service and commissioning. - Page 23 The 1st part is the monitoring computer, including Gree debugger and Gree USB converter driver that are installed in the computer. The 2nd part is Gree USB converter, which is to convert the air conditioning communication into computing communication. This part is made up of Gree USB data converter and USB data wire.
- Page 24 DC Inverter Side Discharge VRF Ⅱ for North America 4.3.2.2 Appearance...
- Page 25 HBS interface: When HBS converter is under HBS communication mode, connect air conditioner’s HBS data interface. HBS interface exhibits no polarity (This interface is not yet available for Gree debugger and the monitoring software). RS485 interface: When RS485 converter is under RS485 communication mode, connect air conditioner’s RS485 data interface.
- Page 26 CAN interface of Gree USB converter. As shown below, the wire can be connected to the communication interface of outdoor unit or the...
- Page 27 Gree Commissioning Tool Kits is applicable to air conditioning system that comsists of multiple series and models. Later, it will be developed to cover all series of Gree central air conditioners, such as multi VRF, centrifugal chiller, screw type chiller, ground source heat pump units, modular units, fan coiled units, close control units, etc.
- Page 28 DC Inverter Side Discharge VRF Ⅱ for North America For the first time to use Gree Commissioning Tool Kits, install these programmes: .Net Framework 4.0, USB Data Converter, Access Driver (necessary for versions below OFFICE 2007), Gree Debugger. 4.4.1.2 Installation flowchart Button Graphics This flowchart describes basically the software installation process.
- Page 29 DC Inverter Side Discharge VRF Ⅱ for North America 4.4.1.3 Installation process Install .Net Framework 4.0 If your computer has installed .Net Framework 4.0 or versions above, there’s no need to install again. Otherwise, click “Install .Net Framework 4.0”. Extracting files Click and select “I have read and accept the license terms”.
- Page 30 DC Inverter Side Discharge VRF Ⅱ for North America Installation is in progress.
- Page 31 DC Inverter Side Discharge VRF Ⅱ for North America Click “Finish” to complete the installation. Install Access Driver Before operating Gree commissioning software, please first install Access Driver (necessary for versions below OFFICE 2007). Click “Install Access Driver”.
- Page 32 DC Inverter Side Discharge VRF Ⅱ for North America Click ”Next”. Tick “I accept the terms in the License Agreement” and then click “Next” continue the installation.
- Page 33 DC Inverter Side Discharge VRF Ⅱ for North America Installation is in progress.
- Page 34 DC Inverter Side Discharge VRF Ⅱ for North America Click “Ok” to complete the installation. Install Gree Debugger Before installing Gree debugger, make sure that your computer is installed with .Net Framework 4.0 or versions above. Then click “Install Gree Debugger”. Click “Next”.
- Page 35 DC Inverter Side Discharge VRF Ⅱ for North America Click “Next”.
- Page 36 DC Inverter Side Discharge VRF Ⅱ for North America Installation is in progress. Click “Close” to complete the installation. Install USB Converter Driver If USB converter driver is already installed in your computer, this part can be skipped.
- Page 37 DC Inverter Side Discharge VRF Ⅱ for North America Otherwise, click “Install USB Converter Driver”. Then the following installation window will be shown. This window will exit after installation is finished.
- Page 38 Install Gree USB Data Converter If converter baud rate is needed to be set, then converter configuring software must be installed. Click “Install Gree USB Data Converter”. Then select the setup language. You can choose Chinese ”simplified”, Chinese “traditional” or English. Then click “OK”.
- Page 39 DC Inverter Side Discharge VRF Ⅱ for North America Click “Next”. Tick “I accept the agreement”. Then click “Next” to continue installation. Click “Browse” to select your expected installation folder. Click “Next” to continue.
- Page 40 DC Inverter Side Discharge VRF Ⅱ for North America Click “Browse” to change folder. Click “Next” to continue. If you want to create s desktop shortcut, tick “Creat a desktop icon”. Then click “Next” to continue.
- Page 41 DC Inverter Side Discharge VRF Ⅱ for North America Destiniation location, folder and additional task will be shown in the next step. If you need to change any of it, please click “Back”. If not, click “Install” to start installation.
- Page 42 DC Inverter Side Discharge VRF Ⅱ for North America Installaiton is in progress. Click “Finish” to complete the installation. 4.4.2 Data monitoring Gree Debugger。Start up Gree Debugger. On the original interface, user can select language and units system. Click “OK” to...
- Page 43 DC Inverter Side Discharge VRF Ⅱ for North America confirm the defaulted language and units system and start up the software. Select language. Select system of units.
- Page 44 DC Inverter Side Discharge VRF Ⅱ for North America If units you want to monitor are already connected, and able to communicate normally, with correct COM and protocal, then you may click “Connect” to enter the interface of numbers. Otherwise, connect in accordance with the connection diagram shown below.
- Page 45 DC Inverter Side Discharge VRF Ⅱ for North America Protocal selection: This is to select the communication method of your units. Currently, CAN is applicable to the units. After the selection, click “Connnect”. If units can communicate normally with computer, then the interface of numbers will be shown soon.
- Page 46 DC Inverter Side Discharge VRF Ⅱ for North America There are several display zones on this interface. You can hide devices information and system information by clicking devices information icon and system icon . Display zones of indoor unit information and errors can be dragged up and down at the dividing lines.
- Page 47 DC Inverter Side Discharge VRF Ⅱ for North America Menu bar Title bar Error display System info Outdoor modules info Devices info IDU info Status bar On the display zone of devices information, you may click to select and view units that need monitoring.
- Page 48 DC Inverter Side Discharge VRF Ⅱ for North America Click “Start” to enable the debugging function. Then debugging will be started up automatically. indicates that debugging is in progress while indicates debugging is completed. If “OK” button is displayed, it means user needs to judge whether to continue debugging or not.
- Page 49 DC Inverter Side Discharge VRF Ⅱ for North America Confirmation, the preheat time will be displayed. See the following marked with circle). Icon indicates that there is problem found during debugging. Debugging will not be completed unless problem is solved (after problem is solved, step without “OK” button will switch to the next step automatically, otherwise user needs to click “OK”...
- Page 50 DC Inverter Side Discharge VRF Ⅱ for North America During debugging, a click on “Break” can stop debugging. Click “Start” to resume debugging and then debugging will be finished step by step. For No.10 ODU Valves Check Before Startup, there are “Back” and “Skip” buttons. If there is error in this step, you can back to step No.9 and click “OK”...
- Page 51 DC Inverter Side Discharge VRF Ⅱ for North America Take indoor unit as an example. Click “IDU Settings” and a dialog box will pop up. Tick the indoor units that need setting in the IDU selection zone or you may click “Select All”...
- Page 52 DC Inverter Side Discharge VRF Ⅱ for North America then the corresponding order will be sent to units. If setting is successful, it will be displayed at the current values. 4.4.5 Other functions Capture screen Click icon of “Capture Screen” to print the interface. If you want to open the interface, click “Open”.
- Page 53 DC Inverter Side Discharge VRF Ⅱ for North America Search for database folder Click icon of “Open Data Folder” on the menu bar to open database folder.
- Page 54 DC Inverter Side Discharge VRF Ⅱ for North America Conversion of pressure value Click icon of “Others” on the menu bar and then click “Display Settings” to select “High Low Pressure Value” and “Refrigerant Type”. Select “Temperature” and the pressure parameter displayed on the interface will be temperature. Select “Pressure”...
- Page 55 DC Inverter Side Discharge VRF Ⅱ for North America and the pressure parameter displayed on the pressure interface will be pressure. Refrigerant type will affect the pressure parameter displayed on the interface. Database saving of multiple systems Click icon of “Others” on the menu bar and click “Database Save Settings” to select which system that needs to save database.
- Page 56 DC Inverter Side Discharge VRF Ⅱ for North America Change database saving path and rebuild database Change of database saving path and rebuilding of database should be set before the software starts monitoring (see below interface). Click “Change database saving path”...
- Page 57 4.4.6 Usage of USB Converter Usage of converter Gree commissioning software should be connected with CAN interface when converter is used. For air conditioners with a single system, connect D1 and D2 interfaces of the wiring board. For air conditioners with multiple systems, connect G1...
- Page 58 You can check the setting through the function LEDs. Notice: If it’s the first time your PC uses Gree USB data converter, in order to prevent Gree USB data converter from being mistaken by your computer as other devices and make sure your mouse can work well, it is necessary to turn off the Serail Enumerator of computer after Gree USB data converter is connected.
- Page 59 DC Inverter Side Discharge VRF Ⅱ for North America Step 2: In the pop-up window, select “Device Manager” in the left column and then find “Port (COM and LPT)” in the right column. Click its...
- Page 60 DC Inverter Side Discharge VRF Ⅱ for North America Step 4: Right-click ”USB Serial Port (COM6) and then click ”Properties”. The dialog box of properties will then pop up. Step 5: Then click ”Port Settings” in the dialog box...
- Page 61 DC Inverter Side Discharge VRF Ⅱ for North America Step 6: Click ”Advanced” and then a new dialog box will pop up. Find the ”Serial Enumerator” in the miscellaneous options and cancel the tick. Click ”OK” to exit.
- Page 62 DC Inverter Side Discharge VRF Ⅱ for North America Usage of converter configuring software: When the converter is working, hold the button ”SET” for 5 sec. Function LED will be flickering, indicating that the converter has enter the baud rate setting mode. Then you can use the converter configuring software to set the baud rate of converter.
- Page 63 DC Inverter Side Discharge VRF Ⅱ for North America Select the needed communication serial port and language in the “System Settings”. Select the function that is to be set and the corresponding baud rate (refer to the look-up table) in the “Converter Setup”.Then click “Set”. If you want to restore ex-factory settings, click “Default”...
- Page 64 DC Inverter Side Discharge VRF Ⅱ for North America Click “Get” to get the current setting details of converter.
- Page 65 DC Inverter Side Discharge VRF Ⅱ for North America Switchover of Software Languages...
- Page 66 DC Inverter Side Discharge VRF Ⅱ for North America INSTALLATION...
-
Page 67: Installation
DC Inverter Side Discharge VRF Ⅱ for North America INSTALLATION 1 Engineering Installation Preparation and Notice 1.1 Installation notice Personnel and property safety are highly concerned during the entire installation process. Installation implementation must abide by relevant national safety regulations to ensure personnel and property safety. -
Page 68: Installation Materials Selection
DC Inverter Side Discharge VRF Ⅱ for North America The loss in pipe is considerable and the unit energy efficiency Refrigerant pipe exceeds the limit. decreases, which are harmful for long-term running of the system. The system cannot correctly control the flow allocation; the Incorrect amount of refrigerant is filled. - Page 69 DC Inverter Side Discharge VRF Ⅱ for North America national and relevant compulsory standards. If environmentally-friendly materials are to be used as required by customers, all such materials must meet national environmental protection requirement and be provided with relevant certificates. 2.1 Refrigerant piping Material requirement: Dephosphorization drawing copper pipe for air conditioners;...
-
Page 70: Installation Of Outdoor Unit
DC Inverter Side Discharge VRF Ⅱ for North America 2.4 Communication cable and control cable Note: For air conditioning units installed in places with strong electromagnetic interference, shielded wire must be used as the communication cables of the IDU and wired controller, and shielded twisted pairs must be used as the communication cables between IDUs and between the IDU and ODU. - Page 71 DC Inverter Side Discharge VRF Ⅱ for North America Make sure the unit is not exposed to sun and rain. And the location can resist dust, typhoon and earthquake. Please keep the unit away from inflammable, explosive and corrosive gas or waste gas.
- Page 72 DC Inverter Side Discharge VRF Ⅱ for North America 3.5 Fixing and damping of unit The outdoor unit shall be fixed with 4 M12 bolts and closely contacted with the foundation. Otherwise, big vibration and noise will be caused. The outdoor unit shall be fixed firmly. The rubber board with thickness over 20mm or corrugated rubber damping pad shall be applied between the unit and foundation.
-
Page 73: Installation Of Electronic Expansion Valve Assy (Unit With External Exv)
DC Inverter Side Discharge VRF Ⅱ for North America 4 Installation of Electronic Expansion Valve Assy (unit with external EXV) The EXV of indoor unit is built-in. 5 Installation of Refrigerant Pipeline 5.1Allowable Length and Height Difference of Connection Pipe Y type branch joint is adopted to connect indoor and outdoor units. - Page 74 DC Inverter Side Discharge VRF Ⅱ for North America le Length and Height Difference of Connection Pipe Piping parameters of GMV-36WL/A-T(U) 、GMV-48WL/A-T(U)、GMV-60WL/A-T(U): Allowable Fitting pipe value(m/feet) Total length (actual length) of fitting pipe 300(984) L1+L2+L3+a+b+c+d Actual length 120(394) Length of farthest fitting pipe L1+L2+L3+d Equivalent length 150(492)
- Page 75 DC Inverter Side Discharge VRF Ⅱ for North America 5.3 Selection of Indoor Branches Select indoor branches according to the total capacity of downstream indoor units. if the capacity exceeds that of the outdoor unit, capacity of outdoor unit prevails. Refrigerant system Total capacity of downstream indoor units C (Btu/h) Model...
- Page 76 DC Inverter Side Discharge VRF Ⅱ for North America Total capacity of downstream indoor units Pipe Liquid pipe C (Btu/h) (mm/inch) (mm/inch) Φ12.7 Φ6.35 C ≤19000 (Φ1/2) (Φ1/4) Φ15.9 Φ9.52 19000<C≤48500 (Φ5/8) (Φ3/8) Φ19.05 Φ9.52 48500<C≤76400 (Φ3/4) (Φ3/8) 5.5 Dimension of Pipe between Indoor Branch and IDU Dimension of pipe between indoor branch and IDU should be consistent with the dimension of indoor pipe.
-
Page 77: Installation Of Connection Pipe
DC Inverter Side Discharge VRF Ⅱ for North America 6 Installation of Connection Pipe Conform to the following principles during pipe connection: Connection pipe should be as short as possible, so is the height difference between indoor and outdoor units. Keep the number of bends as little as possible. - Page 78 DC Inverter Side Discharge VRF Ⅱ for North America 6.1.2 Indoor Pipe Connection Remove pipe cover and pipe plug. Direct the flared part of copper pipe to the center of screwed joint. Twist on the flared nut tightly by hand, as in Fig. 13. (Make sure indoor pipe is correctly connected. Improper location of the center will prevent flared nut from being securely twisted.
- Page 79 DC Inverter Side Discharge VRF Ⅱ for North America Fig. 15 (2)Pipe connection for GMV-60WL/A-T(U) As shown in Fig.16 and Fig.17, open the outermost soundproof cotton and place a fire barrier between compressor and straight pipe. Use a soldering gun to unsolder straight pipe 1 and straight pipe 2.
- Page 80 DC Inverter Side Discharge VRF Ⅱ for North America Fig. 17 6.1.4 Installation of Y-type Branch (1) Y-type Branch Fig. 18 (2) Y-type branch has several pipe sections with different dimension, which facilitates to match with various copper pipes. Use pipe cutter to cut in the middle of the pipe section that is of proper dimension and remove burrs as well.
- Page 81 DC Inverter Side Discharge VRF Ⅱ for North America Branch shall be isolated by insulating material that can bear 120℃(248℉)or even higher temperature. The attached foam of branch cannot be taken as insulating material. 6.1.5 Thermal Insulation for Pipeline For multi VRF system, every copper pipe should be labeled so as to avoid misconnection.
- Page 82 DC Inverter Side Discharge VRF Ⅱ for North America 7.1.6 Support and Protection of Pipeline Support should be made for hanging connection pipe. Distance between each support cannot be over 1m(3-1/4feet). Protection against accidental damage should be made for outdoor pipeline. When pipeline exceeds 1m(3-1/4feet), a pinch board should be added for protection.
- Page 83 DC Inverter Side Discharge VRF Ⅱ for North America Fig. 22 6.3.2 Refrigerant Adding (1) Refrigerant quantity of outdoor unit before delivery: GMV-60WL/A-T(U) Model GMV-36WL/A-T(U) GMV-48WL/A-T(U) Refrigerant Qty (kg/oz) (229) (176) (176) (1) The refrigerant amount charged before delivery doesn’t include the amount that needs to be added to indoor units and the connection pipeline.
- Page 84 DC Inverter Side Discharge VRF Ⅱ for North America working, charge additional R410a with specific amount to the unit through the filling opening of the liquid pipe valve of the outdoor unit. If required amount cannot be quickly filled due to pressure increase of the pipe, then set the unit in cooling startup and fill refrigerant from the low pressure check valve of the outdoor unit.
-
Page 85: Electric Wiring
DC Inverter Side Discharge VRF Ⅱ for North America 7 Electric Wiring All electrical installation must be performed by qualified technicians in accordance with local laws, regulations and this user manual. Use air conditioner specialized power supply and make sure that it is consistent with system’s rated voltage. - Page 86 DC Inverter Side Discharge VRF Ⅱ for North America There are two wiring diagrams for communication wires of indoor/outdoor units and remote monitor: 1) Real line method; 2) Broken line method. Please select it based on the actual installation situation. There are two wiring diagrams for power cord: 1) Real line method;...
-
Page 87: Debugging Of Unit
DC Inverter Side Discharge VRF Ⅱ for North America 8 Debugging of Unit CAUTION: ① After the initial installation is finished and the main board of outdoor unit is replaced, it must perform debugging. Otherwise, the unit can’t operate. ② The debugging must be performed by professional person or under the the guide of professional person. - Page 88 DC Inverter Side Discharge VRF Ⅱ for North America 8.2 Debugging of unit Debugging procedure for test run, display instruction for indicator on main board of outdoor unit and operation method are as below: Description of each stage of debugging progress Debugging ——...
- Page 89 DC Inverter Side Discharge VRF Ⅱ for North America Communication between master ODU and driver has error. Check the communication connection of ODU’s main board and drive board. When the error is eliminated, start next step. If power is off during troubleshooting, then restart debugging from progress 01 after power is...
- Page 90 DC Inverter Side Discharge VRF Ⅱ for North America System detects error on indoor components. XXXX means the project code of IDU with error. 3s later, related error code will be showed. For instance, if no.1 IDU has d6 and d7 errors, then the LED3 digital tube Error will show circularly...
- Page 91 DC Inverter Side Discharge VRF Ⅱ for North America Valves of ODU are being inspected. Compressor will start operation for 2min or so and then stop. The opening and closing status of outdoor valves are as below: Outdoor valves are not fully turned on.
- Page 92 DC Inverter Side Discharge VRF Ⅱ for North America Debugging for heating mode. If no malfunction occurs for 20min when compressor is running, then system will start progress 17. If malfunction occurs, unit will display as below: 16_ Heating Malfunction occurs when debugging debugging for heating mode.
- Page 93 DC Inverter Side Discharge VRF Ⅱ for North America Parameter Debug item Unit Reference name GMV-36WL/A-T(U) Changes in Compressor’ GMV-48WL/A-T(U) 10Hz~80Hz. s operating Changes in freq GMV-60WL/A-T(U) 16Hz~80Hz Compressor’ When compressor works normally, the current is no s operating more than22.6A. current When ambient temp is below 35℃(95℉), IPM temp ℃...
-
Page 94: Maintenance
DC Inverter Side Discharge VRF Ⅱ for North America MAINTENANCE... -
Page 95: Malfunction List
DC Inverter Side Discharge VRF Ⅱ for North America MAINTENANCE 1 Malfunction List 1.1 Malfunction list for the wired controller Display Display Display Content Content Content code code code Wrong number of indoor Malfunction of Malfunction of water unit for one-to-more indoor indoor unit temperature sensor unit... - Page 96 DC Inverter Side Discharge VRF Ⅱ for North America Malfunction of liquid Maflunction of Malfunction of gas temperature sensor for defrosting temperature temperature sensor for subcooler sensor 2 subcooler Malfunction for Malfunction for Malfunction of gas exit temperature sensor of temperature sensor of temperature sensor for inlet tube of gas and...
-
Page 97: Troubleshooting
DC Inverter Side Discharge VRF Ⅱ for North America EU AA class energy Charge refrigerant Heating efficiency test mode automatically Charge refrigerant by Fan blow Cleaning alarm for filter hand Startup debugging Long-distance emergency Emergency stop confirmation of unit stop Defrosting period K 1 SE setting for the Limit opereation... - Page 98 DC Inverter Side Discharge VRF Ⅱ for North America High pressure protection High pressure protection Measure whether Replace main Measure whether the high pressure the pressure board of outdoor is too high with manometer switch is normal unit Replace pressure switch Charge refrigerant according to the volume on Check whether the refrigerant- nameplate;...
- Page 99 DC Inverter Side Discharge VRF Ⅱ for North America Low-pressure protection Low pressure protection Measure Replace main whether the Measure whether the low pressure board of outdoor is too low with manometer pressure switch unit is normal Replace pressure switch Charge refrigerant according to the volume Check whether the refrigerant- on nameplate;...
- Page 100 DC Inverter Side Discharge VRF Ⅱ for North America Discharge temperature protection Discharge temperature protection Measure whether the resistance valve for Replace main board of Check whether the discharge temperature for compressor is temperature sensor is outdoor unit reached to 113℃ normal Replace discharge temperature sensor...
- Page 101 DC Inverter Side Discharge VRF Ⅱ for North America Mafunction of temperature sensor Malfunction of temperature sensor Conform whether the Whether the plug of temperature is plug is connected connected with the plug of main board correctly correctly Replace temperature Measure whether resistance value of temperature sensor is in the normal range sensor...
- Page 102 DC Inverter Side Discharge VRF Ⅱ for North America Failure start-up Reset protection for drive module of compressor, drive PFC protection for compressor, malfunction of drive temperature sensor for compressor, circuit malfunction of drive current detection for compressor Drive IPM overtemperature protection for compressor (10) Wired controller...
- Page 103 DC Inverter Side Discharge VRF Ⅱ for North America Desynchronizing protection for inverter compressor (11) Wired controller displays P0 LED3 dual-8 nixie tube displays P9 Whether the Adjust the sequence of wire sequence of wire for compressor is for compressor correct? Connect the wires Whether...
- Page 104 DC Inverter Side Discharge VRF Ⅱ for North America Loop malfunction of driven charging for compressor (13) Wired controller displays P0 LED3 dual-8 nixie tube displays PF Check whether the wires for PFC induction is correct/ Replace main Reinsert the board wires for PFC Work normally...
- Page 105 DC Inverter Side Discharge VRF Ⅱ for North America Overcurrent protection for inverter compressor, IPM module protection, phase-lacking of (15) inverter compressor Wired controller displays P1 LED3 dual-8 nixie tube displays P5、P6 or PE Whether the sequence of wire Adjust the sequence of for compressor is wire for compressor correct?
- Page 106 DC Inverter Side Discharge VRF Ⅱ for North America AC current protection for inverter compressor (17) Wired controller displays E0 LED3 dual-8 nixie tube displays PP Replace main board Work normally Communication malfunction between main contoller and driver of inverter compressor (18) Wired controlled displays C2...
-
Page 107: Power Distribution Of Unit
DC Inverter Side Discharge VRF Ⅱ for North America 3 Power Distribution of Unit 3.1 Power distribution of unit The control logical relationship among parts inside the electric box of unit is showed by the mongline diagram (CAD source file). The main loop is showed by bold line (line width: 1mm);... - Page 108 DC Inverter Side Discharge VRF Ⅱ for North America 3.2 Main electric parts Name Photo Function introduction It main effect is to eliminate the interference of power for protecting unit’s anti-interference capability and Filter plate prevent the interference to other electric appliances.
- Page 109 DC Inverter Side Discharge VRF Ⅱ for North America 3.3 Circuit diagram GMV-36WL/A-T(U)、GMV-48WL/A-T(U) GMV-60WL/A-T(U)
-
Page 110: Removal Of Parts
DC Inverter Side Discharge VRF Ⅱ for North America 4 Removal of Parts 4.1 Key parts Photo Name Function Core part of air conditioning system. It sucks low temperature and low pressure compressor gas, compress it to high temperature and high pressure gas, and then discharge it. - Page 111 DC Inverter Side Discharge VRF Ⅱ for North America It stays between outlet of evaporator and suction ouitlet Vapour liquid of compressor. It used for separator separating low temperature and low pressure refrigerant. It used for storing the High pressure liquid superfluous high pressure storage tank refrigerant liquid during...
- Page 112 DC Inverter Side Discharge VRF Ⅱ for North America 4.2 Removal of key parts 4.2.1 GMV-36WL/A-T(U), GMV-48WL/A-T(U), GMV-60WL/A-T(U) , series unit Removal operation for panel Remark: Before removing the panel, please make sure that the unit is disconected with the power Process Photo Operation Instruction...
- Page 113 DC Inverter Side Discharge VRF Ⅱ for North America Loose screws fixing left side plate and 4. Remove left rear side plate with side plate and screwdriver rear side plate remove the rear side plate Removal operation for blade Remark: Before removing the motor, please make sure that the unit is disconnected with the power. Process Photo Operation Instruction...
- Page 114 DC Inverter Side Discharge VRF Ⅱ for North America Loose screws fixing the motor with screwdriver 3. Remove then remove the motor power cord of motor Take out the damaged motor Replace the motor, tighten screws with 4. Install motor screwdriver and then connect teh power cord of motor...
- Page 115 DC Inverter Side Discharge VRF Ⅱ for North America Removal operation of compressor Remark: Before removing the compressor, please make sure that there’s no refrigerant inside the pipeline and the power is disconnected. Process Photo Operation Instruction Loose screws fiixng the compressor with screwdriver Then pull out the...
- Page 116 DC Inverter Side Discharge VRF Ⅱ for North America Take out the compressor and replace it 4. Remove the Note: When compressor from replacing the chassis compressor, do not damage nearby pipelines and other parts After replacing the 5. Fix the new compresor, fix the compressor at the nuts at the bottom of...
- Page 117 DC Inverter Side Discharge VRF Ⅱ for North America Loose screws fixing the power cord with screwdriver conenct the power cord well again 7. Connect the Note: When power cord of connecting the compressor well power cord, make marks for different color power cords and corresponding wiring terminals.
- Page 118 DC Inverter Side Discharge VRF Ⅱ for North America Removal operation for 4-way valve Remark: Before removing the 4-way valve, please make sure that there’s no refrigerant inside the pipeline of system and then power is disconnected. Process Photo Operation Instruction 1.Disconnect the coil of Remove the coil of...
- Page 119 DC Inverter Side Discharge VRF Ⅱ for North America Weld the connection position between 4-way valve 4. Replace and pipeline 4-way valve Note: During welding process, do not let flame burn out other parts Remival operation for eletronic expansion valve Remark: Before removing the electronic expansion valve, please make sure that there’s no refrigerant in th pipeline of system and the power is disconnected Process...
- Page 120 DC Inverter Side Discharge VRF Ⅱ for North America Weld the connection pipe of electronic expansion valve 3. Replace Inistall the coil of electronic electronic expansion expansion valve valve Note; During welding process, do not let the flame burn out other parts Removal operation of gas liquid separator Remark: Before removing the gas liquid separator, please make sure that there’s no refrigerant inside the pipeline of system and disconnect the power...
- Page 121 DC Inverter Side Discharge VRF Ⅱ for North America Weld the pipe connected with gas liquid separator Fix the screws at 3. Replace the base of gas gas liquid liquid separator well separator again Note: During welding process, do not let flame burn out other parts Removal operation for plate heat exchanger...
- Page 122 DC Inverter Side Discharge VRF Ⅱ for North America Weld those 4 connection spots on the plate heat 2.Disconnect exchanger, and then inlet pipe and pull out the outlet pipe of connection pipe. plate heat Note: During welding exchanger process, do not let flame burn out other parts 3.
-
Page 123: Common Maintenance
DC Inverter Side Discharge VRF Ⅱ for North America 5 Common Maintenance 5.1 Vacuum drying for the system 5.1.1 Selection requirement for the vaccum pump Do not use different vacuum pump for vaccum-pumping for different refrigerant system; The final vacuum for the vacuum pump should reach -0.1Mpa; The air discharge volume for the vacuum pump should reach 4L/S above;... - Page 124 DC Inverter Side Discharge VRF Ⅱ for North America b.When turn off the vacuum pump to stop vacuum-pumping, please turn off the valve at first and then de-energize the vacuum pump; c. Keep the vacuum pump for 2h and confirm that the pressure of vacuum meter hasn’t been increased.
- Page 125 DC Inverter Side Discharge VRF Ⅱ for North America Calculation example IDU: IDU ① IDU ② IDU ③ IDU ④ Duct type Duct type Duct type Duct type Model GMV-ND18PLS/A-T(U) GMV-ND12PLS/A-T(U) GMV-ND09PLS/A-T(U) GMV-ND09PLS/A-T(U) Liquid pipe: Φ9.52mm Φ9.52 mm Φ9.52 mm Φ6.35 mm Pipe size (Φ3/8inch)
- Page 126 DC Inverter Side Discharge VRF Ⅱ for North America and liquid-charging tank to the detection head of gas valve and liquid valve. Before connection, please release some refrigerant and then drain out the air inside the charging conduct pipe; Confirm that the gas valve and liquid valve for outdoor unit is at off status; When the unit hasn’t been turned on, open the governing valve for the liquid-charging tank and then charge refrigerant from gas pipe and liquid pipe at the same time.
- Page 127 DC Inverter Side Discharge VRF Ⅱ for North America leakage may be found out; Step 2: Increase pressure slowly to 1.5MPa, stop for 5min to check the airtightness. Small leakage may be found out; Step 3; Increase pressure slowly to 4.15MPa for R410A slowly (3.0MPa for R22 refrigerant system), stop for 5min and perform the strength test.
-
Page 128: Exploded View Of Unit And Parts' List
DC Inverter Side Discharge VRF Ⅱ for North America 6 Exploded View of Unit and Parts’ List Exploed view for outdoor unit and parts’ list (1) Model: GMV-36WL/A-T(U)、GMV-48WL/A-T(U) 、GMV-60WL/A-T(U) Exploded view... - Page 129 DC Inverter Side Discharge VRF Ⅱ for North America Parts list GMV-36WL/A-T(U)/ GMV-60WL/A-T(U) GMV-48WL/A-T(U) Name of Part CN850W0230/ Product Code Product Code CN850W0270 CN850W0220 01264100047P Coping 01264100008P Inductance Assy 01394100050 43128000015 Inductance 43120122 100002000013 Electric Box Assy 01394100427 30221000029 Main Board 30228000005 49018000097 Radiator...
- Page 130 DC Inverter Side Discharge VRF Ⅱ for North America 765100047 Electrical Heater 765100047 030006000087 Capillary Sub-Assy 04004100023 Strainer 07415200002 07415200002 43000054 Electromagnetic Valve 43000054 4304000416 Magnet Coil 4304000417 Right Connection 01344100059P 01344100003P Board Rear Side Plate 01314100083P 01314100011P Sub-Assy 322101002 Sensing Device 322101002 Sensor (High...
- Page 131 JF00302320...
Need help?
Do you have a question about the GMV-36WL/A-T(U) and is the answer not in the manual?
Questions and answers