Table of Contents
Advertisement
Advertisement
Table of Contents

Subscribe to Our Youtube Channel
Summary of Contents for PS Audio Stellar PowerPlant 3
- Page 1 Owner’s Reference Stellar PowerPlant ™ ™ ®...
-
Page 2: Table Of Contents
Table of Contents Stellar PowerPlant 3 ® Safety Information Introduction Thank You Contact Information Welcome Symbols Found on the P3 Getting Started Included With Your P3 The Remote Front Panel View Rear Panel View Installation Considerations Plugging In The Power Cable... -
Page 3: Safety Information
® Do not remove or bypass the ground pin on the end of the AC cord. All PS Audio products ship with a grounding-type plug. If the provided plug does not fit into your outlet, consult an electrician for replacement of the obsolete outlet. -
Page 4: Introduction
Stellar PowerPlant 3’s functions and capabilities. It is our intention to provide you with full details about the Stellar PowerPlant 3 and to answer any and all questions you may have. If you have additional questions or concerns, please contact us and we will be happy to assist you. -
Page 5: Getting Started
Getting Started Stellar PowerPlant 3 ® Included With • 6-foot Power Cable Your P3 • Owner’s Reference Manual • Remote Control The Remote The Dim button turns the front panel LEDs off. The MW button turns the MultiWave ™ function on and off. -
Page 6: Front Panel View
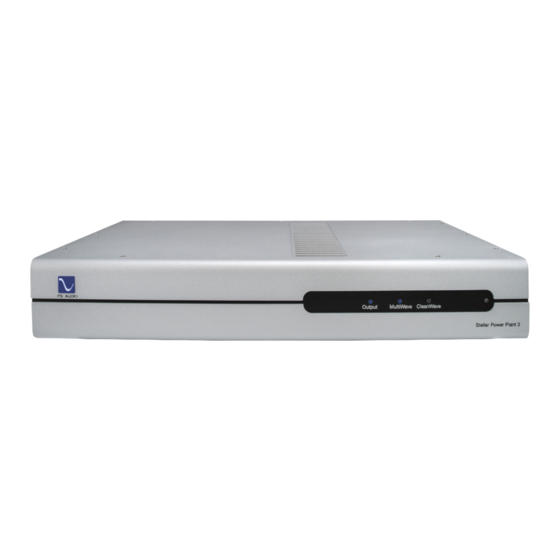
Getting Started Stellar PowerPlant 3 ® Front Panel View PS Audio Logo LED Idle Button Output LED Indicator MultiWave LED Indicator CleanWave LED Indicator Infrared Remote Sensor... -
Page 7: Rear Panel View
Getting Started Stellar PowerPlant 3 ® Rear Panel View Master Power Switch IEC AC Power Inlet Fuse Socket Regenerated/Bypass Switch For Filtered High Current Regenerated or Filtered High Current Outlet Rengenerated Outlet Circuit Breaker Reset Button... -
Page 8: Installation Considerations
Location Considerations Once your new Stellar PowerPlant 3 is unpacked, you will need to find a convenient place to set it. If you wish to stack this unit with other Stellar products, or any other equipment, the P3 must be the top component in the stack to ensure proper ventilation. -
Page 9: Plugging In Your Equipment
Once the unit is connected to power, flip the master power switch on the rear panel to the Your P3 on position. The PS Audio Logo LED button on the upper left corner of the front panel will flash for approximately 3 seconds while the unit initilizes. Once you hear a click and the... -
Page 10: Operation Guide
To take the P3 out of idle mode, press the PS Audio logo button, located on the upper left hand corner of the P3’s front panel. This button will glow blue when the P3 is not in idle... -
Page 11: Output
Stellar PowerPlant 3 ® Output The Stellar PowerPlant 3 has a maximum output power of 300 watts. The Output LED on the front panel of the P3 will glow either blue, yellow, or red, depending on the output power of the unit. -
Page 12: Multiwave Function
Operation Guide Stellar PowerPlant 3 ® MultiWave The MultiWave function increases the charge time of the P3’s output waveform by altering Function the peak of the sine wave. A longer charging time, occurring at the peak of the output sine wave, lowers the connected equipment’s power supply ripple, much the same way as increasing the power supply capacitance of connected equipment. -
Page 13: Troubleshooting
® Fault Mode If the PS Audio LED Logo button is rapidly flashing blue, your Stellar PowerPlant 3 has detected an error and entered into fault mode, disabling all outputs. When in fault mode, the status of the other LEDs on the front panel will help indicate what error the unit has detected. -
Page 14: Specifications
Specifications Stellar PowerPlant 3 ® Specifications By Country... - Page 15 Specifications Stellar PowerPlant 3 ®...
-
Page 16: Warranty
3 years from the date the unit was first purchased from PS Audio or its dealers and agents. If you do not register your product within 30 days of service, a copy of your purchase receipt from an authorized PS Audio dealer may be used as proof of purchase to establish the warranty start date. -
Page 17: Limitations Under This Warranty
Stellar PowerPlant 3 ® Limitations Under In no event will PS Audio’s liability to you exceed the origianl purchase price of your unit. This Warranty This warranty does not cover the cost of custom installation, customer instruction, setup adjustments, or signal reception problems. Consequential and incidental damages are not covered under this warranty. -
Page 18: Service Information
Authorization Number (RMA#) prior to returning any item. Please contact PS Audio or an authorized PS Audio repair center to receive an RMA#. The RMA# must be on all returned items. If it is not clearly marked, PS Audio will return the package back to you, freight collect. -
Page 19: Your Product
Your Product Stellar PowerPlant 3 ® Your Serial Number Your Purchase Information Date of Purchase... - Page 20 ®...


Need help?
Do you have a question about the Stellar PowerPlant 3 and is the answer not in the manual?
Questions and answers