Avaya AG2330 Installation Instruction
Hide thumbs
Also See for AG2330:
- Task based manual (21 pages) ,
- Installation manual (52 pages) ,
- Quick start manual (56 pages)
Table of Contents
Advertisement
Quick Links
Download this manual
See also:
Installation Manual
Advertisement
Table of Contents

Related Manuals for Avaya AG2330

Summary of Contents for Avaya AG2330
- Page 1 Installation — Chassis Avaya Advanced Gateway 2330 Release 10.3.5 NN47264-304 Issue 02.02 August 2013...
- Page 2 Product provided by Avaya including the selection, arrangement and to users of its products. Documentation does not include marketing design of the content is owned either by Avaya or its licensors and is materials. Avaya shall not be responsible for any modifications,...
- Page 3 See the Avaya Support website: http://support.avaya.com for product notices and articles, or to report a problem with your Avaya product. For a list of support telephone numbers and contact addresses, go to the Avaya Support website: http://support.avaya.com, scroll to the bottom of the page, and select Contact Avaya Support.
- Page 4 Installation — Chassis August 2013 Comments? infodev@avaya.com...
-
Page 5: Table Of Contents
Compatible internal modules........................28 Replaceable parts............................. 29 Chapter 5: Avaya Advanced Gateway 2330 chassis installation........Prerequisites to Avaya Advanced Gateway 2330 chassis installation............31 Avaya Advanced Gateway 2330 chassis installation procedures............. 31 Avaya Advanced Gateway 2330 chassis installation navigation.............. 32 Unpacking and inspecting the chassis and shipping accessories............ - Page 6 Job aid.............................. 33 Installing the mounting brackets....................... 34 Installing chassis in an equipment rack....................36 Installing the terminal lug on the AG2330....................38 Removing the top cover of the AG2330....................39 Hardware specifications..................... Chassis dimensions..........................41 Weights..............................41 Clearance requirements..........................41 Environmental requirements........................
-
Page 7: Chapter 1: Regulatory Information And Safety Precautions
This section provides information about regulatory conformities and compliances. International Regulatory Statements of Conformity This is to certify that the Avaya Advanced Gateway 2330 equipment was evaluated to the international regulatory standards for electromagnetic compliance (EMC) and safety and were found to have met the requirements for the following international standards: •... -
Page 8: Tia-968-A
Regulatory information and safety precautions Changes or modifications not expressly approved by Avaya could void the user's authority to operate the equipment. TIA-968-A This equipment complies with Part 68 of the FCC rules. The FCC Part 68 label is located on the bottom chassis panel. -
Page 9: Ce Marking Statement (Europe Only)
CE marking statement (Europe only) EN 55022 statements This is to certify that the Avaya Advanced Gateway 2330 equipment is shielded against the generation of radio interference in accordance with the application of Council Directive 2004/108/EC. Conformity is declared by the application of EN 55022 Class A (CISPR 22). -
Page 10: Vcci Statement (Japan/Nippon Only)
National Safety Statements of Compliance EN 60950 statement This is to certify that the Avaya Advanced Gateway 2330 equipment is in compliance with the requirements of EN 60950 in accordance with the Low Voltage Directive. Additional national differences for all European Union countries have been evaluated for compliance. -
Page 11: Nom Statement (Mexico Only)
52 5 480 2100 52 5 480 2199 Input: Avaya Advanced Gateway 2330: 100 - 240 VAC~ 0,5 A Max. 50/60 Información NOM (unicamente para México) La información siguiente se proporciona en el dispositivo o en los dispositivos descritos en este documento, en cumplimiento con los requisitos de la Norma Oficial Méxicana (NOM):... -
Page 12: National Environmental Statements Of Compliance
(2002/96/EC). Safety messages This section describes the precautionary notices you find in this document. This section also contains precautionary notices that you must read for safe operation of the Avaya Advanced Gateway 2330 and safe operation. Installation — Chassis August 2013... -
Page 13: Notices
Avaya products. Electrostatic alert: ESD notices provide information about how to avoid discharge of static electricity and subsequent damage to Avaya products. Caution: Caution notices provide information about how to avoid possible service disruption or damage to Avaya products. - Page 14 The Lithium battery in this product is part of a nonvolatile memory device and will retain data for 10 years in the absence of power. Avaya does not consider the lithium battery in this unit a field replaceable or serviceable part and should not be accessed by the customer.
-
Page 15: Personal Safety And Equipment Protection
Personal safety and equipment protection Read this section to prevent injury and equipment damage. Module protection The following practices prevent equipment damage when you work on the Avaya Advanced Gateway 2330: • Always wear a grounded antistatic wrist strap when you handle modules. -
Page 16: Cables And Connectors Protection
When shipping the product, proper antistatic packaging shields the product from charge caused by movement of the product within the shipping container. Antistatic material Antistatic material prevents electrical damage to equipment and therefore prevents the interruption of normal operations in an electronic system. Installation — Chassis August 2013 Comments? infodev@avaya.com... - Page 17 Personal safety and equipment protection Place modules on an appropriate antistatic material when you replace hardware. Use an ESD pad or antistatic packaging. Important: Some antistatic packaging is effective only on the inside of the package. Installation — Chassis August 2013...
- Page 18 Regulatory information and safety precautions Installation — Chassis August 2013 Comments? infodev@avaya.com...
-
Page 19: Chapter 2: Introduction
Chapter 2: Introduction Purpose This document provides information you need to properly and safely install the Avaya Advanced Gateway 2330 (AG2330) chassis. For more information about installing hardware components, see Avaya Advanced Gateway 2330 Installation — Hardware Components (NN47264-301). Related resources... -
Page 20: Support
Introduction Support Visit the Avaya Support website at http://support.avaya.com for the most up-to-date documentation, product notices, and knowledge articles. You can also search for release notes, downloads, and resolutions to issues. Use the online service request system to create a service request. Chat with live agents to get answers to questions, or request an agent to connect you to a support team if an issue requires additional expertise. -
Page 21: Chapter 3: New In This Release
Chapter 3: New in this release There are no changes to Avaya Advanced Gateway 2330 Installation — Chassis (NN47264-304) for Release 10.3.5 of the Avaya Advanced Gateway 2330 (AG2330). Installation — Chassis August 2013... - Page 22 New in this release Installation — Chassis August 2013 Comments? infodev@avaya.com...
-
Page 23: Chapter 4: Chassis Fundamentals
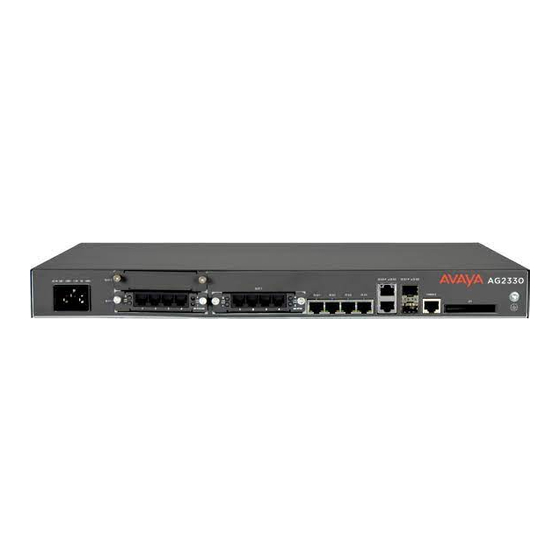
The AG2330 chassis is one rack unit high (1.75 inches [in.]; 4.45 centimeters [cm]). You can mount the AG2330 in a 19-in. (48.26 cm) equipment rack, and use the rack mounting brackets to secure the AG2330 to the rack. You can also mount the chassis in under-desk or wall mountings. - Page 24 Two Small Form-factor Pluggable (SFP) ports (GE 0/7 and 0/8), for plug-in SFP modules Console port Compact Flash slot (CF1) Ground lug The following table lists the LEDs on the front panel of the AG2330, and describes the LED behavior. Table 2: AG2330 front panel LED indicators Color Definition FE 0/1 port status No cable is connected;...
- Page 25 A cable is connected; a link is established. Compact Flash Compact Flash card is not installed. status (CF1) Green Compact Flash card is ready to access. The following figure shows the rear panel of the AG2330. Installation — Chassis August 2013...
- Page 26 Item Description System LED indicator Fan LED indicator Redundant 12VDC power input The following table describes the LEDs on the rear panel of the AG2330 and describes the LED behavior. Table 4: AG2330 rear panel LED indicators Color Definition System Status LED The AG2330 is not powered.
-
Page 27: Important Information
Important information Figure 3: AG2330 air flow Important information You can mount multiple AG2330 units in the same rack without an air gap between the units, and you can intermingle them with other Avaya products or other vendor equipment. Caution: Cable bundles must not block the intake or exhaust vents of the AG2330. -
Page 28: Compatible External Interface Modules
• 4-port FXS/DID Small Module • 2-port FXO/CAMA Small Module • 4-port FXO/CAMA Small Module For overview and installation information on these modules, see Avaya Advanced Gateway 2330 Installation — Hardware Components (NN47264-301). Compatible internal modules The AG2330 supports the following mandatory internal modules: •... -
Page 29: Replaceable Parts
Packetized voice internal module (PVIM) DDR-2 SO DIMM(CPU memory) Internal Compact Flash To replace any of the above internal modules, you must remove the cover of the AG2330. For more information, see Removing the top cover of the AG2330 on page 39. - Page 30 Chassis fundamentals Table 6: AG2330 replaceable parts Part Hot swap Limitations capable External You can replace the external interface module with a interface module of the same type that you remove. You must modules insert the replacement module in the same slot as that of the module being removed.
-
Page 31: Chapter 5: Avaya Advanced Gateway 2330 Chassis Installation
This chapter describes how to unpack, inspect, and install the Avaya Advanced Gateway 2330 (AG2330). Install the AG2330 chassis in a 19-in. (48.26 cm) equipment rack. You must securely install the chassis in an equipment rack before completing other further tasks associated with installation, such as grounding the chassis and installing internal and external modules. -
Page 32: Avaya Advanced Gateway 2330 Chassis Installation Navigation
Installing the mounting brackets on page 34 • Installing chassis in an equipment rack on page 36 • Installing the terminal lug on the AG2330 on page 38 • Removing the top cover of the AG2330 on page 39 Installation — Chassis August 2013 Comments? infodev@avaya.com... -
Page 33: Unpacking And Inspecting The Chassis And Shipping Accessories
2. Place the chassis on antistatic material. 3. Check for damage or missing accessories. Important: If you detect any damage, do not install the chassis. Call the Avaya Technical Solutions Center in your area. Job aid The following table lists the accessories that shipped with AG2330. -
Page 34: Installing The Mounting Brackets
Installing the mounting brackets You must install the mounting brackets on the AG2330 before you install the chassis. You can mount the brackets flush with the front panel or rear panel for rack mounting, or flush with the top or bottom of the chassis for under-desk or wall mounting. - Page 35 Installing the mounting brackets Position Description Rear panel facing operator Under desk mounting example 1 Under desk mounting example 2 Installation — Chassis August 2013...
-
Page 36: Installing Chassis In An Equipment Rack
Average time to install the chassis in an equipment rack: 2 minutes. Site location is important for the proper operation of the AG2330. You must place the unit in a clean and dry environment with adequate air circulation. Allow 2 to 3 feet (ft) (0.61 to 0.91 meters [m]) of additional clearance around the AG2330 for access to the cable connectors on the front and front panels. - Page 37 Installing chassis in an equipment rack Prerequisites Important: You must install the AG2330 in a restricted-access location. You must limit access to the AG2330 to authorized service personnel only. Caution: Risk of equipment damage Only trained personnel can install this product.
-
Page 38: Installing The Terminal Lug On The Ag2330
For all installations, you must provide proper grounding through a UL listed terminal attached to the grounding location on the rear panel of the AG2330. The grounding lug, as well as the screws and washers necessary to attach it to the AG2330, ship in the container with the unit. -
Page 39: Removing The Top Cover Of The Ag2330
Open the top cover to replace the DDR-2 SO DIMM, PVIM, or Compact Flash. Do not hot swap an internal component. The average time required to open the top cover of the AG2330 is 2 minutes. Installation — Chassis August 2013... - Page 40 4. Remove the three screws securing the right-hand side of the top cover to the chassis. 5. Slowly slide the top cover back to take it off of the AG2330. Installation — Chassis August 2013 Comments? infodev@avaya.com...
-
Page 41: Hardware Specifications
Fully loaded (that is, interface modules installed) AG2330 8.5 lb (3.85 kg) Clearance requirements The AG2330 has two internal, non-removable fans. You require sufficient clearance within and around the unit and the equipment rack for maintenance and for proper airflow. Keep cable Installation — Chassis... -
Page 42: Environmental Requirements
The AG2330 must operate within the specified tolerance limits shown in the following table. Important: Install the AG2330 in a restricted-access location. You must limit access to the AG2330 to authorized service personnel only. Ensure that you allow two to three feet of additional clearance around the AG2330 for access to the cable connectors on the front and front panels. -
Page 43: Mounting Rack Requirements
Acoustic noise GR-63-CORE Issue 3, section 4.6 and 5.6 Mounting rack requirements The AG2330 requires a mounting rack or frame with certain mechanical specifications. The following table provides the mounting rack mechanical specifications. Table 12: Mounting rack specifications Specific requirements... -
Page 44: Power And Grounding
+12 V DC Grounding The AG2330 ships with a grounding lug. You must connect your ground wire to the lug, and attach the lug to the chassis in the right-hand side of the front panel (as shown in the following figure). -
Page 45: Translations Of Safety Messages
Translations of safety messages This section contains translations of precautionary notices that you must read and follow for safe operation of the Avaya Advanced Gateway 2330 (AG2330). Class A device caution statement Caution: This device is a Class A product. Operation of this equipment in a residential area is likely to cause harmful interference, in which case users are required to take appropriate measures necessary to correct the interference at their own expense. -
Page 46: Qualified Service Personnel Warning Statement
Warning: Aviso Instalação só deve ser executada através de pessoal de serviço qualificado. Leia e siga toda a advertência nota e instruções marcaram no produto ou incluíram na documentação. Installation — Chassis August 2013 Comments? infodev@avaya.com... -
Page 47: Overcurrent Warning Statement
Overcurrent warning statement Warning: The AG2330 relies on the building installation for overcurrent protection. Ensure that a fuse or circuit breaker no larger than 120 V AC, 15 A U.S. (240 V AC, 10 A international) is used on the phase conductors. -
Page 48: Cover Plate Warning Statement
Caso você não instale um módulo no slot, mantenha a placa de cobertura metálica sobre o slot. A remoção da placa de cobertura impede o fluxo de ar e a refrigeração apropriada da unidade. Laser fiber optic warning statement Warning: Risk of eye injury by laser Installation — Chassis August 2013 Comments? infodev@avaya.com... - Page 49 Laser fiber optic warning statement Fiber optic equipment can emit laser or infrared light that can injure your eyes. Never look into an optical fiber or connector port. Always assume that fiber optic cables are connected to a light source. Warning: WARNUNG Risiko einer Augenverletzung durch Laser...
-
Page 50: Electric Shock Danger Statement
Utilice sólo cables de corriente que tengan puesta a tierra. Asegúrese de que el interruptor tenga puesta a tierra antes de encender la unidad. Voltage: PERIGO Installation — Chassis August 2013 Comments? infodev@avaya.com... -
Page 51: Installation — Chassis August
Electric shock danger statement Risco de ferimentos por choque elétrico Antes de começar a trabalhar com o equipamento, esteja ciente das práticas de segurança adequadas e dos perigos inerentes a circuitos elétricos. Use apenas cabos de alimentação que tenham ligação à terra. Certifique-se de que o switch esteja devidamente aterrado antes de ligar o aparelho. - Page 52 Installation — Chassis August 2013 Comments? infodev@avaya.com...
Need help?
Do you have a question about the AG2330 and is the answer not in the manual?
Questions and answers