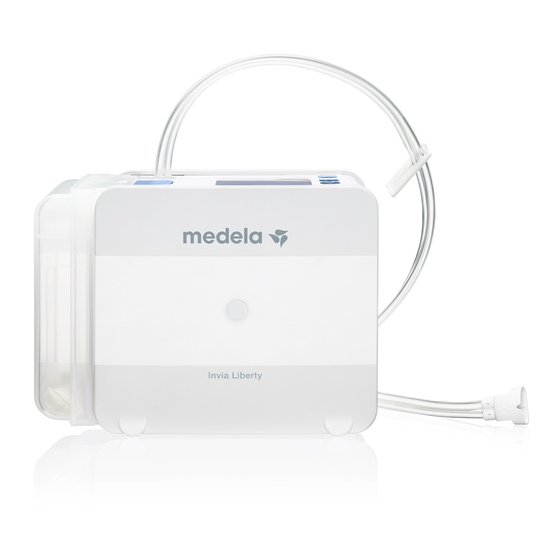
Medela Invia Liberty Instructions For Use Manual
Negative pressure wound therapy system
Hide thumbs
Also See for Invia Liberty:
- Clinician instructions for use (488 pages) ,
- Patient instructions for use (312 pages) ,
- Instructions for use manual (208 pages)

Related Manuals for Medela Invia Liberty


Summary of Contents for Medela Invia Liberty
- Page 1 Invia Liberty ® ™ NEGATIVE PRESSURE WOUND THERAPY SYSTEM Clinician instructions for use Instrucciones para uso clínico Mode d’emploi à l’usage du personnel médical...
- Page 3 NPWT University Medela.com website provides all the educational tools you need to set-up and operate the Invia Liberty NPWT system. The Medela University page includes instructions for use, quick cards and training videos to support you in becoming a confident and knowledgeable NPWT user.
-
Page 4: Table Of Contents
Invia Liberty pump ........................12 Display ........................... 13 Invia Liberty pump disposables ....................14 Invia Liberty canister with solidifier 300 ml and 800 ml..............14 Invia Liberty canister tubing/Y-connector/Drain adapter ............... 15 Power supply ........................... 16 USB port ..........................16 Preparation for use ........................ - Page 5 Air leakage indicator ....................... 25 Standby ..........................26 Turn OFF ..........................26 Set up carrying case ......................... 26 Change Invia Liberty canister and Invia Liberty tubing .............. 27 Battery charging ........................29 Alarms ............................. 30 Warning ..........................31 Alarm ............................ 31 Internal fault ..........................
-
Page 6: Introduction
To consider before use These instructions for use are a general guide for the use of the Invia Liberty pump with associated prod- ucts. Medical matters must be addressed by a physician. In order to ensure safe and proper operation of Medela products, a quality management system is used. -
Page 7: Indications For Use
When used on closed surgical incisions, the Invia Liberty NPWT system is also intended to manage the environment of surgical incisions that continue to drain following sutured or stapled closure by maintaining a closed environment and removing exudate via the application of Negative Pressure Wound Therapy. -
Page 8: Warnings
– Should a spinal cord injury patient experience autonomic hyperreflexia, discontinue treatment with the Invia Liberty NPWT system and consult a physician immediately. – Never place the Invia Liberty pump in water or liquids. Clamp the drain and disconnect from the dressing prior to bathing or showering. -
Page 9: Cautions
– Explosion hazard – the Invia Liberty pump is not for use in potentially explosive environments inclu- ding oxygen enriched environments and in areas of flammable anesthetics. – In the event that defibrillation is required, disconnect the pump from the wound dressing before the patient is defibrillated. -
Page 10: Safety Instructions
– The Invia Liberty pump is verified within the scope of conformity evaluation and is only to be used with products included in the Invia Liberty NPWT system and distributed by Medela. Medela can only gua- rantee the effective performance of the system with these products. -
Page 11: Safety-Related Checks
The Invia Liberty pump is a device in protection class II (EN IEC 60601-1), the safety-related checks are confined to visual inspection of the housing and charger for damage. This check must be performed prior to each use. -
Page 12: Invia Liberty Pump
USB port Electrical outlet port Bedholder brackets Standard rail holder The max flow of Invia Liberty pump is 5 liters / minute with an adjustable pressure range of – 40 to – 200 mmHg ( – 5 to – 27 kPa). -
Page 13: Display
Display Information field Power (ON / OFF) Selection buttons Navigation field Instruction field “Soft” buttons Therapy ID number Therapy timer Intermittent / Constant Administrative mode / Patient mode Battery Run / Standby indicator charging status Air leakage indicator... -
Page 14: Invia Liberty Pump Disposables
Composition of solidifier: Cross-linked sodium polyacrylate CAUTIONS For appropriate, safe operation the Invia Liberty pump must remain in an upright position during use. If the pump tips over, set it upright again. The special construction of the safety chamber in the upper region of the canister protects the overflow protection / bacteria filter from clogging immediately, if tipped over. -
Page 15: Invia Liberty Canister Tubing/Y-Connector/Drain Adapter
The smaller lumen (measuring tubing) regulates the pressure and the larger lumen (suction tubing) removes the fluid from the wound into the canister. A hydrophilic overflow protection / bacteria filter in the tubing base helps to prevent contamination of Invia Liberty pump. The Invia Y-connector with Quick-connector For warnings and cautions of the Invia Y-connector with Quick-connector consult the Invia Y-connector with Quick-connector instructions for use. -
Page 16: Power Supply
Do not disassemble, crash, heat above 100 ° C (212 ° F), incinerate or dispose of in fire. Invia Liberty pump is operable while connected to the electrical power supply or by an internal rechargeable lithium-ion battery. While in use and connected to the electrical power supply, the battery is re-charged. -
Page 17: Preparation For Use
A. Open the tubing packaging canister tubing B. Insert the tubing base into the pump as shown (straight push) 3. Click in Invia Liberty A. Unpack new canister and canister remove the safety sticker. Slip the pegs at the bottom of the canister into the slots at the base of the pump. -
Page 18: Invia Liberty Pump User Modes
30 sec. – check system and retry. If the above check was successful, switch OFF Invia Liberty pump by pressing > 3 seconds ]. If the self-test is not successful, follow instructions shown on the display or see the Alarms chapter. -
Page 19: Administrative Mode
Administrative Mode The factory default settings of the Invia Liberty pump are -125 mmHg and constant mode. CAUTION The pressure level should always be set according to prescribing healthcare professional instruction. When an Invia FitPad is used, the set pressure is controlled at the wound site. -
Page 20: Administrative Mode
3. Press the Selection buttons [ ] or [ ] to set pressure level. 4. Press “OK” ] to confirm and enter the main display. Administrative mode 1. To enter the Administrative mode, unlock the display, press and hold [ ], and then press [ ➡... -
Page 21: Change Pressure Set-Up Mode
Change pressure set-up mode Detailed pressure mode allows to select pressure level from – 40 to – 200 mmHg in increments of 5mmHg (5kPa to 27kPa in increments of 1kPa) 1. To enter the Administrative mode, unlock the display, press and hold [ ], and then press [ 2. - Page 22 Selecting between Standard and High air leakage volume: 1. To enter the Administrative mode, unlock the display, press and hold [ ], and press [ 2. Press the soft buttons [ ] at the same time to enter the Settings menu. 3.
-
Page 23: Change Therapy Mode
[ ], and then press [ 2. To change the therapy mode, press "Standby" 3 seconds ] to put the Invia Liberty pump into the Standby mode. Constant mode – C The default therapy mode is Constant. -
Page 24: Change Settings
Change settings 1. To enter the Administrative mode, ➡ unlock the display, press and hold [ ], and then press [ 2. Press the soft buttons [ ] at the same time to enter the Settings menu. 3. To change a setting, choose with the Selection buttons ] or [ Selection –40 to –200 mmHg (–... -
Page 25: Therapy Log File
“Graph” To exit the Therapy Log file, press “Back” The Invia Liberty pump switches automatically into main display (in Administrative mode) 30 seconds after the last button has been pressed. After additional 30 seconds, the pump switches into Patient mode and the display is locked. -
Page 26: Standby
> 3 seconds] and the pump will turn off. Set up carrying case The Invia Liberty is intended to be worn in a carrying case during operation. 1. Open the carrying case. 2. Slide the Invia Liberty into the designated pocket. -
Page 27: Change Invia Liberty Canister And Invia Liberty Tubing
Change Invia Liberty canister and Invia Liberty tubing Change Invia Liberty canister minimum once a week, when canister looks full on visual inspection or when "Canister full" / "Filter clogged" alarm signal is activated. Change Invia Liberty tubing minimum once a week, when tubing looks clogged on visual inspection or when "System clogged"... - Page 28 Unpack new canister tubing and connect to Invia Liberty pump. Insert the tubing base into the pump (straight push). 8.1 Unpack new canister and remove the safety sticker. 8.2 Slip the pegs at the bottom of the canister into the slots at the base of the pump.
-
Page 29: Battery Charging
If the battery is completely discharged it will take 3 to 4 hours to charge to full status. If the Invia Liberty pump is fully charged AND the pump is still connected to an electrical source, will appear in the battery icon. -
Page 30: Alarms
Alarms The pump distinguishes between “Warning”, “Alarm” and “Internal fault”. If the Invia Liberty pump detects any situations where the therapy cannot be maintained, an acoustic alarm sounds, a fault number and a description of the problem appears on the display. For explanation of the fault number, see the Alarm Table in this chapter. -
Page 31: Warning
The acoustic alarm will resume in 1 minute if the problem is not solved. Follow the instruction shown on the display or see the Alarm table. If the problem cannot be solved, turn off the Invia Liberty pump [ > 3 seconds] and contact the Medela customer service for further instructions. -
Page 32: Alarm Table
Alarm table Fault number Problem description Troubleshooting Pressure on the display on the display... - Page 33 - If dressing tubing is clogged, change the dressing. Then press "On" to restart the therapy. Recharge the battery either by placing the Invia Liberty pump in the docking station or plug in the charger to the electrical outlet port on the pump.
- Page 34 Pressure on the display on the display CAUTION If fault repeats, note the fault number, switch off the pump and contact the Medela customer service. CAUTION Invia Liberty instructions advise 24 hours therapy without interruption. If therapy is discontinued for more than 2 hours using foam or gauze, the dressing should be...
- Page 35 To restart the therapy after canister has been changed, press right selection button “On” Occurs when Warning 406 was pending for 30 minutes. Cool Invia Liberty pump down. Restart the pump. If internal fault remains, turn off by pressing [ > 3 seconds ] and contact the Medela customer service.
-
Page 36: Accessories Overview
Accessories overview CAUTION The Invia Liberty pump is verified within the scope of conformity evaluation and is only to be used with products included in the Invia Liberty NPWT system and distributed by Medela. Medela can only guarantee performance of the system with these products. -
Page 37: Wound Dressings
Wound dressings to be applied and changed by healthcare professionals only. The Invia Liberty NPWT system is intended to be used in conjunction with the Invia dressings only. For spe- cific dressing indications, contraindications, warnings and cautions, consult the appropriate Invia dressing instruction for use. -
Page 38: Cleaning And Disinfection
Cleaning and disinfection CAUTION Invia Liberty pump with associated products (docking station, rail holder and charger) should be cleaned / disinfected after every use. Before cleaning the device, unplug the pump from the wall outlet. Cleaning Disinfection Sterilization Dishwasher Pump... -
Page 39: Disposal
Service work may only be carried out by authorized personnel. A safety-related check is confined to visual inspection of the housing and charger for damage and must be performed prior to each use. If Invia Liberty pump has not been in use, the battery must be charged approximately once every 6 months to ensure optimum function. -
Page 40: Map Time Zone
Map time zone The figure below indicates the different time zones. Please follow the indications in chapter "change settings" to select the correct time zone. -
Page 41: Signs And Symbols
Signs and symbols This symbol indicates a safety This symbol indicates manufacturer`s This symbol indicates MR unsafe. related tip. serial number. This symbol indicates a CAUTION or This symbol indicates manufacturer`s This symbol indicates the temperature WARNING associated with the device. batch code. -
Page 42: Technical Specifications
Technical specifications vacuum range max. noise level - 40 to –200 mmHg - 42.5 dB(A) - 5 to –27 kPa low flow alarm noise level 5 L/min 78 dB(A) without canister Operating 1000 g Conditions 2.2 Ibs Transport / Storage Conditions H x W x D Switching adapter AC... - Page 43 El sitio web Medela.com le ofrece todas las herramientas educativas que necesita para configurar y utilizar el sistema NPWT Invia Liberty. La página Medela University incluye instrucciones de uso, guías rápidas y vídeos de formación para ayudarle a convertirse en un usuario experimentado del sistema NPWT.
- Page 44 Componentes desechables del aspirador Invia Liberty .............. 54 Recipiente del Invia Liberty con solidificador de 300 ml y 800 ml ..........54 Conector en Y, tubo del recipiente y adaptador de drenaje del Invia Liberty ........55 Suministro eléctrico ........................56 Puerto USB ..........................56 Preparación para el uso ......................
- Page 45 Indicador de fuga de aire ......................65 Espera ........................... 66 Apagado ..........................66 Ajuste del maletín de transporte ....................66 Cambio del recipiente y el tubo del Invia Liberty ................ 67 Carga de la batería........................69 Alarmas ............................ 70 Advertencia ........................... 71 Alarma ..........................
-
Page 46: Introducción
Introducción Al elegir el Invia Liberty, ha optado por un sistema para el tratamiento de heridas con presión negativa (NPWT). El aspirador ligero Invia Liberty proporciona un intervalo de presión negativa ajustable y dos modalidades de tratamiento junto con un sistema electrónico de medición y supervisión. Se trata de un aspirador de funcionamiento silencioso y cuenta con alarmas visuales y acústicas para la seguridad del paciente. -
Page 47: Indicaciones De Uso
Medela solo se responsabilizará de los efectos relacionados con la SEGURIDAD BÁSICA, la fiabilidad y el rendi- miento del sistema NPWT Invia Liberty siempre que este se utilice como se indica en las instrucciones de uso. Lea y tenga en cuenta estas advertencias e instrucciones de seguridad antes de comenzar a utilizar el sistema. -
Page 48: Advertencias
– Este dispositivo no se ha estudiado en pacientes pediátricos. – Cierre el drenaje y desconecte el aspirador Invia Liberty antes de que el paciente ingrese en una cámara de oxígeno hiperbárico (OHB) o se realice una tomografía por emisión de positrones (TEP). -
Page 49: Precauciones
No utilice el recipiente ni los tubos del sistema Invia Liberty si el envase estéril está dañado. El tratamiento de heridas con presión negativa debe aplicarse las 24 horas del día sin interrupción. -
Page 50: Instrucciones De Seguridad
– Mantenga el aspirador Invia Liberty y los productos relacionados lejos de superficies calientes. – Nunca sumerja el aspirador Invia Liberty, el cargador o la estación de conexión en agua u otros líquidos y mantenga el conector del cargador lejos de la humedad y del agua. -
Page 51: Controles De Seguridad
útil de acuerdo con los procedimientos de servicio. El aspirador Invia Liberty es un dispositivo de protección de clase II (EN CEI 60601-1). Los controles de seguridad se reducen a la inspección visual de la carcasa y del cargador para detectar cualquier daño. -
Page 52: Aspirador Invia Liberty
Puerto del enchufe adaptador Soportes de sujeción a la cama Soporte del raíl estándar El flujo máximo del aspirador Invia Liberty es de 5 litros por minuto, con un intervalo de presión ajustable entre –40 y –200 mmHg (–5 a –27 kPa). -
Page 53: Pantalla
Pantalla Campo de información Encendido/ Apagado Botones de selección Campo de navegación Campo de instrucciones Botones programables Número de identificación del tratamiento Temporizador del tratamiento Intermitente/Constante Modo administrativo / Modo de paciente Estado de carga Indicador de de la batería funcionamiento/espera Indicador de fuga de aire... -
Page 54: Componentes Desechables Del Aspirador Invia Liberty
Composición del solidificador: poliacrilato de sodio entrecruzado PRECAUCIONES Para un funcionamiento adecuado y seguro, el aspirador Invia Liberty debe mantenerse en posición vertical durante su uso. Si el aspirador se vuelca, vuelva a colocarlo en posición vertical. La construcción especial de la cámara de seguridad situada en la parte superior del recipiente protege el filtro bacteriano y protector contra desbordamientos de la obstrucción inmediata en caso de vuelco. -
Page 55: Conector En Y, Tubo Del Recipiente Y Adaptador De Drenaje Del Invia Liberty
La luz más pequeña (tubo de medición) regula la presión y la luz más grande (tubo de succión) retira la secreción de la herida hacia el recipiente. Un filtro bacteriano y protector contra desbordamiento hidrófilo situado en la base del tubo ayuda a evitar la contaminación del aspirador Invia Liberty. Conexión en Y con conector rápido Invia Para conocer los avisos y precauciones relativos a la conexión en Y con conector rápido Invia, consulte las... -
Page 56: Suministro Eléctrico
100 °C (212 °F), incinerarse ni quemarse. El aspirador Invia Liberty funciona conectado a la red de suministro eléctrico o con una batería interna recargable de iones de litio. Cuando el dispositivo se utilice conectado a la red eléctrica, la batería se cargará. -
Page 57: Preparación Para El Uso
Preparación para el uso ADVERTENCIA Utilizar solo después de recibir instrucciones de personal cualificado. Utilice guantes para todas las aplicaciones y tome las precauciones universales. Tubo del recipiente del Invia Liberty Compruebe los componentes necesarios. Aspirador Invia Liberty Recipiente del Invia Liberty Conecte el tubo A. -
Page 58: Modos De Usuario Del Aspirador Invia Liberty
Si el resultado del control anterior ha sido correcto, pulse el botón [ ] durante 3 s para apagar el aspirador Invia Liberty. Si la prueba no es satisfactoria, siga las instrucciones indicadas en la pantalla o consulte el capítulo «Alarmas». -
Page 59: Modo Administrativo
Modo administrativo El ajuste de fábrica del aspirador Invia Liberty es de –125 mmHg en modo constante. ATENCIÓN El nivel de presión debe ajustarse siempre conforme a las instrucciones del profesional sanitario encargado. Cuando se utilice un FitPad Invia, la presión ajustada se controlará en la localización de la herida. -
Page 60: Modo Administrativo
3. Pulse los botones de selección [ ] y [ ] para ajustar el nivel de presión. 4. Pulse «OK» ] para confirmar y acceder a la pantalla principal. Modo administrativo 1. Para acceder al modo administrativo, desbloquee la pantalla, mantenga pulsado [ ] y luego pulse [ ➡... -
Page 61: Cambio Del Modo De Ajuste Del Nivel De Presión
Cambio del modo de ajuste del nivel de presión El modo detallado de presión permite seleccionar el nivel de presión entre – 40 y – 200 mmHg, en incrementos de 5 mmHg (5 kPa a 27 kPa en incrementos de 1 kPa). 1. Para acceder al modo administrativo, desbloquee la pantalla, mantenga pulsado [ ] y luego pulse [ 2. - Page 62 Selección de fuga de aire Estándar o Elevada: 1. Para acceder al modo administrativo, desbloquee la pantalla, mantenga pulsado [ ] y luego pulse [ 2. Pulse al mismo tiempo los botones programables [ para acceder al menú de ajustes. 3.
-
Page 63: Cambio De La Modalidad De Tratamiento
[ ] y luego pulse [ 2. Para cambiar la modalidad de tratamiento, pulse «Espera» 3 segundos ] y colocará el aspirador Invia Liberty en modo de espera. Modo constante: C La modalidad de tratamiento predeterminada es Constante. -
Page 64: Cambio De Los Ajustes
7. Pulse «Atrás» ] para salir de la configuración. Un minuto después de haber pulsado el último botón, ➡ el aspirador Invia Liberty cambia automáticamente al modo de paciente y se bloquea la pantalla. -
Page 65: Archivo De Registro De Tratamiento
«Gráfica» Para salir del archivo de registro de tratamiento, pulse «Atrás» El aspirador Invia Liberty cambia automáticamente a la pantalla principal (en el modo administrativo) a los 30 segundos de haberse pulsado el último botón. Transcurridos otros 30 segundos, el aspirador cambia al modo de paciente y se bloquea la pantalla. -
Page 66: Espera
] durante 3 segundos y el aspirador se apagará. Ajuste del maletín de transporte El Invia Liberty está concebido para ubicarse en un maletín de transporte durante su funcionamiento. 1. Abra el maletín de transporte. 2. Deslice el Invia Liberty en el compartimento correspondiente. -
Page 67: Cambio Del Recipiente Y El Tubo Del Invia Liberty
«Recipiente lleno» / «Filtro obstruido». Sustituya el tubo del Invia Liberty, como mínimo, una vez a la semana, cuando el tubo parezca obstruido tras realizar una inspección visual o cuando se active la señal de alarma de «Sistema obstruido». - Page 68 Retire el tubo del recipiente en el sentido de la flecha. Extraiga el tubo del recipiente nuevo y conéctelo al aspirador Invia Liberty. Fije el adaptador del tubo al aspirador (presione en línea recta). 8.1 Desempaquete el recipiente nuevo y despegue la pegatina de seguridad.
-
Page 69: Carga De La Batería
«Batería baja». Si la batería está totalmente descargada, tardará entre tres y cuatro horas en cargarse por completo. Si el aspirador Invia Liberty está totalmente cargado Y aún está conectado a una fuente de alimentación, en el icono de la batería. -
Page 70: Alarmas
Alarmas El aspirador distingue entre «Advertencia», «Alarma» y «Fallo interno». Si el Invia Liberty detecta una situación en la que no se pueda continuar con el tratamiento, sonará una alarma acústica y se mostrará en la pantalla el número del fallo y una descripción del problema. Para obtener una explicación del número de fallo, consulte la tabla de alarmas de este capítulo. -
Page 71: Advertencia
La alarma acústica volverá a emitirse al cabo de un minuto si el problema persiste. Siga las instrucciones que se muestran en la pantalla o consulte la tabla de alarmas. Si no se consigue resolver el problema, apague el aspirador Invia Liberty [ > 3 segundos] y consulte al servicio de atención al cliente de Medela para obtener más instrucciones. -
Page 72: Tabla De Alarmas
Tabla de alarmas Número de fallo Descripción del Solución del Presión problema en la pantalla problema en la pantalla... - Page 73 Recargue la batería colocando el aspirador Invia Liberty en la estación de conexión o enchufe el cargador al puerto de alimentación del aspirador. El tiempo restante de la batería es de 15 minutos. Cambie el recipiente; consulte el capítulo «Cambio del recipiente y el tubo del Invia Liberty».
- Page 74 Medela. ATENCIÓN Las instrucciones del Invia Liberty aconsejan realizar un tratamiento ininterrumpido de 24 horas. Si el tratamiento se suspende durante más de 2 horas usando espuma o gasa, deberá reemplazarse el apósito y el profesional sanitario deberá volver a comenzar...
- Page 75 Enfríe el aspirador Invia Liberty. Reinicie el aspirador. Si persiste el fallo interno, apague el aspirador pulsando [ > 3 segundos] y póngase en contacto con el servicio de atención al cliente de Medela. El aspirador se detiene El aspirador sigue funcionando...
-
Page 76: Descripción General De Los Accesorios
El aspirador Invia Liberty ha sido comprobado en el marco de la correspondiente evaluación de conformidad. Solo deberá utilizarse con los productos incluidos en el sistema NPWT Invia Liberty y solo será distribuido por Medela. Medela solo puede garantizar el funcionamiento correcto del sistema con estos productos. -
Page 77: Apósitos
Apósitos Solamente un profesional sanitario podrá colocar y cambiar los apósitos de las heridas. El sistema NPWT Invia Liberty está diseñado para ser utilizado únicamente con los apósitos Invia. Si desea obtener instrucciones, contraindicaciones, advertencias o precauciones específicas relativas a los apósitos, consulte las correspondientes instrucciones de uso de los apósitos Invia. -
Page 78: Limpieza Y Desinfección
* Si es necesario, el maletín de transporte puede lavarse en la lavadora ATENCIÓN El aspirador Invia Liberty, la estación de conexión, el soporte de barra y el maletín de transporte no pueden esterilizarse. No está permitida la desinfección por inmersión ni la desinfección termal, así como tampoco la limpieza mediante ultrasonidos. -
Page 79: Eliminación
Invia Liberty no podrá volver a encenderse. La eliminación de los componentes electrónicos y plásticos debe realizarse según la normativa ambiental local. Los componentes desechables y los apósitos del Invia Liberty se deben tratar y desechar de acuerdo con los procedimientos ambientales locales. -
Page 80: Mapa De Zonas Horarias
Mapa de zonas horarias En la siguiente imagen se muestran las diferentes zonas horarias. Siga las instrucciones del capítulo «Cambio de los ajustes» para seleccionar la zona horaria correcta. -
Page 81: Signos Y Símbolos
Signos y símbolos Este símbolo indica un consejo Este símbolo indica el número Este símbolo indica que el aparato de seguridad. de serie del fabricante. no es seguro para RM. Este símbolo acompaña a una Este símbolo indica el código Este símbolo indica el límite PRECAUCIÓN o ADVERTENCIA de lote del fabricante. -
Page 82: Especificaciones Técnicas
Especificaciones técnicas el intervalo de vacío máx. nivel de ruido –40 a –200 mmHg –42,5 dB(A) – 5 a –27 kPa caudal bajo nivel de ruido de la alarma 5 l/min 78 dB(A) sin el recipiente 1000 g 2,2 Ib Condiciones de transporte y almacenamiento Altura ×... - Page 83 NPWT University Le site Web Medela.com fournit tous les outils pédagogiques dont vous avez besoin pour mettre le système NPWT Invia Liberty en place et le faire fonctionner. La page Université Medela comprend des instructions pour l’utilisation, des quick cards et des vidéos de formation pour vous aider à devenir un utilisateur NPWT confiant et bien informé.
- Page 84 Pompe Invia Liberty ........................92 Écran ............................. 93 Articles jetables de la pompe Invia Liberty ................94 Bocal Invia Liberty avec agent solidifiant 300 ml et 800 ml ............94 Tubulure de bocal/raccord Y/adaptateur de drain Invia Liberty ............95 Alimentation électrique ......................96 Port USB ..........................
- Page 85 Témoin de fuite d’air ......................105 Veille ............................ 106 Arrêt ............................ 106 Réglage du sac de transport ....................106 Remplacer le bocal Invia Liberty et la tubulure Invia Liberty ............. 107 Charge de la batterie ......................109 Alarmes ...........................110 Avertissement ........................111 Alarme ..........................
-
Page 86: Introduction
Ce dispositif n‘a pas été étudié sur des patients de pédiatrie. Environnement prévu Le dispositif médical TPPN Invia Liberty est destiné à être utilisé dans le cadre de soins de longue durée, à l’hôpital et à domicile. -
Page 87: Indications D'utilisation
Indications d’utilisation Le dispositif médical de traitement des plaies par pression négative (TPPN) Invia Liberty est préconisé pour les patients pouvant bénéficier d‘un appareil d‘aspiration (TPPN), car, lorsqu‘il est utilisé sur des plaies ouvertes, il crée un environnement qui favorise la guérison des plaies en seconde ou troisième intention (première différée). -
Page 88: Advertissements
– Cet appareil n’a pas été étudié pour des patients de pédiatrie. – Fixer le drain et débrancher la pompe Invia Liberty avant de placer le patient dans le caisson à oxygène hyperbare (HBO) ou le dispositif de tomographie par émission de positons (PET). -
Page 89: Mises En Garde
– Le système Invia Liberty TPPN n’est pas compatible avec la résonance magnétique (RM) et ne doit donc pas être emporté dans un tel environnement. – Risque d’explosion : la pompe Invia Liberty n’est pas conçue pour fonctionner dans des environnements présentant des risques d’explosion, comme ceux enrichis en oxygène ou en présence d’anesthésiques inflammables. -
Page 90: Consignes De Sécurité
– Avant de brancher le dispositif, vérifier que la tension locale correspond à la tension mentionnée sur la plaque de spécification. – La pompe Invia Liberty a été contrôlée dans le cadre d’une évaluation de conformité et doit être utilisée exclusivement avec des produits inclus dans le système Invia Liberty TPPN et distribués par Medela. -
Page 91: Contrôles De Sécurité
Pour les contrôles de sécurité, l’appareil doit être entretenu et réparé conformément aux instructions d’entretien tout au long de sa vie opérationnelle. La pompe Invia Liberty étant un appareil de classe de protection II (EN IEC 60601-1), les contrôles de sécurité consistent uniquement à inspecter visuellement le boîtier et le chargeur pour s’assurer qu’ils ne sont pas endommagés. -
Page 92: Pompe Invia Liberty
Pattes de support au lit Support pour rail standard La pompe Invia Liberty offre un débit max. de 5 litres/minute avec une gamme de pression réglable de – 40 à – 200 mmHg ( – 5 à – 27 kPa). -
Page 93: Écran
Écran Champ d’information Interrupteur (Marche/Arrêt) Touches de sélection Champ de navigation Champ d’instruction Touches Numéro d’identification du traitement Temps du traitement Intermittent/Constant Mode administratif/ Mode patient État de charge Témoin de de la batterie fonctionnement/veille Témoin de fuite d’air... -
Page 94: Articles Jetables De La Pompe Invia Liberty
Composition de l’agent solidifiant : Polyacrylate de sodium réticulé MISES EN GARDE Pour un fonctionnement sûr et approprié, la pompe Invia Liberty doit rester en position verticale pendant son utilisation. Si la pompe se renverse, la replacer en position verticale. La disposition spéciale de la chambre de sécurité... -
Page 95: Tubulure De Bocal/Raccord Y/Adaptateur De Drain Invia Liberty
Une protection contre le débordement du filtre hydrophile/ antibactérien dans la base de la tubulure empêche la contamination de la pompe Invia Liberty. Le raccord Y Invia avec connecteur rapide Pour les avertissements et mises en garde du raccord Y Invia avec connecteur rapide, consulter le mode d’emploi du raccord Y Invia avec connecteur rapide. -
Page 96: Alimentation Électrique
La charge de la batterie dépend de la durée d’utilisation de la pompe. La durée d’utilisation fait référence au fonctionnement réel du moteur. Le moteur de la pompe Invia Liberty ne s’active que lorsque la pression mesurée est inférieure à la pression réglée. -
Page 97: Préparation Pour L'utilisation
Invia Liberty B. Insérer la base de la tubulure dans la pompe comme indiqué (en ligne droite) 3. Clipser le bocal Invia Liberty A. Déballer un nouveau bocal et enlever l‘autocollant de sécurité. Faire coulisser les chevilles au fond du bocal dans les encoches situées à... -
Page 98: Modes D'utilisation De La Pompe Invia Liberty
Pour les applications de pansement, se reporter au mode d’emploi fourni avec les kits de pansements Invia. Mettre la pompe Invia Liberty en marche comme indiqué dans le chapitre des modes d’utilisation. Modes d’utilisation de la pompe Invia Liberty Mode administratif Utilisé... -
Page 99: Mode Administratif
Mode administratif Les paramètres d’usine par défaut de la pompe Invia Liberty sont –125 mmHg et mode constant. MISE EN GARDE Le niveau de pression doit toujours être réglé en fonction des consignes du professionnel de santé. Lorsqu’un FitPad Invia est utilisé, la pression réglée est contrôlée au niveau du site de la plaie. -
Page 100: Mode Administratif
3. Appuyer sur les touches de sélection [ ] ou [ ] afin de régler le niveau de pression. 4. Appuyer sur « OK » ] pour confirmer et entrer dans le menu principal. Mode administratif 1. Pour passer en mode administratif, déverrouiller l’écran, appuyer sur la touche [ ] en la maintenant enfoncée, puis appuyer sur ➡... -
Page 101: Modification Du Mode De Configuration De Pression
Modification du mode de configuration de pression Le mode détaillé de pression permet de sélectionner le niveau de pression de – 40 à – 200 mmHg par incréments de 5 mmHg (5 kPa à 27 kPa par incréments de 1 kPa) 1. Pour passer en mode administratif, déverrouiller l’écran, appuyer sur la touche [ ] en la maintenant enfoncée, puis appuyer sur 2. - Page 102 Sélectionner le volume de fuite d’air standard ou élevé : 1. Pour passer en mode administratif, déverrouiller l’écran, appuyer sur la touche [ ] en la maintenant enfoncée, et appuyer sur 2. Appuyer simultanément sur les touches [ ] pour entrer dans le menu des réglages.
-
Page 103: Modification Du Mode De Traitement
] en la maintenant enfoncée, puis appuyer sur 2. Pour changer le mode de traitement, appuyer sur « Veille » 3 secondes ] pour mettre la pompe Invia Liberty en mode Veille. Mode constant – C Le mode de traitement par défaut est constant. -
Page 104: Modification Des Réglages
7. Appuyer sur la touche « Retour » ] pour sortir du mode de réglage. ➡ 1 minute après que le dernier bouton a été enfoncé, la pompe Invia Liberty passe automatiquement au mode patient et l’écran se verrouille. -
Page 105: Fichier Journal De Traitement
Mode patient Mise en marche Mettre la pompe Invia Liberty en marche en appuyant sur la touche L’autotest démarre Si l’autotest a échoué, suivre les consignes relatives au dépannage sur l’écran ou consulter le chapitre relatif aux alarmes. -
Page 106: Veille
> 3 secondes] arrête la pompe. Réglage du sac de transport La pompe Invia Liberty est destinée à être portée dans un sac de transport pendant l’utilisation. 1. Ouvrir le sac de transport. 2. Glisser Invia Liberty dans la poche prévue à cet effet. -
Page 107: Remplacer Le Bocal Invia Liberty Et La Tubulure Invia Liberty
Remplacer le bocal Invia Liberty et la tubulure Invia Liberty Remplacer le bocal Invia Liberty au moins une fois par semaine, lorsqu’il est visiblement plein ou lorsque le signal d’alarme « Bocal plein »/« Filtre obstrué » se déclenche. Remplacer la tubulure Invia Liberty au moins une fois par semaine, lorsqu’elle est visiblement obstruée ou lorsque le signal d’alarme «... - Page 108 Déballer une nouvelle tubulure de bocal et la brancher sur la pompe Invia Liberty. Introduire la base de la tubulure dans la pompe (pousser en ligne droite). 8.1 Déballer un nouveau bocal et enlever l’autocollant de sécurité. 8.2 Faire coulisser les chevilles au fond du bocal dans les encoches situées à...
-
Page 109: Charge De La Batterie
Si la pompe est débranchée de l’alimentation électrique, 4 barres, indiquant que la batterie est complètement chargée, s’affichent sur l’icône de la batterie. Si la pompe Invia Liberty n’a pas été utilisée, la batterie doit en moyenne être chargée tous les 6 mois afin de garantir un fonctionnement optimal. -
Page 110: Alarmes
La pompe opère une distinction entre « Avertissement », « Alarme » et « Erreur interne ». Si la pompe Invia Liberty détecte une situation, qui empêche la poursuite du traitement, une alarme sonore retentit, et un numéro d’erreur, ainsi qu’une description du problème s’affichent à l’écran. Pour connaître l’explication du numéro d’erreur, consulter le tableau des alarmes dans ce chapitre. -
Page 111: Avertissement
L’alarme sonore reprend 1 minute plus tard si le problème n’est pas résolu. Suivre les consignes affichées à l’écran ou consulter le tableau des alarmes. Si le problème ne peut pas être résolu, arrêter la pompe Invia Liberty [ > 3 secondes] et contacter le service à... -
Page 112: Tableau Des Alarmes
Tableau des alarmes Numéro Description du Indications pour le Pression de l’erreur problème à l’écran dépannage à l’écran... - Page 113 Remarques / causes potentielles de l’erreur Recharger la batterie soit en plaçant la pompe Invia Liberty sur la station d’accueil ou en branchant le chargeur sur l’adaptateur secteur de la pompe. La durée de charge restante de la batterie est d’environ 30 minutes.
- Page 114 à la clientèle de Medela. MISE EN GARDE Les instructions relatives à la pompe Invia Liberty recommandent un traitement continu pendant 24 heures. Si le traitement est interrompu pendant plus de 2 heures avec mousse ou avec gaze, il est recommandé de faire remplacer le pansement...
- Page 115 Laisser refroidir la pompe Invia Liberty. Redémarrer la pompe. Si l’erreur interne persiste, arrêter la pompe en appuyant sur > 3 secondes ] et contacter le service à la clientèle de Medela. La pompe s’arrête La pompe continue de fonctionner...
-
Page 116: Vue D'ensemble Des Accessoires
Vue d’ensemble des accessoires MISE EN GARDE La pompe Invia Liberty a été contrôlée dans le cadre d’une évaluation de conformité et doit être utilisée exclusivement avec des produits inclus dans le système Invia Liberty TPPN et distribués par Medela. -
Page 117: Kits De Pansement
Kits de pansement Pansements à appliquer et à changer exclusivement par des professionnels de santé. Le système Invia Liberty TPPN est conçu pour être utilisé avec les pansements Invia uniquement. Pour des indications, contre-indications, avertissements et mises en garde spécifiques de pansement, consulter les instructions appropriées d’utilisation des pansements Invia. -
Page 118: Nettoyage Et Désinfection
* Si nécessaire, le sac de transport peut être lavé à la machine à laver. MISE EN GARDE La pompe, la station d’accueil, le support pour rail, le chargeur et le sac de transport Invia Liberty ne peuvent pas être stérilisés. -
Page 119: Mise Au Rebut
à l’inspection visuelle du boîtier et du chargeur pour s’assurer qu’ils ne sont pas endommagés. Il doit être effectué avant toute utilisation. Si la pompe Invia Liberty n’a pas été utilisée, la batterie doit en moyenne être chargée tous les 6 mois afin de garantir un fonctionnement optimal. -
Page 120: Carte Des Fuseaux Horaires
Carte des fuseaux horaires L'illustration ci-dessous indique les fuseaux horaires. Respecter les indications du chapitre « Modification des réglages » pour choisir le fuseau horaire approprié. -
Page 121: Signes Et Symboles
Signes et symboles Ce symbole indique un conseil Ce symbole indique le numéro de sé- Ce symbole signifie que l’utilisation de sécurité. rie du fabricant. de l’appareil présente un danger dans un environnement RM. Ce symbole indique une MISE EN Ce symbole indique le code de Ce symbole indique la limite de tem- GARDE ou un AVERTISSEMENT lot du fabricant. -
Page 122: Spécifications Techniques
Spécifications techniques plage de vide niveau sonore maximum –40 à –200 mmHg –42,5 dB(A) – 5 à –27 kPa débit réduit niveau sonore de l’alarme 5 l/min 78 dB(A) sans bocal Conditions de 1 000 g fonctionnement 2,2 lb Conditions de transport/stockage H x l x P 150 x 170 x 95 mm Adaptateur secteur CA 5,91 x 6,69 x 3,74 pouces Modèle : MSA-C2500IS12.0-30C-ZZ... -
Page 123: Electromagnetic Compatibility (Emc)
IEC 60601-1-2:2014 4th Edition, Table 1 ) Electromagnetic emissions The Invia Liberty pump is intended for use in the electromagnetic environment specified below. The customer or the user of the Invia Liberty pump should assure that it is used in such environment. Emission tests Compliance Electromagnetic environment –... -
Page 124: Electromagnetic Immunity
Table 2 ) Electromagnetic immunity The Invia Liberty pump is intended for use in the electromagnetic environment specified below. The customer or the user of the Invia Liberty pump should assure that it is used in such environment. Immunity tests IEC 60601 Compliance Electromagnetic environment –... - Page 125 Table 4) Electromagnetic immunity The Invia Liberty pump is intended for use in the electromagnetic environment specified below. The customer or the user of the Invia Liberty pump should assure that it is used in such environment. Immunity IEC 60601...
-
Page 126: Recommended Separation Distance
Recommended separation distance between portable and mobile RF communications equipment and the Invia Liberty pump The Invia Liberty pump is intended for use in an electromagnetic environment in which radiated RF disturbances are controlled. The customer or the user of the Invia Liberty pump can help prevent... - Page 127 Notes...
- Page 128 Medela AG Lättichstrasse 4b 6341 Baar, Switzerland www.medelahealthcare.com Canada Medela Inc. USA Medela Canada Inc. 1101 Corporate Drive 4160 Sladeview Cres., Unit #8 McHenry, IL 60050 Mississauga, ON, L5L 0A1 Canada Phone +1 800 435 8316 Phone +1 877 735 1626...
Need help?
Do you have a question about the Invia Liberty and is the answer not in the manual?
Questions and answers