
Subscribe to Our Youtube Channel
Related Manuals for Vacmaster UC0101


Summary of Contents for Vacmaster UC0101
- Page 1 Use & Care Guide Bagless Upright Vacuum Cleaner MODEL NO. UC0101 www.vacmaster.com Cleva North America, Inc. Greenville, SC 29607 (866) 384-8432 Made in China...
-
Page 2: Table Of Contents
Operating Instructions..........................Maintaining Your Vacuum........................Troubleshooting............................. ® Thank you for purchasing this Vacmaster vacuum cleaner. With it you are obtaining a high quality product that is engineered for optimal performance. FOR YOUR SAFETY Read and understand this manual before use. -
Page 3: Important Safety Instructions
IMPORTANT SAFETY INSTRUCTIONS When using an electrical appliance, basic precautions should always be followed, including the following: READ ALL INSTRUCTIONS BEFORE USING THIS VACUUM CLEANER. Failure to follow the warnings and instructions may result in electric shock, fire and/or serious injury. WARNING–... -
Page 4: Warranty
WITH PROOF OF SALE, a defective appliance will be replaced free of charge. For warranty coverage details to obtain free replacement, visit the web page: www.vacmaster.com or call (866) 384-8432. • This warranty does not cover filters or belt, which are expendable parts that can wear out from normal use within the warranty period. -
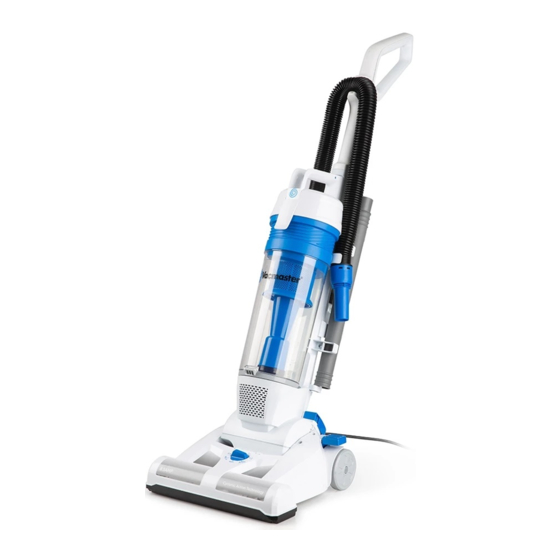
Page 5: Getting To Know Your Vacuum
GETTING TO KNOW YOUR VACUUM Primary Filter Handle Hose Storage Pre-filter Hose Dust Cup Nut (Pre-installed) Release Button Carrying Handle Screws (5) Dust Cup Lid Latch Floor/Tools Screw Bolt (Pre-installed) Selector Dust Cup Upper Locking Notch Height Adjust Selector Upper Cord Hook Floor Nozzle Power Cord... - Page 6 Replacement Parts Item Part No. Primary Filter 571003122 Belt 571003165 Crevice Tool 571003111 Dusting Brush 571003112 Extension Wand 571003110 Hose 571003109 Screws (5) 571003116 Screw Bolt 571003114 571003106 Available online at www.vacmaster.com or call (866) 384-8432.
-
Page 7: General Assembly Instructions
GENERAL ASSEMBLY INSTRUCTIONS Assembly Instructions 1. Insert the main body into the floor nozzle and secure with screws provided. Insert four screws into the front of the main body, and insert one screw into the back of the main body. Note: Make sure all screws are installed into place correctly. - Page 8 Screw Bolt 4. Insert the handle into the main body and secure with one screw bolt provided. Handle Screw Bolt 5. Install the hose into the main body. Insert the other end of the hose into the hose storage and fix into place. Hose...
- Page 9 6. Insert the dust cup into the slots on the bottom of the main body, then press the dust cup into locked slot and click into place. Dust Cup 7. Insert the dusting brush onto the accessory storage located on the back of the main body.
- Page 10 8. Make sure the upper cord hook is in the upright position as shown. Wrap the power cord loosely around the upper and lower cord hooks. Upper Cord Hook Lower Cord Hook 9. Lock power cord plug onto the power cord. Power Cord Plug Power Cord WARNING...
-
Page 11: Operating Instructions
OPERATING INSTRUCTIONS Using Your Upright Vacuum Cleaner Note: Make sure the vacuum cleaner is completely assembled and the dust cup is empty before using. Do not operate vacuum cleaner without filters in place. 1. Turn the upper cord hook to either side to release the power cord. Upper Cord Hook Lower Cord Hook 2. - Page 12 Note: Lock the power cord into the lower locking notch first and then lock it into the upper locking notch to avoid damaging the power cord. 4. Plug the power cord plug into an outlet located near the floor. WARNING To reduce the risk of electric shock, this appliance has a polarized plug (one blade is wider than the other).
-
Page 13: Pile Height Selection And Settings
7. Press the on/off button to turn the vacuum cleaner on. 8. Once you have completed vacuuming, press the on/off button, return the handle to the upright position and unplug the power cord plug from the outlet. Pile Height Selection and Settings Height Adjust Selector Select a pile height setting by turning the height adjust selector located on the floor nozzle. - Page 14 CAUTION Moving parts! To reduce the risk of personal injury, DO NOT touch the brush roll in the floor nozzle when the vacuum is on. Contacting the brush roll while it is rotating can cause injuries. Always turn off before performing maintenance or servicing.
- Page 15 3. Release the hose from the main body. 4. Insert the hose into the smaller end of the extension wand. 5. Choose the desired accessories and insert into the larger end of the extension wand. Note: You can also choose to use your vacuum cleaner by inserting the crevice tool or the dusting brush directly into the hose.
- Page 16 6. Plug the power cord plug into an outlet located near the floor. 7. Press the on/off button to turn the vacuum cleaner on. 8. Once you have completed vacuuming, press the on/off button, return the handle to the upright position and unplug the power cord plug from the outlet. Note: Remember to rotate the floor/tools selector back to the “FLOOR”...
-
Page 17: Maintaining Your Vacuum
MAINTAINING YOUR VACUUM CAUTION To reduce the risk of shock, disconnect the power cord and turn off before performing any service or maintenance. Note: Use dry cloth to clean the outside of the unit. Do not allow any kind of liquid to enter the unit. - Page 18 3. Position dust cup area of vacuum over a waste receptacle. Press down on the dust release latch to open dust cup lid and allow contents to drop into waste receptacle. Dust Release Latch Dust Release Latch 4. Shake the dust cup to release any debris that might hang in the pre-filter. 5.
- Page 19 Cleaning the Pre-Filter The pre-filter is located inside the dust cup. Check the pre-filter frequently and clean when dirty. NOTE: Make sure the dust cup is free of any debris before opening. 1. Remove the dust cup as outlined in the Emptying the Dust Cup. 2.
- Page 20 4. If necessary, rinse the pre-filter with cold water only. Do not use detergent or soap. Set the pre-filter aside and allow to air dry for 24 hours. Do not wash in the dishwasher. Do not install damp. IMPORTANT: The filters must dry completely before reuse. 5.
- Page 21 1. Remove the dust cup as outlined in the Emptying the Dust Cup. 2. Pull the dust cup lid latch and open the lid. Dust Cup Lid Latch 3. Remove the primary filter cover with the primary filter from the dust cup. Primary Filter Cover Primary Filter -21-...
- Page 22 4. Separate the primary filter from the primary filter cover. Primary Filter Cover Primary Filter 5. Use a soft brush to brush loose debris from the primary filter then rinse with cold water. Rinse and gently squeeze dry the primary filter. Set it aside and allow to air dry for 24 hours.
-
Page 23: Changing The Belt
TROUBLESHOOTING 8. Close the dust cup lid until you hear a click. 9. Reinstall the dust cup into the main body. See installation instructions in the Emptying the Dust Cup. Changing the Belt Replace the belt whenever a burning rubber smell caused by excessive slippage occurs. - Page 24 3. Remove the brush roll by carefully lifting out . 4. Remove the worn or broken belt. 5. Use scissors to remove any entangled hair around the brush roll. Clean any debris from the floor nozzle. 6. Loop the new belt around motor shaft and the brush roll. Brush Roll Belt Motor Shaft...
- Page 25 8. Reinstall the lower plate by aligning tabs on front edge of lower plate with slots in the nozzle first, and then press the lower plate into installed position. 9. Reinstall five screws into the lower plate. Do not over-tighten the screws. Cleaning the Brush Roll WARNING Always unplug the power cord from an electrical outlet before performing...
-
Page 26: Removing Clogs
Removing Clogs 1. Remove any accessories from the end of hose. 2. Remove the hose end from the main body by turning counterclockwise. 3. Check and remove any clogs in the hose. 4. Press the two release buttons, and pull the connection hose away from the main body. -
Page 27: Troubleshooting
The brush roll is worn. Call (866) 384-8432 for assistance. Replace the belt. Purchase online at The belt is worn or broken. www.vacmaster.com or call (866) 384- The job of dirt 8432. pick-up is poor Replace the hose. Purchase online at or suction power The hose is worn. - Page 28 Check filter for correct installation. installed incorrectly. Follow instructions on page 19. Replace the primary filter. Purchase The primary filter is damaged online at www.vacmaster.com or call Dust escapes and needs to be replaced. (866) 384-8432. from vacuum. The pre-filter is damaged.
- Page 29 There are obstructions in the Check accessories for fuzz lint, pet hair accessory tools restricting air Airflow restricted or other debris. flow. with accessories in use; sound There is an obstruction in the Check for and remove any clogs and changes.
Need help?
Do you have a question about the UC0101 and is the answer not in the manual?
Questions and answers