Table of Contents
Advertisement
Quick Links
PANOPTIX
LVS32-TH
INSTALLATION
INSTRUCTIONS
Important Safety Information
See the Important Safety and Product Information guide in the
product box for product warnings and other important
information.
The device must be installed with at least one of the included
anti-rotation bolts. Failure to do so could result in the device
rotating while the boat is moving and could cause damage to
your vessel.
You are responsible for the safe and prudent operation of your
vessel. Sonar is a tool that enhances your awareness of the
water beneath your boat. It does not relieve you of the
responsibility of observing the water around your boat as you
navigate.
Failure to install and maintain this equipment in accordance with
these instructions could result in damage or injury.
Always wear safety goggles, ear protection, and a dust mask
when drilling, cutting, or sanding.
When drilling or cutting, always check what is on the opposite
side of the surface.
To obtain the best performance and to avoid damage to your
boat, you must install the Garmin
instructions.
Read all installation instructions before proceeding with the
installation. If you experience difficulty during the installation,
contact Garmin Product Support.
Registering Your Device
Help us better support you by completing our online registration
today. Keep the original sales receipt, or a photocopy, in a safe
place.
1
Go to my.garmin.com/registration.
2
Sign in to your Garmin account.
Software Update
You must update the software when you install this device.
If your Garmin chartplotter has Wi‑Fi
update the software using the ActiveCaptain
compatible Android
or Apple
™
not have has Wi‑Fi technology, you should update the software
using a memory card and a Windows
For more information, go to support.garmin.com.
Tools Needed
• Drill
1
• 3 mm bit (
/
in.)
8
3
• 9 mm bit (
/
in.)
8
1
• 12 mm bit (
/
in.) (metal hull)
2
1
• 13 mm bit (
/
in.) (fiberglass hull)
2
LIVESCOPE
™
WARNING
CAUTION
NOTICE
transducer according to these
®
technology, you should
®
app on a
™
device. If your chartplotter does
®
computer.
®
• 32 mm spade bit (1
• 38 mm hole saw (1
™
• Bandsaw or table saw
• Slip-joint pliers or crescent wrench
• Masking tape
• Marine sealant
• Solvent wash
• Marine-grade epoxy or exposed core sealant that can be
used on plastic (cored fiberglass hull)
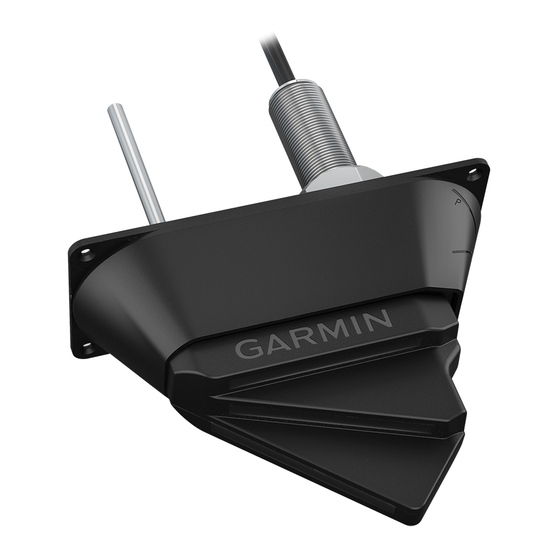
About the Transducer
The transducer transmits and receives sound waves through the
water, and relays sound-wave information to your Garmin sonar
device.
Mounting Location Considerations
• On outboard and sterndrive vessels
be mounted in front of and close to the engine or engines.
• On inboard vessels
front of and far away from the engine propeller and shaft.
• On step-hull vessels
front of the first step.
• On full-keel vessels
a slight angle that aims at the bow, not parallel to the
centerline.
• On fin-keel vessels
from 25 cm to 75 cm (from 10 to 30 in.) in front of the keel
and a maximum of 10 cm (4 in.) to the side of the centerline.
• On vessels with displacement hulls
be mounted approximately
the vessel from the bow, and from 150 to 300 mm (from 6 to
12 in.) to the side of the centerline.
• The transducer should be mounted parallel to the bow-stern
axis of your vessel.
• The transducer should not be mounted behind strakes, struts,
fittings, water intake or discharge ports, or anything that
creates air bubbles or causes the water to become turbulent.
The transducer must be in clean (non-turbulent) water for
optimal performance.
• The transducer should not be mounted in a location where it
might be jarred when launching, hauling, or storing.
• On single-drive boats, the transducer must not be mounted in
the path of the propeller.
The transducer can cause cavitation that can degrade the
performance of the boat and damage the propeller.
• On twin-drive boats, the transducer should be mounted
between the drives, if possible.
1
/
in.) (fiberglass hull)
4
1
/
in.) (metal hull)
2
, the transducer should
, the transducer should be mounted in
, the transducer should be mounted in
, the transducer should be mounted at
, the transducer should be mounted
, the transducer should
1
/
aft of the waterline length of
3
190-02496-90_0A
January 2019
Advertisement
Table of Contents

Related Manuals for Garmin Panoptix Livescope LVS32-TH


Summary of Contents for Garmin Panoptix Livescope LVS32-TH
- Page 1 About the Transducer WARNING The transducer transmits and receives sound waves through the water, and relays sound-wave information to your Garmin sonar See the Important Safety and Product Information guide in the device. product box for product warnings and other important information.
-
Page 2: Mounting Considerations
Mounting Considerations Cutting the Fairing Block • You must install the sonar module in a location with adequate CAUTION ventilation where it will not be exposed to extreme Always wear safety goggles, ear protection, and a dust mask temperatures. when drilling, cutting, or sanding. •... - Page 3 Drill the remaining pilot holes. Secure the device to the mounting location. Blink Codes After the sonar module is installed, it turns on when the chartplotter is turned on. The color status LED on the sonar module indicates its operational status. LED Color State Status Green...
-
Page 4: Installation Instructions
Drilling the Transducer Stem Hole and the Anti-Rotation Bolt Hole in a Non-Cored or Fiberglass Hull Before you can drill holes for the anti-rotation bolts, you must drill the hole for the transducer stem, and you must cut the fairing block (Cutting the Fairing Block, page You should follow these instructions when you are using a Seat the transducer housing firmly within the fairing block... - Page 5 From inside the hull, use slip-joint pliers or a crescent wrench to secure the backing block to the anti-rotation bolt with the included M8 nut and 8 mm washer Do not over-tighten the M8 nut. Before the sealant hardens, remove all excess sealant on the outside of the fairing block and exterior hull to ensure smooth water flow over the transducer.
- Page 6 Installing the Transducer without a Fairing Block Drilling the Transducer Stem Hole and the Anti-Rotation Bolt Hole in a Metal Hull It is recommended that two installers complete these instructions, with one positioned outside the boat and one inside You should follow these instructions when you are using a the boat.
- Page 7 Drilling the Transducer Stem and Anti-Rotation Bolt Holes You should follow these instructions if you are mounting your transducer on a metal hull boat and you are not using a fairing block. Trim the included transducer template. Select a mounting location without surface irregularities or obstructions.
-
Page 8: Cleaning The Transducer
© 2019 Garmin Ltd. or its subsidiaries Maintenance Garmin ® and the Garmin logo are trademarks of Garmin Ltd. or its subsidiaries, registered in the USA and other countries. ActiveCaptain ™ , LiveScope ™ , Panoptix ™...
Need help?
Do you have a question about the Panoptix Livescope LVS32-TH and is the answer not in the manual?
Questions and answers