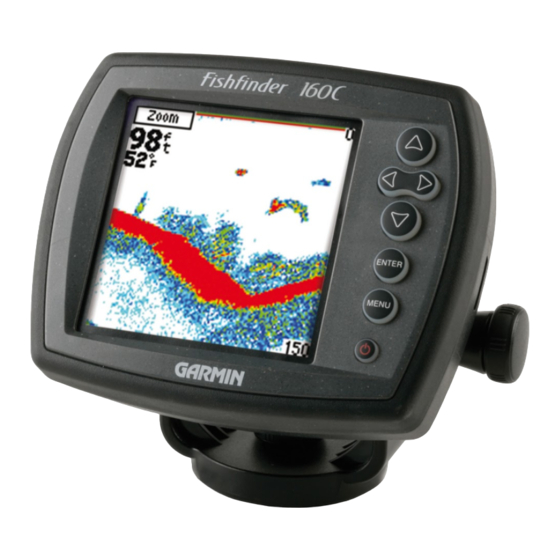
Garmin Fishfinder 160C Owner's Manual
Color sonar
Hide thumbs
Also See for Fishfinder 160C:
- Owner's manual (34 pages) ,
- Specification (2 pages) ,
- Declaration of conformity (1 page)
Table of Contents
Advertisement
Advertisement
Table of Contents

Related Manuals for Garmin Fishfinder 160C


Summary of Contents for Garmin Fishfinder 160C
- Page 1 Fishfinder 160C ® color sonar owner’s manual...
- Page 2 Information in this document is subject to change without notice. Garmin reserves the right to change or improve its products and to make changes in the content without obligation to notify any person or organization of such changes or improvements. Visit the Garmin Web site (www.garmin.com) for current updates and supplemental information concerning the use and operation of this and other Garmin products.
-
Page 3: Manual Conventions
Thank you for choosing the Garmin Fishfinder 160C. This manual covers the installation and operation of the Fishfinder 160C. To get the most out of your new Fishfinder, take time to read this manual and learn the operating procedures for your unit in detail. -
Page 4: Table Of Contents
Mounting the Transducer on a Trolling Motor ... 6 Testing the Transom Mount Installation ... 7 Wiring Harness Installation ... 8 Caring for the Fishfinder 160C ... 9 Cleaning the Case ... 9 Cleaning the Screen ... 9 Storage ... 9 Water Immersion ... -
Page 5: Installation Instructions
When in doubt, seek professional assistance. Be sure the wiring harness reaches the unit and transducer location before beginning installation. The Garmin Fishfinder 160C hardware allows for installation on either the transom or trolling motor. Please check the packing list below. If you are missing any items, please contact your Garmin dealer. -
Page 6: Unit Installation
3. Secure the swivel base with three bolts or screws. DO NOT OVERTIGHTEN. 4. Attach the swivel bracket and secure it with the short knob. Mounting Holes Short Knob Swivel Bracket and Base Fishfinder 160C Owner’s Manual Swivel Base... -
Page 7: Transducer Installation
4. Rotate the entire bracket by twisting it left or right. (NOTE: You will hear clicks as you turn the bracket.) 5. Tighten all knobs when the viewing angle you want is obtained. Fishfinder 160C Owner’s Manual NSTALLATION NSTRUCTIONS Transducer Installation To assemble the transducer: 1. -
Page 8: Selecting A Transom Mount Location
Do not mount the transducer directly in the path of the at high speed. prop. The transducer can cause cavitation that may degrade the boat’s performance and damage the prop. Apply marine sealant to all screw threads to prevent water from seeping into the transom. Fishfinder 160C Owner’s Manual... -
Page 9: Mounting The Transducer On A Transom
Adjust the transducer to be aligned parallel with the water. 4. Tighten the 10-32 locking nut until it touches the mounting bracket, and then tighten 1/4 turn more (do not overtighten). Fishfinder 160C Owner’s Manual NSTALLATION NSTRUCTIONS Drill pilot holes here. -
Page 10: Mounting The Transducer On A Trolling Motor
6. Route the 30' (9 m) transducer cable using the supplied cable ties to secure the cable to the motor shaft. You can fill the forward-facing portion (except the cable tie pocket) of the transducer mount with sealant to avoid accumulating debris. Cable tie Mounting gasket Fishfinder 160C Owner’s Manual... -
Page 11: Testing The Transom Mount Installation
1/8" below the transom of the boat. It might take several adjustments to eliminate the degradation. 4. If the signal does not improve it may be necessary to move the transducer to a different location. Fishfinder 160C Owner’s Manual NSTALLATION NSTRUCTIONS RANSDUCER NSTALLATION... -
Page 12: Wiring Harness Installation
IRING ARNESS Wiring Harness Installation The Fishfinder 160C comes with a wiring harness that connects the unit to power and the transducer with one easy-to-remove connection. If it is necessary to extend the power wires, use 22 AWG wire. DO NOT cut the transducer cable, as this will void your warranty. -
Page 13: Caring For The Fishfinder 160C
After submersion, be certain to wipe and air dry the unit before reuse. WARNING: The Fishfinder 160C lens is coated with a special anti-reflective coating which is very sensitive to skin oils, waxes, and abrasive cleaners. -
Page 14: Operating Instructions
Press and hold to turn the unit on or off. Press briefly and release to activate the backlight. To change the backlight level, press the POWER key repeatedly to cycle between off, user level, and high. Fishfinder 160C Owner’s Manual... -
Page 15: Unit Capabilities
The unit displays fish as arches or fish symbols in three sizes and can alert you when a fish is detected. Thermocline and Structure Garmin’s See-Thru technology can display more than just the thermocline and structure, the unit displays fish in and below the thermocline, trees, brush, and deadfall. -
Page 16: The Adjustment Bar
Auto Gain setting in the Setup menu. Scroll Adjusts the rate that the graph scrolls from right to left. If you are sitting still or the graph is moving too fast, slowing or pausing the graph can be beneficial. Fishfinder 160C Owner’s Manual... -
Page 17: View
When adjusting this setting, the top and bottom numbers reflect the zoomed view depth range. Fishfinder 160C Owner’s Manual PERATING NSTRUCTIONS The Setup Menu The Setup menu contains the settings that should not need to be changed frequently. -
Page 18: Graph
The Beam setting allows the selection of a Narrow Beam or Wide Beam for the transducer. A narrow beam provides higher detail structure returns of a smaller bottom area. The wide beam shows a larger fish return area with poorer detail of non-bottom structure. Fishfinder 160C Owner’s Manual... -
Page 19: Auto Gain
A hard bottom returns a stronger signal and displays a thicker bottom layer. A soft bottom returns a weaker signal and displays a thinner bottom layer. Whiteline Off Fishfinder 160C Owner’s Manual PERATING NSTRUCTIONS Hard Bottom Whiteline On... -
Page 20: Numbers
Hide the Water Temperature. Speed Speed automatically appears when set to Auto (default), or you may choose to Hide the Speed. Distance Distance automatically appears when set to Auto, or you may choose to Hide (default) the Distance. Fishfinder 160C Owner’s Manual... -
Page 21: Calibrate Speed
With OK highlighted, press ENTER and check that the speed sensor wheel is moving or safely increase boat speed. If there is a problem with the speed sensor/unit, check the cable connections. Fishfinder 160C Owner’s Manual PERATING NSTRUCTIONS ETUP... -
Page 22: Units
(km). System Simulator The Fishfinder 160C comes with a built-in Simulator mode that allows you to practice and learn the operation of the unit at home rather than on the water. The unit indicates that it is running the Simulator mode by showing in the lower-left of the screen. -
Page 23: Nmea Output
NMEA Output Choose to turn the NMEA Output On or Off (default). The Fishfinder 160C can output NMEA data for Water Depth, Water Temperature, and Water Speed. The NMEA output is NMEA 0183 version 3.01. Beeper Choose to turn the Beeper On or Off. When the Beeper is On, a beep is sounded when a key is pressed, a message is shown or an alarm activated. -
Page 24: Appendix
Fuse: AGC/2A - 2.0 Amp Sonar Power: Dual Beam: 150 watts (RMS); 1200 watts (peak to peak) Frequency: 200 kHz/80kHz Depth: 900 foot max depth (Depth capacity is dependent on water salinity, bottom type, and other water conditions.) Fishfinder 160C Owner’s Manual... -
Page 25: Understanding Sonar
Understanding Sonar This section is intended to help the novice user gain some understanding of how the Fishfinder 160C operates and how it can help improve fishing productivity. To understand what the unit is displaying, it is important to have a general knowledge of how the unit works and how it determines what to display. -
Page 26: Transducer Coverage
The bottom area covered by the transmitted sound waves is determined by the beam width of the transducer, and the water depth. The Fishfinder 160C can transmit either a Narrow or Wide beam. The Narrow beam provides crisp bottom and structure detail, but the coverage area is limited. -
Page 27: Whiteline
Whiteline The Fishfinder 160C can help you to determine if the bottom is hard or soft. When the sonar soundwaves are reflected back by the bottom, a hard bottom returns a stronger signal than a soft bottom. A thin whiteline indicates a softer bottom while a thick whiteline indicates a harder bottom. -
Page 28: Limited Warranty
Garmin dealer for repairs. The Fishfinder 160C is fastened shut with screws. Any attempt to open the case to change or modify the unit in any way will void your warranty and may result in permanent damage to the equipment. -
Page 29: Software License Agreement
Product Registration link on our Home page. Use this area to record the serial number (8-digit number located on the back of the box) in case your Fishfinder 160C is lost, stolen, or needs service. Be sure to keep your original sales receipt in a safe place or attach a photocopy inside the manual. -
Page 30: Index
Language 18 Bottom Shape and Type 11 Light 19 Limited Warranty 24 Calibrate Speed 17 Caring for the Fishfinder 160C 9 MENU key 10 Change a Setup Menu item 13 Mounting the transducer 5 Cleaning the Case 9 Mounting on a trolling motor 6... - Page 32 © Copyright 2005 Garmin Ltd. or its subsidiaries Garmin International, Inc. 1200 East 151 Street, Olathe, Kansas 66062, U.S.A. Garmin (Europe) Ltd. Unit 5, The Quadrangle, Abbey Park Industrial Estate, Romsey, SO51 9DL, U.K. Garmin Corporation No. 68, Jangshu 2 Road, Shijr, Taipei County, Taiwan www.garmin.com...
Need help?
Do you have a question about the Fishfinder 160C and is the answer not in the manual?
Questions and answers