Table of Contents
Advertisement
Quick Links
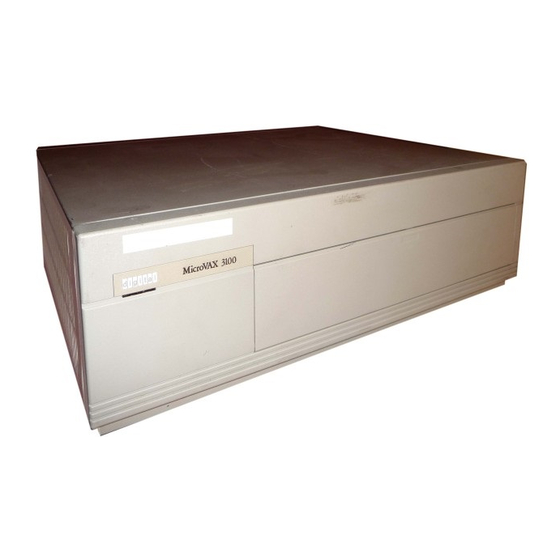
MicroVAX 3100
Model 85/95/96
Installation Information
Order Number: EK–A0716–IN. C01
DATE 1995
This manual describes how to install and test the MicroVAX 3100
Model 85, Model 95, and Model 96.
Revision Information:
Digital Equipment Corporation
Maynard, Massachusetts
This manual supersedes
EK–A0716–IN. B01
Advertisement
Table of Contents

Related Manuals for Digital Equipment MicroVAX 3100 Model 85


Summary of Contents for Digital Equipment MicroVAX 3100 Model 85
- Page 1 Model 85/95/96 Installation Information Order Number: EK–A0716–IN. C01 DATE 1995 This manual describes how to install and test the MicroVAX 3100 Model 85, Model 95, and Model 96. Revision Information: This manual supersedes EK–A0716–IN. B01 Digital Equipment Corporation Maynard, Massachusetts...
- Page 2 DATE 1995 Digital Equipment Corporation makes no representations that the use of its products in the manner described in this publication will not infringe on existing or future patent rights, nor do the descriptions contained in this publication imply the granting of licenses to make, use, or sell equipment or software in accordance with the description.
-
Page 3: Table Of Contents
Contents Preface ..........1 Installation Procedure Step 1: Choosing a Suitable Location . -
Page 5: Preface
Model 85/95/96. It is written for both experienced and inexperienced users. Structure of This Manual The procedure for installing the MicroVAX 3100 Model 85/95/96 is presented in only one chapter. Each section in the chapter represents a major step in the procedure and contains detailed instructions to follow. - Page 6 Conventions The following conventions are used in this manual: Convention Description MONOSPACE type Text displayed on the screen is shown in monospace type. italic type Italic type emphasizes important information and indicates the complete titles of manuals. Note A note contains information that is of special importance to the user.
-
Page 7: Installation Procedure
Installation Procedure This chapter shows you, step by step, how to install the MicroVAX 3100 Model 85/95/96. Step 1: Choosing a Suitable Location Follow these guidelines when you choose where to place the system unit: • Place the system unit where the room temperature is between 10°C and 40°C (50°F and 104°F) and the humidity is between 10% and 90%. -
Page 8: Step 2: Unpacking The System And Identifying The Parts
Step 2: Unpacking the System and Identifying the Parts 1. Unpack the system. 2. Make sure that you have all the parts listed on the packing slip. The following loose-piece accessory kit is shipped with all basic systems. If you do not have all the parts listed, contact your Digital Sales representative. -
Page 9: Step 3: Connecting The Console Terminal
Step 3: Connecting the Console Terminal 1. Connect one end of the terminal cable to modified modular jack (MMJ) port 3. 2. Connect the other end of the terminal cable to a DEC423 (MMJ) communications port on the console terminal. If your terminal has only RS232 ports, use the RS232 to DEC423 adapter (H8575-A) to provide an MMJ port on the terminal. -
Page 10: Step 4: Connecting The Thinwire Terminator
Step 4: Connecting the ThinWire Terminator 1. Assemble the T-connector and the two terminators to form a ThinWire terminator. 2. Connect the ThinWire terminator to the system unit. O P A O MLO-012031 T-Connector Terminator 1–4 Installation Procedure... -
Page 11: Step 5: Connecting The Standard Ethernet Loopback Connector
Step 5: Connecting the Standard Ethernet Loopback Connector Connect the standard Ethernet loopback connector (12-22196-01) to the system unit. O P A O MLO-012032 Standard Ethernet Loopback Connector (12-22196-01) Installation Procedure 1–5... -
Page 12: Step 6: Connecting The Power Cord
Step 6: Connecting the Power Cord 1. Ensure that the on/off switch is in the off (O) position. 2. Connect the power cord to the system unit. 3. Connect the other end of the power cord to an isolated, grounded circuit. O P A O MLO-012033 On/Off Switch... -
Page 13: Step 7: Turning On The Console Terminal And System Unit
1. Turn on the console terminal. Wait until it completes its power-up test. (See the terminal documentation for more information.) 2. Check the terminal settings. See the MicroVAX 3100 Model 85/95/96 Operator Information manual for the list of correct settings. -
Page 14: Step 8: Checking The Power-Up Test Results
3. Make sure that all the connections you made in step 3, step 4, step 5, and step 6 are correct. 4. Set the on/off switch to the on ( | ) position. 5. If an error report is still displayed, see the MicroVAX 3100 Model 85/95/96 Troubleshooting and Diagnostic Information manual. 1–8 Installation Procedure... -
Page 15: Unsuccessful Power-Up Test Screen With An Error Report
Figure 1–2 Unsuccessful Power-Up Test Screen with an Error Report KA55-A or KA51-A or KA56-A V2.6, VMB 2.15 Performing normal system tests. 74..73..72..71..70..69..68..67..66..65..64..63..62..61..60..59.. ? Test_Subtest_31_05 Loop_Subtest=00 Err_Type=FF DE_Memory_Setup_CSRs.lis Vec=0000 Prev_Errs=0000 P1=00000000 P2=01000000 P3=00000001 P4=00010000 P5=2101801C P6=00000007 P7=80000003 P8=0000CF4A P9=00000001 P10=2006B8D8 r0=00000002 r1=21018000 r2=00000008 r3=81000000 r4=00000001 r5=01000000 r6=2006EB77 r7=21018048 r8=00000000 r9=20140758 r10=00000000 r11=FFFFFFFF dser=0000 cesr=00000000 intmsk=00 icsr=01 pcsts=FA00 pcadr=FFFFFFF8 pcctl=FC13... -
Page 16: Step 9: Connecting The System To A Network
Note Step 9 and step 10 are optional. However, step 11 is mandatory. Step 9: Connecting the System to a Network If you want to connect the system to a network, see the MicroVAX 3100 Model 85/95/96 Operator Information manual. Step 10: Connecting External Options to the System If you want to connect external options to the system, see the MicroVAX 3100 Model 85/95/96 Operator Information manual. - Page 17 Fax: (809) 749-8377 3 Digital Plaza, 1st Street Suite 200 Metro Office Park San Juan, Puerto Rico 00920 Canada Phone: 800-267-6215 Digital Equipment of Canada Ltd. Fax: (613) 592-1946 100 Herzberg Road Kanata, Ontario, Canada K2K 2A6 Attn: DECdirect Sales International —————...
- Page 19 Reader’s Comments MicroVAX 3100 Model 85/95/96 Installation Information EK–A0716–IN. C01 Your comments and suggestions help us improve the quality of our publications. Thank you for your assistance. I rate this manual’s: Excellent Good Fair Poor Accuracy (product works as manual says) Completeness (enough information) Clarity (easy to understand) Organization (structure of subject matter)
- Page 20 If Mailed in the United States BUSINESS REPLY MAIL FIRST CLASS PERMIT NO. 33 MAYNARD MASS. POSTAGE WILL BE PAID BY ADDRESSEE DIGITAL EQUIPMENT CORPORATION Shared Engineering Services MLO5–5/E76 2 THOMPSON STREET MAYNARD, MA 01754-1716 Do Not Tear – Fold Here...
Need help?
Do you have a question about the MicroVAX 3100 Model 85 and is the answer not in the manual?
Questions and answers