Corsair Carbide Series Installation Manual
Hide thumbs
Also See for Carbide Series:
- User manual ,
- Manual (76 pages) ,
- Installation manual (64 pages)
Table of Contents
Advertisement
Available languages
Available languages
CARBIDE SERIES
®
47100 Bayside Parkway • Fremont • California • 94538 • USA | corsair.com
© 2015-2019 CORSAIR MEMORY, Inc.
INSTALLATION GUIDE n GUIDE D'INSTALLATION
All rights reserved. CORSAIR, the sails logo, and Carbide Series are registered
trademarks of CORSAIR in the United States and/or other countries. All other
INSTALLATIONSANLEITUNG n MANUALE DI INSTALLAZIONE
trademarks are the property of their respective owners. Product may vary
slightly from those pictured.
GUÍA DE INSTALACIÓN n РУКОВОДСТВО ПО УСТАНОВКЕ
GUIA DE INSTALAÇÃO n インストールガイド
49-001257 AB
Advertisement
Chapters
Table of Contents

Related Manuals for Corsair Carbide Series


Summary of Contents for Corsair Carbide Series
- Page 1 CARBIDE SERIES ® 47100 Bayside Parkway • Fremont • California • 94538 • USA | corsair.com © 2015-2019 CORSAIR MEMORY, Inc. INSTALLATION GUIDE n GUIDE D’INSTALLATION All rights reserved. CORSAIR, the sails logo, and Carbide Series are registered trademarks of CORSAIR in the United States and/or other countries. All other INSTALLATIONSANLEITUNG n MANUALE DI INSTALLAZIONE trademarks are the property of their respective owners.
- Page 2 English ......................1-10 Français ....................11-20 Deutsch ..................... 21-30 Italiano ...................... 31-40 Español ..................... 41-50 Россию ......................51-60 Português ....................61-70 日本語 ......................71-80...
-
Page 3: Table Of Contents
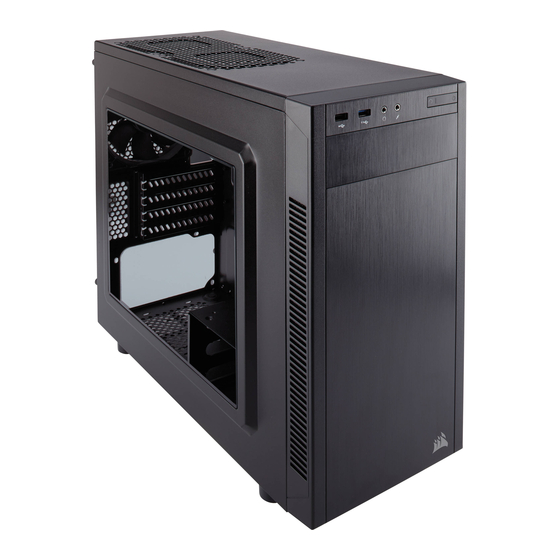
Thank you for purchasing the Carbide Series 88R Micro-ATX Mid-Tower PC Case. The Carbide Series 88R Micro ATX Mid Tower Case is sleek and refined. With a minimalist front panel, blacked out interior, and large side panel window, you might find yourself spending as much time staring at your next PC as you do using it. -
Page 4: Accessory Kit Contents
CARBIDE SERIES ® Accessory kit contents Case features I/O Panel (x1 USB 3.0, x1 USB 2.0, Headphone/ Mic, and Power/ Reset) Removable front fascia x1 Tool-free removable ODD cover Windowed side panel Solid side panel x4 HDD rails Cable ties... -
Page 5: Removing The Side Panels
CARBIDE SERIES ® 1. Removing the side panels 3. Installing PCI-e/PCI card(s) Simply remove the Remove slot cover, install thumbscrews then slide the expansion card, and secure side panels back and out. with screw(s) as necessary. Note: CORSAIR recommends removing both side panels and... -
Page 6: Removing The Front Fascia
CARBIDE SERIES ® 5. Removing the front fascia 7. Installing HDDs To remove the front fascia Step 1 – Clamp the side rails (front panel), grasp the tab to the drive, with prongs and located at the bottom fascia drive connectors facing the and pull outward. -
Page 7: Powering The Case Fans
3. Who should I contact if I received my case damaged or one of the fans is no longer working? Please go to support.corsair.com and request an RMA so that we can replace the damaged part(s). 10. Installing the front I/O connectors 4. - Page 8 Nous vous remercions d'avoir acheté le boîtier d'ordinateur mi-tour Carbide Series 88R Micro-ATX. Le boîtier d'ordinateur mi-tour Carbide Series 88R Micro-ATX est élégant et fin. Avec sa face avant au style minimaliste, son intérieur noir et son panneau latéral à grande fenêtre, vous risquerez d'admirer autant si ce n'est plus votre nouveau PC que ce que vous n'allez l'utiliser.
-
Page 9: Contenu Du Kit D'accessoires
CARBIDE SERIES ® Contenu du kit d’accessoires Attributs du boîtier Panneau E/S (x1 USB 3.0, x1 USB 2.0, Casque/Mic, et Alimentation/Réinitialisation) Façade amovible x1 caches pour lecteurs optiques amovibles sans outils Panneau latéral à fenêtre Panneau latéral normal x4 rails HDD attache-câbles... -
Page 10: Retrait Des Panneaux Latéraux
à l'aide des vis. Remarque : CORSAIR recommande de retirer les deux panneaux latéraux et de les mettre de côté lors de la construction de votre système, afi n d’éviter tout endommagement accidentel. -
Page 11: Retrait De La Façade
CARBIDE SERIES ® 5. Retrait de la façade 7. Installation HDDs Pour retirer la façade Étape 1 – Enclenchez les rails (panneau avant), au disque, avec les broches tirez sur la languette située et les connecteurs du disque en bas de la façade. -
Page 12: Alimentation Des Ventilateurs Du Boîtier
120mm USB 3.0 POWER SW HDD LED POWER LED - Arrière 120mm (inclus) HD AUDIO RESET SW POWER LED + Côté Milieu Pour en savoir plus sur ce boîtier, veuillez vous rendre sur corsair.com à la page des produits. - Page 13 Häufig gestellte Fragen ............................30 Herzlichen Glückwunsch! 440mm Vielen Dank, dass Sie sich für ein Micro-ATX Mid-Tower-PC-Gehäuse der Carbide Series 88R entschieden haben. Das Micro-ATX Mid-Tower-PC-Gehäuse der Carbide Series 88R zeichnet sich durch raffinierte Eleganz aus. Möglicherweise verbringen Sie genauso viel Zeit damit, Ihren nächsten PC mit seiner minimalistischen...
-
Page 14: Inhalt Zubehörkit
CARBIDE SERIES ® Inhalt Zubehörkit Merkmale Gehäuse I/O-Abdeckung (1 USB 3.0, 1 USB 2.0-Anschlüsse, Kopfhörer/Mikrofon und Stromschalter/Reset) Abnehmbare Frontplatte 1 werkzeuglos abnehmbare ODD-Abdeckungen Seitenabdeckung mit Fenster Stabile Seitenabdeckung 4 HDD-Schienen Kabelbinder MBD/HDD- SSD/ODD-Schrauben 3-poliger 120 mm Lüfter Schrauben Staubfilter des unteren Netzteils Schiene für PCI-e-Schraube... -
Page 15: Entfernen Der
CARBIDE SERIES ® 1. Entfernen der Seitenplatten 3. Installation der PCI-e-/PCI-Karte(n) Entfernen Sie einfach die Nehmen Sie die Rändelschrauben und Steckplattenabdeckung schieben Sie die Seitenplatte ab, installieren Sie eine nach hinten heraus. Erweiterungskarte und sichern Sie sie gegebenenfalls mit Hinweis: Sie sollten beim Bau Schrauben. -
Page 16: Entfernen Der Frontplatte
CARBIDE SERIES ® 5. Entfernen der Frontplatte 7. Installation eines HDDs Ziehen Sie zum Entfernen Schritt 1 – Klemmen Sie der Frontplatte an ihrer die Seitenschienen an Entriegelungstaste an der das Laufwerk. Zinken und Unterseite und ziehen Sie Laufwerksanschlüsse weisen sie heraus. -
Page 17: Antrieb Der Gehäuselüfter
3. An wen kann ich mich wenden, wenn ich ein beschädigtes Gehäuse erhalten habe oder einer der Lüfter nicht mehr funktioniert? 10. Installation der vorderen I/O-Anschlüsse Bitte besuchen Sie support.corsair.com und fordern Sie eine RMA an, damit wir das/die beschädigte(n) Teil(e) ersetzen können. Die Position der Frontplatten-Header 4. - Page 18 440mm Grazie per aver acquistato il case mid-tower per PC Carbide Series 88R Micro-ATX. Il case mid-tower Carbide Series 88R Micro ATX è elegante e raffinato. Con il pannello anteriore dal design minimalista, i componenti interni nascosti e la grande finestra sul pannello laterale, il tuo PC avrà un aspetto così...
-
Page 19: Contenuto Kit Accessori
CARBIDE SERIES ® Contenuto kit accessori Proprietà del prodotto Pannello I/O (x1 USB 3.0, x1 USB 2.0, Cuffia/Microfono e Alimentazione/Reset) Fascia frontale rimovibile x1 copertura per unità ODD rimovibile Pannello laterale con finestra Pannello laterale opaco x4 guide per unità HDD... -
Page 20: Rimozione Dei Pannelli Laterali
Nota: CORSAIR consiglia di rimuovere e mettere da parte entrambi i pannelli per evitare danni accidentali durante l’assemblaggio del sistema. -
Page 21: Rimozione Del Frontale
CARBIDE SERIES ® 5. Rimozione del frontale 7. Installazione dei dischi rigidi Per rimuovere il frontale Passaggio 1 - Fissare le guide (pannello anteriore), laterali all’unità, in modo afferrare la linguetta che i supporti e i connettori posizionata in basso dell’unità... -
Page 22: Alimentazione Delle Ventole Del Case
3. Chi è necessario contattare se si riceve un case danneggiato oppure se una delle ventole non funziona più? 10. Installazione dei connettori di I/O frontali Visitare il sito support.corsair.com e richiedere un RMA in modo da permetterci di sostituire le parti danneggiate. Per i pin in uscita e la posizione dei connettori 4. - Page 23 Le agradecemos que haya adquirido el chasis semitorre para PC Carbide Series 88R Micro ATX. El chasis semitorre Carbide Series 88R Micro ATX es elegante y refinado. Con un panel frontal minimalista, un interior oscurecido y una gran ventana en el panel lateral, pasará...
-
Page 24: Contenido De Los Accesorios
CARBIDE SERIES ® Contenido de los accesorios Características del chasis Panel de I/O (x1 USB 3.0, x1 USB 2.0, auricular/micrófono, y alimentación/reinicio) Fascia frontal desmontable 1 cubiertas desmontables para ODD sin necesidad de herramientas Panel lateral con ventana Panel lateral sólido x4 Raíles HDD... -
Page 25: Cómo Remover Los Paneles Laterales
CARBIDE SERIES ® 1. Cómo remover los paneles laterales 3. Cómo instalar la(s) tarjeta(s) PCI-e/PCI Simplemente retire los Retire la cubierta de las tornillos mariposa y deslice los ranuras, instale una tarjeta de paneles laterales hacia atrás y expansión y fíjela con tornillos, hacia afuera. -
Page 26: Cómo Remover La Fascia Frontal
CARBIDE SERIES ® 5. Cómo remover la fascia frontal 7. Cómo instalar HDDs Para remover la fascia frontal Paso 1 – Fije los raíles laterales (panel frontal), tome la a la unidad, con las clavijas y pestaña localizada al fondo... -
Page 27: Cómo Alimentar Los Ventiladores Del Chasis
3. ¿Con quién me debo poner en contacto si recibo mi chasis dañado o uno de los ventiladores no funciona? Por favor, diríjase a support.corsair.com y pida un RMA para que podamos 10. Cómo instalar los conectores frontales de I/O reemplazar las piezas dañadas. - Page 28 Часто задаваемые вопросы ............................60 Поздравляем! 440mm Благодарим Вас за приобретение корпуса ПК Carbide Series 88R Micro-ATX формата Mid-Tower. Корпус Carbide Series 88R Micro-ATX формата Mid-Tower элегантный и изящный. Изящная передняя панель без излишеств, тонированная внутренняя часть и боковая панель с большим окном — вы можете часами любоваться...
-
Page 29: Содержимое Комплекта Аксессуаров
CARBIDE SERIES ® Содержимое комплекта аксессуаров Особенности корпуса Панель ввода-вывода (1 разъема USB 3.0, 1 разъема USB 3.0 наушники/микрофон, питание/сброс) Съемная передняя панель 1 крышки оптических дисков, снимаемых без использования инструментов Боковая панель с декоративным окном твердый боковой панели 4 Направляющие жестких дисков... -
Page 30: Снятие Боковых Панелей
CARBIDE SERIES ® 1. Снятие боковых панелей 3. Установка плат PCI-e/PCI Просто отверните барашковые Удалите заглушку разъема, установите винты, сдвиньте боковые панели и плату расширения и закрепите ее снимите их. винтами при необходимости. CORSAIR 2. Установка материнской платы 4. Установка источника питания... -
Page 31: Снятие Передней Панели
CARBIDE SERIES ® 5. Снятие передней панели 7. Установка HDDs Для снятия передней панели Действие 1 – прикрепите возьмитесь за выступ в нижней ее боковые направляющие части и потяните панель наружу. к диску по направлению в разъемам подключения и контактным штырькам в том же... -
Page 32: Питание Вентиляторов Корпуса
Нет, она важна только для светодиодных разъемов. 3. К кому необходимо обратиться, если корпус получен поврежденным или один из вентиляторов больше не работает? Перейдите на сайт support.corsair.com и запросите разрешение на возврат 10. Установка передних разъемов ввода/вывода материалов (RMA), чтобы мы смогли заменить поврежденные части. -
Page 33: Especificações De Caso
440mm Obrigado por comprar o gabinete de PC Mid-Tower Carbide Series 88R Micro-ATX. O gabinete Mid-Tower Carbide Series 88R Micro ATX é elegante e refinado. Com um painel frontal minimalista, interior escuro e janela de painel lateral grande, você poderá se encontrar passando tanto tempo apreciando quanto usando o seu novo PC. -
Page 34: Conteúdo Do Kit De Acessórios
CARBIDE SERIES ® Conteúdo do kit de acessórios Características de caso I / O Painel (x1 USB 3.0, USB 2.0 x1, fone de ouvido/microfone, e Potência/Reset) Painel frontal removível x1 Tampa do ODD removível sem ferramentas Painel lateral de janela Painel lateral sólido... -
Page 35: Remoção Dos Painéis Laterais
CARBIDE SERIES ® 1. Remoção dos painéis laterais 3. Instalação de placa(s) PCI-e/PCI Basta remover os parafusos Remova a tampa da ranhura, em seguida, deslize os instale a placa de expansão painéis laterais para trás e e prenda com parafuso(s) para fora. -
Page 36: Remoção Do Painel Frontal
CARBIDE SERIES ® 5. Remoção do painel frontal 7. Instalando HDDs Para remover o painel frontal Etapa 1 – Prenda os trilhos (painel frontal), segure a guia laterais à unidade com localizada na fáscia inferior e presas e conectores da puxe para fora. -
Page 37: Ligando Os Fãs De Caso
Topo x2 120mm USB 3.0 Traseiro 120mm (incluído) USB 2.0 POWER SW HDD LED POWER LED – Inferior HD AUDIO RESET SW Lado POWER LED + Meio Para saber mais sobre este caso visite a página do produto no corsair.com. - Page 38 HDDs の取り付け .................................78 SSDs の取り付け................................78 ケースファンへの電力供給 ............................79 フロントI/Oコネクタの取り付け..........................79 よくある質問 ..................................80 はじめに! 440mm Carbide Series 88R マイクロ ATX ミドルタワー PC ケースをご購入いただき、ありがとうございます。 Carbide Series 88R マイクロ ATX ミドルタワー PC ケース では、スマートで洗練されたデザインが採用されています。 ミニマリストのフロントパネル、ブラック塗装が施された内 部、そしてサイドパネルに設置された大型ウインドウによ り、PC を組み立てる楽しさも実感できる製品に仕上がってい ます。SSD と USB 3.0 に完全対応しており、設置スペースを 心配することなく高速ドライブを設置したり、最新の周辺機器 を使用したりすることができます。 198mm...
-
Page 39: アクセサリーキットの内容
CARBIDE SERIES ® アクセサリーキットの内容 ケースの特徴 I/O パネル( x1 USB 3.0, x1 USB 2.0, ヘッドフォン/マイク、電源/リセット) 取り外し可能フロントフェイシア 工具不要の取り外し可能 ODD カバーx1 窓付きのサイドパネル ソリッドサイドパネル HDD レール x4 MBD/HDD ねじ SSD/ODD ねじ ケーブルタイ 3 ピン 120mm ファン 底部の PSU ダストフィルタ PCI-e ねじレール 3.5 インチハードディスクケージ x4 上部... -
Page 40: サイドパネルの取り外し
CARBIDE SERIES ® 1. サイドパネルの取り外し 3. PCI-e/PCI カードの取り付け 蝶ねじを取り外してから、サ スロットカバーを取り外し、拡 イドパネルを後ろにスライド 張カードを取り付けます。必要 させて、取り外します。 に応じてネジで固定します。 注記:CORSAIR では、システム を構築する際、事故による破損を 避けるために、両サイドのパネル を取り外して、それらを脇に置く よう推奨します。 両サイドのパネ ルは相互に交換可能で、乱雑さを 低減するために除去する必要があ ります。 2. マザーボードの取り付け 4. PSU(電源ユニット)の取り付け 最初に、マザーボードのI/O ケースの底部に PSU を配置 シールドを取り付けます( してから、ケースの穴を揃え ガイダンスは、マザーボー て、PSUを PSU に同梱のねじで ドのマニュアルを参照して 88R STEP1 固定します。... -
Page 41: フロントフェイシアの取り外し
CARBIDE SERIES ® 5. フロントフェイシアの取り外し 7. HDDs の取り付け ステップ 1 – 突起とドライブコ フロントフェイシア(フロント パネル)を取り外すには、底部 ネクタが同じ方向を向いた状態 のフェイシアにあるタブを掴 で、サイドレールをドライブに み、外側に引きます。 固定します。 ステップ 1 ステップ 2 – マザーボードの 後ろから HDD ケージに向かっ て、図のようにドライブとレ ールアセンブリをスライドさ せます。 88R Step 8 ステップ 2 88R STEP7 6. ODD の取り付け(光学ディスクドライブ)... -
Page 42: ケースファンへの電力供給
CARBIDE SERIES ® 9. ケースファンへの電力供給 よくある質問 1. I/Oパネルの取り外し方を教えてください。 マザーボード上の 3 または4ピン 必要な場合、フロントフェイシアを取り外して(手順 5)から、各サイドのパネル のファンヘッダーの位置を確認し の 2 本のねじを緩めることにより、I/Oパネルを取り外すことができます。 た後(ファンのヘッダーの場所は マザーボードのマニュアルを確認 してください)、同梱のファンケ ーブルを差し込みます。 2. I/O パネルの電源とリセットヘッダーで極性は重要ですか? いいえ。LED のヘッダーでのみ重要です。 3. 破損したケースを受け取ったか、またはファンの一つが動作しない場合、 誰に連絡すべきですか? support.corsair.com にアクセスして、当社が破損した部品を交換できるよ 10. フロントI/Oコネクタの取り付け う、RMA を依頼します。 4. どこにファンを搭載できますか? フロントパネルのヘッダーの場所 とピン配列は、マザーボードのマ ファンマウントの位置... - Page 43 CORSAIR MEMORY, BV Beitrag zum Schutz unserer Umwelt. In Deutschland gelten verpakking duidt erop dat het product onderworpen is CORSAIR MEMORY, Inc. declara que este equipo cumple Wormerweg 8, 1311 XB, Almere, Netherlands oben genannte Entsorgungsregeln, laut Batterieverordnung, aan deze richtlijnen. Door te recycleren, hergebruiken van con la directiva 2011/65/EU.
- Page 44 NOT OM MILJÖSKYDD KÖRNYEZETVÉDELMI TUDNIVALÓK INFORMASJON OM BESKYTTELSE AV MILJØET Efter implementeringen av EU direktiv 2012/19/EU i den Az európai irányelvek 2012/19/EU ajánlása szerint, a Etter implementering av EU-direktiv 2012/19/EU i det nationella lagstiftningen, gäller följande: megjelölt időponttól kezdve, minden EU-s tagállamban nasjonale lovverk, er følgende gjort gjeldende: >...
Need help?
Do you have a question about the Carbide Series and is the answer not in the manual?
Questions and answers