Table of Contents
Advertisement
Advertisement
Table of Contents

Related Manuals for Casada ALPHASONIC


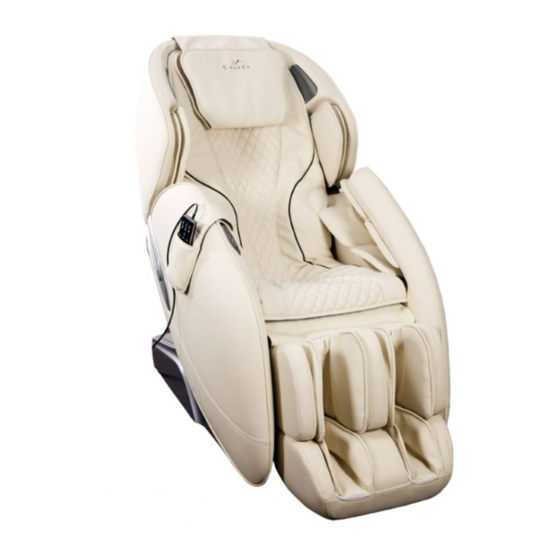
Summary of Contents for Casada ALPHASONIC
- Page 1 Body&Mind syncSystem brainwave stimulation system ALPHASONIC USER MANUAL...
-
Page 2: Table Of Contents
Floor Protection..........................9 < timetorelax Moving the Massage Chair .........................9 Since the company was founded in the year 2000, the name CASADA has stood for high grade products Storage & Maintenance ...........................9 in the area of wellness and fitness. Remote Control .............................10 Today, CASADA –... -
Page 3: Safety & Maintenance Instructions
Safety & Maintenance Instructions Safety & Maintenance Instructions WARNING: • In case of malfunction, disconnect immediately from power, cease any operation of the chair, and contact the manufacturer. This Massage Chair is an electrical appliance, and careful considerations must be fol- lowed when using this device. -
Page 4: Massage Chair Usage Precautions
Massage Chair Usage Precautions Equipment IF YOU ARE UNSURE WHETHER YOU SHOULD USE THE MASSAGE CHAIR, CONSULT YOUR DOCTOR: 1. Head cushion • Massages during pregnancy or in case of one or several of the following complaints in the massaged 2. -
Page 5: Functional Specifications
Functional Specifications Functional Specifications • Designed with a set of vertically movable, 4-roller system or "massage hands" or "hands" FLOOR PROTECTION • Designed with emulated massage methods of Shiatsu, kneading, tapping/flapping/knocking and simul- If your massage chair is to be placed on a hardwood taneous kneading and tapping or other damageable floor surface, we recommend the use of an area rug or other pad under the chair's... -
Page 6: Remote Control
Remote control Installation 1 – SWITCH POWER SUPPLY ON Display ON/OFF Adjust Shoulder Diagram During Braintronics mode: of plug in Diagram of the switch position of power supply Adjust Volume Zero Gravity To begin, attach the power cable You will note the power is indicated by symbols “l” and “O”. “I” is the Po- Movement of massage arms wer ON setting and “O”... -
Page 7: Installation
Installation Installation Shoulder adjust High shoulder position Suitable shoulder position 3 – CHOOSE MASSAGE FUNCTION TO MASSAGE BACK STRETCH Low shoulder position BUTTON DESCRIPTION DISPLAY Memory function massage Press button Upper body/M1 or Lower body/M2 for 3 sec- Fixed position (fixed point) massage back and forth onds, then enter into memory massage function M1 or M2, it will revert to the previous memory massage mode. - Page 8 Installation Installation 4 – STOP MASSAGE / MEMORY FUNCTION c) As shown in Chart 3, please close the R-pin on the other side of the foot rest. d) Finished Installation. (Chart 4) 1. Press the Power button on the Remote Control at any time during the massage to stop all massage functions.
-
Page 9: Specials
The aim of Shiatsu is to simulate indi- Your Alphasonic comes with an adjustable two-part head cushion for your Individual comfort. You vidual parts of the body and to mobilize the muscles. - Page 10 Specials Specials ARTHROSIS TRACTION RECLINING POSITION Arthrosis Traction is a gentle stretching and pressure. This stimulates the cartilages, so that liquid The adjustability of the backrest and footrest contributes to personal well-being of the body transport is stimulated, nutrients are better received and Arthrosis symptoms can be alleviated. position.
-
Page 11: Product Specifications
Casada USA Elite Massage Chairs Evergreen, Colorado USA (800) 592-0548 www.elitemassagechairs.com Copyright Images and text are subject to the copyright of CASADA International GmbH and may not be used without express consent. Copyright © 2016 CASADA International GmbH. All rights reserved. -
Page 12: Unboxing & Assembly
Unboxing & Assembly Unboxing & Assembly 3. Remove top protection board (use caution for any sharp edges), packing materials, and accessories bag from chair. Cut packaging tape Remove Lay cardboard flet Styrofoam in order to roll from each chair out of box side and top board The chair can now be removed from the base box via two methods. - Page 13 Unboxing & Assembly Unboxing & Assembly FOOTREST ASSEMBLY For orientation, this next step referenc- es the left side of the footrest. For the 1. Remove cotter pins, foam, and twist tie used for secure shipping. purposes of these instructions, the left side is as you stand in front of the chair, or where the right leg would be posi- Remove cotter pins...
- Page 14 Unboxing & Assembly Unboxing & Assembly 4. The opposite side footrest mount requires 6. Insert the cotter pin as on the opposite side. At this point the foot- a mostly blind install – as the connection rest installation is completed. Indent may be hidden from view by the footrest as you position it for install.
Need help?
Do you have a question about the ALPHASONIC and is the answer not in the manual?
Questions and answers