Table of Contents
Advertisement
Quick Links
Advertisement
Table of Contents

Related Manuals for Fiat 500 L 2019


Summary of Contents for Fiat 500 L 2019
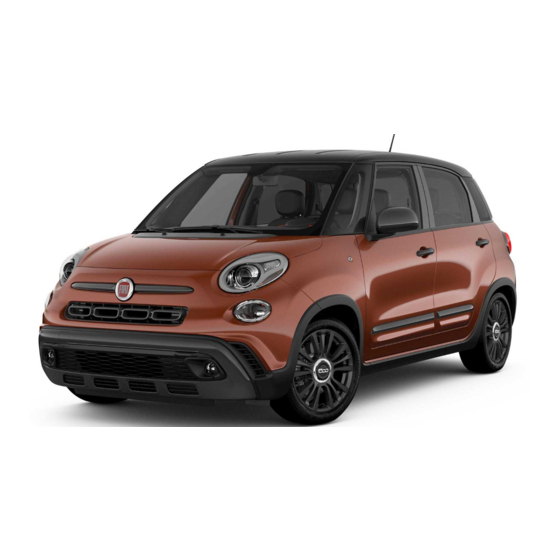
- Page 1 2 0 1 9 F I AT 50 0L US ER GU ID E ®...
- Page 2 The driver’s primary responsibility is the safe operation of the vehicle. Driving while distracted can result in loss of vehicle control, resulting in a collision and personal injury. FCA US LLC strongly recommends that the driver use extreme caution when using any device or feature that may take their attention off the road. Use of any electrical devices, such as cellular telephones, computers, portable radios, vehicle navigation or other devices, by the driver while the vehicle is moving is dangerous and could lead to a serious collision.
-
Page 3: How To Find Your Owner's Manual Online
Congratulations on selecting your new FCA US This User Guide has been prepared to help you For more detailed descriptions of the topics LLC vehicle. Be assured that it represents preci- quickly become acquainted with the important discussed in this User Guide, as well as informa- sion workmanship, distinctive styling, and high features of your vehicle. -
Page 4: How To Use This Manual How To Use This Manual
To identify the chapter with the information HOW TO USE THIS MANUAL WARNINGS AND CAUTIONS needed you can consult the index at the end of this User Guide. Essential Information While reading this User Guide you will find a Chapters can be rapidly identified with dedicated series of WARNINGS to be followed to prevent Each time direction instructions (left/right or graphic tabs, at the side of each odd page. -
Page 5: Graphical Table Of Contents
GRAPHICAL TABLE OF CONTENTS GETTING TO KNOW YOUR VEHICLE GETTING TO KNOW YOUR INSTRUMENT PANEL SAFETY STARTING AND OPERATING IN CASE OF EMERGENCY SERVICING AND MAINTENANCE TECHNICAL SPECIFICATIONS MULTIMEDIA CUSTOMER ASSISTANCE INDEX... -
Page 6: Table Of Contents
Rear Head Restraint Removal ... . 17 WELCOME FROM FCA US LLC UNIVERSAL GARAGE DOOR OPENER (HOMELINK) — IF EQUIPPED ... . 32 STEERING WHEEL . - Page 7 Electronic Stability Control (ESC) ..48 Towing This Vehicle Behind Another Vehicle ..90 ENGINE COMPARTMENT — 1.4L TURBO ..112 RAISING THE VEHICLE ....113 AUXILIARY DRIVING SYSTEMS .
- Page 8 Using Do Not Disturb ....149 UCONNECT SETTINGS ....142 CUSTOMER ASSISTANCE Incoming Text Messages .
-
Page 9: Instrument Panel
INSTRUMENT PANEL Instrument Panel 1 — Multifunction Lever 6 — Windshield Wiper Lever 2 — Instrument Cluster Display Control Buttons 7 — Ignition Switch (Behind Steering Wheel) 3 — Steering Wheel 8 — Uconnect System 4 — Instrument Cluster 9 — Climate Controls 5 —... -
Page 10: Interior
INTERIOR Interior 1 — Seats 3 — Upper Glove Compartment 2 — Gear Selector 4 — Lower Glove Compartment... -
Page 11: Keys
To Unlock The Doors And Liftgate KEYS Push and release the unlock button on the key fob once to unlock the driver’ s door or twice, Key With Remote Control within five seconds, to unlock all doors, and the The Remote Keyless Entry (RKE) key fob contains liftgate.The turn signal lights will flash to acknowl- an integrated key. -
Page 12: Ignition Switch
General Information IGNITION SWITCH The following regulatory statement applies to all radio frequency (RF) devices equipped in this Ignition Switch vehicle: The ignition switch can be turned to three This device complies with Part 15 of the FCC different positions: Rules and with Industry Canada license-exempt •... -
Page 13: Key-In-Ignition Reminder
Key-In-Ignition Reminder 3. The horn will sound and the vehicle security WARNING! light in the instrument cluster will switch on the engine OFF, remove the key fob from Opening the driver's door when the key is in the for approximately three seconds. This shows the vehicle and lock your vehicle. -
Page 14: Child-Protection Door Lock System (Rear Doors)
Child-Protection Door Lock System To Engage Or Disengage The Child-Protection SEATS Door Lock System (Rear Doors) 1. Open the rear door. To provide a safer environment for small children Seats are a part of the Occupant Restraint riding in the rear seats, the rear doors are System of the vehicle. - Page 15 Fold And Tumble Rear Seat 2. Fold the seatback forward. 3. Locate the seatback recline lever on the outboard side of the seat and lift upward on NOTE: the lever. • Prior to folding the rear seat, it may be neces- sary to reposition the front seats.
-
Page 16: Heated Seats - If Equipped
• Push the heated seat switch once to turn HEAD RESTRAINTS on the heated seat. • Push the heated seat switch a second time Head restraints are designed to reduce the risk of to turn off the heated seat. injury by restricting head movement in the event NOTE: of a rear impact. -
Page 17: Reactive Head Restraints - Front Seats
Reactive Head Restraints — Front Seats NOTE: Do not reposition the head restraint 180 degrees The front driver and passenger seats are to the incorrect position in an attempt to gain equipped with Reactive Head Restraints. In the additional clearance to the back of the head. event of a rear impact, the Reactive Head Re- straints will automatically extend forward, mini- WARNING! -
Page 18: Rear Head Restraint Adjustment
Rear Head Restraint Adjustment Front Head Restraint Removal The head restraints should only be removed by The rear seats are equipped with adjustable head qualified technicians, for service purposes only. If restraints, the outboard head restraints have two either of the head restraints require removal, see comfort positions, while the central head restraint an authorized dealer. -
Page 19: Rear Head Restraint Removal
Rear Head Restraint Removal To unlock the steering column, pull the control STEERING WHEEL handle down. To tilt the steering column, move To remove the outboard or center head re- the steering wheel upward or downward as Tilt/Telescoping Steering Column straints, raise it as far as it can go. -
Page 20: Daytime Running Lights - If Equipped
NOTE: NOTE: Flash-To-Pass The external lights can only be turned on with the When the headlights are turned on, the Daytime You can signal another vehicle with your head- ignition in the MAR (ACC/ON/RUN) position. Running Lights will be deactivated. lights by lightly pulling the multifunction lever toward you. -
Page 21: Front Fog Lights - If Equipped
Activation Through the Uconnect menu, under the “Greeting WIPERS AND WASHERS Lights” setting, the driver can choose between the Remove the key or turn the ignition to the STOP following activation times: 0, 30, 60, or 90 seconds. (OFF/LOCK) position, and pull the multifunction The windshield wiper/washer lever is located on To switch off the feature, select 0 seconds. - Page 22 Windshield Wiper Off Front Windshield Washer Operation This is the normal position of the wiper lever: O. Pull the windshield wiper/washer lever toward the steering wheel to activate the washers. The Intermittent Wiper System wipers will activate automatically for three cycles Intermittent Low Speed —...
-
Page 23: Rear Wiper/Washer Operation
Manual High Speed/Mist • In continuous mode, when the lever is in the (continuous) position. Push the lever upward from the off position.The Pushing the windshield wiper lever forward acti- wipers will operate at high speed to clear off road vates the rear window washer. -
Page 24: Automatic Climate Control Overview
Automatic Climate Control Overview Automatic Climate Controls... - Page 25 Automatic Climate Control Descriptions Icon Description A/C Button Push and release to change the current setting, the indicator illuminates when A/C is on. Performing this function again will cause the A/C operation to switch into manual mode and the A/C indicator will turn off. Recirculation Button Push and release this button to change the system between Recirculation mode and outside air mode.
- Page 26 Icon Description Passenger Temperature Knob Provides the passenger with independent temperature control. Rotate the knob clockwise for warmer temperature settings. Ro- tate the knob counterclockwise for cooler temperature settings. When the SYNC feature is active, the passenger’ s temperature will move with the driver’ s temperature. Acting on the passenger's temperature will cause the Sync feature turn off. Blower Control Knob Blower Control is used to regulate the amount of air forced through the climate system.
-
Page 27: Climate Control Functions
Icon Description Climate Control Power Button Push and release this button to turn the Climate Control on/off. Driver Temperature Knob Provides the driver with independent temperature control. Rotate the knob clockwise for warmer temperature settings. Rotate the knob counterclockwise for cooler temperature settings. When the SYNC feature is active, the driver’ s temperature will also manage the passenger’... -
Page 28: Automatic Temperature Control (Atc)
Recirculation NOTE: Operating Tips • It is not necessary to move the temperature In cold weather, use of Recirculation mode may Winter Operation settings for cold or hot vehicles. The system lead to excessive window fogging. The Recircula- To ensure the best possible heater and defroster automatically adjusts the temperature, mode, tion feature may be unavailable if conditions exist performance, make sure the engine cooling sys-... -
Page 29: Windows
Window Fogging Outside Air Intake Vehicle windows tend to fog on the inside in mild, Make sure the air intake, located directly in front of rainy, and/or humid weather. To clear the win- the windshield, is free of obstructions, such as leaves. dows, select Defrost or Mix mode and increase Leaves collected in the air intake may reduce airflow, the front blower speed. -
Page 30: Wind Buffeting
To stop the window during an Auto-Up opera- Resetting The Auto-Up Feature WARNING! tion, push or pull again the window switch. Should the Auto-Up feature stop working, the the vehicle, or in a location accessible to To close the window part way, pull the window window probably needs to be reset. -
Page 31: Power Sunroof
WARNING! POWER SUNROOF come entrapped by the power sunroof The sunroof has two glass panels (the front one while operating the power sunroof switch. is operational and the rear one fixed) and is Such entrapment may result in serious injury equipped with an electrically operated sun blind. -
Page 32: Closing
NOTE: Sunroof Reinitialization Power Sun Blind During Express Open operation, any movement 1. Place the ignition in the ON/RUN mode. Opening of the sunroof switch will stop the sunroof. 2. Pull and hold the power sunroof close switch Push the sun blind switch for approximately one until the sunroof is completely closed and you Closing second and the sun blind will open completely, then... -
Page 33: Hood
Closing To open the liftgate, push the liftgate electronic HOOD release and pull the liftgate open with one fluid WARNING! motion. Opening Be sure the hood is fully latched before driving To open the hood, two latches must be released. your vehicle. -
Page 34: Universal Garage Door Opener (Homelink) - If Equipped
• To operate HomeLink, push and release any of WARNING! UNIVERSAL GARAGE DOOR the programmed HomeLink buttons. These • If you are required to drive with the liftgate buttons will activate the devices they are pro- OPENER (HOMELINK) — IF open, make sure that all windows are closed, grammed to with each press of the correspond- EQUIPPED... -
Page 35: Erasing All The Homelink Channels
Erasing All The HomeLink Channels the antenna is attached to the device.The button 2. Place the garage door opener transmitter 1 to 3 inches (3 to 8 cm) away from the HomeLink may not be immediately visible when looking at To erase the channels, follow this procedure: button you wish to program, while keeping the the device.The name and color of the button may... -
Page 36: Programming Homelink To A Miscellaneous Device
Rolling Code Garage Door Opener Final Steps Non-Rolling Code Garage Door Opener Final Programming HomeLink To A Miscellaneous Steps Device NOTE: 1. Push and hold the programmed HomeLink You have 30 seconds in which to initiate rolling Refer to “Programming HomeLink To A Garage button and observe the HomeLink indicator code final step 2, after completing rolling code Door Opener”... -
Page 37: Reprogramming A Single Homelink Button
Reprogramming A Single HomeLink Button General Information INTERNAL EQUIPMENT To reprogram a single HomeLink button that has The following regulatory statement applies to all been previously trained, without erasing all the Radio Frequency (RF) devices equipped in this Power Outlets channels, follow the procedure below. -
Page 38: Cigar Lighter - If Equipped
NOTE: WARNING! Do not connect devices with power higher than 180 W to the socket. Do not damage the socket When the cigar lighter is in use it becomes by using unsuitable adaptors. very hot. To avoid serious injury, handle the cigar lighter with care. -
Page 39: Instrument Cluster Display
INSTRUMENT CLUSTER DISPLAY Your vehicle may be equipped with an instrument cluster display, which offers useful information to the driver. With the ignition in the STOP/OFF position, opening/closing of a door will activate the display for viewing, and display the total miles (kilometers) in the odometer. -
Page 40: Change Engine Oil Indicator System
• Push and release the down arrow button to system is duty cycle based, which means the Instrument Cluster Display Menu Items scroll downward through the main menu and engine oil change interval may fluctuate, depen- The menu comprises a series of functions ar- submenus. -
Page 41: Warning Lights And Messages
will illuminate with a single chime when a fault The dual brake system provides a reserve braking WARNING LIGHTS AND with the Air Bag Warning Light has been detected, capacity in the event of a failure to a portion of it will stay on until the fault is cleared. - Page 42 Vehicles equipped with the Anti-Lock Brake Sys- — Electronic Throttle Control (ETC) — Engine Coolant Temperature Warn- tem (ABS) are also equipped with Electronic Warning Light ing Light Brake Force Distribution (EBD). In the event of This warning light will illuminate to inform of a This warning light warns of an overheated engine an EBD failure, the Brake Warning Light will turn problem with the Electronic Throttle Control...
- Page 43 Belt Reminder Light will flash or remain on — Battery Charge Warning Light Do not operate the vehicle until the cause is continuously and a chime will sound. Refer to corrected.This light does not indicate how much This warning light will illuminate when the battery “Occupant Restraint Systems”...
-
Page 44: Yellow Warning Lights
Yellow Warning Lights when ESC is activated. It should go out with the — Electronic Stability Control (ESC) Off engine running. If the “ESC Indicator Light” comes Warning Light — If Equipped — Anti-Lock Brake (ABS) Warning on continuously with the engine running, a mal- This warning light indicates the Electronic Stability Light function has been detected in the ESC system. - Page 45 Certain conditions, such as a loose or missing gas — Tire Pressure Monitoring System CAUTION! (TPMS) Warning Light cap, poor quality fuel, etc., may illuminate the light after engine start.The vehicle should be serviced Prolonged driving with the Malfunction Indica- The warning light switches on and a message is if the light stays on through several typical driving tor Light (MIL) on could cause damage to the...
-
Page 46: Yellow Indicator Lights
Each tire, including the spare (if provided), should even if under-inflation has not reached the level CAUTION! be checked monthly when cold and inflated to to trigger illumination of the TPMS low tire the inflation pressure recommended by the ve- pressure telltale. - Page 47 • Parking Lights — Icy Road Condition Indicator — Transmission Temperature Warning Light — If Equipped Light • Daytime Running Lights This light will illuminate during an icy road condi- This light indicates that the transmission fluid • License Plate Lights tion.
-
Page 48: Green Indicator Lights
— Immobilizer Fail / VPS Electrical — Turn Signal Indicator Lights — Cruise Control Cancelled Light — If Alarm Indicator Light Equipped When the left or right turn signal is activated, the turn signal indicator will flash independently and This telltale will illuminate when the vehicle This indicator will illuminate when a set cruise the corresponding exterior turn signal lamps will security alarm system has detected an attempt to... -
Page 49: Blue Indicator Lights
Blue Indicator Lights other information to assist your service technician WARNING! in making repairs. Although your vehicle will — High Beam Indicator Light usually be drivable and not need towing, see an • ONLY an authorized service technician This indicator light will illuminate to indicate that authorized dealer for service as soon as possible. -
Page 50: Safety Features
WARNING! WARNING! SAFETY FEATURES or wheel size may adversely affect ESC • The Electronic Stability Control (ESC) can- Electronic Stability Control (ESC) performance. Improperly inflated and un- not prevent the natural laws of physics from evenly worn tires may also degrade ESC This system enhances directional control and acting on the vehicle, nor can it increase the performance. -
Page 51: Auxiliary Driving Systems
Partial Off NOTE: AUXILIARY DRIVING SYSTEMS To improve the vehicle's traction when driving The “ESC OFF” button is located in the switch with snow chains, or when starting off in deep bank above the climate control. To enter the snow, sand, or gravel, it may be desirable to switch Tire Pressure Monitoring System (TPMS) “Partial Off”... - Page 52 The TPMS will warn the driver of a low tire tire pressure is sufficiently low enough to turn on CAUTION! pressure if the tire pressure falls below the low the TPMS Warning Light. Driving the vehicle may • After inspecting or adjusting the tire pres- pressure warning limit for any reason, including cause the tire pressure to rise to approximately sure, always reinstall the valve stem cap.This...
- Page 53 • Seasonal temperature changes will affect tire Tire Pressure Monitoring Low Pressure Warnings system fault still exists. The TPMS Warning Light pressure, and the TPMS will monitor the actual will turn off when the fault condition no longer The Tire Pressure Monitoring System Warning tire pressure in the tire.
-
Page 54: Occupant Restraint Systems
• If you install the compact spare tire in place of General Information OCCUPANT RESTRAINT a road tire that has a pressure below the The following regulatory statement applies to all low-pressure warning limit, upon the next igni- SYSTEMS radio frequency (RF) devices equipped in this tion cycle, a chime will sound and the TPMS vehicle: Some of the most important safety features in... -
Page 55: Seat Belt Systems
Here are some simple steps you can take to 7. The driver and front passenger seats should Seat Belt Systems minimize the risk of harm from a deploying air be moved back as far as practical to allow the Buckle up even though you are an excellent bag: front air bags room to inflate. - Page 56 NOTE: Initial Indication the seat belts are buckled.The BeltAlert warning sequence may repeat based on vehicle speed until If BeltAlert has been deactivated and the driver If the driver is unbuckled when the ignition switch the driver and occupied outboard front seat or outboard front seat passenger (if equipped is first in the AVV/START or MAR/RUN position, passenger seat belts are buckled.
- Page 57 WARNING! WARNING! WARNING! • In a collision, you and your passengers can these instructions to wear your seat belt • A seat belt that is buckled into the wrong suffer much greater injuries if you are not safely and to keep your passengers safe, too. buckle will not protect you properly.The lap properly buckled up.
- Page 58 too tight, tilt the latch plate and pull on the lap WARNING! belt.A snug seat belt reduces the risk of sliding • A frayed or torn seat belt could rip apart in under the seat belt in a collision. a collision and leave you with no protection. 5.
- Page 59 3. Slide the latch plate upward over the folded Position the lap belt snug and low below the Energy Management Feature abdomen and across the strong bones of the hips. webbing. The folded webbing must enter the The front outboard seat belt system is equipped Place the shoulder belt across the chest and away slot at the top of the latch plate.
- Page 60 Use the Automatic Locking Mode anytime a child How To Disengage The Automatic Locking restraint is installed in a seating position that has Mode a seat belt with this feature. Children 12 years old Unbuckle the combination lap/shoulder belt and and under should always be properly restrained in allow it to retract completely to disengage the the rear seat of a vehicle with a rear seat.
-
Page 61: Supplemental Restraint Systems (Srs)
Supplemental Restraint Systems (SRS) • Front and Side Impact Sensors The ORC also includes diagnostics that will illu- minate the instrument panel Air Bag Warning • Seat Belt Pretensioners Some of the safety features described in this Light if a malfunction is detected that could affect •... - Page 62 WARNING! WARNING! injury to a child 12 years or younger, includ- Ignoring the Air Bag Warning Light in your ing a child in a rear-facing child restraint. instrument panel could mean you won’t have • Never install a rear-facing child restraint in the air bag system to protect you in a collision.
- Page 63 This vehicle may be equipped with a driver and/or Because air bag sensors measure vehicle decel- WARNING! eration over time, vehicle speed and damage by front passenger seat belt buckle switch that • Relying on the air bags alone could lead to themselves are not good indicators of whether or detects whether the driver or front passenger more severe injuries in a collision.
- Page 64 Knee Impact Bolsters Supplemental Side Air Bags The Knee Impact Bolsters help protect the knees Supplemental Seat-Mounted Side Air Bags of the driver and front passenger, and position the (SABs) front occupants for improved interaction with the This vehicle is equipped with Supplemental Seat- front air bags.
- Page 65 and seated properly, or if items are positioned in WARNING! the area where the SABICs inflate. Children are at an even greater risk of injury from a deploying Do not use accessory seat covers or place air bag. objects between you and the Side Air Bags; the performance could be adversely affected The SABICs may help reduce the risk of partial or and/or objects could be pushed into you,...
- Page 66 Side Impacts Side Air Bags are a supplement to the seat belt WARNING! restraint system. Side Air Bags deploy in less time The Side Air Bags are designed to activate in than it takes to blink your eyes. • Side Air Bags need room to inflate. Do not certain side impacts.
- Page 67 Rollover Events Air Bag System Components If A Deployment Occurs Side Air Bags are designed to activate in certain The front air bags are designed to deflate imme- NOTE: diately after deployment. rollover events. The ORC determines whether The Occupant Restraint Controller (ORC) moni- the deployment of the Side Air Bags in a particu- tors the internal circuits and interconnecting NOTE:...
- Page 68 rinse the area with cool water. For nose or Enhanced Accident Response System • Cut off battery power to the: throat irritation, move to fresh air. If the irrita- – Engine In the event of an impact, if the communication tion continues, see your doctor.
- Page 69 Enhanced Accident Response System Reset Customer Will See Customer Will See Procedure NOTE: NOTE: Customer Action Customer Action Each step MUST BE Each step MUST BE After the event occurs, when the system is active, held for at least two held for at least two a message regarding fuel cutoff is displayed.
- Page 70 If a reset procedure step is not completed within • Whether or not the driver and passenger safety WARNING! 60 seconds, then the turn signal lights will blink belts were buckled/fastened; modifications are made.Take your vehicle to and the reset procedure must be performed •...
-
Page 71: Child Restraints
Child Restraints and warnings in the child restraint Owner’ s WARNING! Manual and on all the labels attached to the child Everyone in your vehicle needs to be buckled up restraint. In a collision, an unrestrained child can become at all times, including babies and children. Every a projectile inside the vehicle. - Page 72 Child Size, Height, Weight Or Age Recommended Type Of Child Restraint Children Too Large for Child Children 12 years old or younger, who have outgrown the Vehicle Seat Belt, seated in a rear seat of the vehicle Restraints height or weight limit of their booster seat Infant And Child Restraints in the forward-facing direction are for children WARNING!
- Page 73 Children Too Large For Booster Seats If the answer to any of these questions was “no, ” WARNING! then the child still needs to use a booster seat in Children who are large enough to wear the this vehicle. If the child is using the lap/shoulder •...
- Page 74 Recommendations For Attaching Child Restraints Restraint Type Combined Weight of Use Any Attachment Method Shown With An “X” Below the Child + Child Re- LATCH – Lower An- Seat Belt Only LATCH – Lower An- Seat Belt + Top Tether straint chors Only chors + Top Tether An-...
- Page 75 Lower Anchors And Tethers For CHildren Your vehicle is equipped with the child restraint LATCH Positions For Installing Child Re- straints In This Vehicle (LATCH) Restraint System anchorage system called LATCH, which stands for Lower Anchors and Tethers for CHildren. The LATCH system has three vehicle anchor points for installing LATCH-equipped child seats.
- Page 76 Frequently Asked Questions About Installing Child Restraints With LATCH Do not use the seat belt when you use the LATCH anchor- age system to attach a rear-facing or forward-facing child re- Can the LATCH anchorages and the seat belt be used to- straint.
- Page 77 Locating The LATCH Anchorages Center Seat LATCH The lower anchorages are round bars that WARNING! are found at the rear of the seat cushion where it meets the seatback. They are just visible when • Do not install a child restraint in the center you lean into the rear seat to install the child position using the LATCH system.
- Page 78 below. See the section “Installing Child Restraints 5. Tighten all of the straps as you push the child route the seat belt through the child restraint belt restraint rearward and downward into the path and then buckle it. Do not lock the seat belt. Using theVehicle Seat Belt”...
- Page 79 Installing Child Restraints Using The Vehicle lap portion of the seat belt tight around the child Lap/Shoulder Belt Systems For Installing Seat Belt Child Restraints In This Vehicle restraint so that it is not necessary to use a locking clip. The ALR retractor can be “switched” into a Child restraint systems are designed to be se- locked mode by pulling all of the webbing out of cured in vehicle seats by lap belts or the lap belt...
- Page 80 Frequently Asked Questions About Installing Child Restraints With Seat Belts Can the rear-facing child restraint touch the Contact between the front passenger seat and the child restraint is allowed, if the child back of the front passenger seat? restraint manufacturer also allows contact. The rear head restraints can be removed in every seating position if they interfere with Can the rear head restraints be removed? the installation of the child restraint.
- Page 81 7. Finally, pull up on any excess webbing to Installing Child Restraints Using The Top seat forward to provide better access to the tighten the lap portion around the child re- Tether Anchorage: tether anchorage. If there is no top tether straint while you push the child restraint anchorage for that seating position, move the rearward and downward into the vehicle seat.
-
Page 82: Transporting Pets
4. Remove slack in the tether strap according to Exhaust Gas SAFETY TIPS the child restraint manufacturer’ s instructions. WARNING! WARNING! Transporting Passengers Exhaust gases can injure or kill. They contain carbon monoxide (CO), which is colorless and • An incorrectly anchored tether strap could NEVER TRANSPORT PASSENGERS IN THE odorless. -
Page 83: Safety Checks You Should Make Inside The Vehicle
Whenever a change is noticed in the sound of the Air Bag Warning Light Floor Mat Safety Information exhaust system, when exhaust fumes can be The Air Bag warning light will turn on for Always use floor mats designed to fit your detected inside the vehicle, or when the under- four to eight seconds as a bulb check when the vehicle. -
Page 84: Periodic Safety Checks You Should Make Outside The Vehicle
Periodic Safety Checks You Should Make WARNING! WARNING! Outside The Vehicle installing any other floor mat. NEVER install trapped under accelerator, brake, or clutch Tires pedals and could cause a loss of vehicle or stack an additional floor mat on top of an control. -
Page 85: Engine Break-In Recommendations
Operating Modes CAUTION! ENGINE BREAK-IN RECOMMENDATIONS Never use Non-Detergent Oil or Straight Mineral Oil in the engine or damage may A long break-in period is not required for the result. engine and drivetrain (transmission and axle) in NOTE: your vehicle. A new engine may consume some oil during its Drive moderately during the first 300 miles first few thousand miles (kilometers) of opera-... - Page 86 NOTE: Activation: system reach a speed slower than 15 mph (25 km/h). After reaching the desired speed, • To prevent engine stalling do not use the system Rotate the selector and hold in this position for release the accelerator and brake pedals com- if the transmission is in NEUTRAL.
-
Page 87: Speed Control
• If the speed exceeds 15 mph (25 km/h) and is The Speed Control buttons are located on the NOTE: below 31 mph (50 km/h), the Gravity Control right side of the steering wheel. In order to ensure proper operation, the Speed system intervention set-up is deactivated but is Control system has been designed to shut down ready for being reactivated when the speed... -
Page 88: To Set A Desired Speed
To Set A Desired Speed REAR PARK ASSIST — IF PARKVIEW REAR BACK UP Turn the Speed Control on.When the vehicle has EQUIPPED CAMERA reached the desired speed, push the SET (+) or SET (-) button and release. Release the accelera- The Rear Park Assist system provides an audible Your vehicle is equipped with the ParkView Rear indication of the distance between the rear... - Page 89 When enabled, active guide lines are overlaid on NOTE: Different colored zones indicate the distance to the image to illustrate the width of the vehicle The ParkView Rear Back Up Camera has pro- the rear of the vehicle. and its projected backup path based on the grammable modes of operation that may be The following table shows the approximate dis- steering wheel position.
-
Page 90: Adding Fuel
3. Insert the fuel nozzle fully into the filler pipe – ADDING FUEL the nozzle opens and holds the flapper door while refueling. 1. Open the fuel filler door. NOTE: Only the correct size nozzle opens the latches allowing the flapper door to open. 4. -
Page 91: Materials Added To Fuel
Indiscriminate use of fuel system cleaning agents WARNING! should be avoided. Many of these materials • A fire may result if fuel is pumped into a intended for gum and varnish removal may con- portable container that is inside of a vehicle. tain active solvents or similar ingredients. -
Page 92: Recreational Towing (Behind Motorhome, Etc.)
RECREATIONAL TOWING (BEHIND MOTORHOME, ETC.) Towing This Vehicle Behind Another Vehicle Towing Condition Wheels OFF The Ground Automatic Transmission Flat Tow NONE NOT ALLOWED Front Dolly Tow Rear NOT ALLOWED On Trailer NOTE: CAUTION! When towing your vehicle, always follow appli- cable state and provincial laws. -
Page 93: Hazard Warning Flashers
Bulb Number HAZARD WARNING BULB REPLACEMENT LED (See Authorized Rear Tail Lamp FLASHERS Dealer) Replacement Bulbs Rear Turn Signal Lamps P21W The Hazard Warning flasher switch is located on Interior Bulbs Rear Backup Lamps W16W the instrument panel, below the radio. Rear Side Marker LED (See Authorized Bulb Number... -
Page 94: Fuses
WARNING! FUSES unit systems (engine system, transmission system) or steering system blows, contact an WARNING! authorized dealer. • When replacing a blown fuse, always use an General Information appropriate replacement fuse with the same amp rating as the original fuse. Never re- The fuses protect electrical systems against ex- place a fuse with another fuse of higher amp cessive current. - Page 95 Cavity Maxi Fuse Mini Fuse Description 20 Amp Yellow – Ignition Switch 40 Amp Orange – Anti-Lock Brake Pump 70 Amp Tan – Electric Power Steering 30 Amp Green – Radiator Fan - Low Speed 50 Amp Red – Radiator Fan - High Speed 40 Amp Orange –...
-
Page 96: Interior Fuses
Cavity Maxi Fuse Mini Fuse Description – 7.5 Amp Brown USB Charger Sockets – 7.5 Amp Brown Heated Mirrors Interior Fuses The interior fuse panel is part of the Body Control Module (BCM) and is located on the driver's side under the instrument panel. Cavity Vehicle Fuse Number Mini Fuse... -
Page 97: Rear Interior Fuses
Cavity Vehicle Fuse Number Mini Fuse Description 7.5 Amp Brown Left Low Beam, Headlamp Leveling 7.5 Amp Brown Airbag Vehicle Radio Switch, Climate Control System, Stop Light, Reverse Gear, Sun- 5 Amp Tan roof, Parking Sensor, Rear Camera 7.5 Amp Brown Stop Light Switch, Instrument Panel Node 5 Amp Tan Exterior Mirror, GPS, Electric Mirror, Parking Sensor... -
Page 98: Jacking And Tire Changing
Jack Location Spare Tire Removal/Stowage JACKING AND TIRE The spare tire jack is located in the rear cargo area underneath the cargo floor. CHANGING WARNING! • Do not attempt to change a tire on the side of the vehicle close to moving traffic. Pull far enough off the road to avoid the danger of being hit when operating the jack or chang- ing the wheel. -
Page 99: Preparations For Jacking
Preparations For Jacking 1. Park the vehicle on a firm, level surface. Avoid ice or slippery areas. WARNING! Do not attempt to change a tire on the side of the vehicle close to moving traffic. Pull far enough off the road to avoid being hit when operating the jack or changing the wheel. - Page 100 2. If equipped with aluminum wheels where the WARNING! center cap covers the wheel bolts, use the • Turn on the Hazard Warning flasher. wheel bolt wrench to pry the center cap off • Block the wheel diagonally opposite the carefully before raising the vehicle.
- Page 101 8. Install the wheel bolts with the threaded end WARNING! of the wheel bolt toward the wheel. Lightly tighten the wheel bolts. Raising the vehicle higher than necessary can make the vehicle less stable. It could slip off WARNING! the jack and hurt someone near it. Raise the vehicle only enough to remove the tire.
-
Page 102: Tire Service Kit
Remove the Tire Service Kit from the vehicle, take WARNING! it out from the bag and place it near the punctured tire. Screw the clear flexible filling tube A loose tire or jack thrown forward in a to the tire valve. collision or hard stop could endanger the occupants of the vehicle.Always stow the jack parts and the spare tire in the places provided. - Page 103 Insert the power plug into the vehicle power WARNING! WARNING! outlet socket. Start the vehicle engine. • A loose Tire Service Kit thrown forward in a Tire Service Kit is not a permanent flat tire Push the Tire Service Kit power button to the “I” collision or hard stop could endanger the repair.
-
Page 104: Jump Starting
NOTE: Preparations For Jump Start JUMP STARTING Replace the sealant canister prior to the expira- The battery in your vehicle is located on the tion date at an authorized dealer. driver’ s side of the engine compartment. If your vehicle has a discharged battery, it can be jump started using a set of jumper cables and a battery in another vehicle or by using a portable battery booster pack. -
Page 105: Jump Starting Procedure
2. Connect the opposite end of the positive (+) WARNING! WARNING! jumper cable to the positive (+) post of the • Remove any metal jewelry such as rings, booster battery. Do not allow vehicles to touch each other as watch bands and bracelets that could make this could establish a ground connection and 3. -
Page 106: If Your Engine Overheats
Disconnecting The Jumper Cables WARNING! IF YOUR ENGINE OVERHEATS 1. Disconnect the negative (-) end of the jumper You or others can be badly burned by hot cable from the engine ground of the vehicle In any of the following situations, you can reduce engine coolant (antifreeze) or steam from with the discharged battery. -
Page 107: Ignition Key Removal Override
7. Once the key is removed, reinstall the steering 3. By pulling the gear selector boot, carefully IGNITION KEY REMOVAL column cover. separate the gear selector bezel and boot assembly from the center console, and raise it OVERRIDE up to access the gear selector mechanism. CAUTION! This vehicle is equipped with a Key Ignition Park 4. -
Page 108: Freeing A Stuck Vehicle
WARNING! CAUTION! FREEING A STUCK VEHICLE • When “rocking” a stuck vehicle by shifting Fast spinning tires can be dangerous. Forces If your vehicle becomes stuck in mud, sand or between DRIVE and REVERSE, do not spin generated by excessive wheel speeds may snow, it can often be moved using a rocking the wheels faster than 15 mph (24 km/h), or cause damage, or even failure, of the axle and... -
Page 109: Towing A Disabled Vehicle
TOWING A DISABLED VEHICLE NOTE: This section describes procedures for towing a disabled vehicle using a commercial towing ser- vice. Towing Condition Wheels OFF The Ground AUTOMATIC TRANSMISSION Flat Tow NONE NOT ALLOWED Front Dolly Tow Rear NOT ALLOWED Flatbed BEST METHOD Proper towing or lifting equipment is required to If you must use the accessories (wipers, defroster,... -
Page 110: Enhanced Accident Response System (Ears)
If the ignition key is unavailable, or the vehicle’ s ENHANCED ACCIDENT EVENT DATA RECORDER battery is discharged, refer to “Gear Selector Override” in this section for instructions on RESPONSE SYSTEM (EARS) (EDR) shifting the transmission out of PARK in order to move the vehicle. -
Page 111: Scheduled Servicing
NOTE: Maintenance Plan SCHEDULED SERVICING Under no circumstances should oil change inter- Required Maintenance Intervals vals exceed 10,000 miles (16,000 km), twelve Your vehicle is equipped with an automatic oil Refer to the maintenance plan on the following months, or 350 hours of engine run time: which- change indicator system. - Page 112 Mileage or time passed (whichever comes first) Or Years: Or Kilometers: Additional Inspections Inspect the CV joints. Inspect front suspension, tie rod ends and boot seals, and replace if necessary. Inspect the brake linings, parking brake function. Additional Maintenance Replace engine air filter. Replace cabin air filter.
-
Page 113: Heavy Duty Use Of The Vehicle
WARNING! • You can be badly injured working on or around a motor vehicle. Do only service work for which you have the knowledge and the right equipment. If you have any doubt about your ability to perform a service job, take your vehicle to a competent mechanic. -
Page 114: Engine Compartment - 1.4L Turbo
ENGINE COMPARTMENT — 1.4L TURBO 1 — Air Cleaner Filter 4 — Battery 7 — Coolant Pressure Cap 2 — Engine Oil Dipstick 5 — Front Distribution Unit (Fuses) 8 — Coolant Pressure Bottle 3 — Brake Fluid Reservoir 6 — Washer Fluid Reservoir 9 —... -
Page 115: Raising The Vehicle
Tire Markings NOTE: RAISING THE VEHICLE • P (Passenger) — Metric tire sizing is based on U.S. design standards. P-Metric tires have the In the case where it is necessary to raise the letter “P” molded into the sidewall preceding vehicle, go to an authorized dealer or service the size designation. - Page 116 Tire Identification Number (TIN) white sidewall side of the tire. Look for the TIN on the outboard side of black sidewall tires as The TIN may be found on one or both sides of mounted on the vehicle. If the TIN is not found the tire;...
- Page 117 Tire Terminology And Definitions Term Definition B-Pillar The vehicle B-Pillar is the structural member of the body located behind the front door. Cold Tire Inflation Pressure Cold tire inflation pressure is defined as the tire pressure after the vehicle has not been driven for at least three hours, or driven less than 1 mile (1.6 km) after sitting for a minimum of three hours.
- Page 118 Tire Loading And Tire Pressure This placard tells you important information about the: NOTE: 1. Number of people that can be carried in the The proper cold tire inflation pressure is listed on vehicle. the driver’ s side B-Pillar or the rear edge of the driver's side door.
- Page 119 To determine the maximum loading conditions of (4) The resulting figure equals the available Metric Example For Load Limit your vehicle, locate the statement “The combined amount of cargo and luggage load capac- For example, if “XXX” amount equals 635 kg and weight of occupants and cargo should never ity.
-
Page 121: Tires - General Information
Safety NOTE: WARNING! • Unequal tire pressures from side to side may WARNING! Overloading of your tires is dangerous. Over- cause erratic and unpredictable steering re- loading can cause tire failure, affect vehicle sponse. • Improperly inflated tires are dangerous and handling, and increase your stopping distance. - Page 122 At least once a month: Check tire pressures more often if subject to a Increased tire pressure and reduced vehicle load- wide range of outdoor temperatures, as tire ing may be required for high-speed vehicle op- • Check and adjust tire pressure with a good pressures vary with temperature changes.
- Page 123 Tire Repair limited driving capabilities and needs to be re- WARNING! placed immediately. A Run Flat tire is not repair- If your tire becomes damaged, it may be repaired able.When a run flat tire is changed after driving Fast spinning tires can be dangerous. Forces if it meets the following criteria: with underinflated tire condition, please replace generated by excessive wheel speeds may...
- Page 124 These indicators are molded into the bottom of replacement is needed. Refer to the paragraph on WARNING! “Tread Wear Indicators” in this section. Refer to the tread grooves. They will appear as bands the Tire and Loading Information placard or the when the tread depth becomes a 1/16 of an inch Tires and the spare tire should be replaced Vehicle Certification Label for the size designation...
-
Page 125: Tire Types
Summer Or Three Season Tires — If WARNING! CAUTION! Equipped Replacing original tires with tires of a different • Do not use a tire, wheel size, load rating, or Summer tires provide traction in both wet and speed rating other than that specified for size may result in false speedometer and dry conditions, and are not intended to be driven odometer readings. -
Page 126: Spare Tires - If Equipped
Snow Tires While studded tires improve performance on ice, Spare Tire Matching Original Equipped Tire skid and traction capability on wet or dry surfaces And Wheel — If Equipped Some areas of the country require the use of may be poorer than that of non-studded tires. snow tires during the Winter. - Page 127 Do not install a wheel cover or attempt to mount Collapsible spare tire description example: Full Size Spare — If Equipped a conventional tire on the compact spare wheel, 165/80-17 101P. The full size spare is for temporary emergency since the wheel is designed specifically for the Since this tire has limited tread life, the original use only.
-
Page 128: Wheel And Wheel Trim Care
Your wheels are susceptible to deterioration Mopar Wheel Treatment or Mopar Chrome WARNING! caused by salt, sodium chloride, magnesium chlo- Cleaner or their equivalent is recommended or ride, calcium chloride, etc., and other road chemi- select a non-abrasive, non-acidic cleaner for alu- Limited use spares are for emergency use only. -
Page 129: Department Of Transportation Uniform Tire Quality Grades
Dark Vapor Chrome, Black Satin Chrome, or All passenger vehicle tires must conform Traction Grades Low Gloss Clear Coat Wheels to Federal safety requirements in addition The Traction grades, from highest to low- to these grades. est, are AA, A, B, and C. These grades CAUTION! represent the tire's ability to stop on wet Treadwear... -
Page 130: Temperature Grades
Temperature Grades WARNING! The Temperature grades are A (the high- The temperature grade for this tire is est), B, and C, representing the tire's established for a tire that is properly resistance to the generation of heat and inflated and not overloaded. Excessive its ability to dissipate heat, when tested speed, under-inflation, or excessive under controlled conditions on a specified... -
Page 131: Wheel And Tire Torque Specifications
Inspect the wheel mounting surface prior to After 25 miles (40 km), check the lug nut/bolt WHEEL AND TIRE TORQUE mounting the tire and remove any corrosion or torque to be sure that all the lug nuts/bolts are properly seated against the wheel. loose particles. -
Page 132: Fluid Capacities
FLUID CAPACITIES U.S. Metric Fuel (Approximate) 12.7 Gallons 48.1 Liters Engine Oil With Filter 1.4L Turbo Engine 4 Quarts 3.8 Liters Cooling System 1.4L Turbo Engine (Mopar Antifreeze/Engine Cool- 6.1 Quarts 5.8 Liters ant 10 Year/150,000 Mile Formula). FLUIDS AND LUBRICANTS Engine Component Fluid, Lubricant, or Genuine Part... -
Page 133: Chassis
CAUTION! CAUTION! CAUTION! coolant (antifreeze). If a non-OAT engine not use additional rust inhibitors or antirust • Mixing of engine coolant (antifreeze) other coolant (antifreeze) is introduced into the products, as they may not be compatible than specified Organic Additive Technology with the radiator engine coolant and may cooling system in an emergency, the cooling (OAT) engine coolant (antifreeze), may re-... -
Page 134: Mopar Accessories
Authentic Accessories By Mopar approved. • The following highlights just some of the many • For the full line of Authentic FIAT Accessories Authentic FIAT Accessories by Mopar featuring by Mopar, visit your local dealership or online at a fit, finish, and functionality specifically for your mopar.com for U.S. - Page 135 ELECTRONICS: • Electronic Vehicle Tracking System (EVTS) • Remote Start • Mopar Web CARRIERS: • Removable Roof Rack • Hitch-mount Bike Carrier • Bike Receiver • Roof-Mount Cargo Carrier • Roof-Mount Cargo Basket • Roof-Mount Canoe Carrier • Roof-Mount Water Sports Carriers •...
-
Page 136: Cybersecurity
• To help further improve vehicle security and WARNING! CYBERSECURITY minimize the potential risk of a security breach, vehicle owners should: • It is not possible to know or to predict all of Your vehicle may be a connected vehicle and may –... -
Page 137: Uconnect 4/4 Nav With 7-Inch Display
Setting The Time Balance/Fade UCONNECT 4/4 NAV WITH • Press the “Balance/Fade” button on the touch- • For Uconnect 4/4 NAV, turn the unit on, and 7-INCH DISPLAY screen to Balance audio between the front then press the time display at the top of the speakers or fade the audio between the rear screen. -
Page 138: Drag & Drop Menu Bar
Loudness — If Equipped Radio Off Delay — If Equipped 2. Press and hold, then drag the selected App to replace an existing shortcut in the main menu • Press the “On” button on the touchscreen to • Press the “Radio Off Delay” button on the bar. -
Page 139: Media Hub - Usb/Audio Jack (Aux) - If Equipped
Direct Tune Media Hub — USB/Audio Jack (AUX) — If WARNING! Equipped • Tune directly to a radio station by pressing the ALWAYS drive safely with your hands on the “Tune” button on the screen, and entering the wheel. You have full responsibility and assume desired station number. - Page 140 Audio Jack (AUX) • When connected, the compatible USB device can be controlled using the radio or Steering • The AUX allows a device to be plugged into the Wheel Audio Controls to play, skip to the next radio and utilize the vehicle’ s sound system, using or previous track, browse, and list the contents.
-
Page 141: Uconnect 4 Nav Navigation
Bluetooth Streaming Audio NOTE: Uconnect will automatically switch to the appro- • If equipped with Uconnect Voice Command, priate mode when something is first connected your Bluetooth-equipped device may also be or inserted into the system. able to stream music to your vehicle's sound system. -
Page 142: Android Auto - If Equipped
• Select your destination and press the Drive NOTE: and buttons on your radio faceplate, and the radio button on the touchscreen to begin navigation. For more information, see your Uconnect display’ s touchscreen to control many of your apps. 4/4 NAV Owner’... -
Page 143: Apple Carplay Integration - If Equipped
NOTE: Apple CarPlay Integration — If Equipped To use Android Auto, make sure you are in an area NOTE: with cellular coverage. Android Auto may use Feature availability depends on your carrier and cellular data and your cellular coverage is shown mobile phone manufacturer. -
Page 144: Uconnect Settings
2. Once the device is connected and recognized, NOTE: UCONNECT SETTINGS CarPlay should automatically launch, but you To use CarPlay make sure that cellular data is can also launch it by touching the CarPlay icon turned on, and that you are in an area with The Uconnect system allows you to access Cus- on the touchscreen, located under Apps. -
Page 145: Steering Wheel Audio Controls
Left Switch STEERING WHEEL AUDIO • Push the switch up or down for less than two CONTROLS seconds to search for the next listenable station or song on USB/iPod. The steering wheel audio controls are located on • Push the switch up or down for more than two the rear surface of the steering wheel. -
Page 146: Uconnect Phone
UCONNECT PHONE Uconnect Phone (Bluetooth Hands Free Calling) Uconnect 4 Phone Menu 1 — Favorite Contacts 11 — Recent Call Log 2 — Mobile Phone Battery Life 12 — Browse Phone Book Entries 3 — Currently Paired Mobile Phone 13 — End Call 4 —... -
Page 147: Pairing (Wirelessly Connecting) Your Mobile Phone To The Uconnect System
The Uconnect Phone feature enables you to For Uconnect Customer Care: Start Pairing Procedure On The Radio place and receive hands-free mobile phone calls. • U.S. residents visit UconnectPhone.com or call Uconnect 4/4 NAV: Drivers can also place mobile phone calls using 1-877-855-8400. - Page 148 Pair Your iPhone: Complete The iPhone Pairing Procedure: take precedence over other paired mobile phones within range and will connect to the Uconnect system automatically when entering the vehicle. Only one mobile phone and/or one Bluetooth audio device can be connected to the Uconnect system at a time.
- Page 149 3. Select Connections. Complete The Android Pairing Procedure: Select The Android Mobile Phone's Priority Level 4. Turn Bluetooth setting to “On.” When the pairing process has successfully com- • Ensure the Bluetooth feature is enabled. pleted, the system will prompt you to choose Once enabled, the mobile phone will begin whether or not this is your favorite mobile to search for Bluetooth connections.
-
Page 150: Common Phone Commands (Examples)
You are now ready to make hands-free calls. Press Phonebook • If you are listening to available voice command the Uconnect “Phone” button on your options, you do not have to listen to the entire The Uconnect system will automatically sync your list. -
Page 151: Using Do Not Disturb
Using Do Not Disturb • Auto reply with text message is only available on phones that support Bluetooth MAP. With Do Not Disturb, you can disable notifica- tions from incoming calls and texts, allowing you Incoming Text Messages to keep your eyes on the road and hands on the After pairing your Uconnect system with a wheel. -
Page 152: Uconnect Voice Recognition Quick Tips
Get Started UCONNECT VOICE All you need to control your Uconnect system RECOGNITION QUICK TIPS with your voice are the buttons on your steering wheel. Introducing Uconnect 1. Visit UconnectPhone.com to check mobile Start using Uconnect Voice Recognition with device and feature compatibility and to find these helpful quick tips. -
Page 153: Basic Voice Commands
TIP: At any time, if you are not sure of what to say or want to learn a Voice Command, push the VR button and say “Help.” The system provides you with a list of commands. Uconnect 4/4 NAV Basic Voice Uconnect Voice Command Commands 1 —... -
Page 154: Phone
. After the beep, say Push the VR button • “Redial (call previous outgoing phone number)” one of the following commands and follow the • “Call back (call previous incoming phone prompts to switch your media source or choose number)” an artist. -
Page 155: Navigation (4 Nav) - If Equipped
Navigation (4 NAV) — If Equipped Siri Eyes Free — If Equipped Android Auto — If Equipped The Uconnect navigation feature helps you save Siri lets you use your voice to send text messages, NOTE: time and become more productive when you select media, place phone calls and much more. -
Page 156: Apple Carplay - If Equipped
• Phone Apple CarPlay — If Equipped • Text Messages NOTE: Feature availability depends on your carrier and • Additional Apps mobile phone manufacturer. Some Apple CarPlay and Android Auto features may or may not be available in every region and/or language. Apple CarPlay allows you to use your voice to interact with Siri through your vehicle’... -
Page 157: General Information
General Information NOTE: Uconnect System Support: Changes or modifications not expressly approved • U.S. residents visit DriveUconnect.com or call: The following regulatory statement applies to all by the party responsible for compliance could 1-877-855-8400 (24 hours a day 7 days a week) Radio Frequency (RF) devices equipped in this void the user’... -
Page 158: If You Need Assistance
Any communication to the manufacturer's cus- In Mexico Contact IF YOU NEED ASSISTANCE tomer center should include the following infor- Av. Prolongacion Paseo de la Reforma, 1240 mation: The manufacturer and its authorized dealer are Sante Fe C.P. 05109 • Owner's name and address vitally interested in your satisfaction.We want you Mexico, D. -
Page 159: Customer Assistance For The Hearing Or Speech Impaired (Tdd/Tty)
Customer Assistance For The Hearing Or Service Contract We appreciate that you have made a major investment when you purchased the vehicle. An Speech Impaired (TDD/TTY) You may have purchased a service contract for a authorized dealer has also made a major invest- vehicle to help protect you from the high cost of To assist customers who have hearing difficulties, ment in facilities, tools, and training to assure that... -
Page 160: Reporting Safety Defects
Manual, United States customers may visit the If you believe that your vehicle has a Fiat Contact Us page at www.fiat.com scroll to tor, NHTSA, 1200 New Jersey Avenue, defect that could cause a crash or cause the bottom of the page and select the “Contact... -
Page 161: Index
INDEX Accessories ....132 Android Auto ....140, 153 Changing A Flat Tire ... .96, 113 Checking Your Vehicle For Safety . - Page 162 Daytime Running Lights ... . .18 Enhanced Accident Response Feature . .66, 108 Fueling ..... .88 Deck Lid, Emergency Release.
- Page 163 Security Alarm ....11, 41 Jump Starting ....102 Oil, Engine ....130 Service .
- Page 164 Energy Management Feature ..57 Spark Plugs ....130 Radio Presets ....136 Front Seat .
- Page 165 Recreational ....90 Compact Spare ....124 USB ..... . .137 General Information .
- Page 171 This guide has been prepared to help you get quickly acquainted with your new FIAT brand vehicle and to provide ® a convenient reference source for common questions. However, it is not a substitute for your Owner’s Manual. For complete operational instructions, maintenance procedures and important safety messages, please consult your Owner’s Manual, Navigation/Uconnect manuals found on the website on the back cover and other Warning Labels in...
- Page 172 (U.S.) or fiatcanada.com/en (Canada) ©2018 FCA US LLC. All Rights Reserved. FIAT is a registered trademark of FCA Group Marketing S.p.A., used under license by FCA US LLC. App Store is a registered trademark of Apple Inc. Google Play Store is a registered trademark of Google.
Need help?
Do you have a question about the 500 L 2019 and is the answer not in the manual?
Questions and answers