Table of Contents
Advertisement
Advertisement
Table of Contents

Related Manuals for Teka CLC


Summary of Contents for Teka CLC
- Page 1 User’s guide Models Guía de Uso Manuale d’uso Instrukcja obsługi Guia de Utilização Gebruiksaanwijzingen User’s guide Οδηγίε χρήση Guide d’Utilisation Kullanım kılavuzu Bedienungsanleitung Руководство пользователя www.teka.com...
-
Page 2: Table Of Contents
INDEX CLEANING AND MAINTENANCE ..14 Cleaning the coffee maker ...... 14 INTRODUCTION ......3 Cleaning the coffee grounds container ..14 Symbols used in these instructions ..3 Cleaning the drip tray ....... 14 Letters in brackets ........3 Cleaning the water tank ...... -
Page 3: Introduction
INTRODUCTION If repairs are required, contact Customer Servi- ces only. The addresses are given in the guaran- Thank you for choosing the automatic coffee and tee certificate provided with the machine. cappuccino maker. We hope you enjoy using your new appliance. SAFETY Take a few minutes to read these instructions. - Page 4 parts in contact with the coffee children aged from 8 years and and milk. above if they have been given Cleaning and user maintenance supervision or instruction con- shall not be made by children cerning use of the appliance in a without supervision.
-
Page 5: Designated Use
• Never touch the plug with damp hands. fitted with a cooling fan at the rear (maximum • Make sure the socket used is freely accessi- oven power: 3 kW). ble at all times, enabling the appliance to be unplugged when necessary. Instructions • Unplug directly from the plug only. Never Read these instructions carefully before using pull the power cable as you could damage it. -
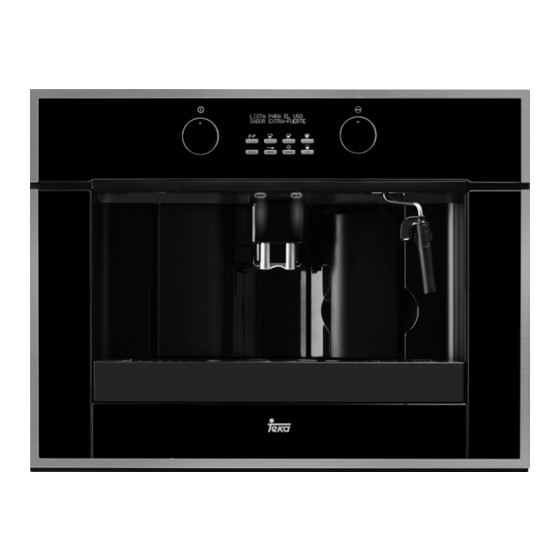
Page 6: Description Of Control Panel
Description of control panel (the water in the appliance could freeze and cause damage). (page 3 - B) • You should customise the water hardness as A number of buttons on the panel have a dou- soon as possible following the instructions ble function. This is indicated in brackets in the in the “SETTING WATER HARDNESS”... -
Page 7: Built-In Installation
even if switched off by turning the knob (A7) to the left or right. Important! Do not look at the lights di- rectly or using an optical instrument. BUILT-IN INSTALLATION Verify the minimum measurements required for correct installation of the appliance. The coffee maker must be installed in a column and the column must be firmly fixed to the wall with commercially available brackets. - Page 8 nufacturer’s instructions and legislation in force in the country of installation. x 16 The electrical socket must be accessible. x 16 Position the rails on the sides of the cabinet as shown in the figure. Fix with the screws, then extract completely. If the coffee maker is installed over a warmer drawer (500 W max.), use the top surface of this as a reference to position the rails.
-
Page 9: First Time
USING THE APPLIANCE Important! To prevent malfunction, never FOR THE FIRST TIME introduce pre-ground coffee, freeze dried coffee, caramelised beans or anything else which could • Coffee has been used to factory test the ap- damage the appliance. pliance and it is therefore completely normal for there to be traces of coffee in the mill. The coffee maker is now ready for normal use. -
Page 10: Replacing The Filter
9. “HOT WATER PRESS OK” is displayed. menu. 10. Press the OK button (B9) 2. Press the NEXT button (B7) until “UNIN- The appliance begins delivering hot water STALL FILTER” is displayed. and the message “PLEASE WAIT” is di- 3. Press the OK button (B9). The appliance au- splayed. - Page 11 the button twice (within 2 seconds). water. To change the quantity of coffee the ap- NOTE 4: While the appliance is making coffee, pliance delivers automatically into the cup, delivery can be interrupted at any moment by proceed as described in the following chap- pressing the previously selected button, ter.
-
Page 12: Coffee In The Cup
left on the bottom. initially. However, if after making the first few coffees you Important! when removing the drip tray, find that delivery is either too fast or too slow (a the grounds container must be emptied, even if drop at a time), this can be corrected by adju- it is not completely full. -
Page 13: Delivering Hot Water
deactivate the pre-ground coffee function by • Take a container and fill it with about 100 g pressing the button (B2) (fig. 6) again of milk for each cappuccino to be made and to enable the coffee mill. place it under the cappuccino maker. NOTE 1: Never introduce pre-ground coffee when In choosing the size of the recipient, bear in the machine is off or it could spread through the mind that the milk doubles or triples in vo-... -
Page 14: Cleaning And Maintenance
Cleaning the coffee grounds • Wait a few minutes for the cappuccino maker to cool down, then holding the cappuccino container maker lever firmly in one hand, unscrew the When “EMPTY GROUNDS CONTAINER” is di- cappuccino maker itself with the other, tur- splayed, the grounds container must be emptied ning it clockwise and removing it downwards and cleaned. -
Page 15: Cleaning The Water Tank
Cleaning the water tank 1. Make sure the machine is correctly turned off (see “Turning the appliance off”). 1. Clean the water tank (A12) regularly (about 2. Open the service door (A2) (fig. 13). once a month) with a damp cloth and a little 3. -
Page 16: Rameters
9. Close the service door (A2). • Make sure the clock on the appliance is set as described in the previous chapter. • Press the MENU button (B6) (the light over the button comes on) then press the NEXT button (B7) repeatedly until the appliance displays: “START TIME 00:00”. • Press the CHANGE button (B8) to set the au- to-start time. (If you hold the CHANGE button down, the time is changed rapidly). -
Page 17: Changing Coffee Temperature
• Make sure the appliance is ready and the • When the water tank is empty, the appliance water softener filter has been removed. displays the message “RINSING COMPLETE • Press the MENU button (B6) then press the PRESS OK”. NEXT button (B7) repeatedly until the ap- • Press the OK button and refill the water tank pliance displays “DESCALE NO”. with clean water. • Press the CHANGE button (B8) and the ap- • The descale programme is now terminated pliance displays “DESCALE YES”. -
Page 18: Setting Water Hardness
CHANGING THE LANGUAGE Setting water hardness The descale message is displayed after the ap- To change the language, press the CHANGE pliance has been operated for a factory set period button for at least 5 seconds until the appliance of time calculated on the basis of the maximum displays the installation message in various lan- quantity of limescale which may be contained in guages. - Page 19 ELECTRICAL CONNECTION (UK ONLY) A) If your appliance comes fitted with a plug, it will incorporate a 13 Amp fuse. If it does not fit your socket, the plug should be cut off from the mains lead, and an appropriate plug fitted, as below.
-
Page 20: Displayed Messages
DISPLAYED MESSAGES DISPLAYED MESSAGE POSSIBLE CAUSE REMEDY FILL TANK • The water tank is empty or • Fill the tank with water and/ positioned incorrectly. or insert it correctly, push- ing it as far as it will go. GROUND TOO FINE ADJUST • The grinding is too fine and • Turn the grinding adjust- MILL alternating with PRESS the coffee is delivered too ment knob one click clock- slowly. - Page 21 DISPLAYED MESSAGE POSSIBLE CAUSE REMEDY DESCALE • The machine must be de- • The descaling procedure scaled. described in the “Descaling” section needs to be perfor- med as soon as possible. LESS COFFEE • Too much coffee has been • Select a milder taste or used.
-
Page 22: Troubleshooting
TROUBLESHOOTING Below is a list of some of the possible malfunctions. If the problem cannot be resolved as described, contact Customer Services. PROBLEM POSSIBLE CAUSE REMEDY The coffee is not hot. • The cups were not pre- • Warm the cups by rinsing heated. - Page 23 PROBLEM POSSIBLE CAUSE REMEDY The coffee is delivered too • The coffee is ground too co- • Turn the grinding adjust- quickly. arsely. ment knob one click anti- clockwise towards “1” while the coffee mill is in opera- tion (fig. 11). Avoid turning the grinding adjustment knob excessi- vely otherwise when you select 2 cups, the coffee...
-
Page 24: Recipes
RECIPES Irish cofee Ingredients (serves 3): Coffee punch 2 spoons of sugar Ingredients (serves 6): 1 spoon of water 1/2 l of hot coffee 9 teaspoons of whipping cream 1/2 l of white Port 6 spoon of Irish Whisky 1/2 l of rum 4 cups of hot coffee 100 g of candied brown sugar Method:... - Page 25 Teka Chile S.A. China No.1506, Shengyuan Henghua Bldg. No.200 Wending Rd. Xuhui, Dist. 200030 Shanghai +86 2 153 076 996 Teka International Trading (Shanghai) Co. Ltd. Czech Republic V Holesovickách, 593 182 00 Praha 8 - Liben +420 284 691 940 Teka CZ S.R.O.
Need help?
Do you have a question about the CLC and is the answer not in the manual?
Questions and answers