Table of Contents
Advertisement
Quick Links
EXPLANATION OF GRAPHICAL SYMBOLS
This symbol is intended to alert the user to the presence of unprotected
"dangerous voltage" within the product's enclosure that may be strong
enough to cause a risk of electric shock persons.
This symbol is intended to alert the user to the presence of
important operating and maintenance (servicing)
instructions in the literature accompanying the appliance.
WARNING
TO REDUCE THE RISK OF FIRE OR ELECTRIC SHOCK, DO NOT EXPOSE THIS
APPLIANCE TO RAIN OR MOISTURE.
NOTE: This equipment has been tested and found to comply with the limits for a class a digital
device, pursuant to part 15 of the FCC Rules. These limits are designed to provide
reasonable protection against harmful interference when the equipment is operated in
a commercial environment. This equipment generates, uses, and can radiate radio
frequency energy and, if not installed and used in accordance with the instruction
manual, may cause harmful interference to radio communications. Operation of this
equipment in a residential area is likely to cause harmful interference in which case the
user will be required to correct the interference at his own expense.
DIGITAL VIDEO RECORDER
WARNING
1
Advertisement
Table of Contents

Related Manuals for Samsung SVR1620


Summary of Contents for Samsung SVR1620
- Page 1 WARNING EXPLANATION OF GRAPHICAL SYMBOLS This symbol is intended to alert the user to the presence of unprotected “dangerous voltage" within the product's enclosure that may be strong enough to cause a risk of electric shock persons. This symbol is intended to alert the user to the presence of important operating and maintenance (servicing) instructions in the literature accompanying the appliance.
- Page 2 In this case, do the power off right away and check the cooling fan working. • The HDD is recommended to use Enhanced IDE Hard Disc Drive type made by Western Digital and Samsung Electronics. For more information, refer to “Specification”.
-
Page 3: Table Of Contents
TABLE OF CONTENT FEATURE LIST ----------------------------------------------------------------------------------------------------------- PACKING DETAIL ------------------------------------------------------------------------------------------------------- LOCATION OF PART AND CONTROL ---------------------------------------------------------------------------- FRONT PANEL CONTROLS ------------------------------------------------------------------------------- REAR PANEL CONNECTORS --------------------------------------------------------------------------------- INSTALLATION ----------------------------------------------------------------------------------------------------------- TOTAL CONNECTION LAY-OUT ------------------------------------------------------------------------- INDIVIDUAL CONNECTION -------------------------------------------------------------------------------- RACK MOUNT -------------------------------------------------------------------------------------- CAMERA --------------------------------------------------------------------------------------------- AUDIO ------------------------------------------------------------------------------------------------ MONITOR -------------------------------------------------------------------------------------------- POWER ----------------------------------------------------------------------------------------------- EXTRA HDD BAY------------------------------------------------------------------------------------ OPERATION ---------------------------------------------------------------------------------------------------------------... -
Page 4: Feature List
FEATURE LIST DISPLAY Real Time Single or Multi Screen Display Auto Sequence Switching Instant Switching from Live Display to Playback Display Pan/Tilt, Digital Zoom and PIP Display RECORDING Simultaneous Record, Playback & Record Backup (Triplex) Easy, User Friendly Set-up Menus Up to 8 Different Record Quality Grade Individual Camera Frame or Field Rate can be set by User Full 60 Images per Second Recording Speed... -
Page 5: Packing Detail
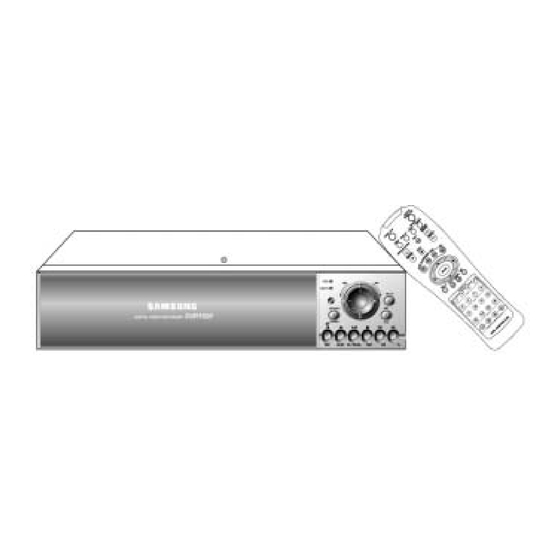
PACKING DETAIL 1. SVR1620 2. Remote Controller 3. Manual 4. Power Cord 5. Rack Mount 6. R-HDD Rack Key & Screw CONTENTS 1. SVR1620 2. Remote Controller 3. User’s Manual 4. Power Cord (230VAC & 115AC) 5. Rack Mount 6. R-HDD Rack Key & Screw for R-HDD Installation... -
Page 6: Location Of Part And Control
LOCATION OF PART AND CONTROL FRONT PANEL CONTROLS ○ ○ ○ ○ ○ ○ ○ ○ ○ ○ ○ ○ ○ ○ ○ ○ ○ ○ ○ ○ ○ ○ ○ ○ ○ ○ ○ Button Name Description ○ Press this button to turn the power on / off POWER SWITCH ○... -
Page 7: Rear Panel Connectors
LOCATION OF PART AND CONTROL REAR PANEL CONNECTORS ○ ○ ○ ○ ○ ○ ○ ○ ○ ○ ○ ○ ○ ○ ○ ○ ○ ○ ○ Port Name Description ○ These are BNC input connectors for cameras CAMERA IN ○... -
Page 8: Installation
INSTALLATION TOTAL CONNECTION LAY-OUT USER’S MANUAL... -
Page 9: Individual Connection
INSTALLATION INDIVIDUAL CONNECTION 1. Rack mount Adapt the supplied rack mount to DVR Adapt the DVR rack (19 inch) 2. Camera * Connect the female BNC from each camera to the male BNC on the “CAMERA IN” port * Connect the looping BNC output to other inputs as required DIGITAL VIDEO RECORDER... -
Page 10: Audio
INSTALLATION 3. Audio *Refer to the specification Audio Input - AUDIO IN : Connect the RCA Line Jack from the relevant equipment (for example camera with inbuilt Microphone) to the AUDIO IN port Note : Please refer to the AUDIO setup at the main menu setup for input selection. If the audio is recorded with images, audio can be re-played at that moment in any type of screen division mode. -
Page 11: Monitor
INSTALLATION 4. Monitor - Connect the female BNC for monitor output. - Connect the Y/C cable for S-VIDEO monitor output. 5. Power - Select the correct voltage of power (230=180~265 VAC / 115=90~135 VAC) - Connect the power cord. DIGITAL VIDEO RECORDER... -
Page 12: Extra Hdd Bay
INSTALLATION ◈ INSTALLATION PROCESS. 1) Turn off the power of DVR. 2) Connect the Grounding conductor between DVR and EXTRA HDD Bay. 3) Connect the 68pins SCSI cable between DVR and EXTRA HDD Bay. 4) Plug the connecting cable into the inlet socket of the DVR and the outlet of the EXTRA HDD Bay. - Page 13 OPERATION 1. FACTORY DEFAULT MAIN MENU SETUP> SCREEN SETUP> HORIZONTAL POSITION…………………………………..0 AUTO SEQUENCE SETUP> [AUTO-SINGLE] CH 1 ~ CH16…………….………………….03 SEC VIDEO LOSS SKIP…………………………OFF [AUTO-SPLIT] QUAD-A ~ E.………………………………..03 SEC NINE-A~B….………………………………..03 SEC SIXTEEN..…………………………………..03 SEC ADD AUTO SINGLE……………………….OFF DISPLAY SETUP> CLOCK DISPLAY…………………………ON DATE MODE………………………………..YY/MM/DD MONTH TYPE………………………………NUM HDD FREE SPACE ……………………….ON RECORD STATUS ………………………..ON...
-
Page 14: Operation
OPERATION RECORD SETUP> RECORD RATE SETUP> NOR / EVENT CH 1~ CH16………………………………..3F / 3F TERM………………………………………..1S / 1S RECORD MODE SETUP> RECORD MODE……………………………MANUAL IMAGE SIZE…………………………………640 X 240 PLAYBACK MODE…………………………AUTO REPEAT RECORD…………………………ON IMAGE QUALITY SETUP> ………………………………………………..QUALITY 8 SCHEDULE SETUP> CH 1 ~ CH 16…………………..………… 00:00 - 12:00, 12:00-23:59 AUDIO SETUP>... - Page 15 OPERATION EVENT BUZZER……………………………………………...ON SYSTEM SETUP> HDD SETUP> R-HDD MODE…………………………..….BACKUP FIXED HDD INITIALIZE BACKUP SETUP> HDD COPY MODE……………MANUAL EVENT RECORD BACKUP….OFF R-HDD INITIALIZE PASSWORD SETUP> POWER ON/OFF CHECK …..OFF CHECK PASSWORD ………..OFF SUPERVISOR PASSWORD...11111111 (11111111) MANAGER PASSWORD ……22222222 (22222222) NETWORK SETUP> IP ADDRESS 000.000.000.000 GATEWAY...
-
Page 16: Power On / Off
OPERATION 2. FRONT PANNEL CONTROLS 2-1. POWER ON / OFF After the connection of power cord and other devices with SVR-1620, Turn the power on. a. The video signal system (NTSC or PAL) is automatically detected. b. Power Failure Recovery SVR-1620 automatically reverts back to programmed record parameters upon power restoration. - Page 17 OPERATION 2-2-2. Auto Sequence Display (ADD AUTO SINGLE : ON) - Press the AUTO button, each screen displaying will be automatically switching according to the Auto Sequence Setup. (Please refer to the Auto sequence setup in the main menu, p32) - “ADD AUTO SINGLE : OFF”...
-
Page 18: Record
OPERATION 2-3. RECORD Press the REC button, the following message will be displayed as below; MANUAL MODE Press the REC button to begin recording. To stop recording, press the REC button again. SCHEDULE MODE When Schedule mode is selected, the recording will be automatically executed according to the recording schedule. - Page 19 OPERATION 2-4-1. FIXED-HDD TIME SEARCH At the SEARCH menu; ① Turn the SHUTTLE ring to select the FIXED-HDD TIME SEARCH. ② Press ENTER button. The FIXED-HDD TIME SEARCH menu screen appears. [FIXED-HDD TIME SEARCH] HDD ID : ALL ③ CHANNEL: MULTISCREEN PLAY START TIME: YYYY/MM/DD HH:MM:SS TIME: YYYY/MM/DD HH:MM:SS BOARD S/N:************...
- Page 20 OPERATION 2-4-3. R-HDD TIME SEARCH At the SEARCH menu; ① Turn the SHUTTLE ring to select the R-HDD TIME SEARCH. ② Press ENTER button. The R-HDD TIME SEARCH menu screen appears. [R-HDD TIME SEARCH LIST] [R-HDD TIME SEARCH] [START TIME] [END TIME] HDD ID : ALL YYYY/MM/DD HH/MM/SS...
- Page 21 OPERATION 2-4-5. LOG FILE LIST At the SEARCH menu; ① Turn the SHUTTLE ring to select the LOG FILE LIST. ② Press the ENTER button. The LOG FILE LIST menu screen appears. [LOG FILE LIST] DATE TIME CONTENTS YYYY/MM/DD HH:MM:SS PRG UPDATE YYYY/MM/DD HH:MM:SS POWER ON YYYY/MM/DD HH:MM:SS SETUP UPDATE YYYY/MM/DD HH:MM:SS REC END...
-
Page 22: Search Button Information
OPERATION 2-5. SEARCH BUTTON INFORMATION ○ ○ ○ ○ ○ 2-5-1. SLOW ( Press this button to make slower the speed level which is lower than normal speed (X1) and displayed it at the upper left side of screen as below; (If you press this button again, the playback speed will be changed in the order of the below four speed level) i. -
Page 23: Jog Shuttle Information
OPERATION 2-6. JOG SHUTTLE INFORMATION SHUTTLE RING JOG DIAL 2-6-1. Normal Playback Mode ① Turn the SHUTTLE ring to the desired playback direction and speed level according to the above drawing during the playback. ② SVR-1620 will go back to the normal playback mode when the SHUTTLE ring is returned to the center position. -
Page 24: Digital Zoom
OPERATION 2-7. DIGITAL ZOOM ① Press the desired camera number button you wish to display on the monitor. ② Press the D ZOOM button. The indication screen appears on the main screen. ③ Turn the SHUTTLE ring or JOG dial to select the desired location. ④... -
Page 25: Copy
OPERATION 2-9. COPY to Removable HDD Press the COPY button, the COPY MENU screen appears. [COPY MENU] COPY TO REMOVABLE- HDD> DISPLAY COPY STATUS> [COPY TO R-HDD] CHANNEL : ALL S-REC TIME : YYYY/MM/DD HH:MM:SS E-REC TIME : YYYY/MM/DD HH:MM:SS START TIME : YYYY/MM/DD HH:MM:SS END TIME : YYYY/MM/DD HH:MM:SS START COPY TO R-HDD... - Page 26 OPERATION 2-9-2. REMOVAL OF R-HDD ① Before removing the R-HDD from the DVR HDD rack, turn the SHUTTLE ring on the JOG / SHUTTLE dial to select REMOVE R-HDD FROM RACK. [COPY TO R-HDD] CHANNEL : ALL S-REC TIME : YYYY/MM/DD HH:MM:SS E-REC TIME : YYYY/MM/DD HH:MM:SS START TIME : YYYY/MM/DD HH:MM:SS END TIME : YYYY/MM/DD HH:MM:SS...
- Page 27 ④ When the backup is done, the CD/DVD Rom tray will be opened automatically. - 10X speed of CD/DVD manufactured by TDK, SONY, MITSUBISHI, Samsung is recommended. - You can not replay the backup images on CD/DVD with DVR and SVR-916 Viewer program should be installed in the PC prior to the replay.
-
Page 28: System Information
OPERATION 2-11. SYSTEM INFORMATION Press the ENTER button, The SYSTEM INFOMATION screen will appear. Press the ENTER button again to move on next information screen or press the ESC button to exit the menu. [SYSTEM INFORMATION] RECORD MODE : MANUAL SCHEDULE TIME>>... -
Page 29: Ptz Control
Programming capacity for 16 preset locations. (Please refer to 1-6-1. PTZ PRESET SETUP for more information in the main menu setup, p.36) PTZ function can be available for the Dome camera from Samsung Techwin’s SPD-2500, SPD-1600, SRX-100B. DIGITAL VIDEO RECORDER... -
Page 30: Pip
OPERATION 2-13. PIP CONTROL Select a single camera, and then press the PIP button. 2-13-1. Live PIP in Live View ① Press the PIP button when single live view is displaying on the screen. ② Select the desired camera that will be displayed on the PIP screen. ③... -
Page 31: Remote Controller
OPERATION 2-14. REMOTE CONTROLLER Button Name Description ○ EVENT LIST Display the event list ○ BACKUP EVENT LIST Display the backup event list ○ MENU Display the setup menu ○ DISPLAY Display the system information ○ AUDIO Select the audio channel ○... -
Page 32: Setup Menu
SET-UP MENU ENTRANCE OF SVR-1620 MAIN MENU SETUP Press the MENU button. SVR-1620 SETUP menu appears. MAIN MENU SETUP 1. SCREEN SETUP 2. RECORD SETUP 3. EVENT SETUP 4. SYSTEM SETUP 5. CLOCK SETUP 6. LOAD SETUP DEFAULT 7. EXIT WITH SAVE 8. - Page 33 SET-UP MENU 1-1. HORIZONTAL POSITION SETUP At the SCREEN SETUP menu, ① Turn the SHUTTLE ring to the right to select the HORIZONTAL POSITION [SCREEN SETUP] 1. HORIZONTAL POSITION : 0 2. AUTO SEQUENCE SETUP > 3. DISPLAY SETUP > 4.
- Page 34 SET-UP MENU 1-3. DISPLAY SETUP At the SCREEN SETUP menu, ① Turn the SHUTTLE ring to the right to select the DISPLAY SETUP>, and then press the ENTER button. The DISPLAY SETUP> menu screen appears. [DISPLAY SETUP] 1. DATE & CLOCK 2.
- Page 35 SET-UP MENU 1-3-4. HDD FREE SPACE At the DISPLAY SETUP> menu, ① Turn the SHUTTLE ring to the right to select the HDD FREE SPACE. ② Turn the JOG dial to choose ON or OFF. ③ Turn the SHUTTLE ring to go to another menu in the DISPLAY SETUP> or press the ESC button to exit the DISPLAY SETUP>...
- Page 36 SET-UP MENU 1-4. CHANNEL TITLE SETUP At the SCREEN SETUP menu, ① Turn the SHUTTLE ring to the right to select the CHANNEL TITLE SETUP>, and then press the ENTER button. The CHANNEL TITLE SETUP> menu screen appears. [CHANNEL TITLE SETUP] ABCDEFGHIJKLMNOPQRST UVWXYZa b c d e f g h i j k l m n o p q r s t u v w x y z 0 1 2 3 4 5 6 7...
- Page 37 SET-UP MENU 1-6. PTZ SETUP At the SCREEN SETUP menu, ① Turn the SHUTTLE ring to the right to select the PTZ SETUP>, and then press the ENTER button. The PTZ SETUP> menu screen appears. [PTZ SETUP] [PTZ SETUP] MODEL MODEL ============================================== ==============================================...
-
Page 38: Record Setup
SET-UP MENU 2. RECORD SETUP At the MAIN SETUP menu, ① Turn the SHUTTLE ring to select the RECORD SETUP >. ② Press the ENTER button. The RECORD SETUP> menu screen appears. [RECORD SETUP] 1. RECORD RATE SETUP> 2. RECORD MODE SETUP> 3. - Page 39 SET-UP MENU 2-2. RECORD MODE SETUP> At the RECORD SETUP menu, ① Turn the SHUTTLE ring to the right to select the RECORD MODE SETUP>. ② Press the ENTER button. The RECORD MODE SETUP> menu screen appears. [RECORD MODE SETUP] 1 RECORD MODE :MANUAL 2 IMAGE SIZE...
- Page 40 SET-UP MENU 2-2-3. PLAYBACK MODE ① Turn the SHUTTLE ring to select the PLAYBACK MODE. ② Turn the JOG dial to select the Playback mode between three choices. (AUTO / FRAME / FIELD MODE.) ③ Turn the SHUTTLE ring to go to another menu in the RECORD MODE SETUP> or press the ESC button to exit the RECORD MODE SETUP>.
- Page 41 SET-UP MENU 2-3. SCHEDULE SETUP> At the RECORD SETUP menu, ① Turn the SHUTTLE ring to the right to select the SCHEDULE SETUP>. ② Press the ENTER button. The SCHEDULE SETUP> menu screen appears. [SCHEDULE SETUP] TIME1 TIME2 ----------------------------------------------------------------- : 00 : 00 – 12 : 00, 00 : 12 –...
- Page 42 SET-UP MENU 2-4. AUDIO SETUP> At the RECORD SETUP menu, ① Turn the SHUTTLE ring to the right to select the AUDIO SETUP>. ② Press the ENTER button. The AUDIO SETUP> menu screen appears. [AUDIO SETUP] 1. AUDIO RECORD : ON 2.
-
Page 43: Event Setup
SET-UP MENU 3. EVENT SETUP At the MAIN SETUP menu, ① Turn the SHUTTLE ring to select the EVENT SETUP >. ② Press the ENTER button. The EVENT SETUP menu screen appears. [EVENT SETUP] 1. EVENT CHECK :OFF 2. MESSAGE DISPLAY :OFF 3. - Page 44 SET-UP MENU 3-3. RECORD TIME> At the EVENT SETUP menu, ① Turn the SHUTTLE ring to select the EVENT RECORD SETUP>. ② Press the ENTER button. The EVENT RECORD SETUP> menu screen appears. [RECORD TIME] [EVENT RECORD TIME] CH 1 : 1 MIN CH 9 : 1 MIN CH 2 : 1 MIN CH 10 : 1 MIN...
- Page 45 SET-UP MENU 3-4. VALID TIME > At the EVENT SETUP menu, ① Turn the SHUTTLE ring to select the VALID TIME, and then turn the JOG dial to set the desired time. ② Turn the SHUTTLE ring to go to another menu in the EVENT SETUP> or press the ESC button to exit the EVENT SETUP>.
- Page 46 SET-UP MENU 3-5-1. MD AREA SETUP> At the MD SETUP menu, ① Turn the SHUTTLE ring to select the MD AREA SETUP>. ② Press the ENTER button. The MD AREA SETUP screen appears. SENSITIVITY CHANNEL :CH1 AREA SETUP> TEST> ③ Turn the SHUTTLE ring to select the desired channel and turn the JOG dial to select the Sensitivity or channel.
- Page 47 SET-UP MENU 3-6. SENSOR INPUT SETUP> At the EVENT SETUP menu, ① Turn the SHUTTLE ring to select the SENSOR INPUT SETUP>. ② Press the ENTER button. The SENSOR INPUT SETUP menu screen appears. [SENSOR INPUT SETUP] SENSOR01 : NO SENSOR09 : NO SENSOR02...
- Page 48 SET-UP MENU 3-7. RELAY OUTPUT SETUP> At the EVENT SETUP menu; ① Turn the SHUTTLE ring to select the RELAY OUTPUT SETUP>. ② Press the ENTER button. The RELAY OUTPUT SETUP menu screen appears. [RELAY OUTPUT SETUP] 1 LOSS - - - - - - - - - - - - - - - - LOSS OUTPUT: 1SEC 2 POWER: OFF...
-
Page 49: System Setup
SET-UP MENU 3-10. EVENT BUZZER At the EVENT SETUP menu, ① When the EVENT BUZZER is selected, Turn the JOG dial to set ON or OFF. ② Turn the SHUTTLE ring to go to another menu in the EVENT SETUP> or press the ESC button to exit the EVENT SETUP>. - Page 50 SET-UP MENU 4-1-2. FIXED HDD INITIALIZE At the HDD SETUP menu, ① Turn the SHUTTLE ring to select the FIXED HDD INITIALIZE. ② Press the ENTER button, and then turn the JOG dial to select Y (YES) for the initializing. ③...
- Page 51 SET-UP MENU 4-1-3-3. R-HDD INITIALIZE At the BACKUP SETUP> menu, ① Turn the SHUTTLE ring to select the R-HDD INITIALIZE. ② Press the ENTER button and then turn the JOG dial to select Y (YES) for the initializing. ③ Press the ESC button to exit this menu. CAUTION - All data will be deleted on the R- HDD, If the R-HDD is initialized.
- Page 52 SET-UP MENU * PASSWORD INFORMATION * There are two levels of system management password. SUPERVISOR PASSWORD: Can be accessible to all the system of DVR. MANAGER PASSWORD : Can be accessible other than setup menu of DVR. The qualification of password access is as below; MENU SETUP : SUPERVISOR PASSWORD only COPY...
- Page 53 SET-UP MENU 4-2-3. SUPERVISOR PASSWORD At the PASSWORD SETUP> menu, ① Turn the SHUTTLE ring to select the SUPERVISOR PASSWORD. ② Press the ENTER button. The eight digits marked ******** will appear. [PASSWORD SETUP] 1 POWER ON/OFF CHECK : OFF 2 CHECK PASSWORD : 3 SUPERVISOR PASSWORD ********...
- Page 54 SET-UP MENU 4-3. NETWORK SETUP At the SYSTEM SETUP menu, ① Turn the SHUTTLE ring to select the NETWORK SETUP >. NETWORK SETUP> IP ADDRESS - 000.000.000.000 GATEWAY - 000.000.000.000 SUBNET MASK - 255.255.255.000 DHCP : OFF ② When the NETWORK SETUP screen is selected, turn the SHUTTLE and JOG dial to set IP ADDRESS, NETMASK and GATEWAY to matches with your network environment.
- Page 55 SET-UP MENU 4-4-2. RS-232C SETUP At the COM PORT SETUP> menu, ① Turn the SHUTTLE ring to select the RS-232C SETUP. ② Press the ENTER button. The RS-232C SETUP menu screen appears. [RS-232C SETUP] 1 BAUDRATE : 9600 2 DATE BIT 3 PARITY BIT : NONE 4 STOP BIT : 1 ③...
- Page 56 SET-UP MENU 4-5. LANGUAGE SETUP At the SYSTEM SETUP menu, ① Turn the SHUTTLE ring to select the LANGUAGE SETUP >. ② Press the ENTER button. The LANGUAGE SETUP menu screen appears. [LANGUAGE SETUP] CURRENT LANGUAGE : ENGLISH ③ Turn the JOG dial to select the desired Language. 4-6.
- Page 57 SET-UP MENU 4-6-2. PRESET TITLE SETUP At the PRESET SCHEDULE SETUP menu, ① Turn the SHUTTLE ring to select PRESET TITLE SETUP>. ② Press the ENTER button. The PRESET TITLE SETUP menu screen appears. [PRESET TITLE SETUP] ABCDEFGHIJKLMNOPQRST UVWXYZa b c d e f g h i j k l m n o p q r s t u v w x y z 0 1 2 3 4 5 6 7 8 9 : ;...
- Page 58 SET-UP MENU 4-8. KEY BUZZER ECHO At the SYSTEM SETUP menu, ① Turn the SHUTTLE ring to the right to select the BUTTON ECHO. ② Turn the JOG dial to set ON or OFF. ③ Turn the SHUTTLE ring to go to another menu in the SYSTEM SETUP > or press the ESC button to exit the SYSTEM SETUP >.
-
Page 59: Clock Setup
SET-UP MENU 5. CLOCK SETUP At the MAIN SETUP menu, ① Turn the SHUTTLE ring to select the CLOCK SETUP>. ② Press the ENTER button. The DATE & CLOCK SETUP menu screen appears. [CLOCK SETUP] YYYY / MM / DD TIME: HH:MM:SS (MODIFY : ENTER KEY) ③... -
Page 60: Exit With Save
SET-UP MENU 7. EXIT WITH SAVE Exit setup with saving all the changes and return to the display mode. [EXIT WITH SAVE] EXIT WITH SAVE (Y/N)? Select YES or NO by turning the JOG dial and press the ENTER button. YES : Save the setup and the menu will be disappeared. -
Page 61: External Terminal Information
EXTERNAL TERMINAL INFORMATION 1. POWER OUT DC 12V OUT. DESCRIPTION DC +12V OUTPUT 2. RELAY OUT For controlling VCR recording control or alarm output by relay DESCRIPTION DESCRIPTION NO(Normal Open) NO(Normal Open) Video CM(Common) CM(Common) Loss NC(Normal Close) NC(Normal Close) NO(Normal Open) NO(Normal Open) SENSOR... -
Page 62: Alarm
EXTERNAL TERMINAL INFORMATION 3. ALARM DESCRIPTION EXTERNAL ALARM 1 INPUT EXTERNAL ALARM 2 INPUT EXTERNAL ALARM 3 INPUT EXTERNAL ALARM 4 INPUT EXTERNAL ALARM 5 INPUT EXTERNAL ALARM 6 INPUT EXTERNAL ALARM 7 INPUT EXTERNAL ALARM 8 INPUT EXTERNAL ALARM 9 INPUT EXTERNAL ALARM 10 INPUT EXTERNAL ALARM 11 INPUT EXTERNAL ALARM 12 INPUT... -
Page 63: Rs-232C
EXTERNAL TERMINAL INFORMATION 5. RS-232C Used to communicate with PC. Description Description Data Carrier Detect Data Set Ready Receive data RS232C: Rx/Tx data Transmit data RS232C: Rx/Tx data Data Terminal Ready Ring Indicator Signal Ground 6. Ethernet 10/100 Base-T Same Connector and pin out For both 10Base-T and 100 Base-TX. DESCRIPTION N/C (Not Connected) N/C (Not Connected) -
Page 64: Vga
SPECIFICATION 7. VGA SVR-1620 is not compatible with TFT LCD monitor in PAL mode. DESCRIPTION RED(Red Video [75ohm, 0.7Vp-p] ) GREEN(Green Video [75ohm, 0.7Vp-p] ) BLUE(Blue Video [75ohm, 0.7Vp-p] ) 4~12 Reserved HSYNC or CSYNC(Horizontal or Composite Sync.) YSYNC(Vertical Sync.) Reserved 8. - Page 65 SPECIFICATION 1. VIDEO Input Level 1.0 Vp-p, Composite Video Standard NTSC 525 lines, 60 fields / second 625 lines, 50 fields / second Display Speed NTSC 480 Frames / sec (16CH Real Time) 400 Frames / sec (16CH Real Time) Display Resolution NTSC 720(H) X 480(V)
-
Page 66: Specification
SPECIFICATION 8. HDD Maximum Capacity 3 HDDs HDD Type EIDE compatible Minimum Speed 5,400RPM Seek time Faster than 9.0ms avg. 9. PHYSICAL Construction Steel Case Finish Dark Gray Dimensions 420(W) X 434(D) X 88(H) mm 10. BACKUP Digital Backup Removable HDD 11. - Page 67 SPECIFICATION HDD Installation Process 1) Pull the front cover out of the unit. 2) Unscrew the two screws as indicated. 3) Remove the internal HDD tray from the unit as indicated 4) Turn the HDD tray over and then unscrew the four screws as indicated.
- Page 68 SPECIFICATION USER’S MANUAL...
Need help?
Do you have a question about the SVR1620 and is the answer not in the manual?
Questions and answers