
Related Manuals for Vent-Axia HR200WK


Summary of Contents for Vent-Axia HR200WK
- Page 1 HR200WK Through the wall Heat Recovery Ventilator Installation and Maintenance Instructions Stock Ref No:- HR200WK 14120020 PLEASE READ INSTRUCTIONS IN CONJUNCTION WITH ILLUSTRATIONS. PLEASE SAVE THESE INSTRUCTIONS...
- Page 2 4. The unit should be provided with IMPORTANT SAFETY a local isolator switch fitted with a INFORMATION 3A fuse capable of disconnecting PLEASE READ THESE all poles and having a contact INSTRUCTIONS separation of at least 3mm. CAREFULLY BEFORE 5. These units must be earthed. COMMENCING INSTALLATION.
-
Page 3: Table Of Contents
Warnings & Safety Information INSTALLATION GUIDANCE Contents 1. The installer is responsible for the installation Section Page and electrical connection of the system on site. It is the responsibility of the installer to ensure that Introduction the equipment is safely and securely installed and left only when mechanically and electrically Site Requirements safe. -
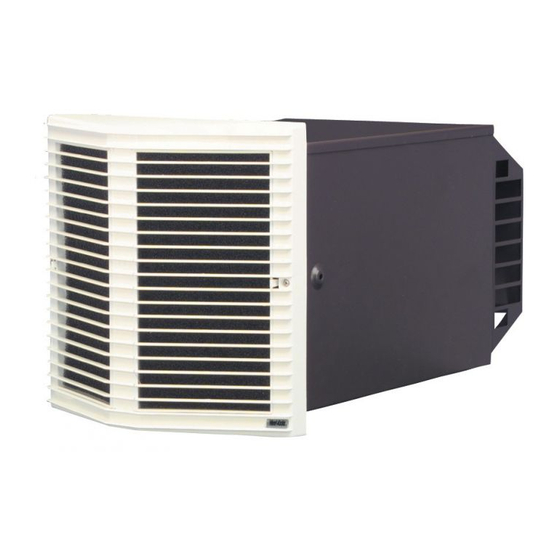
Page 4: Introduction
1.0 Introduction Description (Fig. 1) 1. The HR200WK unit is a through the wall heat recovery ventilator for use in kitchens and utility rooms. It is designed for installation in external walls having a thickness up to 335mm. Fig. 1 2. -
Page 5: Site Requirements
2.0 Site Requirement Information 1. The unit must be sited and connected by a suitably competent person and be in accordance with current UK Building Regulations and I.E.E. Wiring Regulations (BS 7671). 2. The unit is intended for permanent connection to the mains electrical supply. -
Page 6: Installation
3.0 Installation Controllers 1. The HR200WK unit can be installed in conjunction with a number of controllers. 150VA (563538): The 150VA transformer, when used with a trickle/boost switch (455213), allows for a trickle and boost speed to be selected. Only terminals providing 140V or higher should be used as the unit will not operate reliably bellow 140V. - Page 7 3.0 Installation Installing the Appliance From Inside 1. Remove the grille, heat exchanger, from the unit. Note: it is not necessary to remove the fan assembly from the housing to carry out the Fig. 4 installation. 2. Slide the unit into the mounting hole and ensure that the flange around its open end is not held off the mounting surface by the threaded bushes located in the flange.
-
Page 8: Electrical
4.0 Electrical Fig. 5 Electrical Connections 230V 50Hz 130W max 1. Wiring must be via a 3A fused switched spur with a 3mm contact separation in each pole. The wiring should be suitably (Basec or Har) approved cable of appropriate current carrying capacity. - Page 9 4.0 Electrical Fig. 8 Fig. 9...
-
Page 10: Maintenance
Inlet blanking plate Inlet Blank 1. An inlet blanking plate is provided with the unit. With this in place the HR200WK acts as an extract only fan. 2. Release the catch for the supply side(left side) grille and remove the grille 3. - Page 11 The unit is supplied with four, 6-month Timestrip indicators. A Timestrip is a single use self-adhesive label that once activated will turn red over 6 months. It should be used to keep track of when the filter and cell need cleaning/replacement.
- Page 12 PRODUCT FICHE For Residential Ventilation Units (Complying Commission Delegated Regulation (EU) No 1254/2014) Name: Vent-Axia Model ID (Stock Ref.) : HR200WK - 14120020 SEC Class SEC Value ('Average') -29.42 SEC Value ('Warm') -7.11 SEC Value ('Cold') -69.16 Label Required? (Yes/No=Out of scope)
- Page 13 Notes:-...
- Page 16 IF CLAIMING UNDER TERMS OF GUARANTEE Please return the complete product, carriage paid to your original supplier or nearest Vent-Axia Centre, by post or personal visit. Please ensure that it is adequately packed and accompanied by a letter clearly marked “Guarantee Claim”...
Need help?
Do you have a question about the HR200WK and is the answer not in the manual?
Questions and answers