Table of Contents
Advertisement
Advertisement
Table of Contents

Subscribe to Our Youtube Channel
Related Manuals for Park House Healthcare Endeavour


Summary of Contents for Park House Healthcare Endeavour
- Page 1 Endeavour Bed Service Manual...
-
Page 2: Table Of Contents
Service Manual – Endeavour Contents INTRODUCTION TECHNICAL SPECIFICATION PRODUCT ILLUSTARTION AND FUNCTIONS PRODUCT DESCRIPTION TRANSPORT AND FIRST USE TRANSPORT UNPACKING AND FIRST USE 4.3. INSTALLATION AND FIRST USE 4.4. STORAGE EVALUATING THE CORRECT FUNCTIONING OF THE BED SERVICE 4.1. MAINTENANCE ACTIVITIES 4.2. -
Page 3: Introduction
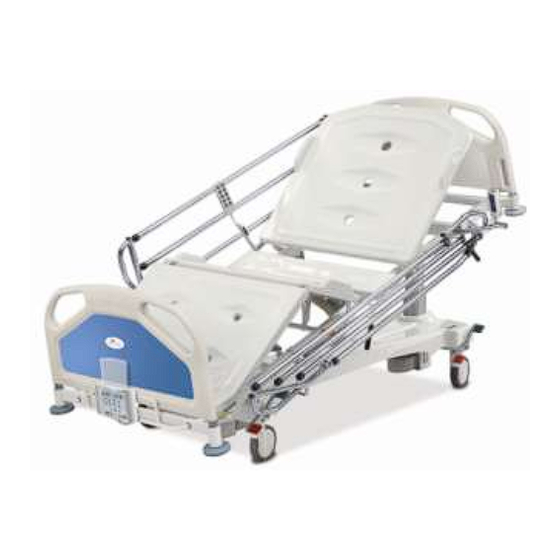
Caution! The use of accessories, additional equipment, cables or spare parts other than those offered and/ or advised by Park House Healthcare will only be permitted on under written acceptance from Park House Healthcare. 1.1 Technical Specification Length of the bed 2280 ±... - Page 4 Service Manual – Endeavour 1.2 PRODUCT ILLUSTRATION AND FEATURES Fig. 1 Pos. in Description fig. 1 Base Bed frame Back rest section Fixed section Thigh rest section Calf rest section Side rail Foot end (Top) Castor Handset Page4...
-
Page 5: Product Description
Back rest and thigh rest sections have double auto-regress function. The bed is provided with a potential equalising clamp. The bed is compatible with all Park House Healthcare pressure relieving and pressure reducing mattresses. Due to its policy of continued development and improvement, Park House Healthcare reserves the right to amend any details and specifications without notice. -
Page 6: Unpacking And First Use
Caution! The bed is shipped by Park House Healthcare assembled and in a wooden, open-work chest. The bed should be unpacked indoors to protect from possible damage Prior to installation you must:... -
Page 7: Evaluating The Correct Functioning Of The Bed
Maintenance activities To ensure longevity and safe and correct use, regular servicing of the technical functions and general condition of the bed should be carried out by Park House Healthcare or authorised and trained technical staff. All service and repairs should be recorded and a record kept with the guarantee certificate. -
Page 8: Product Disposal
4.2. Product disposal If use of the of the Endeavour bed is no longer required, the customer is obliged to dispose of the bed correctly according to the rules of environment protection, detailed information is situated in annex 3. 4.3. -
Page 9: Replacing The Support Column
Service Manual – Endeavour Assembling of the base cover: 1. Attach the front and back cover, 2. Attach the middle cover, 3. Lower the support column covers, 4. Screw the fastening support column screw. 4.4. Replacing the support column Disassembling the support column: 1. - Page 10 Service Manual – Endeavour Assembling the support column: 1. Carefully place the column holder [5] on the column [4] to protect from damage, 2. Attach the plastic cover to the column, 3. Lower the bed frame, 4. Carefully place in the column into the socket in the base of the bed, 5.
-
Page 11: Replacing The Cpr Mechanism Cord
Service Manual – Endeavour Assembling the servo-motor: 1. Mount the servo-motor by M10 screw [4] to the ear located on the bed frame, 2. Mount the servo-motor by M10 screw [3] to the ear connected to the section, 3. Put the cord into the releasing mechanism [2] of the servo-motor, and then secure it with the plastic snap fastener, 4. - Page 12 Service Manual – Endeavour 4.7. Replacing the shank rest section gas springs Disassembling the gas spring: 1. Disconnect the bed from the mains power supply 2. Unscrew M8 screw [2], mounting the gas spring [1] from shank section side and hold it in place to prevent it from falling 3.
-
Page 13: Replacing The Electric Control Box
Service Manual – Endeavour 4.8. Replacing the electric control box Disassembling the electric control box: 1. Disconnect the bed from the mains power supply, 2. Remove the middle and front cover of the bed base 3. Remove the terminal socket cover on the electric control box 4. -
Page 14: Replacing The Scales Sensor
Service Manual – Endeavour 4.10. Replacing the control panels/handsets 1. Disconnect the bed from the mains power supply, 2. Remove the middle cover of the base, 3. Unfasten the band clip mounting the control panel/handset cable, 4. Disconnect the control panel/handset from the control box, 5. -
Page 15: Replacing The Scales Controller
Service Manual – Endeavour Assembling the scales sensor 1. Screw down the absorber [3] to the scales sensor [1], it could also be shifted from disabled sensor, 2. Screw down the sensor [1] to the base frame, 3. Connect the sensor cable to the scales controller, 4. -
Page 16: Changing The Buffers
Service Manual – Endeavour 4.14. Changing the buffers 1. Unscrew the screw [2] fixed to the buffer [1]. 2. Put a new buffer [1] onto the sleeve [4]. 3. Put a washer [3] and a sleeve [4] either side the new buffer [1] and screw in place securely [2].
Need help?
Do you have a question about the Endeavour and is the answer not in the manual?
Questions and answers