
Subscribe to Our Youtube Channel
Related Manuals for Bartscher E-4


Summary of Contents for Bartscher E-4
- Page 1 INSTRUCTIONS FOR INSTALLATION AND USE INSTRUCTIONS FOR INSTALLATION AND USE PIZZA OVENS E - 4, 6, 6 L, 9, 8, 12, 12 L, 18 200.2150 200.2170 Date: 05 / 2010...
- Page 2 CONTENT DECLARATION OF A STANDARDS CONFORMITY INSTRUCTION FOR USE CLEANING AND MAINTENANCE DIE NORMENÜBEREINSTIMMUNGSDEKLARATION GEBRAUCHSANWEISUNG DIE REINIGUNG UND INSTANDSHALTUNG DÉCLARATION DE CONFORMITÉ MODE D’EMPLOI NETTOYAGE ET ENTRETIEN...
-
Page 3: Technical Data
DECLARATION OF A STANDARDS CONFORMITY The producer confi rms that the devices agreee with 73/23 EEC standards, rule nr. 22/1997 Sb, Nr. 258/2000 Sb and with relevant goverments ordres. 38/2001 Sb.. Instalation must be done with respect to valid standards. Attention, the producer refuses any responsibility in case of direct or indirect damages which are caused due to wrong instalation, incorrect intervention or modifi... - Page 4 TECHNICAL INSTRUCTIONS FOR INSTALATION AND REGULATION Can be used ONLY by specialized technicians. following instructions apply to the technician specialized in instalation to do all the operations in the most correct way and according to the valid standards. Important Any activity connected with regulation etc. must be done only when the device is disconnected from electricity. If it is necessary to have the device connected to the electricity (during repairs) you must be very careful.
- Page 5 CONNECTION OF THE ELECTRIC CABLE TO THE ELECTRICITY Instalation of electric feeder - This feeder must be separetely protected by a safety fuse according to the specifi c electric stream which depends on the wattage of the instaled device. Check the wattage on the label at the back of the device.
-
Page 6: Operating Instructions
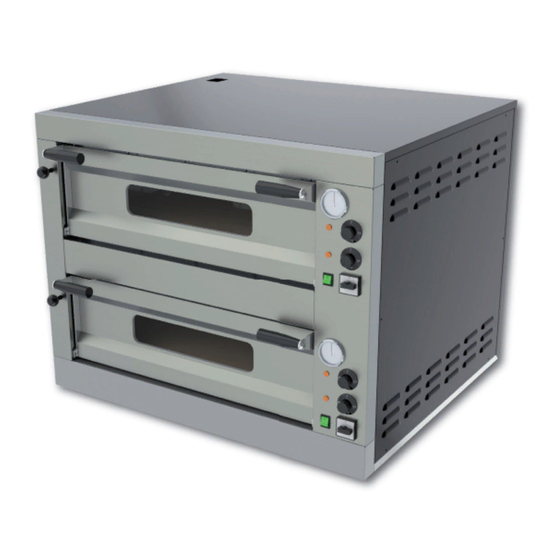
Turning the oven off To turn the oven off make sure that the interior lighting and the heating elements have been turned off, then turn the main switch to “0“. Control panel (pic. 1) MAIN SWITCH UPPER HEATING ELEMENT THERMOSTAT LOWER HEATING ELEMENT THERMOSTAT HEATING ELEMENT PILOT LIGHTS INTERIOR LIGHTING SWITCH... -
Page 7: Cleaning And Maintenance
Oven chamber (pic. 3) FIRE-CLAY SLABS INTERIOR CHAMBER LIGHTING HEATING ELEMENT SUPPORT HEATING ELEMENTS CLEANING AND MAINTENANCE The oven must be cleaned every time it is no longer in use, in compliance with the hygienic regulations. Always make sure that the oven has cooled down and is disconnected from the mains. Remove adhering food remains using a suitable spatula and a fi... - Page 8 DIMENSION PLANS / MASSSKIZZEN / DIMENSIONS E - 4, 6, 6L, 9, 9L TYPE A (CM) B (CM) C (CM) E - 4 E - 6 E - 6 L E - 9 DIMENSION PLANS / MASSSKIZZEN / DIMENSIONS E - 8, 12, 12L, 18 TYPE A (CM) B (CM)
Need help?
Do you have a question about the E-4 and is the answer not in the manual?
Questions and answers