Table of Contents
Advertisement
Quick Links
LSN50 LoRa Sensor Node User Manual
Document Version: 1.6.1
Image Version: v1.6
Version
Description
1.0
Release
1.1
Add steps of install STM320x; Add ST-Link Upload firmware method
1.2
Add trouble shooting for UART upload, Add change log for firmware v1.4
1.2.1
More detail description for 8 channel mode and trouble shooting for using in
US915/AU915
1.2.2
Modify trouble shooting for upload via Flashloader
1.2.3
Add ISP Mode / Flash mode different/
Add working flow diagram (Chapter 2.1 how it works)
Add FAQ for how to configure the Keys
1.5.0
Upgrade to v1.5 version firmware
Add ultrasonic sensor support and description.
Add downlink description
Change decoder for v1.5
Add working flow chart
Add Mydevices support
1.5.1
Improve Interrupt feature, change interrupt example to use door sensor
1.5.2
Various minor text and format edits.
1.6.0
Update to firmware v1.6 version, add 3ADC mode
1.6.1
Trouble shooting for AT Command input
Add support for 3 * DS18B20 (MOD4)
LSN50 LoRa Sensor Node User Manual
www.dragino.com
Date
2018-Dec-4
2018-Dec-27
2019-Jan-23
2019-Feb-21
2019-Mar-13
2019-Apr-1
2019-Apr-19
2019-Jun-10
2019-Aug-7
2019-Sep-18
1
60
/
Advertisement
Table of Contents

Related Manuals for Dragino LSN50


Summary of Contents for Dragino LSN50
- Page 1 LSN50 LoRa Sensor Node User Manual Document Version: 1.6.1 Image Version: v1.6 Version Description Date Release 2018-Dec-4 Add steps of install STM320x; Add ST-Link Upload firmware method 2018-Dec-27 Add trouble shooting for UART upload, Add change log for firmware v1.4 2019-Jan-23 1.2.1...
- Page 2 1. Introduction What is LSN50 LoRa Sensor Node Specifications Features Applications Pin Definitions Hardware Change log Hole Option 2. Use LSN50 with LoRaWAN firmware How it works Quick guide to connect to LoRaWAN server (OTAA) Working Mode & Uplink Payload 2.3.1 MOD=1 (Default Mode)
- Page 3 How to change the LoRa Frequency Bands/Region? Can I use Private LoRa protocol? How to set up LSN50 to work in 8 channel mode How to set up LSN50 to work with Single Channel Gateway such as LG01/LG02? How to configure the EUI keys in LSN50? 7.
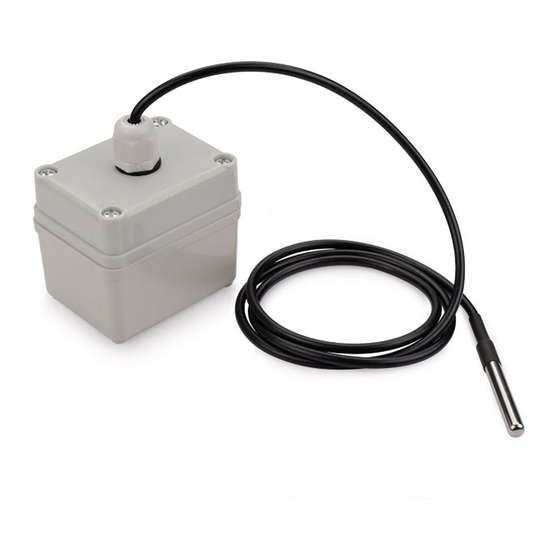
- Page 4 1. Introduction 1.1 What is LSN50 LoRa Sensor Node LSN50 is a Long Range LoRaWAN Sensor Node. It is designed for outdoor data logging powered by Li/SOCl2 battery for long term use and secure data transmission. It is designed to facilitate developers to quickly deploy industrial level LoRa and IoT solutions.
-
Page 5: Specifications
Self Discharge: <1% / Year @ 25°C ● Max continuously current: 130mA ● Max boost current: 2A, 1 second Power Consumption ● STOP Mode: 2.7uA @ 3.3v ● LoRa Transmit Mode: 125mA @ 20dBm 44mA @ 14dBm LSN50 LoRa Sensor Node User Manual... - Page 6 AT Commands to change parameters ● 4000mAh Battery for long term use 1.4 Applications ● Smart Buildings & Home Automation ● Logistics and Supply Chain Management ● Smart Metering ● Smart Agriculture ● Smart Cities ● Smart Factory LSN50 LoRa Sensor Node User Manual...
-
Page 7: Pin Definitions
Directly connect to main VCC(2.9V) OUTPUT power for board In/Out Directly from STM32 chip Used as ADC in LSN50 image In/Out Directly from STM32 chip Directly from STM32 chip, 10k Used as UART_TXD in LSN50 In/Out pull up to VCC... -
Page 8: Hardware Change Log
Add LED. Turn on for every LoRa transmit ● Add pin PA4, PB13, NRST ● Add 5V Output, on/off control by PB5(Low to Enable, High to Disable) LSN50 v1.3: ● Add P-MOS to control 5V output LSN50 LoRa Sensor Node User Manual... - Page 9 1.7 Hole Option The LSN50 provides different hole size options for different size sensor cable. The options provided are M12, M16 and M20. The definition is as below: LSN50 LoRa Sensor Node User Manual...
- Page 10 2. Use LSN50 with LoRaWAN firmware 2.1 How it works The LSN50 is pre-loaded with a firmware and is configured as LoRaWAN OTAA Class A mode by default. It has OTAA keys to join LoRaWAN network. To connect a local LoRaWAN network, you just need to input the OTAA keys in the LoRaWAN IoT server and power on the LSN50.
- Page 11 , so what we need to now is configure the TTN server. Step 1: Create a device in TTN with the OTAA keys from LSN50. Each LSN50 is shipped with a sticker with the default device EUI as below: LSN50 LoRa Sensor Node User Manual...
- Page 12 You can enter this key in the LoRaWAN Server portal. Below is TTN screen shot: Add APP EUI in the application Add APP KEY and DEV EUI LSN50 LoRa Sensor Node User Manual...
- Page 13 Put a Jumper on JP2 to power on the device. Step 3: The LSN50 will auto join to the TTN network. After join success, it will start to upload messages to TTN and you can see the messages in the panel.
- Page 14 Use can use the AT Command AT+MOD to set LSN50 to different working modes. For example: AT+MOD=2 // will set the LSN50 to work in MOD=2 distance mode which target to measure distance via Ultrasonic Sensor. NOTE: 1.
- Page 15 The 8 and 9 bytes is for the distance. Size(bytes) Value Temperature Digital in & Distance measure by: Humidity (DS18B20) Digital 1) LIDAR-Lite V3HP (SHT20) Interrupt 2) Ultrasonic Sensor Connection of LIDAR-Lite V3HP: LSN50 LoRa Sensor Node User Manual...
- Page 16 This mode has total 12 bytes. Include 3 x ADC + 1x I2C Size(bytes) Value ADC1 ADC2 ADC3 Digital in & Temperature Humidity (Pin PA0) (PA1) (PA4) Digital (SHT20 or (SHT20 or Interrupt SHT31) SHT31) LSN50 LoRa Sensor Node User Manual...
- Page 17 (Note: R3 & R4 should change from 10k to 4.7k to support DS18B20, Software set to AT+MOD=4) This mode has total 11 bytes. As shown below: Size(bytes) Value Temperature1 Digital in & Temperature2 Temperature3 (DS18B20) Digital (DS18B20) (DS18B20) (PB3) Interrupt (PA9) (PA10) LSN50 LoRa Sensor Node User Manual...
- Page 18 Decoder(bytes, port) { // Decode an uplink message from a buffer // (array) of bytes to an object of fields. if(bytes[6] & 0x10) var mod4="3DS18B20"; //work mode else if(bytes[6] & 0x08) var mod3="3ADC"; //work mode LSN50 LoRa Sensor Node User Manual...
- Page 19 | bytes[5])/1000;//PA0,ADC Channel 0,units:V switch_=(bytes[6] & 0x80)? "CLOSE":"OPEN";//PB14,GPIO_MODE_IT_FALLING digital_IS=(bytes[6] & 0x02)? "H":"L";//PA12,Digital Input Status exti_trigger=(bytes[6] & 0x01)? "TRUE":"FALSE";//PB14,GPIO_MODE_IT_FALLING if(mod1=="IIC") value=bytes[7]<<8 | bytes[8]; if(bytes[7] & 0x80) {value |= 0xFFFF0000;} temp_SHT=(value/10).toFixed(2);//SHT20,temperature,units:℃ value=bytes[9]<<8 | bytes[10]; LSN50 LoRa Sensor Node User Manual...
- Page 20 {value |= 0xFFFF0000;} var tempc2=(value/10).toFixed(2);//DS18B20,PB3,units:℃ value=bytes[9]<<8 | bytes[10]; if(bytes[9] & 0x80) {value |= 0xFFFF0000;} var tempc3=(value/10).toFixed(2);//DS18B20,PB3,units:℃ return { BatV:batV, TempC1:tempc1, TempC2:tempc2, TempC3:tempc3, ADC_CH0V:adc_ch0, ADC_CH1V:adc_ch1, ADC_CH4V:adc_ch4, Digital_IStatus:digital_IS, EXTI_Trigger:exti_trigger, Door_status:switch_, MOD1:mod1, MOD2:mod2, MOD3:mod3, MOD4:mod4, Distance: distance, TempC_SHT:temp_SHT, Hum_SHT:hum_SHT LSN50 LoRa Sensor Node User Manual...
-
Page 21: Digital Input
2.4 Payload Explanation and Sensor Interface 2.4.1 Battery Info Check the battery voltage for LSN50. Ex1: 0x0B45 = 2885mV Ex2: 0x0B49 = 2889mV 2.4.2 Temperature (DS18B20) If there is a DS18B20 connected to PB3 pin. The temperature will be uploaded in the payload. - Page 22 In the LSN50, we can use PB4 and PA0 pin to calculate the resistance for the oil sensor. Steps: Solder a 10K resistor between PA0 and VCC.
- Page 23 Below is the installation example: Fix one piece of the magnetic sensor to the door and connect the two pins to LSN50 as follows: ● One pin to LSN50’s PB14 pin ●...
- Page 24 (0v --> VCC , door close) and the falling edge (VCC --> 0v , door open) as the interrupt. The command is: AT+INTMOD=1 //(more info about INMOD please refer AT Command Manual. ) Below shows some screen captures in TTN: LSN50 LoRa Sensor Node User Manual...
- Page 25 Convert the read byte to decimal and divide it by ten. Example: Temperature: Read:0116(H) = 278(D) Value: 278 /10=27.8℃; Humidity: Read:0248(H)=584(D) Value: 584 / 10=58.4, So 58.4% If you want to use other I2C device, please refer the SHT20 part source code as reference. LSN50 LoRa Sensor Node User Manual...
-
Page 26: Ultrasonic Sensor
_proof_Ultrasonic_Sensor_with_Separate_Probe_SKU___SEN0208 The LSN50 detects the pulse width of the sensor and converts it to mm output. The accuracy will be within 1 centimeter. The usable range (the distance between the ultrasonic probe and the measured object) is between 24cm and 600cm. - Page 27 You can see the serial output in ULT mode as below: In TTN server: 2.4.9 +5V Output Since v1.2 hardware version, a +5v output is added in the hardware. The +5V output will be valid for every sampling. LSN50 LoRa Sensor Node User Manual...
-
Page 28: Downlink Payload
2.5 Downlink Payload By default, LSN50 prints the downlink payload to console port. Downlink Control Type FPort Type Code Downlink payload size(bytes) TDC (Transmit Time Interval) RESET AT+CFM INTMOD Examples Set TDC If the payload=0100003C, it means set the END Node’s TDC to 0x00003C=60(S), while type code is 01. - Page 29 Step 1: Be sure that your device is programmed and properly connected to the network at this time. Step 2: To configure the Application to forward data to Mydevices you will need to add integration. To add the Mydevices integration, perform the following steps: LSN50 LoRa Sensor Node User Manual...
- Page 30 Step 3: Create an account or log in Mydevices. Step 4: Search the LSN50 and add DevEUI. Use the LSN50 v1.6+ for the firmware version > v1.6 After added, the sensor data arrive TTN, it will also arrive and show in Mydevices.
- Page 31 MOD=3. LSN50 LoRa Sensor Node User Manual...
-
Page 32: Firmware Change Log
Add auto send feature after power on Solve negative temperature issue. Support Mydevices_LPP payload, user need to recompile firmware again. V1.1 Firmware: Support Battery Voltage(mV) ,the data of Oil Sensor ,the data of DS18B20, Digital I/0, ADC_IN1(PA1), LSN50 LoRa Sensor Node User Manual... - Page 33 Proximity switch, I2C Device Example V1.0 Firmware: Support ADC monitoring (See how to in the case study of Oil Sensor) and DS18B20 (See how to in the case study of DS18B20) LSN50 LoRa Sensor Node User Manual...
-
Page 34: Battery Type
2.8 Battery Analysis 2.8.1 Battery Type The LSN50 battery is a combination of a 4000mAh Li/SOCI2 Battery and a Super Capacitor. The battery is non-rechargeable battery type with a low discharge rate (<2% per year). This type of battery is commonly used in IoT devices such as water meter. -
Page 35: Replace The Battery
2.8.4 Replace the battery You can change the battery in the LSN50. On the main board, there is a diode (D1) between the battery and the main circuit. If you need to use a battery with less than 3.3v, please... - Page 36 3. Using the AT Commands 3.1 Access AT Commands LSN50 supports AT Command set in the stock firmware. You can use a USB to TTL adapter to connect to LSN50 for using AT command, as below. In the PC, you need to set the serial baud rate to 9600 to access the serial console for LSN50.
- Page 37 : Rx2 Window Frequency AT+TXP : Transmit Power Information AT+RSSI : RSSI of the Last Received Packet AT+SNR : SNR of the Last Received Packet AT+VER : Image Version and Frequency Band AT+FDR : Factory Data Reset LSN50 LoRa Sensor Node User Manual...
- Page 38 3.2 Common AT Command Sequence 3.2.1 Multi-channel ABP mode (Use with SX1301/LG308) If device has not joined network via OTAA: AT+FDR AT+NJM=0 If device already joined network: AT+NJM=0 3.2.2 Single-channel ABP mode (Use with LG01/LG02) Sect 6.7 LSN50 LoRa Sensor Node User Manual...
-
Page 39: Upload Firmware
AT+FDR. Otherwise (e.g. from v1.2 to v1.3), AT+FDR may erase the keys. 4.1 Upload Firmware via Serial Port The LSN50’s AT Command port can be used for firmware upgrade. The hardware connection for upgrade firmware is as below: Step1: Download flash loader. - Page 40 Board detected LSN50 LoRa Sensor Node User Manual...
- Page 41 Step4: Switch SW1 back to flash state and push the RESET button. The LSN50 will then run the new firmware. LSN50 LoRa Sensor Node User Manual...
- Page 42 4.2 Upload Firmware via ST-Link V2 You can use ST-LINK to upgrade firmware into LSN50. The hardware connection for upgrade firmware is as below: Connection: ● ST-LINK v2 GND <--> LSN50 GND ● ST-LINK v2 SWCLK <--> LSN50 PA14 ●...
- Page 43 NOTE: If this step fails, ST-LINK can’t establish connection to LSN50, please try to swap SWDIO & SWCLK pin. Some ST-LINK v2 devices are incorrectly marked. LSN50 LoRa Sensor Node User Manual...
- Page 44 MDK support and get a license. 1: Open the Webpage: http://www2.keil.com/stmicroelectronics-stm32/mdk 2: Download the Keil MDK: 3: Login with an account that has administration rights. 4: Right-click the µVision icon and select Run as Administrator… from the context menu. LSN50 LoRa Sensor Node User Manual...
- Page 45 5: Open the dialog File — License Management… and select the Single-User License tab 6: Click the button Get LIC via Internet..., then click the button OK to register the product. This action opens the License Management page on the Keil web site. LSN50 LoRa Sensor Node User Manual...
- Page 46 7: Enter the Product Serial Number 4PPFW-QBEHZ-M0D5M along with your contact information and click the button Submit. An e-mail is sent back with the License ID Code (LIC) within a few minutes. LSN50 LoRa Sensor Node User Manual...
- Page 47 8: To activate the Software Product, enter the LIC in the field New License ID Code (LIC) of the dialog License Management… and click Add LIC. 9: Finish LSN50 LoRa Sensor Node User Manual...
- Page 48 5.2.2 Install STM32L0 Series Device 1: Open the webpage: http://www.keil.com/dd2/pack/eula-container; 2: Find the STMicroelectronics STM32L0 Series Device and download it. 3: Find the Software Pack and install it. LSN50 LoRa Sensor Node User Manual...
- Page 49 4: Add the Device, then you can rebuild the project. LSN50 LoRa Sensor Node User Manual...
- Page 50 5.2.3 Compile Source Code 1. Download the source code from Software Source Code Download Link. 2. Use Keil to open the project file: STM32CubeExpansion_LRWAN/Projects/Multi/Applications/LoRa/DRAGINO- LRWAN(AT)/MDK-ARM/STM32L072CZ-Nucleo/Lora.uvprojx 3. In Keil, you can see what frequency band the code support. LSN50 LoRa Sensor Node User Manual...
- Page 51 4. If you want to change frequency, modify the Preprocessor Symbols. For example, change EU868 to US915 5. Compile and build LSN50 LoRa Sensor Node User Manual...
-
Page 52: How To Change The Lora Frequency Bands/Region
In this demo, we will show the communication between LoRa Shield and LSN50, both of them using the basic LoRa library. LSN50 will send a message to a LoRa Shield and the LoRa Shield will print it to the console. - Page 53 LSN50, the LSN50 will transfer on the frequency 868.3Mhz. In the Arduino Console, it will see the received packets as below. 6.5 How to set up LSN50 to work in 8 channel mode By default, the frequency bands US915, AU915, CN470 work in 72 frequencies. Many gateways are 8 channel gateways, and in this case, the OTAA join time and uplink schedule is long and unpredictable while the end node is hopping in 72 frequencies.
- Page 54 923.8 924.2 924.4 924.6 Channel 40-47 924.8 925.2 925.4 925.6 925.8 926.2 Channel 48-55 926.4 926.6 926.8 927.2 927.4 927.6 927.8 Channel 56-63 Channels(500KHz,4/5,Unit:MHz,CHS=0) 915.9 917.5 919.1 920.7 922.3 923.9 925.5 927.1 Channel 64-71 LSN50 LoRa Sensor Node User Manual...
- Page 55 6.6 How to set up LSN50 to work with Single Channel Gateway such as LG01/LG02? In this case, users need to set LSN50 to work in ABP mode and transmit in only one frequency. Assume we have a LG02 working in the frequency 868400000 now, below is the steps.
- Page 56 Step2: Run AT commands to make the LSN50 work in Single frequency and ABP mode. Below are the AT commands: AT+FDR Reset Parameters to Factory Default, Keys Reserve AT+NJM=0 Set to ABP mode AT+ADR=0 Set the Adaptive Data Rate Off...
- Page 57 USB to TTL adapter to solve the issue. 7.2 Why I can’t join TTN in US915 / AU915 bands? It is due to channel mapping. Please see the Eight Channel Mode section above for details. LSN50 LoRa Sensor Node User Manual...
- Page 58 In the case if user can see the console output but can’t type input to the device. Please check if you already include the ENTER while sending out the command. Some serial tool doesn’t send ENTER while press the send key, user need to add ENTER in their string. LSN50 LoRa Sensor Node User Manual...
-
Page 59: Order Info
● 20: With M20 waterproof cable hole ● NH: No Hole 9. Packing Info Package Includes: ● LSN50 LoRa Sensor Node x 1 Dimension and weight: ● Device Size: 8 x 6.5 x 5 cm ● Device Weight: 137g ●... - Page 60 11. References ● Product Page (http://www.dragino.com/products/lora/item/128-lsn50.html) ● Data Sheet (http://www.dragino.com/downloads/index.php?dir=datasheet/EN/&file=Datasheet_LoRaS ensorNode.pdf) ● Image Download (https://github.com/dragino/LoRa_STM32/tree/master/LSN50.hex) ● AT Command Manual (http://www.dragino.com/downloads/index.php?dir=LSN50- LoRaST/&file=DRAGINO_STM_AT_Commands_v1.3.pdf) LSN50 LoRa Sensor Node User Manual...
Need help?
Do you have a question about the LSN50 and is the answer not in the manual?
Questions and answers