
Related Manuals for Technika TGC6IND-5


Summary of Contents for Technika TGC6IND-5
- Page 1 Instructions for Use and Installation 60cm induction cooktop TGC6IND-5 90cm induction cooktop TGC9IND-5...
-
Page 2: Table Of Contents
Contents For your safety ..................3 Product overview ..................8 The control panel ..................9 A word on induction cooking ..............10 Using the touch controls ................ 10 Choosing the right cookware ..............11 Using your hob ..................12 Using the boost function ................ 13 Locking the controls ................ -
Page 3: For Your Safety
SAFETY WARNINGS PLEASE READ THE FOLLOWING INSTRUCTIONS CAREFULLY BEFORE USING THE APPLIANCE. Installation Electrical Shock Hazard • Disconnect the appliance from the mains electricity supply before carrying out any work or maintenance on it. • Connection to a properly earthed wiring system is essential and mandatory. - Page 4 • This appliance is to be properly installed and earthed only by a suitably qualified person. • This appliance should be connected to a circuit which incorporates an isolating switch providing full disconnection from the power supply. • WARNING: Use only hob guards designed by the manufacturer of the cooking appliance or indicated by the manufacturer of the appliance in the instructions for use as suitable or hob guards incorporated in the appliance.
- Page 5 Hot Surface Hazard • WARNING: Accessible parts may become hot during use. Young children should be kept away • Do not let your body, clothing or any item other than suitable cookware contact the ceramic glass until the surface is cool. •...
- Page 6 • Do not store items of interest to children in cabinets above the appliance. Children climbing on the cooktop could be seriously injured. • Do not leave children alone or unattended in the area where the appliance is in use. •...
- Page 7 • Care should be taken to avoid touching heating elements. • This appliance is not intended for use by persons (including children) with reduced physical, sensory or mental capabilities, or lack of experience and knowledge, unless they have been given supervision or instruction concerning use of the appliance by a person responsible for their safety.
-
Page 8: Product Overview
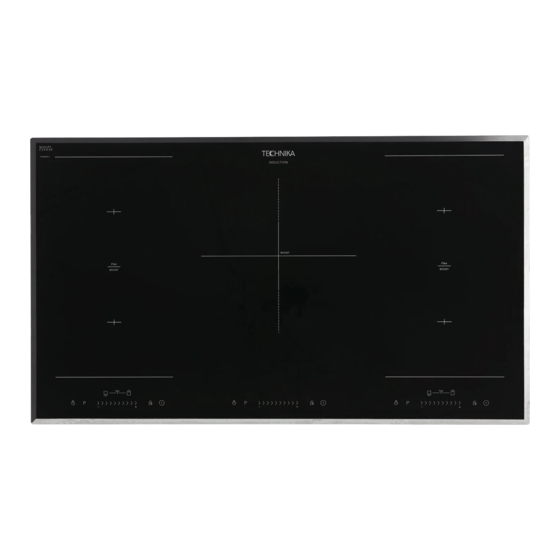
4. 160mm, max. 1200 / 1500 W zone 5. 210 x 400mm, max. 3000 / 3600 W zone 6. Control panel TGC6IND-5 0 x 190 mm, max. 1800 / 2100 W zone 1. 21 0 x 190 mm, max. 1800 / 2100 W zone 2. -
Page 9: The Control Panel
The Control Panel TGC6IND-5 TGC9IND-5 NOTE: The hob is divided into separate segments, each with its own ON/OFF key. 1. ON/OFF key 4. Child lock key 2. Power level selection (slider 5. Heating zone selection control) 3. Timer key 6. Boost control key... -
Page 10: A Word On Induction Cooking
A Word on Induction Cooking Induction cooking is a safe, advanced, efficient, and economical cooking technology. It works by electromagnetic vibrations generating heat directly in the pan, rather than indirectly through heating the glass surface. The glass becomes hot only because the pan eventually warms it up. -
Page 11: Choosing The Right Cookware
Choosing the right Cookware Only use cookware with a base suitable for induction cooking. Look for the • induction symbol on the packaging or on the bottom of the pan. You can check whether your cookware is suitable by carrying out a magnet •... -
Page 12: Using Your Hob
Using your Hob To start cooking Please note, the hob is divided into separate segments, each with its own ON/OFF • key. After powering on, the hob beeps once, all the indicators light up for 1 second then go out, indicating that the segment has entered standby mode. 1. -
Page 13: Using The Boost Function
Using Boost function Activating the boost function 1. Select the heating zone you wish to use. 2. Touch the "Boost" key and the power level indication will show “P”. Canceling the Boost function 1. Select the heating zone with the boost function activated. -
Page 14: Locking The Controls
Locking the Controls (Child lock) You can lock the controls to prevent unintended use (for example children • accidentally turning the cooking zones on). When the controls are locked, all the controls except the ON/OFF key are • disabled. Each segment of the hob has its own control lock. •... - Page 15 Using the Timer as a Minute Minder 1. Make sure the hob segment you wish to use is turned on, and the heating zone selection key is not activated (Timer and power level indicators display “-“) Note: You can also set the minute minder whilst the cooking zone is on as long as the power level indicator is not blinking.
- Page 16 Using the timer to switch off one or more cooking zones Note: For model TGC9IND-5, there is no heating zone selection key of middle heating area. You can set the timer whilst cooking zone is on and the power level indiction is blinking. 1.
- Page 17 If the timer is set on more than one zone: 1. When you set the timer for several cooking zones, red dots of the relevant cooking zones are indicated. The timer display shows the remaining time. The dot for the corresponding zone blinks. Note: You can check the remaining time for the other zones by touching the corresponding heating zone selection key.
-
Page 18: Cooking Guidelines
Cooking Guidelines ke care when frying as oil and fat heat up very quickly, particularly if you’re using the Boost setting. At extremely high temperatures oil and fat may ignite spontaneously which could present a serious fire risk. Cooking Tips When food comes to the boil, reduce the power setting. -
Page 19: Heat Settings
For stir-frying 1. Choose an Induction compatible flat-based wok or a large frying pan. 2. Have all the ingredients and equipment ready. Stir-frying should be quick. If cooking large quantities, cook the food in several smaller batches. 3. Preheat the pan briefly and add two tablespoons of oil. 4. -
Page 20: Care And Cleaning
Care and Cleaning What? How? Important! • When the power to the cooktop is 1. Switch the power to the cooktop Everyday soiling on switched off, there will be no ‘hot off. glass (fingerprints, surface’ indication but the cooking 2. Apply a cooktop cleaner while the marks, stains left by zone may still be hot! Take extreme glass is still warm (but not hot!) - Page 21 (typically contact the Technika service alternating with one or department. two digits in the cooking timer display).
-
Page 22: Technical Specification
If an abnormality occurs, the induction hob will enter a protective state automatically and display corresponding protective codes: Problem Possible causes What to do E4/E5 Temperature sensor failure Please contact the Technika service department. E7/E8 Please contact the Technika service Temperature sensor of the department. IGBT failure. -
Page 23: Installation
W(mm) H(mm) D(mm) A(mm) B(mm) X(mm) TGC6IND-5 50 min TGC9IND-5 50 min Ensure the hob is well ventilated and the air inlet and outlet are not blocked. Ensure the hob is in good working order. Install Rangehoods and Exhaust Fans in accordance to the manufacturer’s instructions. - Page 24 A(mm) B(mm) C(mm) 600min 50 min 20 min Air intake Air exit 5mm Before you install the hob, make sure that The work surface is square and level, and no structural members interfere with • space requirements. The work surface is made of a suitable material. •...
- Page 25 Fix the hob on the work surface by screwing the four brackets on the bottom of • hob after installation. Adjust the bracket position to suit for different work surface’s thickness. • Ensure the hob sits flat and square to the work surface and doesn’t slide around. • TGC6IND-5 TGC9IND-5...
-
Page 26: Electrical Connection
Immediately after installation, carry out a thorough inspection and test of the appliance. If the appliance fails to operate correctly, after checking that you have followed the user instructions correctly, disconnect the appliance and contact the Technika Service department. Never attempt to repair the appliance. TGC9IND-5 220-240V~... -
Page 27: Disposal
TGC6IND-5 If the cable is damaged or needs replacing, this must be done by the • manufacturer or suitably qualified person. The installer must ensure that the correct electrical connection has been made • and that it complies with safety regulations. - Page 28 All Technika appliances are for Domestic use only, and must be installed by a licenced installer for Domestic Applications only, without exception and to the required Authorities guidelines.
Need help?
Do you have a question about the TGC6IND-5 and is the answer not in the manual?
Questions and answers