Table of Contents
Advertisement
Advertisement
Table of Contents

Related Manuals for LUMENIS LightSheer Duet


Summary of Contents for LUMENIS LightSheer Duet
- Page 1 High Speed Clinical In-Service Training UPDATE v.24 March 2010 PB-1076090_A...
- Page 2 Clinical In-Service Training Agenda Laser Safety Laser Tissue Interaction Laser Operations – Platform & Handpieces Clinical Protocols - LHR & PFB Lumenis & You – A Partnership for Success Questions?
- Page 3 Laser Safety...
- Page 4 ANSI Laser Classifications Laser Safety ANSI Laser Classification Description Examples Class I Generally do not pose a hazard (i.e., CD, DVD) Class II Generally do not pose a hazard (i.e., checkout unless viewed directly for scanners) extended period of time Class IIIa Generally pose low hazard risk (i.e., laser pointers)
- Page 5 LSO Establishes Controls Laser Safety Every facility must have a Laser Safety Officer (LSO) appointed Administrative Controls Documentation, training programs, etc. Procedural Controls Policies, Safety Glasses, Signs, etc. LSO: Laser Safety Engineering Controls (by Mfg) Officer Interlocks, standby, emission indicators...
- Page 6 LSO Verifies Documentation Laser Safety Facility LSO is responsible for Laser Log, to include (not limited to): System and Equipment Audits Laser Maintenance Records Safety Audits Education – Initial and On-going Competency – Skills Check Lists...
- Page 7 NHZ: Nominal Hazard Zone Laser Safety NHZ is the actual area (boundary) where someone could be injured by the laser beam ANSI Laser Standards state that the entire room is the NHZ NHZ depends on factors such as: Wavelength Power Spot Size and Divergence Angles Exposure Time MPE (maximum permissible exposure)
- Page 8 Laser Safety Verify Proper Eye Protection Ensure all persons in treatment room are wearing protective eyewear OD 5, wavelength 790–830 nm If patient‘s face is treated they must wear opaque or metal eye goggles or shields Laser beam can cause severe retinal injury Do not treat within bony orbit of eye Do not treat eyebrows or eyelashes Ocular Hazard Zone:...
- Page 9 Protective Eyewear Required Laser Safety Operator Glasses: OD 5 for 800 nm wavelength Patient Goggles or Shields: Opaque or metal...
- Page 10 Laser Safety Calibration for LightSheer ET & HS Calibration is required: At start up, when system is first turned on When new handpiece is attached After 25,000 pulses in one ‗power on‘ session Calibration is recommended prior to the start of each treatment Verify port is clean and handpiece is properly seated prior to calibration...
- Page 11 Calibration Instructions Laser Safety Remove the handpiece and reinsert into the calibration port Verify hp is perpendicular to port and not seated at an angle; improves accuracy, avoids damage Touch screen prompts, follow each step Press enable button on handpiece Press and hold trigger until calibration complete...
- Page 12 Laser Safety ‗Vacuum Purge‘ for LightSheer HS Vacuum Purge is required: At start up and before any treatments To ensure proper function of vacuum assist technology Vacuum Purge is also recommended as needed Upgrade planned for Q2 2010 will include a reminder screen for system operators.
- Page 13 ‗Vacuum Purge‘ Instructions Laser Safety Select ‗Utility‘ on Main Screen ‗System Operating Tools‘ on Utility Menu ‗Vacuum Purge‘ on System Tools Screen Follow on screen instructions until purge is complete.
- Page 14 General Safety Guidelines Laser Safety ‗Laser in Use‘ warning sign on door Pair of operator glasses outside of door Enclosed room with opaque fire resistant window coverings Allow any flammable liquids used for cleaning the skin to fully evaporate before treatment Have a fire extinguisher available Water must be available (e.g., running or in bowl)
- Page 15 Laser Safety Laser Classification & Standards LightSheer Duet classification Class IV laser by Center for Devices and Radiological Health (CDRH) Class 4 laser by European Standard (EN 60825-1) Follow ANSI, OSHA, European standards Contact Laser Institute of America (LIA) (800) 34LASER for current ANSI and OSHA standards http://www.laserinstitute.org...
- Page 16 Laser Tissue Interaction...
- Page 17 Permanent Hair Reduction Defined Laser Tissue Interaction Hair growth has three phases Anagen (active/growth) Catagen (transition/regression) Telogen (resting) Growth cycle Depends on body part Lasts anywhere from 4 to 12 months Hair reduction is considered permanent when a significant amount of hair does not return for longer than the complete growth cycle...
- Page 18 How Does It Work? Laser Tissue Interaction Based on the theory of Selective Photothermolysis The target chromophore is melanin Present in the hair shaft Also present in the upper third of the follicular epithelium Heat generated in the hair shaft diffuses to the follicular epithelium to cause the damage that is desired...
- Page 19 Goal is to Damage Hair to Kill Point Laser Tissue Interaction A normal follicle A damaged follicle...
- Page 20 Pulse Width Considerations Laser Tissue Interaction PW must be equal to or shorter than Thermal Relaxation Time (TRT) of the target (hair follicle) to confine thermal damage Depends on hair diameter (i.e., fine vs. coarse) PW must be matched with appropriate amount of fluence to cause follicular damage while sparing surrounding tissue Depends on melanin content in skin vs.
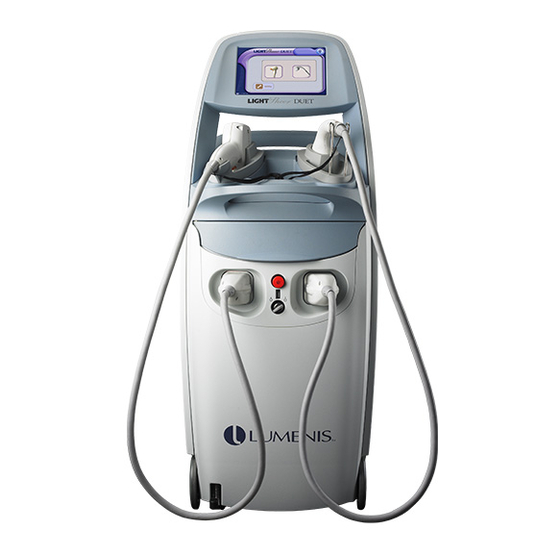
- Page 21 Laser Operation LightSheer Duet Platform...
- Page 22 Main Screen with Two Options LS ET & LS HS...
- Page 23 Two Distinct Handpieces: ET & HS Introduction LightSheer ET LightSheer HS 9 X 9 mm treatment area 22 X 35 mm treatment area 10 -100 J/cm Up to 12 J/cm 5 - 400 msec pulse widths 30 - 400 msec pulse widths ChillTip cooling Vacuum Assist technology Full LS ET functionality...
- Page 24 User Friendly Interface LS ET & LS HS LightSheer ET LightSheer HS HS Treatment Screen ET Treatment Screen...
- Page 25 Laser Operation LightSheer ET Handpiece...
- Page 26 How to Operate the Handpiece LightSheer ET Press enable button Position tip on patient‘s skin, apply light pressure Depress pulse trigger to begin treatment...
- Page 27 Higher Fluence & Contact Cooling LightSheer ET LightSheer ET Handpiece delivers up to 100 J/cm with 5-400 ms pulse durations & Contact Cooling Contact Cooling with ChillTip reduces temperature Compression Reduces competing chromophore, oxyhemoglobin Blanches vessels, eliminates energy lost into this target Rotates follicle closer to surface, so laser light hits broadside, penetrates deeper into the hair shaft Melanin in follicle is heated to point of thermal damage...
- Page 28 LightSheer ET Clinical Indications: Starting Presets User Presets Lumenis Presets...
- Page 29 LightSheer ET Clinical Indications: Saving Presets User pre-sets Save user pre-set Sample of Saved User Preset...
- Page 30 Treatment Parameters: GUI Settings LightSheer ET Select: Rate (Hz), OptiPulse (ms), Fluence (J/cm Reset Verify in Pulse Ready Mode Counter Verify ChillTip NOTE: CHILLTIP MUST REMAIN ON DURING LASER HAIR REMOVAL TREATMENT. (Blue is ON)
- Page 31 Treatment Parameters: What to Select LightSheer ET Rate (Hz) Fast (1—3 Hz), Med (0.5—1 Hz), Slow(0.5 Hz) Rate will adjust based on pulse duration and fluence; maximum rate is 3 Hz Fluence (J/cm AUTO, 30 ms and 100 ms will allow up to 60 J/cm² 400 ms pulse duration will allow up to 100 J/cm²...
- Page 32 Treatment Parameters: What to Select LightSheer ET Pulse Width (ms) Auto: 1/2 fluence rate, 5 ms to 30 ms; provides the highest efficacy for fair skin, shallow/fine hair 30ms: deeper, terminal / coarse hair 100-400ms: darker skin types, tanned skin, dense hair Tip Counter Counts total pulses on handpiece and per treatment...
- Page 33 LightSheer ET Before Treatment: Perform Test Spots Prep skin Recommend patient shave area to be treated day before procedure; clinician to verify prior to treatment Apply gel if desired Avoid contact between laser tip and any areas of blood from shaving Press enable button Position tip on patient‘s skin, apply moderate...
- Page 34 Handpiece Placement: How to Move LightSheer ET ―Pick and Place‖ Technique Place on skin, pulse laser, release trigger, handpiece is then picked up from skin, moved to the next treatment area, and lowered against the skin ―Bounce & Glide‖ Technique Place on skin, hold trigger in ON position, the tip is kept continuously in contact with the skin and bounced along skin tissue in cadence with the...
- Page 35 LightSheer ET During Treatment: Safety Guidelines Check if ChillTip is activated Physically touch the tip to check for cooling before treating patient ChillTip must be cleaned often Singed hair can collect on tip causing excessive heating Can occur after several pulses or up to one full run, depending on the amount of hair extrusion Visually check the tip for any debris every 50-100 pulses, without looking directly into tip...
- Page 36 LightSheer ET Handpiece ChillTip: How to Clean Cleaning should be performed with gauze pads moistened with distilled water or a mild alcohol solution Caution: While operating the LightSheer system, never look directly into the laser aperture at the distal end of the handpiece, even if you are wearing laser safety glasses.
- Page 37 Laser Operation LightSheer HS (High Speed) Handpiece...
- Page 38 LightSheer HS Enables Treatment Speed & Comfort ‗High Speed‘ handpiece 22 mm x 35mm spot size Vacuum Assist technology Enhances light absorption Improves treatment comfort Disposable tip / insert protects VA technology Replace disposable insert between patients Also replace during treatment if insert or filters become dirty/clogged Do not use treatment gel with ‗HS‘...
- Page 39 LightSheer HS How to Operate the Handpiece Ensure new, clean insert in HS handpiece prior to treatment Press ENABLE button Position HS opening on patient‘s skin Obtain vacuum contact Press and hold trigger for desired pulses Move to next treatment spot Note: A fine mist of mineral spring water may be applied to skin prior to treatment to maximize patient comfort...
- Page 40 Lower Fluence & Vacuum Assist LightSheer HS HS Handpiece delivers up to 12 J/cm and 30-400 ms pulse durations with Vacuum Assist Vacuum assist technology gently Vacuum pressure temporarily Skin is stretched thin. Hair is pulled pulls skin up into handpiece. Skin compresses tissue and surrounding closer to energy source.
- Page 41 LightSheer HS Clinical Indications: Starting Presets User Presets Lumenis Presets...
- Page 42 Clinical Indications: Saving Presets LightSheer HS User pre-sets Save user pre-set Sample of Saved User Preset...
- Page 43 LightSheer HS Treatment Parameters: GUI Settings Select: No. of Pulses, Vacuum, OptiPulse (ms), Fluence (J/cm Reset Pulse Verify in Counter Ready Mode Verify Vacuum (Green is ON)
- Page 44 Treatment Parameters: What to Select LightSheer HS Number of Pulses (pulse stacking) User selects number of pulses emitted per trigger press Recommend beginning with one pulse The additional pulses will emit additional energies and should only be increased with caution If desired clinical endpoints are not reached using single pulse at max.
- Page 45 Treatment Parameters: What to Select LightSheer HS Vacuum Level High (18 inHg) Medium (12 inHg) Low (8 inHg) Pulse Duration (ms) 30 ms: Fastest Pulse Duration Fluence max 6 J Custom: Most common setting, automatic PD selection 30-70 ms based on fluence level selected Actual will be indicated at column bottom 100 ms: Darker skin types and tans 400 ms: Darker skin types and tans...
- Page 46 Treatment Parameters: What to Select LightSheer HS Fluence 4.5 - 6 J/cm² When 30 ms pulse duration is selected 4.5 - 12J/cm² When Custom (30-70ms);100 ms;400 ms pulse durations are selected Tip Counter Counts total pulses on handpiece and per treatment During treatment, the system operator must visually check insert frequently (e.g., every...
- Page 47 LightSheer HS Before Treatment: Perform Test Spots Prep skin: shave to skin surface, clean skin Press ENABLE button Position handpiece on patient‘s skin Depress pulse trigger to begin treatment Perform test spot Observe laser tissue interaction Wait and observe tissue response See ‗Clinical Protocols‘...
- Page 48 Handpiece Coverage: How to Move LightSheer HS...
- Page 49 LightSheer HS During Treatment: Safety Guidelines Keep the diode window and disposable insert clean at all times during treatment Whenever you see any contamination on the window surface: using lint free gauze pad moistened with alcohol, clean the HS handpiece window and then clean with dry gauze pad Frequently observe disposable insert for damage and replace it if necessary...
- Page 50 Laser Operation HS Handpiece & Disposable Insert Care Guidelines...
- Page 51 Product Update HS Handpiece & Disposable Insert NEW disposable insert with NEW Disposable Insert (with glass window; available) glass window designed to be easier to clean and last longer per treatment Released in March 2010; available NOW FORMER Disposable Insert FORMER disposable insert with (all plastic;...
- Page 52 Caution HS Handpiece & Disposable Insert Care Debris or particles, including fingerprints, adhering to the inside of the disposable insert during application of energy could lead to absorption of light and overheating and/or burning of the disposable insert. FORMER Disposable w/all plastic : NEW Disposable w/glass window: This product is no longer sold;...
- Page 53 Caution HS Handpiece & Disposable Insert Care Use of the LightSheer Duet with a damaged disposable insert can damage your HS handpiece and compromise treatment quality. ‗Damaged‘ sample of former disposable w/all plastic; no longer sold, obsolete.
- Page 54 Pre-Treatment HS Handpiece & Diode Window Care Pre-treatment Requirements Thoroughly shave and clean the treatment area to remove any pieces of hair or other debris. While the system is OFF, inspect the handpiece. The diode window should be clean and free of debris.
- Page 55 Caution HS Handpiece & Diode Window Care IF THE DIODE GLASS WINDOW IS NOT CLEAN Remove disposable insert using outer edge/lip Caution: when removing disposable insert with glass window after firing the laser, DO NOT TOUCH the backside that faces diode window;...
- Page 56 HS Handpiece & Disposable Insert Care Pre-Treatment Insert a new and clean disposable insert with a gloved hand (note: use powder-less gloves). Avoid creating fingerprints or having debris contaminate the insert. How to Insert Note: ‘Disposable tip’ in photo same as ‘disposable insert’.
- Page 57 HS Handpiece & Disposable Insert Care During Tx During Treatment Frequently observe the disposable insert for debris or damage – more often when treating coarse hair. Throughout the treatment, check the disposable insert every 5-10 pulses. Wipe away any contamination with a dry gauze. If the dry gauze does not clean the insert, clean with alcohol moistened gauze.
- Page 58 HS Handpiece & Disposable Insert Care During Tx During Treatment (continued) After firing the laser, if smoke is visible, or white flash is seen, check the disposable insert and clean again or change as necessary. If the disposable insert cannot be completely cleaned with alcohol, discard and insert a new one.
- Page 59 HS Handpiece & Disposable Insert Care Caution White Flash = Stop & Replace Insert If during treatment the clinician sees a bright white flash from the handpiece, the disposable insert* should be replaced immediately. Caution: when removing the disposable insert with glass window after firing the laser, use outer edge/lip;...
- Page 60 HS Handpiece & Disposable Insert Care Overview B. Contaminated Inserts – CLEAN A. Clean Inserts – USE C. Burned Insert - REPLACE D. Burned Insert - REPLACE Note: C & D above are ‗damaged‘ samples of former/obsolete disposable (all plastic); no longer sold and replaced with new disposable insert (w/glass window).
- Page 61 HS Handpiece & Diode Window Care Overview A. Diode Window is CLEAN: Ready to Use B. Diode Window is DIRTY: C. Clean Diode Window: with Clean prior to Use alcohol moistened cotton...
- Page 62 HS Handpiece & Diode Window Care Contact Service IF Diode Window Can NOT Be Cleaned DO NOT USE CALL Customer Service In the US: 1-877-LUMENIS Outside the US: contact your local service representative.
- Page 63 HS Handpiece & Disposable Insert Care Post Treatment Post Treatment Dispose of the insert after each patient treatment. Caution: when removing the disposable insert with glass window after firing the laser, use outer edge/lip; DO NOT TOUCH the backside that faces diode window as this will get very HOT after firing the laser.
- Page 64 Clinical Protocols Laser Hair Removal...
- Page 65 Prior to Tx Manage Patient Expectations No two patients are alike, treatment outcome cannot always be predicted Never promise 100% reduction Clearly define permanent hair reduction Describe need for multiple treatments Multiple treatments are required (e.g., avg. 5-7) For darker skin types IV-VI, more treatments may be needed (e.g., can be as many as 12) Discuss possible side effects and obtain signed patient consent...
- Page 66 Pre Treatment Guidelines Recommended Take baseline photographs Recommend patient shave area to be treated day before procedure (clinician to verify prior to treatment) Avoid contact between laser tip and any area of blood from shaving skin Clean skin surface to remove any hair debris Note: a lint roller may be helpful to remove hair particles, debris;...
- Page 67 Patient Consultation & Selection To Consider Obtain complete patient history Manage patient‘s expectations Discuss number of treatments Discuss contraindications Discuss complications & possible side effects Record clinical indications Skin type Hair color Hair density Hair diameter...
- Page 68 Patient Skin Types To Consider LightSheer is cleared to treat all skin types (Fitzpatrick I-VI), including tanned skin Refer to physician recommended treatment parameters (e.g., presets) Use added caution with darker skin types Avoid treating patients with recent or lengthy exposure to sun or artificial UV light DO NOT TREAT patients with artificial tan on skin Perform the recommended test spot protocol...
- Page 69 Fitzpatrick Scale Skin Typing To Consider Skin Type Genetic Disposition Reaction to Sun, Tanning Habits White; very fair; red or blond hair; blue Always burns, eyes; freckles never tans White; fair; red or blond hair; blue, hazel Usually burns, or green eyes tans with difficulty Cream white;...
- Page 70 *Note: Lumenis recommends conservative approach to darker skin types IV-VI; perform test spots & wait; then adjust parameters to optimize treatment. If uncertain about skin type IV, approach as if skin type V for test spots to verify.
- Page 71 Light blonde or white can experience temporary loss for up to 3 months Recommend electrolysis as a treatment for permanent removal of discrete white hair Terminal hair, not vellous (short, fine light colored hairs) Lumenis does not recommend treating hair that is lighter than surrounding tissue...
- Page 72 To Consider Hair Growth Cycle Duration Richards-Meharg Table AREA OF BODY ANAGEN TELOGEN Scalp 2-6 Years 3-4 Months Beard/Chin 52 weeks 10 Weeks Upper Lip 16 Weeks 6 Weeks Eyebrows 4-8 Weeks 3 Months 4-8 Weeks 3 Months Legs 24 Weeks 16 Weeks Arms 18 Weeks...
- Page 73 Clinical Contraindications Caution Advised Active infection in the treatment area Active infection or a history of herpes simplex in the area to be treated Use of oral Isotretinoin (e.g., Accutane, others) within the preceding 6 months History of keloid formations History of livedo reticularis, an autoimmune vascular disease Hypersensitivity at the treatment site to any agents,...
- Page 74 Clinical Contraindications (cont‘d.) Caution Advised Dysplastic nevi in the area to be treated History of bleeding disorders History of collagen, vascular or immunosuppression disorders Tattoos at the treatment sites: stay more than ¼ inch away from tattoo border Significant concurrent skin conditions affecting areas to be treated or any inflammatory skin conditions Active cold sores, open lacerations or abrasions on the area to be treated...
- Page 75 Related Contraindications Caution Advised History of erythema ab igne; an acquired persistent reticulated erythematous and pigmented rash of the skin produced by prolonged or repeated exposure to moderately intense heat of infrared radiation Use of depilatories or other hair removal treatments (i.e., waxing, plucking, tweezing, or electrolysis) in the treatment area within the preceding 6 weeks Chronic or cutaneous viral, fungal, or bacterial...
- Page 76 Complications & Possible Side Effects Caution Advised Erythema, edema and perifollicular edema may occur immediately after treatment and typically resolve in a few days Hypo- or Hyperpigmentation rare and usually transient; usually resolves in a few months; fluence and skin type dependent Irritation, itching, burning sensation or discomfort during or following treatment may occur...
- Page 77 Complications & Possible Side Effects Caution Advised Erythema ab igne, which is the development of an acquired persistent reticulated erythematous and pigmented rash of the skin produced by prolonged or repeated exposure to moderately intense heat of infrared radiation Pruritis may occur in rare cases Contact dermatitis or irritant dermatitis may occur in some cases Infection at the treatment site...
- Page 78 Contact Us CAUTION is advised when treating patients with any of the listed contraindications. In the event of adverse outcomes, CONTACT LUMENIS In the US @ 1-877-LUMENIS (586-3647) Outside the US, contact your local Customer Support, Sales, and Service representative...
- Page 79 Positive Clinical End Points LS ET / LS HS Smell or visualize singed hair Hair from follicle ejected or vaporized Singed hair on skin or in disposable tip (HS only) Gel becomes brownish from singed hairs (ET only) Odor of singed hair present Perifollicular edema and erythema May be Mild (HS hp) to Moderate (ET hp)
- Page 80 LS ET Results Positive Clinical End Points Perifollicular erythema Initial redness from ChillTip and pressure Erythema around treated hair increases after a few minutes...
- Page 81 Positive Clinical End Points LS ET Results Perifollicular edema Swelling around the follicle (bumps) several minutes after treatment...
- Page 82 Positive Clinical End Points LS HS Results When using LightSheer HS hp, lower fluence is used and laser energy lost to competing chromophores is minimized Therefore, LightSheer HS tissue response (i.e., edema and erythema) may be mild in comparison to the patient‘s previous experience Proactively counsel patients to expect milder response to minimize any potential...
- Page 83 L/R Comparison of Clinical Endpoints LS HS / LS ET Immediate Reaction LightSheer HS hp LightSheer ET hp (8-11 j/cm2, custom) (34-38j/cm2, auto-30ms) Courtesy of Girish Munavalli, MD, MHS, FAAD...
- Page 84 During Tx Monitor Laser-Tissue Interaction Monitor laser-tissue interaction throughout treatment, adjust if and as needed Since no two patients are exactly alike, do not rely solely on written parameters Clinical end-points that indicate fluence and/or pulse width must be changed include: Skin graying Skin separation...
- Page 85 Post-Treatment Considerations To Remember Sunburned sensation is common Suggest cool compresses, soothing cream or gel (i.e., aloe vera) Crusty spots may occur Clean area 2 x daily with mild soap Sunscreen for 6 weeks on treatment area May experience singed hair and shedding process in days following...
- Page 86 The Treatment of Pseudofolliculitis Barbae...
- Page 87 Pseudofolliculitis Barbae (PFB) Description Commonly referred to as ‗razor bumps‘ Medical term for persistent irritation due to shaving Problematic for men of African descent, others with curly hair Inflammatory foreign body response to a sharp hair shaft...
- Page 88 LightSheer Treatment of PFB Skin Types IV-VI LightSheer ET Results Shown Before Treatment After Treatment Photos courtesy of Fran E. Cook-Bolden, MD...
- Page 89 Lumenis & You – A Partnership for Success...
- Page 90 A Partnership for Success Over Time Lumenis & You Lumenis is Committed to Your Clinical Success In office training by a Clinical Application Specialist Advanced training with preceptors, workshops and Webinars Lumenis is Committed to Your Practice Success Lumenis Physician Portal for information and practice building tools with easy access http://aestheticportal.lumenis.com...
- Page 91 Marketing Tools, Training, Discussions Physician Portal Customers go to: http://aestheticportal.lumenis.com Register, ‗Create a New Account‘ Download practice marketing tools, access training Join discussion forums of interest, with your peers...
- Page 92 Help Patients Find Your Practice… Consumer Site www.skinandhealth.com raises consumer awareness Lumenis customers register for free referral service ‗Doctor Finder‘ helps patients ‗Find a Practitioner‘...
- Page 93 Any Questions…? Contact Us...
- Page 94 LightSheer Duet: Intended Use 510(k) FDA Clearance 510(k) K053628, 7 April 2006 Skin Types Fitzpatrick I-VI, including tanned skin Primary Procedures Hair removal, permanent hair reduction Secondary Procedures Treatment of benign vascular lesions, leg veins Treatment of pseudofolliculitis barbae (PFB)
Need help?
Do you have a question about the LightSheer Duet and is the answer not in the manual?
Questions and answers