Table of Contents
Advertisement
Quick Links
Moisture meter
Operating Manual
humimeter BLW
Moisture meter with ram electrode for measuring the
moisture content of round and log wood
78,0 °F | 6,16 % | 456 kg/m
| -27,3 td | 0,64 aw | 51,9 %r.H. | 14,8 % abs | 100,4 g/m
| 09 m/s | 4,90 Ugl | 1
3
2
Always read this operating manual before using the humimter BLW!
Version 3.0
Advertisement
Table of Contents

Related Manuals for Schaller Humimeter BLW


Summary of Contents for Schaller Humimeter BLW
- Page 1 Moisture meter Operating Manual humimeter BLW Moisture meter with ram electrode for measuring the moisture content of round and log wood 78,0 °F | 6,16 % | 456 kg/m | -27,3 td | 0,64 aw | 51,9 %r.H. | 14,8 % abs | 100,4 g/m...
-
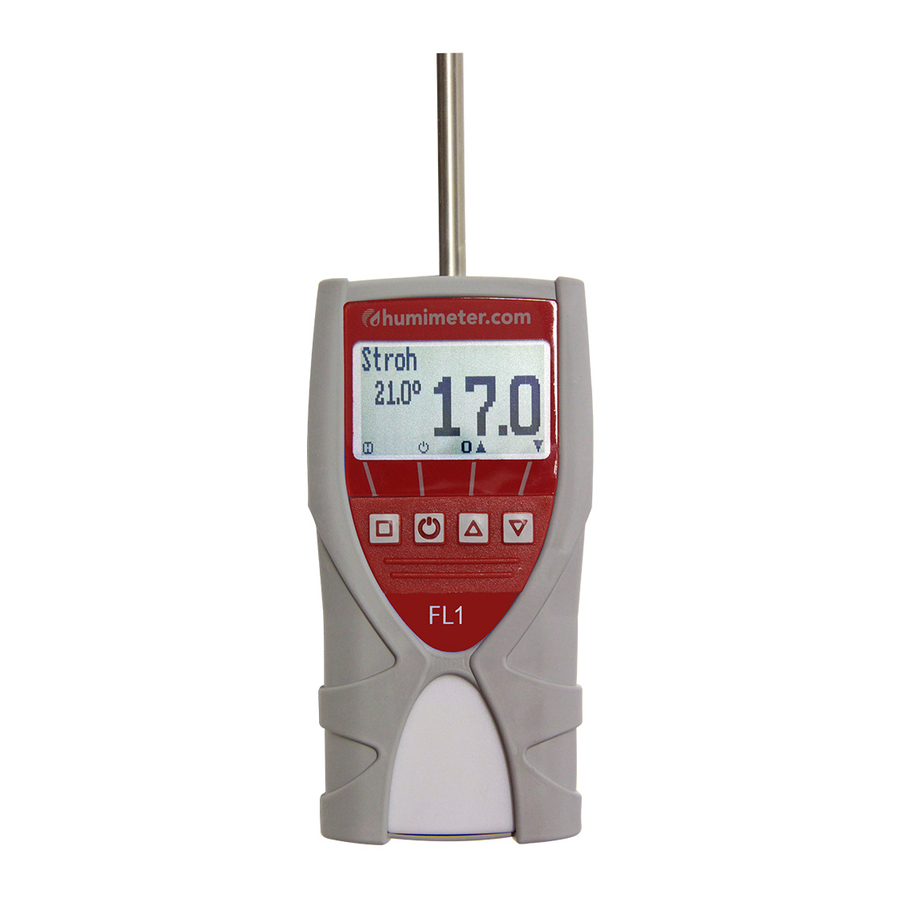
Page 2: Your Humimeter Blw At A Glance
BLW Operating Manual Your humimeter BLW at a glance The main unit Name Sensor cable USB port (optional) Ram electrode Keypad Rubber protection cover Measuring tips Display Page 2... -
Page 3: Rear Of The Main Unit
Rear of the main unit Name Battery compartment The display Name Wood type Moisture content in % ("6.1 How moisture is defined") Display symbols Temperature display Page 3... -
Page 4: The Display Symbols
BLW Operating Manual The display symbols Symbol Name Symbol Name Enter Change input level Down Back Change menu Enter numbers Enter data Enter letters View measurements Continue / go right Delete measurements Left On/off button, display light Save measured value... - Page 5 Data Log menu Name Change menu Display illumination / device on/off Save measured value Show the last recorded values Main menu The main menu comprises the following menu items: • Edit Logs: Manual Logs, Clear Logs • Print Logs: Last Log, All Logs, Clear Logs •...
-
Page 6: Table Of Contents
BLW Operating Manual Table of contents Your humimeter BLW at a glance ������������������������������������������������ 2 The main unit ......................2 Rear of the main unit ....................3 The display ....................... 3 The display symbols ....................4 The menus ....................... 4 1�... - Page 7 Taking a measurement ................16 Switching the device off ................ 16 5� The measuring process ������������������������������������������������� 17 Preparing a measurement ..............17 Taking a measurement ................18 Hold function - Freezing the displayed values ........20 5.3.1 Activating the Hold function in the Options menu ......... 20 5.3.2 Using the Hold function ................
- Page 8 BLW Operating Manual Activating options ................. 34 Deactivating options ................35 Selecting °C/°F ..................35 Reducing the device's power consumption ..........35 9.7.1 Configuring the display illumination time ..........35 9.7.2 Configuring automatic switch-off ............36 Configuring the material calibration function ........37 Changing the password ................
-
Page 9: Introduction
Introduction Information about this operating manual This operating manual is designed to enable you to use the humimeter BLW safely and effectively. It is part of the device, has to be stored nearby and must be easily accessi- ble to users at all times. -
Page 10: Symbols Used In This Manual
BLW Operating Manual Symbols used in this manual All of the safety information provided in this manual is shown with a corresponding symbol. WARNING It is essential to observe this warning. Non-compliance can lead to serious irreversible or fatal injury. -
Page 11: For Your Safety
For your safety The device complies with the following European directives: • Restriction of Hazardous Substances in Electrical and Electronic Equipment (RoHS) • Electromagnetic compatibility (EMC) The device corresponds to state-of-the-art technology. However, it is still associated with a number of residual hazards. These hazards can be avoided through strict observance of our safety information. -
Page 12: General Safety Information
• Keep the measuring tips away from other people throughout all activities. • In case of damages or loose parts on the device, remove the batteries and con- tact Schaller GmbH or your dealer. • All of the device’s technical features have been inspected and tested before delivery. -
Page 13: On Receipt Of Your Device
Make sure that all of the components have been included by checking the package contents against the following list: • humimeter BLW • Ram electrode • 20 pieces of measuring tips without insulation (40 mm & 60 mm, 10 pieces each) •... -
Page 14: Inserting Batteries
BLW Operating Manual Inserting batteries Remove the rubber protection cover. To do so, hold the rubber protection cover at the upper side and pull it over (figure and 2). In case the ram electrode is connected, disconnect the ram electrode before (see "4.4 Discon-... -
Page 15: Selecting The Product Type
Selecting the product type To do so: The device has to be in the product selection menu (figure 7). For an overview of the different product types and the criteria for selecting them, please refer to: "6. Wood types". Press the or button to move from one product to the next... -
Page 16: Inserting The Measuring Tips
BLW Operating Manual Inserting the measuring tips • Unscrew the two nuts located on the head of the ram electrode counterclock- wise (figure 12). » Loosen only the upper nuts. The nuts below must not be loosened! • Insert one measuring tip per nut from behind through the nut (figure 13). -
Page 17: The Measuring Process
The measuring process Preparing a measurement To do so: The device has to have nearly the same temperature than the product being measured. It is recommended to let your humimeter device adjust to the surrounding temperature for at least 30 minutes before the measurement. Insert the measuring tips (see "4.5 Inserting the measuring... -
Page 18: Taking A Measurement
BLW Operating Manual Taking a measurement To do so: The device has nearly the same temperature than the product being measu- red. At the point to be measured the bark has been removed. Put the ram electrode with measuring tips straight to the point to be measured (figure 19). - Page 19 WARNING Risk of injury Risk of injury due to the measuring tips. ► Keep the measuring tips away from your body throughout all activities. ► Keep the measuring tips away from other people throughout all activities. CAUTION Risk of injury Crushing when striking the metal handle downwards.
-
Page 20: Hold Function - Freezing The Displayed Values
BLW Operating Manual Hold function - Freezing the displayed values The device can be configured in such a way that the information being shown on the display will freeze at the touch of a button until a new button is pressed. This function can be very useful when e.g. -
Page 21: Saving Individual Readings
Saving individual readings The device can be configured in such a way that the device will save a reading every time a button is pressed. This option (manual save function) is the device’s default setting. 5.4.1 Activating the manual save function in the options menu To do so: The device has to be switched on and be in the product selection menu. -
Page 22: Saving Several Readings (A Measurement Series) At The Same Time
BLW Operating Manual The data you have inputted can be overwritten at any time. Inputting letters: Press and hold to quickly scroll to the required letter and either press it for 3 seconds or press to confirm the selected letter (figure 31). - Page 23 Inputting letters: Press and hold to quickly scroll to the required letter and either press it for 3 seconds or press to confirm the selected letter (figure 34). Inputting numbers: Press and hold to quickly scroll to the required number and either press it for 3 seconds or press to confirm the selected number.
-
Page 24: Viewing Individual Readings
BLW Operating Manual Viewing individual readings To do so: You must have saved a reading (e.g. 1 Log). The display will now appear as shown in figure 35. Press Select the required reading. To do so, press » The display will now appear as shown in figure 36. -
Page 25: Deleting All Measured Values (Data Log)
Deleting all measured values (data log) To do so: You must have taken and saved one or several readings. Press twice or hold for 2 seconds. Select Edit Logs (figure 41). To do so, press and confirm by pressing Select Clear logs (figure 42). To do so, press and confirm by pressing »... -
Page 26: Deleting Single Values From A Series Of Measurements
BLW Operating Manual » The display will then show the message clear? (figure 47). Confirm by pressing » The value has been deleted. 5.10 Deleting single values from a series of measurements To do so: You must have saved a series of measurements comprising of at least 2 logs. -
Page 27: Wood Types
The wood types listed in the "Wood type" column are displayed in the measurement window of the humimeter BLW. If you want to measure a type of wood that is not displayed on the measuring instrument, search for it in the subgroups and set the corresponding wood type on the instrument, e.g. -
Page 28: How Moisture Is Defined
BLW Operating Manual How moisture is defined In the standard delivery state, the device measures and shows the material moisture content. The moisture content readings are calculated in relation to the material’s overall mass: Mass of the sample with average moisture content... -
Page 29: Using The Logmemorizer Program
Exporting measured values to a computer To do so: The LogMemorizer program is installed. You must have taken and saved one or several moisture readings. Options: You can export moisture readings from the humimeter BLW or initiate the export at your computer. Page 29... - Page 30 All measuring values saved on the humimeter BLW will now be sent to your computer. Initiating the data export at your computer Connect the humimeter BLW to your computer using the supplied USB cable: Insert the USB Mini B connector into the humime- ter BLW (figure 59).
- Page 31 Import most recent manual log (for importing the most recent manually saved logs). Name Import all manual logs Import most recent manual » The measuring values saved on the humimeter BLW will now be sent to your computer. Page 31...
-
Page 32: Checking On The Device's Status
BLW Operating Manual Checking on the device's status Press twice or hold for 2 seconds. Select Status. To do so, press and confirm by pressing » The display will then show the status indicator humimeter. » The display will show the following information:... -
Page 33: Configuring The Device
Configuring the device Turning on Bluetooth The information on Bluetooth is provided in a separate operating manual. Adjusting the date/time Press twice or hold for 2 seconds. Select Options. To do so, press and confirm by pressing Select Date/Time. To do so, press and confirm by pressing »... -
Page 34: Selecting A Language
BLW Operating Manual Selecting a language Press twice or hold for 2 seconds. Select Options. To do so, press and confirm by pressing Select Language. To do so, press and confirm by pressing Navigate to the required language. To do so, press... -
Page 35: Deactivating Options
» The °C/°F, BL On Time, Auto Off Time, Materialcalib., Password, Reset options are now activated. Press to leave the Options menu. Press to leave the main menu. Deactivating options Once the device has been switched restarted, the °C/°F, BL On Time, Auto Off Time, Materialcalib., Password, Reset options will be deactivated again. -
Page 36: Configuring Automatic Switch-Off
BLW Operating Manual Select the required display illumination period (30 seconds, 2 minutes, 5 minutes, 10 minutes). To do so, press and confirm by pressing » The settings have been saved. Press to leave the Options menu. Press to leave the main menu. -
Page 37: Configuring The Material Calibration Function
Configuring the material calibration function The type calibration function is described in a separate operating manual. Changing the password To do so: All of the options must be activated (see "9.4 Activating options"). Press twice or hold for 2 seconds. Select Options. -
Page 38: Resetting The Device To Its Factory Settings
BLW Operating Manual 9.10 Resetting the device to its factory settings To do so: All of the options must be activated (see "9.4 Activating options"). Press twice or hold for 2 seconds. Select Options. To do so, press and confirm by pressing Select Reset. -
Page 39: Care Instructions
10.2 Care instructions • Do not leave the device out in the rain. The device is not waterproof. • Do not expose the device to extreme temperatures. • Protect the device from strong mechanical shocks and loads. 10.3 Cleaning the device Plastic housing •... -
Page 40: Faults
BLW Operating Manual 11. Faults If the measures listed below fail to remedy any faults or if the device has faults not listed here, please contact Schaller GmbH. Fault Cause Remedy Measuring error The temperature of the mate- The temperature of the... -
Page 41: Storage And Disposal
12. Storage and disposal 12.1 Storing the device The device must be stored as follows: • Do not store outdoors. • Store in a dry and dust-free place. • Protect the device from sunlight. • Avoid mechanical shocks/loads. • Remove the batteries if the device isn´t used for a period of 4 weeks or longer. •... -
Page 42: Device Information
BLW Operating Manual 13. Device information 13.1 CE declaration of conformity DECLARATION OF CONFORMITY______ Schaller GmbH Max-Schaller-Straße 99 A – 8181 St. Ruprecht in accordance with the following Directives: EMV - Richtlinie 2014/30/EU, RoHS - Directives 2011/65/EG, hereby declare that the following product types:... -
Page 43: Technical Data
13.2 Technical data Display resolution 0.1 % moisture content, 0.1 °C/°F temperature Measuring range 8 % to 60 % moisture content Operating temperature 0 °C to +50 °C Temperature measuring -10 °C to +80 °C range Storage temperature -20 °C to +60 °C Temperature compensation Automatic Data memory... - Page 44 Paper / Board Schaller Messtechnik develops, produces and sells professional moisture meters and turnkey solutions. Schaller GmbH Max-Schaller-Straße 99, A - 8181 St. Ruprecht an der Raab Tel +43 (0)3178 - 28899 , Fax +43 (0)3178 - 28899 - 901 info@humimeter.com, www.humimeter.com...
Need help?
Do you have a question about the Humimeter BLW and is the answer not in the manual?
Questions and answers