
Related Manuals for Heston Blumenthal Everdure HUB II


Summary of Contents for Heston Blumenthal Everdure HUB II
- Page 1 Assembly, Operation & Maintenance Instructions HUB II Assembly, operation & maintenance instructions for Everdure by Heston Blumenthal HUB II electric ignition charcoal barbeque everdurebyheston.com.au everdurebyheston.com.nz...
- Page 2 Inspired by the past. Innovated for the future. T H E O U T D O O R P E R F O R M A N C E...
-
Page 3: Table Of Contents
Due to continual product development, Everdure by Heston Blumenthal reserves the right to alter specifications or appearances without notice. Dispose of packaging responsibly – recycle where facilities are available. -
Page 4: Important Safety Instructions
Everdure by rotisserie parts can be immersed). Heston Blumenthal in Australia on 1300 HESTON or in New Zealand on (09) 415 6000 10. As charcoal can smoulder for an extended period of time, take care when removing ash before operating your appliance. - Page 5 (and void the warranty). Regular of your surroundings and potential fire hazards caused by sparks or spitting fuels. cleaning and covering with an Everdure by Heston Blumenthal HUB barbeque cover Never dispose of solid fuels or hot ashes in areas where they can be trodden on or can help can help to reduce this.
-
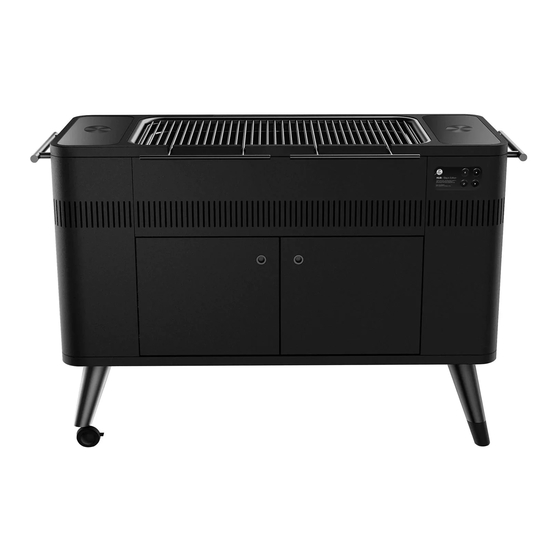
Page 6: Appliance Details
Assembly, Operation & Maintenance Instructions DO NOT OPERATE THIS APPLIANCE BEFORE READING THE INSTRUCTION BOOKLET DO NOT PLACE ARTICLES ON OR AGAINST THIS APPLIANCE DO NOT STORE CHEMICALS OR FLAMMABLE MATERIALS OR SPRAY AEROSOLS NEAR THIS DO NOT OPERATE THIS APPLIANCE INDOORS DO NOT ENCLOSE THIS APPLIANCE. -
Page 7: Outdoor Installation Guide
Assembly, Operation & Maintenance Instructions OUTDOOR INSTALLATION GUIDE Both ends open This Appliance shall only be used in an above ground open-air situation with natural ventilation, without stagnant areas, where products of combustion are rapidly dispersed by wind and natural convection. This appliance must not be used indoors. -
Page 8: Operating Instructions
For more specific information (including set-up illustrations and diagrams) and up to date cooking instructions, please visit the Everdure by Heston Blumenthal website at ROTISCOPE TECHNOLOGY www.everdurebyheston.com.au/www.everdurebyheston.com.nz Rotiscope Technology is the patent pending built-in rotisserie system of the barbeque. -
Page 9: Ignition Procedure
Assembly, Operation & Maintenance Instructions IGNITION PROCEDURE The pole to the right contains the rotisserie motor. Take the rotisserie rod with the food attached and place the pointed end in the motor hole at the top of the right hand side pole. -
Page 10: Cleaning & Storage
Assembly, Operation & Maintenance Instructions CLEANING & STORAGE EXTERNAL CLEANING Before cleaning the barbeque exterior, ensure the appliance has cooled and is safe to touch, and that the appliance has been removed from the power supply. Painted and plastic surfaces can be cleaned using a mild household detergent or cleaner and a clean cloth (do not use scourers or harsh detergents). -
Page 11: Troubleshooting
Assembly, Operation & Maintenance Instructions TROUBLESHOOTING Solid fuel is not igniting or taking longer than expected to ignite: Power supply interrupted Check the LED at the ignition switch is lighting when pressed. Check cord is connected & turned on. Check power is being supplied to appliance (power outage or tripped circuit breaker). -
Page 12: Barbeque Assembly
Assembly, Operation & Maintenance Instructions BARBEQUE ASSEMBLY The barbeque must be fully assembled before use. Only a medium size Philips screwdriver and a adjustable spanner is needed. Open the carton and remove the parts (Note that the barbeque chassis assembly is heavy and will require at least 2 people to move). Remove all packaging (especially check inside the barbeque and under the charcoal grid) and place parts on a clean surface. - Page 13 Assembly, Operation & Maintenance Instructions STEP 01 STEP 02 / Rotate the barbecue chassis assembly (01) onto its rear panel and lay on a clean flat / Take the Ø4mm spring washers (F03) and Ø4mm washers (F04) and place them onto surface (the cardboard packaging is ideal).
- Page 14 Assembly, Operation & Maintenance Instructions STEP 04 STEP 06 / If not already assembled, lever up the element and place the heat shield (09) inside the / Place the left hand open grill (10) and right hand open grill (11) on the twelve pins on the bowl.
- Page 15 Assembly, Operation & Maintenance Instructions STEP 08 STEP 10 / With the barbecue in a secure position, before extending the poles and ignition element, / Take the rotisserie rod with the food attached and place the pointed end in the motor the unit needs to connect the power first.
-
Page 16: Maintenance
The product or defective material will be repaired or replaced at the option of Everdure by Heston Blumenthal , but all costs of installation, removal, cartage, freight, travelling expenses and insurance are to be paid by the claimant. Our Warranty is subject to the product being used for single family domestic household use. - Page 17 7. Damage from cleaning products not recommended by Everdure by Heston Blumenthal. HOW TO CLAIM OUR WARRANTY You will need to contact Everdure by Heston Blumenthal in Australia or New Zealand using the below contacts details. All Service and Assembly Enquiries: IN AUSTRALIA: Telephone 1300HESTON OR VISIT: www.everdurebyheston.com.au...
-
Page 18: Parts List: Barbeque Assembly
Assembly, Operation & Maintenance Instructions Circular Guide Rod PARTS LIST: HBCE3B Square Pipe Bracket PART NAME Pole Assembly Right Rotisserie Rod Proximity Switch Rotisserie Fork Heat Insulation Lid Handle Chassis Rear Panel Plug Recess Left Open Grill Power Cord Assembly Cover Right Open Grill Power Cord Assembly Charcoal Grid... - Page 19 Assembly, Operation & Maintenance Instructions HUB II EXPLODED VIEW Electric Control Box Cover Poles System PCB Switching Power Supply Electric Control Box Castor Leg Rear Castor Leg Front Lockable Castor Hex Bolt M6x12mm Leg Upper Right Rear Foot Rear Leg Upper Right Front Foot Front Thermostat Mount Thermostat...
-
Page 20: Barbeque Accessories
Assembly, Operation & Maintenance Instructions OPTIONAL ACCESSORY: COOKING ACCESSORIES Please see everdurebyheston.com.au/everdurebyheston.com.nz for a full range of accessories... - Page 21 Assembly, Operation & Maintenance Instructions NOTES ......................................................................................................................................................................................................................................................................................................................................................................................................................................................................................................................................................................................................................................................................................................................................................................................................................................................................................................................................................
- Page 22 Assembly, Operation & Maintenance Instructions NOTES ......................................................................................................................................................................................................................................................................................................................................................................................................................................................................................................................................................................................................................................................................................................................................................................................................................................................................................................................................................
- Page 23 Assembly, Operation & Maintenance Instructions...
- Page 24 IM Ref: HUBII 07/2018/06 FOR OUTDOOR USE ONLY eve rd u re byh e s to n .c o m . a u eve rd u re byh e s to n .c o m .nz...
Need help?
Do you have a question about the Everdure HUB II and is the answer not in the manual?
Questions and answers
My hub 2 is not working and emits a chime