
Related Manuals for IWAKI MDK Series


Summary of Contents for IWAKI MDK Series
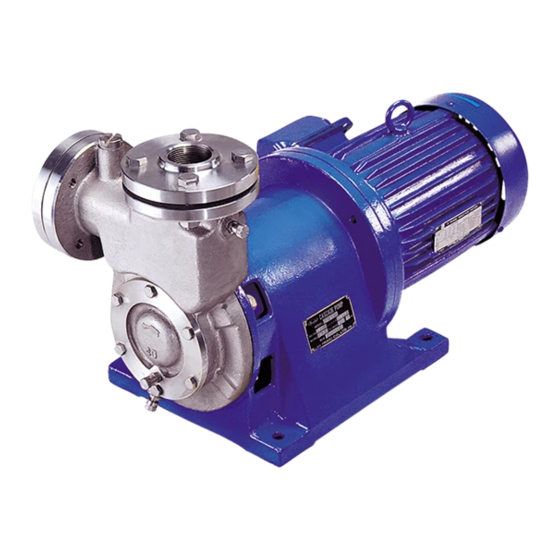
- Page 1 IWAKI Magnetic Drive Pump MDK Series Instruction Manual (Europe Edition) Read this manual before use of product...
-
Page 2: Table Of Contents
Thank you for selecting IWAKI Magnetic Drive Pump MDK Series. This instruction manual, which is divided into five sections, namely "Safety", "Outline of Product", "Installation", "Operation" and "Maintenance", deals with the correct handling and operation procedures for the pump. To make maximum use of the pump and to ensure safe and long time operation of the pump, please read this manual thoroughly and carefully prior to operating the pump. -
Page 3: Safety Section
Safety section For the Safe and Correct Handling of the Pump ● "Safety Instruction" section deals with important details about handling of the product. Before use, read this section carefully for the prevention of personal injury or property damage. ● Observe the instructions accompanied with "WARNING" or "CAUTION" in this manual. These instructions are very important for protecting users from hazardous situations. - Page 4 Safety section WARNING ● Turn off power before service Risk of electrical shock. Be sure to turn off power to stop the pump and related devices before service is performed. Turning off power ● Wear protective clothing Always wear protective clothing such as an eye protection, chemical re- sistant gloves, a mask and a face shield during disassembly, assembly or maintenance work.
- Page 5 Safety section CAUTION ● Qualified personnel only The pump should be handled or operated by qualified personnel with a full understanding of the pump. Any person not familiar with the product should not take part in the operation or management of the pump. ●...
- Page 6 Safety section CAUTION ● Grounding Risk of electric shock! Always properly ground the pump. Conform to local electric codes. Grounding ● Install a GFCI (earth leakage breaker) An electrical failure of the pump may adversely affect other devices on the same line.
-
Page 7: Outline Of Product
OUTLINE OF PRODUCT 1. Unpacking and inspection ....6 2. Operating principle ......6 3. Model identification ......6 4. Specification ........7 5. Construction and material ....7 6. Outline dimension ....... 8 7. Performance curve ......8 8. Construction and parts names .... 9 - 5 -... -
Page 8: Unpacking And Inspection
Remove the plug when the product is installed. 2. Operating principle MDK Series pumps are magnetically driven turbine pump. Impeller is rotated in pump chamber by the magnetic coupling force to suck liquid from suction port and to discharge to outlet. -
Page 9: Specification
4. Specification Standard flow rate (L/min.) Specific Motor Model Bore gravity limit power (kW) 50Hz 60Hz 20mm MDK-20 9 - 10 12 - 12.5 (Rp3/4) 25mm MDK-25 12 - 15 16 - 18.5 0.37 (Rp1) 32mm MDK-32 25 - 29 30 - 36 (Rp1-1/4) 40mm... -
Page 10: Outline Dimension
6. Outline dimension Model MDK-20 260 140 50 209 (Rc3/4) MDK-25 267 200 63 228 (Rc1) MDK-32 317 235 68 234 (Rc1-1/4) MDK-40 270 362 310 20 270 44 230 135 130 70 269 (Rc1-1/2) 7. Performance curves - 8 -... -
Page 11: Construction And Parts Names
8. Construction and parts names The drawing shows every composing parts. Disassembling of pump must be limited to the extent shown on "Maintenance" section. Remarks Parts Q'ty Material MDK-20 MDK-25 MDK-32 MDK-40 Front casing SCS14 Magnet capsule SUS316/SUS329J1 Hex. socket head bolt Stainless steel M6 ×... -
Page 12: Installation
INSTALLATION 1. Precautions before use of pump ... 11~12 2. Plumbing ..........14 3. Electrical wiring ........16 - 10 -... -
Page 13: Precautions Before Use Of Pump
Caution ● Do not run pump dry When you operate pump first time after the installation or after repair works, prime the pump to start. Dry running (running with no liquid) will cause the seizure of rubbing parts resulting in pump failure. Running parts are self-lubricated and cooled by pumped liquid. - Page 14 3) Prime pump Both air-liquid separation tank located top part of pump body and pump chamber must be primed. Before start pump, fill them with liquid. Dry running (pump operation without liquid) may cause pump seizure or shortened pump parts. 4) Max.
- Page 15 ■ Foundation work • I nstallation area should be larger than the footprint Foundation bolt Shim of the pump. Or a plastic base may break due to a Base concentrated load. Liner • I f piping vibrates sympathetically with the pump in operation, provide an expansion joint between the pump and the piping to reduce vibration. Concrete Example of recommended plumbing (1) Discharge pipe...
-
Page 16: Plumbing
2. Plumbing 2-1. Tightening torque between the pump and pipework Connect the pump to pipework via inlet and outlet flanges according to the tightening torque below. The table is based on use of metal pipe flanges with rubber gaskets. Tighten bolts diagonally at even torque. Bolt size Tightening torque 79N•m... - Page 17 Good No Good (5) Sink the suction pipe end in the liquid of suction tank by depth of 500mm or double of pipe diameter. (6) Install a reducer in case the pump suction port bore is not the same as suction pipe diameter. Install the reducer so that the upper part becomes horizontal as shown above.
-
Page 18: Electrical Wiring
2-4. Discharge side plumbing (1) Install pipe support so that the pipe load can not be added to the pump. (2) Long piping will increase pipe resistance which may prevent pump from desired performance. Calculate pipe resistance to get suitable pipe size. (3) It is recommended to install a check valve in the following cases. -
Page 19: Operation
OPERATION 1. Precautions on operation ....18 2. Precautions on operation ....18 3. Operation .......... 19 4. To stop pump ........19 - 17 -... -
Page 20: Precautions On Operation
1. Precautions on operation Caution ● Dry running or operation with suction side valve closed cause pump damage. Prohibited ● If pump is operated in cavitation condition, stop it within a minute. Do not run pump with air being sucked in suction port. ●... -
Page 21: Operation
3. Operation (1) To start pump, fully open the discharge valve and turn on the switch. Pump sucks up liquid in a few minutes. When pump starts discharging, choke the discharge valve (gate valve) several times to increase the pressure and to check if pump operates normally. If the pump does not suck up liquid within five or six minutes, prime and start pump several times. -
Page 22: Maintenance
MAINTENANCE 1. Troubleshooting ........ 21 2. Maintenance and inspection ..22~23 3. Consumable parts ......24 4. Disassembling and assembling ..25 - 20 -... -
Page 23: Troubleshooting
1. Troubleshooting If you find any abnormality on the pump, stop the pump immediately and inspect the pump according to following procedure. Trouble Cause Countermeasure Motor does not ● Disconnected wires. ● Check fuse wiring. rotate. ● Failed motor ● Repair or replacement Pump does not ●... -
Page 24: Maintenance And Inspection
2. Maintenance and inspection Warning ● Wear protector Chemical liquid or toxic liquid may harm your eyes or skin. When you work on pump, wear protectors such as protective mask, goggles, gloves. ● Turn off switch If you work with power turn on, you may be electrically shocked. When the works are done, turn off main power to stop pump and relative equipment. - Page 25 2-2. Periodical inspection To use the pump without problem, inspect the pump periodically according to the procedure shown as below. When the pump is disassembled, take care of handling rubbing parts and plastics parts not to damage them. Caution Magnet force of driving magnet and magnet capsule is strong. Pay attention for your fingers not to be pinched.
-
Page 26: Consumable Parts
3. Consumable parts Bearing and magnet capsule unit are consumable parts. Replace them by new ones at every life time to be replaced (actual running time) shown as below. Parts Life time to be Parts Life time to be Pump model Pump model (Material) replaced... -
Page 27: Disassembling And Assembling
4. Disassembling and assembling Warning ● Wear protective clothing Always wear protective clothing such as an eye protection, chemical resistant gloves, a mask and a face shield during disassembly, assem- bly or maintenance work. The specific solution will dictate the degree of protection. - Page 28 (2) Remove hex. head bolts (17) to take out a casing cover (15), gasket (16), impeller (14) and impeller key (13). (3) Remove suction and discharge pipes and remove hex. head bolts (34) and pull out front casing (1) together with rear casing (9).
- Page 29 (5) Remove hex. socket head bolts (8) to remove bearing housing set B (101) and O ring (12). (6) Remove hex. socket head bolts (8) to remove bearing housing set A (102). 4-2. Assembling Assemble the pump in the reverse order of disassembling. ●...
- Page 30 - 28 -...
- Page 31 - 29 -...
- Page 32 Holland / IWAKI Europe GmbH (Netherlands Branch) U.K. / IWAKI Pumps (U.K.) LTD. China (Guangzhou) / GFTZ IWAKI Engineering & Trading Co., Ltd. TEL: +31 74 2420011 FAX: +49 2154 9254 48 TEL: +44 1743 231363 FAX: +44 1743 366507...
Need help?
Do you have a question about the MDK Series and is the answer not in the manual?
Questions and answers