Miele KM 3034-1 Operating And Installation Instructions
Hide thumbs
Also See for KM 3034-1:
- Installation manual (21 pages) ,
- Operating and installation instructions (68 pages)

Related Manuals for Miele KM 3034-1


Summary of Contents for Miele KM 3034-1
- Page 1 Operating and installation instructions Gas hobs To avoid the risk of accidents or damage to the appliance it is essential to read these instructions before it is installed and used for the first time. en-GB M.-Nr. 11 138 690...
- Page 2 For trouble-free operation of the appliance, it is best to use it in the countries spe- cified for use. For use in other countries, please contact Miele in your country.
- Page 3 Gas-heated appliances Safety precautions to take if you smell gas Turn off the gas emergency control valve immediately. This is usually located near the gas meter. Eliminate all sources of ignition in a safe manner. Do not smoke, light cigarette lighters or matches. ...
-
Page 4: Table Of Contents
Contents Warning and Safety instructions................ 6 Caring for the environment ................ 16 Guide to the appliance .................. 17 Hob........................17 KM 3034-1......................17 KM 3054-1......................18 Control knobs......................19 Burner........................20 Minute minder controls / indicators............... 21 Accessories supplied .................... 22 Before using for the first time ................ - Page 5 Installation...................... 44 Safety instructions for installation ................. 44 Safety distances....................45 Installation notes ....................48 Building-in dimensions ..................49 KM 3034-1......................49 KM 3054-1......................50 Installation ......................51 Gas connection ..................... 53 Electrical connection ..................... 56 Converting to another gas type ................. 58 Jet table.........................
-
Page 6: Warning And Safety Instructions
Miele cannot be held liable for injury or damage caused by non- compliance with these instructions. Keep these instructions in a safe place and pass them on to any... - Page 7 Warning and Safety instructions Correct application This hob is intended for domestic use and use in other similar en- vironments. This hob is not intended for outdoor use. It is intended for domestic use only to cook food and keep it warm.
- Page 8 Warning and Safety instructions Safety with children Children under 8 years of age must be kept away from the hob unless they are constantly supervised. Children over 8 years of age may use the hob without supervision if its operation has been clearly explained to them and they are able to use it safely.
- Page 9 Unauthorised installation, maintenance and repairs can cause considerable danger for the user. Installation, maintenance and re- pairs must only be carried out by a Miele authorised technician. Damage to the hob can compromise your safety. Check the hob for visible signs of damage.
- Page 10 Warning and Safety instructions Miele can only guarantee the safety of the appliance when genu- ine original Miele replacement parts are used. Faulty components must only be replaced by Miele spare parts. The hob is not intended for use with an external timer switch or a remote control system.
- Page 11 Warning and Safety instructions If the hob is installed behind a cabinet door, do not close the door while the hob is in use. Heat and moisture can build up behind the closed door. This can result in damage to the hob, the housing unit and the floor.
- Page 12 Warning and Safety instructions Correct use The hob gets hot when in use and remains hot for a while after be- ing switched off. There is a danger of burning until the residual heat indicators go out. Due to the high temperatures radiated, objects left near the hob when it is in use could catch fire.
- Page 13 If the pan diameter is too large, flames can spread out to the sides and damage or burn the worktop, wall claddings or sur- rounding units and also parts of the hob. Miele cannot be held liable for this type of damage.
- Page 14 Warning and Safety instructions Ensure that the flames from the burner do not spread out beyond the base and up the sides of the pan. Do not use pans with very thin bases on this hob, and never heat up empty pans as they could get damaged.
- Page 15 Warning and Safety instructions Cleaning and care Do not use a steam cleaning appliance to clean this hob. The steam could reach electrical components and cause a short cir- cuit.
-
Page 16: Caring For The Environment
/ recycling centre for electrical and electronic ap- pliances, or contact your dealer or Miele for advice. You are also respons- ible for deleting any personal data that may be stored on the appliance being disposed of. Please ensure that your old appliance poses no risk to children while being stored prior to disposal. -
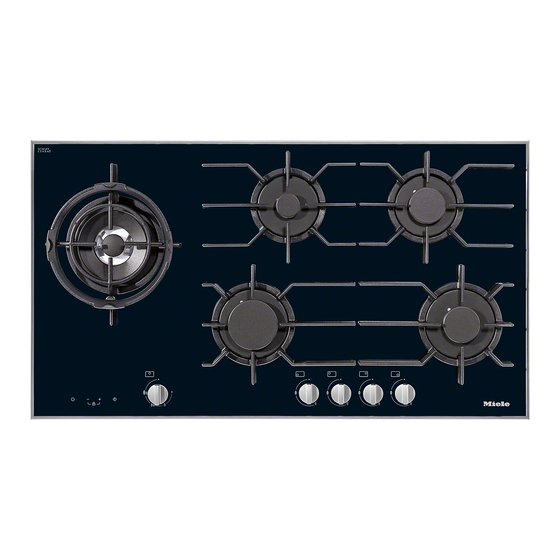
Page 17: Guide To The Appliance
Guide to the appliance KM 3034-1 a Large burner i Delete minute minder durations b Small burner j Cooking zone symbol c Wok burner Control knobs for the cooking zones d Medium burner k Front right e Medium burner l Rear right... - Page 18 Guide to the appliance KM 3054-1 a Wok burner n Minute minder controls / indicators b Large burner o Delete minute minder durations c Small burner Control knobs for the cooking zones d Medium burner g Front right e Medium burner h Rear right f Pan support (one for each burner) i Rear middle...
-
Page 19: Control Knobs
Guide to the appliance Control knobs Small/Medium/Large burners Symbol Description Burner off, the gas supply is turned off Largest flame Smallest flame Wok burner Symbol Description Burner off, the gas supply is turned off Largest flame: inner and outer burner on highest setting. ... -
Page 20: Burner
Guide to the appliance Small, medium and large burners Burner Wok burner a Burner cap b Burner head c Burner base d Thermocouple a Outer burner cap e Ignitor b Inner burner cap c Burner head d Burner base e Thermocouple f Ignitor... -
Page 21: Minute Minder Controls / Indicators
Guide to the appliance Minute minder controls / indicators a Activate system lock/set the time b Minute minder - For switching on and off - For switching between functions - For selecting a cooking zone Indicator lights c Minute minder d Indicator light for relevant zone, e.g. -
Page 22: Accessories Supplied
Guide to the appliance Accessories supplied The accessories supplied with your ap- pliance as well as a range of optional ones are available to order from Miele (see “Optional accessories”). Wok ring The wok ring supplied gives additional stability to the wok, especially to woks with a rounded base. -
Page 23: Before Using For The First Time
Before using for the first time Please stick the extra data plate for Switching on the hob for the the appliance supplied with this doc- first time umentation in the space provided in The metal components have a protect- the “After sales service”... -
Page 24: Pans
Pans – Remember when purchasing new Minimum pan base diameter pans that manufacturers usually refer Ø cm Burner to the diameter at the top of the pan in their documentation, and not to the Small burner base diameter. Medium burner – You can use any cookware that is Large burner heat-resistant. - Page 25 Pans Wok ring Combination trivet Use the wok ring supplied to give ad- The combination trivet must be used if ditional stability to pans, especially to you wish to use a pan with a smaller woks with a rounded base. diameter base than the minimum given in the table.
-
Page 26: Tips On Saving Energy
Tips on saving energy – Use a pan lid whenever possible to minimize heat loss. – Wide, shallow pans are preferable to tall, narrow ones. They will heat up faster. – Cook with as little water as possible. – Reduce the size of the flame once the water has come to the boil or the oil is hot enough to fry in. -
Page 27: Operation
Operation Switching on Risk of fire with overheated food. Unattended food can overheat and Press the control lightly and turn it catch alight. anti-clockwise to the large flame symbol. Do not leave the hob unattended whilst it is being used. ... -
Page 28: Adjusting The Flame
Operation Switching on during a power outage Adjusting the flame If there is an interruption to the electri- The burners can be regulated at any city supply, the gas can be ignited level between the strongest and weak- manually, e.g. with a match. est flame. -
Page 29: Switching Off
Operation Switching off Turn the rotary control clockwise to the position. The gas supply is cut off and the flame goes out. In operation / residual heat in- dicators The in-operation / residual heat indicat- ors light up when a cooking zone is ig- nited. -
Page 30: Minute Minder
Minute minder Minute minder A duration of between 1 minute () and 6 hours (.) can be set. Setting Use the - sensor to reduce the time Touch the sensor. from . to , and the + sensor to in- ... -
Page 31: Setting The Minute Minder For A Cooking Zone
Minute minder Setting the minute minder for a System lock, minute minder cooking zone The system lock can not be activated if a minute minder duration has been set. A minute minder can be allocated for The system lock can be used to prevent any switched on cooking zone. -
Page 32: Safety Features
Safety features Ignition safety The hob is equipped with an ignition safety device. If a gas flame is extin- guished, e.g. by food boiling over or by a draught, and re-ignition does not work, the gas supply is switched off. This prevents the release of gas. -
Page 33: Cleaning And Care
Cleaning and care Unsuitable cleaning agents Danger of burning due to hot surfaces. To avoid damaging the surfaces of the The hob surface, pan supports and appliance, do not use: burners will be hot after use. – cleaning agents containing soda, al- Allow the hob to cool down before kalines, ammonia, acids or chlorides cleaning it. -
Page 34: Ceramic Surface
Then clean the ceramic glass surface with the Miele ceramic and stainless steel hob cleaner (see “optional ac- cessories”) or with a proprietary ceramic glass cleaner applied with kitchen paper or a clean cloth. -
Page 35: Pan Supports
Cleaning and care Pan supports Control knobs Remove the pan supports. The control knobs are not dish- washer-safe. Clean the pan supports in the dish- The control knobs should only be washer or with a solution of warm cleaned by hand. -
Page 36: Burner
Cleaning and care Burner The surface of the burner cap will be- come duller with time. This is com- Do not clean any parts of the burners pletely normal and does not indicate in a dishwasher. material deterioration. The surface of the burner cap will be- come duller with time. - Page 37 Cleaning and care Assembling the small, medium and Assembling the wok burner large burners Place the burner head on the burner base so that the thermo- couple and the ignitor extend Place the burner head on the through their respective holes in the burner base ...
-
Page 38: Problem Solving Guide
Problem solving guide Many malfunctions and faults that can occur in daily operation can be easily remedied. Time and money will be saved because a service call will not be needed. The following guide may help you to find the reason for a malfunction or a fault, and to correct it. - Page 39 Take any pans off the hob and wipe away any residues. Interrupt the power supply to the hob for approx. 1 minute. If the problem persists after power has been re- stored, please contact Miele Service.
- Page 40 All other fault codes There is a fault with the electronics. Interrupt the power supply to the hob for approx. 1 minute. If the problem persists after power has been re- stored, please contact Miele Service.
-
Page 41: Optional Accessories
These products can be ordered through the Miele Webshop. Removes heavy soiling, limescale de- posits and aluminium residues They can also be ordered from Miele (see end of this booklet for contact de- Microfibre cloth tails) or from your Miele dealer. -
Page 42: Burner Ratings
Burner ratings Nominal ratings Burner Gas type Highest setting Lowest set- ting Small burner Natural gas H – 0.25 Liquid gas 0.95 Medium Natural gas H – burner Liquid gas 0.35 Large burner Natural gas H – Liquid gas 2.55 Natural gas H –... -
Page 43: After Sales Service
In the event of any faults which you cannot remedy yourself, please contact your Miele Dealer or Miele Service. Contact information for Miele Service can be found at the end of this document. Please note that telephone calls may be monitored and recorded for training pur- poses and that a call-out charge will be applied to service visits where the problem could have been resolved as described in this booklet. -
Page 44: Installation
Installation Safety instructions for installation Risk of damage from incorrect connection. Incorrect installation can cause damage to the hob. The hob must only be installed by a qualified person. Damage from falling objects. Take care not to damage the hob when fitting wall units or a cooker hood above Fit the wall units and the cooker hood before the hob. -
Page 45: Safety Distances
Installation Safety distances Safety distance above the hob A minimum safety distance must be maintained between the appliance and the cooker hood above it. See the cooker hood manufacturer's operating and installation instructions for details. If the manufacturer's instructions are not available for the cooker hood or if any flammable objects (e.g. - Page 46 Installation Safety distances to the sides and back of the hob Ideally the hob should be installed with plenty of space on either side. There may be a wall at the rear or a tall unit or wall on one side (right or left) (see illus- trations).
- Page 47 Installation Safety distance when installing the appliance near a wall with additional niche cladding A minimum safety distance must be maintained between the worktop cut-out and any niche cladding to protect it from heat damage. If the niche cladding is made from a combustible material (e.g. wood) a minimum safety distance ...
-
Page 48: Installation Notes
Installation Tiled worktops Installation notes Seal between the hob and the work- Grout lines and the hatched area un- derneath the hob frame must be smooth and even. If they are not the hob will not sit flush with the worktop and the sealing strip underneath the ... -
Page 49: Building-In Dimensions
Installation Building-in dimensions All dimensions are given in mm. KM 3034-1 a Front b Casing depth c Mains connection box with mains connection cable, L = 2000 mm d Gas connection R ¹/₂ - ISO 7-1 (DIN EN 10226) e Electronics housing, maximum casing depth 78 mm... - Page 50 Installation KM 3054-1 a Front b Casing depth c Mains connection box with mains connection cable, L = 2000 mm d Gas connection R ¹/₂ - ISO 7-1 (DIN EN 10226) e Electronics housing, maximum casing depth 78 mm...
-
Page 51: Installation
Installation Installing the hob Installation Stick the supplied sealing strip under Preparing the worktop the edge of the hob. Create the worktop cut-out as shown Feed the power cable for the hob in the hob diagram. Remember to down through the worktop cut-out. - Page 52 Installation Securing the hob Functional check After installing the hob, ignite all burners to check that they are operat- ing correctly: – The flame must not go out on the lowest setting, or when the control is turned quickly from the highest to the lowest setting.
-
Page 53: Gas Connection
Installation Gas connection The gas connection must be in- stalled so that connection can be For any gas work in the UK always made either from inside or outside use a Gas Safe registered engineer. the kitchen furniture unit. The isolat- ing valve must be easily accessible and visible (by opening the cabinet door if necessary). - Page 54 Installation Risk of heat damage. Gas connections, pipes and connec- tion cables can suffer damage if ex- posed to heat from the hob. After installation make sure that neither the gas pipe nor the mains cable can come into contact with hot parts of the appliance and that the gas pipe and connections on the hob cannot come into contact with hot...
- Page 55 If the appropriate jets have not been supplied with the appli- ance, you will need to contact Miele. a Connection R ¹/₂" with test point - Conversion to another type of gas is ISO 7-1 (DIN EN 10226)
-
Page 56: Electrical Connection
(RCD) with a trip Danger of injury. range of 30 mA. Miele cannot be held liable for unau- WARNING thorised installation, maintenance THIS APPLIANCE MUST BE and repair work as this can be dan- EARTHED gerous to users. - Page 57 A suitable connec- lowing depending on installation: tion cable is available to order from Safety fuses Miele. Completely remove fuses. Automatic circuit breakers Press the (red) test button until the middle (black) button springs out.
-
Page 58: Converting To Another Gas Type
Converting to another gas type Changing the jets Risk of explosion due to an in- correct conversion. Disconnect the hob from the electri- If the conversion to another type of city supply and turn off the gas sup- gas is carried out incorrectly, it may ply. -
Page 59: Changing The Small Jets
Converting to another gas type Wok burner Lift the top of the appliance off (see il- lustration). Remove burner caps and burner head . Using an M7 socket spanner, un- screw the main jets . Using a small screwdriver, unscrew ... -
Page 60: Functional Check
Converting to another gas type Functional check Check all gas fittings for leaks. Reassemble the hob. Ignite all burners to check that they are operating correctly. – The flame must not go out on the lowest setting, or when the control is turned quickly from the highest to the lowest setting. -
Page 61: Product Data Sheets
The following data sheets apply to the models described in this operating instruc- tion manual. Information for domestic gas-fired hobs In acc. with regulation (EU) No. 66/2014 MIELE Model name/identifier KM 3034-1 Number of gas burners Energy efficiency per gas burner (EE 1. = 55,6 gas burner 3. = 54,3 4. - Page 63 Tel: +65 6735 1191 Fax. +971 4 3418 852 Fax: 011-46 900 001 Fax: +65 6735 1161 800-MIELE (64353) E-mail: customercare@miele.in E-Mail: info@miele.com.sg E-Mail: info@miele.ae Internet: www.miele.in Internet: www.miele.sg Website: www.miele.ae Manufacturer: Miele & Cie. KG, Carl-Miele-Straße 29, 33332 Gütersloh, Germany...
- Page 64 KM 3034-1, KM 3054-1 en-GB M.-Nr. 11 138 690 / 01...
Need help?
Do you have a question about the KM 3034-1 and is the answer not in the manual?
Questions and answers