Table of Contents
Advertisement
Quick Links
Advertisement
Table of Contents

Related Manuals for LI-COR LI-3000C


Summary of Contents for LI-COR LI-3000C
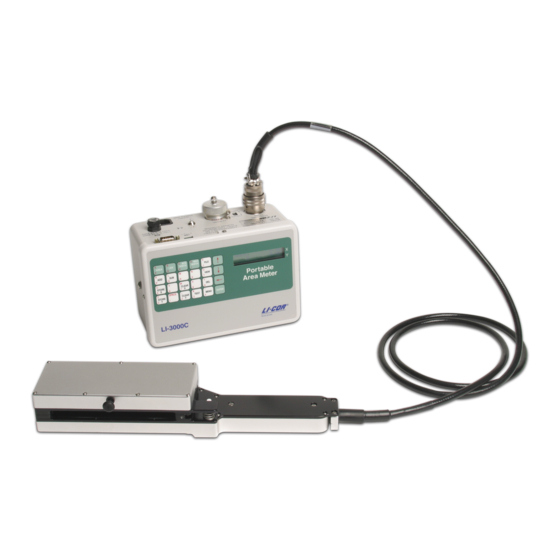
- Page 1 LI-3000C Portable Area Meter Instruction Manual...
- Page 3 LI-3000C Portable Area Meter and LI-3050C Transparent Belt Conveyer Instruction Manual LI-COR Biosciences 4647 Superior Street Lincoln, Nebraska 68504 Phone: +1-402-467-3576 Toll free: 800-447-3576 (U.S. and Canada) envsales@licor.com Regional Offices LI-COR Biosciences GmbH Siemensstraße 25A 61352 Bad Homburg Germany Phone: +49 (0) 6172 17 17 771 envsales-gmbh@licor.com...
- Page 4 LI-COR MAKES NO WARRANTY OF ANY KIND WITH REGARD TO THIS MATERIAL, INCLUDING, BUT NOT LIMITED TO THE IMPLIED WARRANTIES OF MERCHANTABILITY AND FITNESS FOR A PARTICULAR PURPOSE. LI-COR shall not be liable for errors contained herein or for incidental or consequential damages in connection with the furnishing, performance, or use of this material.
- Page 5 LI-COR products have been designed to be safe when operated in the manner described in this manual. The safety of this product cannot be guaranteed if the product is used in any other way than is specified in this manual. The LI-3000C and...
-
Page 7: Table Of Contents
Contents Section 1. General information System description What’s what Scanning head Readout console Standard RS-232 cable USB cable Spare parts kit Theory of operation Instrument calibration Section 2. Preparations Operational check Recharging the battery Using the waist strap Section 3. Instrument operation Power on Basic operation The display... - Page 8 USB connection Serial connection Software basics Logging to a new data file Transferring stored data files from the LI-3000C to a computer Importing a data file to a spreadsheet Section 5. LI-3050C Transparent Belt Conveyer Setup and adjustment Using Realtime Capture Mode with the LI-3050C Storage and maintenance Section 6.
- Page 9 Appendix A. LI-3000C Specifications Appendix B. LI-3050C Specifications Appendix C. Warranty...
- Page 10 viii...
-
Page 11: Section 1. General Information
A rechargeable lead acid battery provides power for portable operation. The bat- tery life is approximately 12 hours. The LI-3000C is designed for field use; however, care should be taken during oper- ation and storage. The instrument is not waterproof, and care should be taken to... -
Page 12: What's What
Optional accessories for the LI-3000C include the 3000A-02 Carrying Case and the LI-3050C Transparent Belt Conveyer Accessory. What’s what If you have just taken delivery of your LI-3000C, check the packing list to verify that you received everything ordered, including the following items: Scanning head The scanning head is calibrated to the readout console at the factory. -
Page 13: Readout Console
A type con- nector is used to connect to your computer. Spare parts kit This box contains replacement parts for your LI-3000C. As you become familiar Part Number: 9910-309... -
Page 14: Theory Of Operation
Theory of operation The method by which the LI-3000C measures area is best understood by examining the technique for manual area measurement. Manual area measurement requires tracing the outline of the sample on graph paper and methodically counting the squares where the sample covers fifty percent or more of the area of an individual grid cell. -
Page 15: Instrument Calibration
Section 1. General information sequentially pulsed. The scanning process begins only when the length encoding cord is pulled. Since 1 mm of cord travel is equivalent to the side of a grid cell, it is apparent that the length encoding cord must be pulled perpendicular to the row of 128 LEDs. When the LED light is blocked by a sample, the unit area (1 mm ) is accumulated on the display. - Page 16 Section 1. General information LI-3000C Portable Area Meter...
-
Page 17: Section 2. Preparations
Operational check The following procedure can be used to connect the scanning head to the readout console and verify that the LI-3000C is working properly. Connect the scanning head to the readout console while the ON/OFF switch is OFF. Mate the cable connector with the connector on the back panel of the readout console, and then push in and turn the collar clockwise until it locks into place. -
Page 18: Recharging The Battery
Clear any logged area data by pressing the white reset button located on the scanning head handle. Recharging the battery The LI-3000C uses a sealed lead acid battery. This battery is rechargeable, and gives about 12 hours of use. The symbol appears on the display (as shown below) when approximately 1 hour of battery life remains. -
Page 19: Using The Waist Strap
If this occurs, disconnect the power cord and contact technical support at LI-COR. You can continue to use the instrument until repairs can be made, but should disconnect the power cord whenever the ‘HI’... - Page 20 Section 2. Preparations LI-3000C Portable Area Meter...
-
Page 21: Section 3. Instrument Operation
Instrument operation The section provides general operating instructions for the LI-3000C and the LI- 3050C. Power on Before turning on the LI-3000C, make the connections to the scanning head or the LI-3050C Transparent Belt Conveyer Accessory. Basic operation The display... - Page 22 Section 3. Instrument operation Figure 3-1. The LI-3000C front panel. The area is measured directly from the instrument scanning head. The average width is computed. value on the right of the display is the instantaneous value. This value changes in real time as a sample is measured. The value is an accumulator that you can use if you wish.
-
Page 23: An Example Measurement
Section 3. Instrument operation An example measurement Put a small piece of paper in the scanning head, pull the string out several centimeters, and let it back. The display will change to something like Sample area was 158.92 cm Press Sample length was 27.4 cm. -
Page 24: Scanning Head Button
Scanning head button The white button on the LI-3000C scanning head has 2 uses. Pressing once will clear the X register (same as pressing ). Pressing the button twice in quick... -
Page 25: Making Measurements
Section 3. Instrument operation will be displayed. When is pressed, the value will be cleared, and nor- CLEAR X mal operation will resume. Maximum string speed is about 1 meter per second. Making measurements When using the scanning head on attached leaves, observe the following three important principles: Pull the length encoding cord at the same rate as the sample is being pulled through the scanning head. - Page 26 Press the scanning head button once to clear the register before starting the measurement. Draw the closed scanning head over the leaf while the length encoding knob is held stationary. LI-3000C Portable Area Meter...
- Page 27 Section 3. Instrument operation Drawing speed need not be constant. After the scanning head has passed over the leaf, remove the leaf and let the length encoding cord slowly rewind itself back into the scanning head. Figure 3-2. Measuring a soybean leaf. Make sure there is no plant material in the scanning head before allowing the length encoding cord to retract into the head.
-
Page 28: Using A Transparent Sheath
Grasp the length encoding knob with your left-hand thumb and forefinger and hold it stationary against the sheath. Press the scanning head button once to clear the value on the display. LI-3000C Portable Area Meter... -
Page 29: Hints For Various Leaf Types
In many cases the LI-3050C Transparent Belt Conveyer Accessory will be the method of choice for measuring small objects and detached leaves. The com- bination of the LI-3050C and LI-3000C provides greater accuracy (±1%) than the LI-3000C alone (±2%). Storing data in memory Readings can be stored in memory for later viewing or output to a computer. - Page 30 The following sequence of events could have occurred to make the above file. It would be a good example to duplicate using your own console, as well. Press to open a file. The display will show FILE Briefly displayed... 3-10 LI-3000C Portable Area Meter...
- Page 31 Section 3. Instrument operation The remark "PLOT 1" is entered by pressing this sequence of keys: P ↑ L ↑ O T ↑ SPACE 1 ENTER To type the alpha characters in the lower left corners of the keys, just press the desired key.
-
Page 32: Structuring Files
5 plants sampled. The COUNT column on each line indic- ates how many leaves per plant were measured. The file for one plot might look something like this: FILE: 2 REM: TEST PLOT 2 3-12 LI-3000C Portable Area Meter... - Page 33 Section 3. Instrument operation 27 APR 2006 10:03:15 ENTRY COUNT AREA LENGTH AV WIDTH MX WIDTH 246.68 45.10 3.23 5.12 125.20 35.60 2.87 3.10 84.48 26.80 3.15 6.02 344.20 120.00 4.67 6.10 140.69 47.32 3.56 5.72 Another approach is to have one file per plant (giving you 50 files when done). When measuring a plant, press after each leaf measurement.
-
Page 34: Viewing Files On The Display
(Y register) before they are stored in a data file. The configuration of the LI-3000C can be changed to facilitate rapid data storage. This is accomplished using the CONFIG REGISTERS routine that is discussed in The Menu key on page 3-17. -
Page 35: View Mode Key Definitions
Section 3. Instrument operation Press the ↓key to see the next part of the file header, which is the date and time the file was created. Press the ↓key again to view the first of the 3 entries. Entry 1 of 3 has 0 counts (e.g., it was stored from the X register). The top line displays the ENTRY number (1), the total entries (3), and the COUNTS for that entry (0, indicating that it is an X value). -
Page 36: Deleting A Range Of Files
Counts through a range, or resumes area display if not found. To exit the file delete routine, enter 0 (or press without making an entry) ENTER for either the FROM or THRU file numbers. Each file in the specified range will be 3-16 LI-3000C Portable Area Meter... -
Page 37: The Menu Key
Section 3. Instrument operation sequentially “stepped” through, even if the files do not exist, so it is best to use this function only with a known range of files. To delete all files, it is best to use the Delete All Files function (see The Menu key below). The Menu key key accesses a list of software routines. -
Page 38: Memory Available
Displays % of available memory. Press any key to return to the help menu. The LI-3000C has approximately 2.15MB of storage space available for data files. The actual number of files or area entries that can be stored is highly dependent on how the data are stored, as indicated in the table below. -
Page 39: Set Clock
Section 3. Instrument operation Set clock Time is displayed on a 24 hour clock (e.g. 14:32:10 = 2:32:10 p.m.) Pressing without making any entries will leave the date or time unchanged. ENTER To enter a new date or time, type in the appropriate characters to match the indic- ated NEW= format. -
Page 40: Realtime Capture
The Realtime Capture mode causes data from the LI-3000C to be transmitted through the LI-3000C console, and into the Windows Application Software. Data are not stored in the LI-3000C; this mode is most commonly used in combination with the LI-3050C Transparent Belt Conveyer Accessory, where large numbers of leaves are measured and captured directly with the LI-3000C Application Software. -
Page 41: Print Files
FROM or THRU prompts will abort ENTER this routine. Press ENTER Enter starting file number. Enter ending file number. If a file is not found, the LI-3000C display shows File number three was not found. Print files 3-21... -
Page 42: Data Communication
500 software that writes the incoming data into a data file (see Section 4, Using the Windows Interface Software). The LI-3000C communication parameters are fixed at 38400 bps, 8 data bits, 1 stop bit, no parity, and hardware handshaking on. -
Page 43: Section 4. Using The Li-3000C Windows Software
Supports serial and USB connections. Installing the interface software The 3000-500 software in on the CD that ships with the LI-3000C. It also can be downloaded from licor.com/env/support. The software will run on most versions of the Windows operating system. Both serial and USB connections are supported by the software. -
Page 44: Usb Connection
In the Device Manager, expand the entry called Ports (COM and LPT) Power on the LI-3000C and install the USB cable between the instrument and the computer. Your computer should assign a communications port number to the LI-3000C In the , make note of the COM port number beside LI-3000C Area Meter. -
Page 45: Serial Connection
The RS-232 serial cable included has 9-pin connectors on both ends; either end plugs into the serial connector on the back panel of the LI-3000C. Use this cable to connect to your computer's 9-pin serial port or a serial-to-USB adapter. -
Page 46: Software Basics
Reset Counter this also resets calculated values for width and length. Pressing the button on the LI-3000C scanning head or on the LI-3050C also resets the PC software counter. Figure 4-2. LI-3000C software, main window. The main window also contains the menu bar, a toolbar with shortcuts for com- monly used tasks, and a grid where the log file can be viewed as it is being created. -
Page 47: Logging To A New Data File
Logging menu, or click on the New Data File icon in the toolbar beneath the File menu. To log data to a file, the LI-3000C must be placed into Realtime Capture mode; in most cases, the LI-3050C Transparent Belt Conveyer Accessory is used, as well. See Using Realtime Capture Mode with the LI-3050C on page 5-6. - Page 48 Section 4. Using the LI-3000C Windows software Figure 4-3. LI-3000C software, New Data File window. The main window of the LI-3000C program contains a grid where a log file can be viewed as it is being created. Pressing the button will prompt the user for Log Data remarks (if enabled) and append a new row of data to the log file.
-
Page 49: Transferring Stored Data Files From The Li-3000C To A Computer
Section 4. Using the LI-3000C Windows software Figure 4-4. Grid on main window of the LI-3000C software, populated by data logged to an open log file. To close the log file, select Close data file from the Logging menu, or click on the Close Data File icon in the toolbar beneath the File menu. - Page 50 Enable the “Place all transferred files into the same file” check box to create a single data file containing all records sent from the LI-3000C. When this check box is enabled, you can enter the file name. Note that when placing all records into a single data file the data are formatted differently;...
-
Page 51: Importing A Data File To A Spreadsheet
Cancel Transfer Transfer menu while the application software is waiting for files to be sent from the LI-3000C; note, however, that once files have started to be sent, the routine can- not be stopped until all files are transferred. Importing a data file to a spreadsheet The data file can be imported into a spreadsheet such as Microsoft Excel using the Text Import Wizard. - Page 52 Section 4. Using the LI-3000C Windows software 4-10 LI-3000C Portable Area Meter...
-
Page 53: Section 5. Li-3050C Transparent Belt Conveyer
3000C, as described later in this section. The LI-3050C replaces the older LI-3050A; the LI-3050A cannot be used with the LI-3000C, as the motor in the LI-3050A will not receive power (contact LI-COR for upgrade information). The LI-3050C, however, is compatible with older LI-3000 and LI-3000A consoles. -
Page 54: Setup And Adjustment
‘F’ in Figure 5-1 below. Center the belt on the pulleys, lift at the knobs, and tighten when the desired belt tension is obtained. Figure 5-1. LI-3050C Transparent Belt Conveyer Accessory front panel. LI-3000C Portable Area Meter... - Page 55 Section 5. LI-3050C Transparent Belt Conveyer Upper pulley assembly knobs Lower pulley assembly idler arm Scanning head support block knob Reset button Upper pulley assembly hex screws for belt tracking adjustment Upper pulley assembly Lower pulley assembly hex screws for belt tracking adjustment Sample tray Lift the weighted lower pulley assembly (Figure 5-1 on the previous page, label ‘B’), and support with a piece of foam rubber to hold it up.
- Page 56 Section 5. LI-3050C Transparent Belt Conveyer Figure 5-2. Insert the LI-3000C scanning head through the opening in the LI-3050C back panel. Turn the support block knob left or right to lower or raise the support blocks. Figure 5-3. When the scanning head is fully inserted, turn the support block knob clockwise to raise the blocks and secure the scanning head.
- Page 57 “grounding plug”, and plug into a properly grounded or ground-fault protected Mains AC source (115/230 VAC, 50-60 Hz.) The LI-3000C can be powered by either battery or AC power. Use the power switch on the LI- 3000C console back panel to turn on both the LI-3000C and LI-3050C.
-
Page 58: Using Realtime Capture Mode With The Li-3050C
The Realtime Capture function causes data from the LI-3000C to be transmitted through the LI-3000C console, and into the Windows Application Software. Data are not stored in the LI-3000C; this function is most commonly used in com- bination with the LI-3050C Transparent Belt Conveyer Accessory, where large num- bers of leaves are measured and captured directly with the LI-3000C Application Software. - Page 59 When in Realtime Capture mode, data shown in the main window of the Applic- ation Software can be cleared in a number of different ways: Clicking the reset button on the LI-3000C scanning head one time (when the LI-3050C is not con- nected).
-
Page 60: Storage And Maintenance
(e.g. the belt surfaces don’t adhere to one another). The transparent belts can be cleaned with warm water and hand dish-washing deter- gent. Do not lubricate the drive gears. This will interfere with the optical switch which encodes the sample length. LI-3000C Portable Area Meter... -
Page 61: Section 6. Maintenance And Calibration
Length encoding cord If the length encoding cord becomes lodged, the problem is likely backlash. This seldom occurs even if the cord is released and allowed to retract rapidly. If the LI-3000C Portable Area Meter... -
Page 62: Knob Separation From The Length Encoding Cord
In rare instances the length encoding cord may need to be replaced if it becomes damaged or broken. There is a 4 ft. (1.22 m) length of cord in the spares kit (p/n 214-17616) that is used for replacement. This type of cord is specific for use with LI-3000C Portable Area Meter... - Page 63 Section 6. Maintenance and calibration the LI-3000C; cords of other compositions will not work in the scanning head. If you need extra replacement cord, please contact LI-COR. The procedure for repla- cing the length encoding cord is given below. Note that this procedure can be a bit difficult;...
- Page 64 The take-up reel is turned clockwise (without wrapping the length encoding cord around it) until the spring is tight; after the spring is fully tightened, it will automatically wind the cord around the take-up reel. LI-3000C Portable Area Meter...
- Page 65 Section 6. Maintenance and calibration Use one hand to turn the take-up reel clockwise – you will need to keep pressure on the top of the wheel while you wind it, to prevent the spring from uncoiling. Hold the slack length encoding cord in your other hand while you wind the take-up reel, and keep it from winding around the reel.
-
Page 66: Battery Replacement
7 screws on the top lid. Battery replacement WARNING: Unplug the power cord from the LI-3000C console before replacing the bat- tery. Failure to do so can result in severe electric shock. Battery replacement should be performed only by qualified Service personnel. -
Page 67: Power On Problems
If nothing happens when the LI-3000C is turned on, turn the instrument off, plug in the AC power cord and turn it on again. If the LI-3000C is still unresponsive, check the AC fuse on the outside of the instrument. -
Page 68: Instrument Storage
The LI-3000C should be stored in an area that is within the temperature range - 20 to 55 °C and has a relative humidity of 5 to 95% non-condensing. - Page 69 Print Cal The Print Cal function outputs the calibration file (via the RS-232 or USB port) to the LI-3000C Application Software. The file is displayed in a Calibration File View window. The file can then be saved from this window.
- Page 70 Section 6. Maintenance and calibration Figure 6-7. Calibration File View window. A sample calibration table is shown below. Note that in the example below, LEDs 72 and 73 failed to reach their target values, indicated by ‘FF f’. 6-10 LI-3000C Portable Area Meter...
- Page 71 Section 6. Maintenance and calibration LI-3000C Calibration HEAD SR #1611 REMARK: XXX XXX XXX 2006-02-14 14:32:02 CAL MAX VAL: 91 CAL MIN VAL: 52 LED DEC HEXVARLED DEC HEXVAR 12.5 6553.5 16.7 6553.5 10.2 18.7 11.5 13.5 14.0 13.7 Test menu...
- Page 72 If the instrument fails the autocalibration routine with clean windows, then it does have a problem and should be returned to LI-COR for repair. 6-12 LI-3000C Portable Area Meter...
- Page 73 Calibrate The calibration routine must be done if a different scanning head is to be used with the LI-3000C. Before proceeding with this test, make sure the scanning head is cleaned, and that nothing is blocking any of the LEDs.
- Page 74 Enter the sensor head serial number. Press Enter when done. The serial number entered at this prompt is used in the start-up message ("Cal- ibrated for Head #xxxx") given when the LI-3000C is turned on. Enter any remarks. Press Enter when done.
- Page 75 LEDs have failed to reach their target value. If an error message occurs, power the LI-3000C off, then back on. Re-check the scanning head to be sure it is cleaned and free of any debris. Then do the calibration routine again. If the error message persists, contact LI-COR.
- Page 76 (e.g. Hyperterminal) can be used to test the RS-232 output by fol- lowing these steps: Connect the LI-3000C to your computer with the RS-232 cable included. Open Hyperterminal. On most Windows® machines, Hyperterminal is located in Start>Pro- grams>Accessories>Communications.
- Page 77 When RS-232 OUT is displayed in the Test menu, pressing Enter will cause a char- acter set to be output and captured in Hyperterminal. During this test, the bottom line of the LI-3000C display shows the character(s) being sent. Press any key to return to the menu, or wait until the test ends automatically.
-
Page 78: Updating The Instrument (Embedded) Software
LI-3000C for 5 minutes or more. Follow these steps to update the instru- ment software: Turn the LI-3000C off. Make sure the computer and the LI-3000C are connected via the serial cable included. 6-18... - Page 79 Locate the Update3000 program, and double-click on the icon to start the program. Alternatively, select Run from the Windows Start menu, and locate the update3000.exe program. Choose the serial port on your computer to which the LI-3000C is connected using the arrow keys in the Update Window.
- Page 80 Wait for the message ‘Update Successful’ to appear. Close the Update Window. Turn the LI-3000C OFF. Wait 10 seconds, replace the jumper at position LK8 from Step 2 above, and then power the LI-3000C back ON. Wait a few seconds for the LI-3000C to initialize. The instrument is now ready to use.
- Page 81 User-Replaceable Mains Fuse: 2/10 amp type T for 115 VAC, 1/10 amp type T for 230 VAC, ¼ x 1 ¼ glass cartridge style. Battery Capacity: Typically 12-15 hours of continuous operation. Recharging Time: 5-8 hours, instrument off. Charging circuitry built-in. LI-3000C Portable Area Meter...
- Page 82 Appendix A. LI-3000C Specifications Battery Voltage Sensor: Low battery warning occurs approximately 1 hour before automatically shutting off the instrument. Over-voltage warning occurs if bat- tery becomes over-charged. Data are stored in FLASH memory, and is secure in either of these conditions.
- Page 83 Operating Temperature: 0 to 55 °C. 5 to 95% RH (non-condensing). Storage Temperature: -20 to 55 °C. 5 to 95% RH (non-condensing). Size: 27.9 cm H × 27.9 W × 38.1 L (11.0" × 11.0" × 15.0") Weight: 7.7 kg (17.0 lb). LI-3000C Portable Area Meter...
- Page 84 Appendix B. LI-3050C Specifications LI-3000C Portable Area Meter...
- Page 85 Inc.'s examination discloses to have been defective in material or workmanship without charge and only under the following conditions, which are: The defects are called to the attention of LI-COR, Inc. in Lincoln, Nebraska, in writing within one year after the shipping date of the instrument.
- Page 86 The foregoing constitutes LI-COR, Inc.'s sole obligation and liability with respect to damages resulting from the use or performance of the instrument and in no event shall LI-COR, Inc. or its representatives be liable for damages beyond the price paid for the instrument, or for direct, incidental or con- sequential damages.
- Page 88 Regional Offices LI-COR Biosciences GmbH Siemensstraße 25A 61352 Bad Homburg Germany Phone: +49 (0) 6172 17 17 771 envsales-gmbh@licor.com LI-COR Biosciences UK Ltd. St. John’s Innovation Centre Cowley Road Cambridge CB4 0WS United Kingdom Phone: +44 (0) 1223 422102 envsales-UK@licor.com LI-COR Distributor Network: www.licor.com/env/distributors...
Need help?
Do you have a question about the LI-3000C and is the answer not in the manual?
Questions and answers