LI-COR LI-600 Instruction Manual
Porometer/fluorometer
Hide thumbs
Also See for LI-600:
- Instruction manual (143 pages) ,
- Quick start manual (2 pages) ,
- Instruction manual (133 pages)
Table of Contents
Advertisement
Advertisement
Table of Contents

Related Manuals for LI-COR LI-600


Summary of Contents for LI-COR LI-600
- Page 1 Using the Ll-600 Porometer/Fluorometer Instruction Manual...
- Page 2 Using the LI-600 Porometer/Fluorometer Instruction Manual LI-COR Biosciences 4647 Superior Street Lincoln, Nebraska 68504 Phone: +1-402-467-3576 Toll free: 800-447-3576 (U.S. and Canada) envsales@licor.com Regional Offices LI-COR Biosciences GmbH Siemensstraße 25A 61352 Bad Homburg Germany Phone: +49 (0) 6172 17 17 771 envsales-gmbh@licor.com...
- Page 3 LIMITED TO THE IMPLIED WARRANTIES OF MERCHANTABILITY AND FITNESS FOR A PARTICULAR PURPOSE. LI-COR shall not be held liable for errors con- tained herein or for incidental or consequential damages in con- nection with the furnishing, performance, or use of this material.
- Page 4 Notes on Safety This LI-COR product has been designed to be safe when oper- ated in the manner described in this manual. The safety of this product cannot be assured if the product is used in any other way than is specified in this manual. The product is intended to be used by qualified personnel.
- Page 5 CE Marking: This product is a CE-marked product. For conformity inform- ation, contact LI-COR Support at envsupport@licor.com. Out- side of the U.S., contact your local sales office or distributor. California Proposition 65 Warning WARNING: This product contains chemicals known to the State of California to cause cancer and birth defects or other reproductive harm.
-
Page 6: Table Of Contents
Taking a measurement Taking a measurement in Auto Mode Taking a measurement in Manual Mode Using the barcode scanner Viewing measurement data on-screen Section 4. Using the computer software Download the software and connect the LI-600 Connection Overview Home screen... - Page 7 Measurement Settings Display Layout Preview 5-10 Save Configuration 5-10 Section 6. Data files Downloading data from the LI-600 Exporting data files from the computer software Data file structure Variables, units, and equations Groups, labels and descriptions Section 7. Troubleshooting Instrument issues...
- Page 8 Software warning when connecting the LI-600 Software warning when updating the firmware The new RH sensor serial number has not updated The RH values and sample RH are high Instrument warnings Matching. Do not clamp on leaf. Low memory Low battery...
- Page 9 Stability criteria in auto mode User calibration procedures 9-10 Fluorometer 9-13 Implementation on the LI-600 9-14 Calculating light intensity from LED calibration coef- ficients 9-14 Dark-adapted vs light-adapted measurements 9-15 Steady-state fluorescence 9-16 Logged Variables 9-17 Porometry group 9-18 Fluorometry group...
-
Page 10: Section 1. The
These measurements, along with information from the GPS receiver, enable the LI-600 software to calculate the angle of incidence of a leaf for each measurement. The LI-600 computer software is available for both Win- ®... -
Page 11: Components
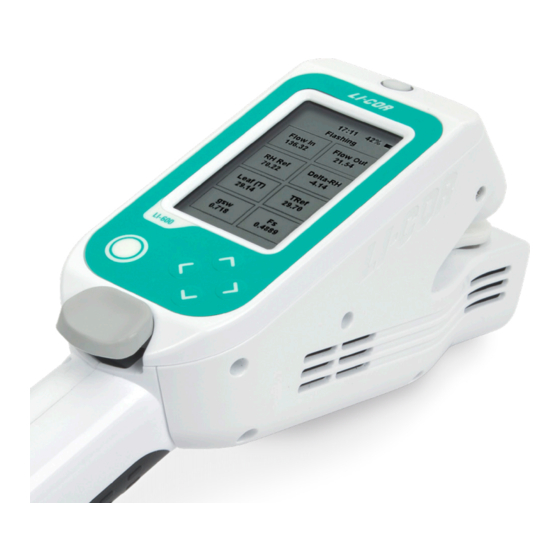
LI-600 Porometer/Fluorometer Instruction Manual Components The LI-600 components are as shown below. Figure 1-1. LI-600 Components. Aperture. (0.75 cm diameter) Surrounds the leaf gasket, is the active measurement. Aperture clamp. Closes onto the leaf. Fluorometer (optional). Takes PAM chlorophyll a fluor- escence measurements. -
Page 12: Accessories Kit
Tripod mount. (1/4-20 UNC) Attaches to a tripod. Porometer. Takes stomatal conductance measurements. Accessories kit The LI-600 includes an accessories kit, which has the fol- lowing accessories and replacement parts for your instru- ment. Additional accessories can be purchased separately (see Support on the next page). -
Page 13: Support
1 Amp at 5 VDC. The LI-600 can be charged when powered on or off. Before using the LI-600 for the first time, charge the bat- tery to 100%. Charging with the instrument powered off and using the universal charging adapter takes approximately 3.5 hours. - Page 14 Powering the LI-600 on and off To power on the LI-600, press and hold the round enter button on top of the instrument. To power off the LI-600, navigate to Settings by press- ing the left arrow at the Select Configuration screen, then select Shut Down and press the Enter button.
- Page 15 LI-600 Porometer/Fluorometer Instruction Manual Battery warnings and disposal The LI-600 includes a rechargeable lithium ion battery (3.7 V, 5.2 AH) that must be disposed of safely. Contact LI-COR for a replacement battery. The exclamation point label on the exterior and a warning label on the interior indicate the location of the lithium ion battery compartment.
-
Page 16: Section 2. Using The Li-600 Interface
Section 2. Using the LI-600 interface The LI-600 user interface includes four arrow buttons, an enter button, and the display. The up and down arrows navigate through options in the display, and the left and right arrows navigate through the screens. The Enter but- ton powers the LI-600 on, selects highlighted options, and initiates or logs a measurement. -
Page 17: Measurement
LI-600 Porometer/Fluorometer Instruction Manual Figure 2-1. The Select Configuration screen. Select Configuration is Home in the navigation, and from it you access Settings and Info. Measurement After a configuration has been selected, the Meas- urement screen appears. The screen headings include a prompt, measurement status, and how many meas- urements have been logged. -
Page 18: Data Labels And Remarks
Mark or Prompt. The left arrow navigates back to Select Configuration. Data labels and remarks Data labels and remarks are configured in the LI-600 computer software (see Data Labels on page 5-5 and Remarks on page 5-7) and correspond to Prompt and... - Page 19 LI-600 Porometer/Fluorometer Instruction Manual Press enter to edit highlighted values, and the remarks heading is Mark reason. Figure 2-3. Data labels and remarks are selected in the "Press enter to edit highlighted values" and "Mark reason" screens. The data label options appear (Press enter to edit highlighted values) after each measurement if Prompt on log is enabled in the configuration.
-
Page 20: Matching
Section 2. Using the LI-600 interface Matching This screen appears when the RH sensors are matching, and goes to Measurements with a beep when match- ing is complete. Matching can only be done when the cuvette is empty. If the instrument is clamped onto a leaf when the instrument is matching, the instrument will beep and prompt the user to unclamp the leaf. -
Page 21: Info
LI-600 Porometer/Fluorometer Instruction Manual Clear All Data: erase all of the data on the instru- ment. Back : go back to Select Configuration. Warning(s) shows instrument warnings (see Instru- ment warnings on page 7-5). Info From Select Configuration, navigate to Info with the right arrow button. -
Page 22: Section 3. Taking Measurements
Observe these precautions and practice these techniques before and while taking measurements with the LI-600. Precautions To protect the LI-600 when not in use, turn it off and place it in the carrying case. Before using the LI-600, take the following precautions. -
Page 23: Techniques
LI-600 Porometer/Fluorometer Instruction Manual Techniques The LI-600 can measure the top or the bottom of a leaf. The following techniques help ensure the quality and accuracy of your measurements. Maintain the original orientation of the leaf. Do not alter the angle or positioning of the leaf you are measuring. -
Page 24: Taking A Measurement
Taking a measurement The workflow for taking a measurement on the LI-600 will vary depending on two settings in the active con- figuration: whether the measurements are taken in Auto mode or Manual mode, and whether Prompt on log is enabled for optional data labels. -
Page 25: Taking A Measurement In Manual Mode
LI-600 Porometer/Fluorometer Instruction Manual barcode scanner with a data label, follow the steps below for using the barcode scanner. Select Done and press Enter to go back to the Measurement screen. At the prompt Clamp on leaf, open the aperture with the aperture clamp and close it onto the leaf. -
Page 26: Using The Barcode Scanner
Section 3. Taking Measurements Clamp to leaf: Watch for stability in the g and F vari- ables. Press the Enter buttonto log the measurement when your stability criteria are met. Unclamp the leaf. If Prompt on log is enabled, the Data labels screen will appear. -
Page 27: Viewing Measurement Data On-Screen
At the Scan Barcode prompt, pass the red light from the bar- code scanner on the bottom of the instrument over the bar- code. When it reads the barcode the LI-600 will beep and return to the Measurement screen. The barcode scanner will time out after a few seconds. If this happens, go back to Data labels and repeat the pro- cess. -
Page 28: Section 4. Using The Computer Software
LI-600 to your computer. Install the computer software, which is downloaded at licor.com/600software Press and hold the Enter button to power on the LI-600. Connect the LI-600 with your computer using the micro USB cable. The LI-600 will automatically connect with the com- puter software if the computer software and instrument firmware are up to date. - Page 29 LI- 600 or safely eject a connected instrument. The software may display warning messages. See Soft- ware warning when connecting the LI-600 on page 7-2 and Software warning when updating the firmware on page 7-3. Figure 4-1. Connection overview.
-
Page 30: Home Screen
No LI-600 detected! No LI-600 has been discovered by the computer software. Connect the instrument to the computer via USB then wait for the LI-600 con- nected! prompt to appear, or select Offline Mode to proceed without a connected LI-600. -
Page 31: Buttons
RH sensor serial number. Buttons When an LI-600 is connected to the computer, the four buttons on the Toolbar are Home, Safely Eject Instru- ment, View Help, and Battery Level. -
Page 32: Configuration Management
Battery Level: Displays the percent battery charge of the connected instrument. Configuration Management When an LI-600 is connected, the Configuration Man- agement menu shows two configuration lists: LI-600 Configurations (those stored on the instrument) and Local Configurations (those stored on the local com- puter). - Page 33 Local Configurations are the configurations created in the computer software. New indicates a configuration that has not been uploaded to an LI-600 since its cre- ation or most recent edit. Double-click on a column heading to sort. Configurations with the same name as...
-
Page 34: Data Management
600 (data files stored on the instrument) and Local Files (data files stored in the computer software). LI-600 data Data on LI-600 lists the date of the last data download. This section is headed with the instrument’s serial num- ber. - Page 35 LI-600 Porometer/Fluorometer Instruction Manual Table 4-4. Data management buttons. Download Instrument Data: Downloads all processed data on the LI-600 to the computer software. A copy of raw data is also downloaded as a precaution. Clear Instrument Data: Removes all data from the LI-600.
-
Page 36: Live View
Section 4. Using the computer software Live View Live View streams data from a connected LI-600 and is useful for educational settings. Live data for each selec- ted variable in graph format are displayed, allowing you to view and log data while taking measurements. -
Page 37: Offline Mode
LI-600 in the Data Management menu at any given time. If you navigate away from the Live View menu, sixty minutes of live data are automatically saved. -
Page 38: Barcode Generator
Section 4. Using the computer software these features is the same as when an LI-600 is con- nected, with the exceptions of not being able to upload configurations or download data from the instrument. Barcode generator The LI-600 computer software can generate custom bar- codes for use with the LI-600 barcode scanner. - Page 39 LI-600 Porometer/Fluorometer Instruction Manual PASTE FROM CLIPBOARD: Paste delimited text that has been copied onto your computer's clipboard. IMPORT FROM FILE: Select a delimited text file from your computer and import it to the Barcodes Text field. CLEAR TEXT: Clear the contents of the Barcodes Text field.
- Page 40 Print: Print or save as a PDF. Done: Go back to the barcode generator screen. When used with the LI-600 barcode scanner, the bar- code text for each measurement appears in the USERDEF group in LI-600 data files (see Groups, labels and descriptions on page 6-3).
- Page 41 4-14...
-
Page 42: Section 5. Configurations
Configurations are uploaded to the instrument from the computer software (see Using the computer software on page 4-1). Figure 5-1. Default configurations on the LI-600. Configuration settings Configurations include settings for auto or manual mode, porometer and fluorometer options, measurement settings, data labels, remarks, and the instrument display layout. -
Page 43: Data Labels
Once two consecutive data points are below the set threshold, the meas- urement is considered stable, and the LI-600 logs the data point. This is based on monitoring changes over time (in seconds) to both the computed stomatal con- ductance (gsw) and/or the de-modulated fluorescence sig- nal (F). -
Page 44: Measurement Settings
See Taking a measurement on page 3-3. Measurement Settings Measurement Settings control the following aspects of measurements taken with the LI-600. If the fluoro- meter option is not available, the fluorometer meas- urement settings are not be included in the configuration. - Page 45 LI-600 Porometer/Fluorometer Instruction Manual Creating custom configurations Custom configurations can be created in the LI-600 com- puter software with or without an LI-600 connected. Go to Configuration Management from the drop- down menu in the upper left. At Local Con- figurations, use the green plus icon to Create New Configuration.
- Page 46 Section 5. Configurations Data Labels Figure 5-3. The Data Labels screen. In Data Labels, you can create labels using a number, list, or barcode format. One label must be a barcode to enable the barcode scanner. Each configuration can have up to three labels. Check Prompt On Log if you want to set a data label after taking each measurement.
- Page 47 LI-600 Porometer/Fluorometer Instruction Manual Number: Check the Auto-Increment box for automatic numbering. List: Add up to three selections with the plus button; drag and drop them to change their order. Barcode: Enable the barcode scanner. Automode Setup In Automode Setup, select Automode, gsw, and/or F (fluorometer).
- Page 48 Section 5. Configurations Table 5-1. Automode Setup variable options. (...- continued) Stability Limit Slope Limit Period Preset Medium 0.001 Custom user specified user spe- 1, 2, or cified To set the instrument to Manual mode, uncheck Auto- mode. In manual mode, you set the display to view the F and g slopes and decide when to log the data by observing those variables on the instrument display (see...
- Page 49 LI-600 Porometer/Fluorometer Instruction Manual Figure 5-6. The Measurement Settings screen. If the Dark Adapted box is checked or the Rect- angular or Multiphase Flash options are selected, val- ues in Flash and Modulation automatically set to default. High flow is recommended for most applications to provide the fastest measurement speed with no observed reduction in sensitivity.
-
Page 50: Display Layout
Rate. Integrated Modulation Intensity is auto- matically calculated. Display Layout In Display Layout, you can customize the layout and variables that are visible on the LI-600 Measurement screen. Figure 5-7. Select a 2- or 8-panel layout for the Logged screen or the Flash Complete screen. -
Page 51: Preview
Connection Overview from the drop-down menu and connect your instrument. Select the Upload button under Local Con- figurations to add it to the LI-600. Up to four con- figurations can be loaded onto the instrument at a time. 5-10... -
Page 52: Section 6. Data Files
Under Data on LI-600, select Download Instrument Data then Download on the prompt. All data on the LI-600 will be downloaded to the com- puter software. Clear on the confirmation prompt to clear all data off the instrument or Cancel. Clearing removes all data from the LI-600, not from the computer software. -
Page 53: Exporting Data Files From The Computer Software
To export data files from the computer software to your computer file system, select files to download under Local Files. If have an LI-600 with a fluorometer, check Export Flash Files to save the fluorometer files with the data file. For information about software that can help with flash file analysis, see FlashAnalysis App on page A-1. -
Page 54: Variables, Units, And Equations
The fluorometer, leaf angle, and GPS groups will be absent from the data files of LI-600 models without those features. Variables, units, and equations To view a variable's unit of measure, format, or equa- tion, see the third row of the data table as imported into a spreadsheet application. - Page 55 Label 1 barcode, list, or number Label 2 barcode, list, or number Label 3 barcode, list, or number Porometry The Porometry Group contains the data collected from the LI-600 porometer. See Porometry group on page 9-18. PORO Stomatal conductance One-sided boundary layer conductance Total conductance...
- Page 56 Leaf H O mole fraction leaf_area Leaf area in cm Fluorometry The Fluorometry Group contains the data collected from the LI-600 Fluorometer. See Fluorometry group on page 9-19. FLUORO flashID Flash file ID Minimum fluorescence in dark Maximum fluorescence in dark...
- Page 57 LI-600 Porometer/Fluorometer Instruction Manual SENSOR Tleaf IRT leaf (sample) temperature P_atm Atmospheric pressure flow Flow rate to cuvette flow_s Exhaust flow leaving cuvette leak_pct Flow percent leak Qamb Ambient light batt Battery voltage Leaf angle The leaf angle group contains measurements from the magnetometer, accelerometer, GPS, and calculated vari- ables.
- Page 58 Section 6. Data files gps_time YYYYMMDD gps_date HHMMSS latitude Latitude longitude Longitude altitude Altitude (meters) gps_sats Number of gps satellites gps_HDOP Horizontal dilution of precision Match The Match group records the time and date of the RH sensor matching and the sensor correction. See Matching RH sensors on page 9-7 for the equations, Measurement Settings on page 5-7, and Taking a measurement on page 3-3.
- Page 59 LI-600 Porometer/Fluorometer Instruction Manual Porometer configuration See Measurement Settings on page 5-3. P_CONFIG auto Auto mode flow_set Flow set point gsw_limit slope limit gsw_period period Fluorometer configuration See Measurement Settings on page 5-3. FL_CONFIG dark Dark adapted or not flash_type Flash type...
- Page 60 The metadata for each measurement includes instru- ment and sensor serial numbers, embedded firmware version, and when the configuration was last updated. Metadata for each data file can be viewed in the LI-600 computer software. See Local Files on page 4-8.
- Page 61 LI-600 Porometer/Fluorometer Instruction Manual META flashId Flash ID (fluoro) lciSerNum Instrument serial# lcpSerNum Porometer serial# lcfSerNum Fluorometer serial# lcrhSerNum RH sensor serial number version Embedded version configUpdatedAt Configuration update date Flash files Flash files are fluorometer data files. If a data file con- tains fluorometer measurements, a flash file for each measurement is downloaded and included in the .zip...
-
Page 62: Section 7. Troubleshooting
Troubleshooting This section describes how to identify possible issues with the LI-600 and any warnings that may appear on the instru- ment display. If you cannot find a solution in this section, contact your local distributor or LI-COR support (see Sup- port on page 1-4). -
Page 63: Instrument Will Not Automatically Log A Measurement
Upload the configuration using the computer software then select it on the instru- ment. Software warning when connecting the LI-600 If the computer software displays a warning message when connecting the LI-600, the firmware version or computer software version may require updates. -
Page 64: Software Warning When Updating The Firmware
Figure 7-1. A software upgrade is available.. Your application software is currently at version...": An updated version of the LI-600 computer software is avail- able for download. CLICK HERE to download! to update the computer software and proceed to LI-600 con- nected!. -
Page 65: The New Rh Sensor Serial Number Has Not Updated
LI-600 Porometer/Fluorometer Instruction Manual Figure 7-3. Failed to identify this instrument! An LI-600 is powered on and has been discovered by the computer via USB, but it was disconnected while updat- ing the firmware. Power cycle the LI-600 by turning it off and on, then Reattempt Identification, or reinstall the firmware. -
Page 66: Instrument Warnings
The Low Battery warning appears when there is less than 10% of battery charge remaining. Stop using the instrument and charge the battery. Blower off The Blower Off warning appears when the blower is off. To turn the blower on, power on the LI-600 and select a... -
Page 67: Pump
LI-600 Porometer/Fluorometer Instruction Manual configuration; the blower should automatically turn on. If the warning persists, power on the LI-600 then con- nect it to a computer via USB. Open the computer soft- ware. From the drop down menu select Instrument Calibration. - Page 68 Section 7. Troubleshooting Duplicate Flash ID This is caused by a user taking measurements, manually changing the clock back an hour from Daylight Saving Time to Daylight Standard Time, then continuing to take measurements that result in a duplicate Flash ID (time stamp).
-
Page 70: Section 8. Maintenance
App" on page A-1 Storing the LI-600 Following are the steps to take when storing the LI-600. Power down and store it in the carrying case when not in use; this will keep dust, insects, and other con- taminants out of the aperture. - Page 71 LI-600 Porometer/Fluorometer Instruction Manual Regularly check that the IRT sensor is clean. Use foam swabs and isopropyl alcohol (IPA) to carefully clean the IRT sensor. Clean the fluorometer. Regularly check that the fluorometer is clean. Use foam swabs, a microfiber cloth, and IPA to carefully clean the fluorometer optics.
-
Page 72: Removing The Instrument Head Shells
Section 8. Maintenance dirt and debris may accumulate after active use. Use foam swabs and DI water to carefully clean them. If dirt remains on the leaf gasket, gently wash it in water and completely dry it before reinserting. If needed, replace it with a new gasket. - Page 73 LI-600 Porometer/Fluorometer Instruction Manual Figure 8-2. Remove the shell on the left side. Remove the five screws on the right of the instru- ment. Set the shells and screws aside for safekeeping. Figure 8-3. Remove the shell on the right side.
-
Page 74: Removing And Inserting A Battery
Removing and inserting a battery Removing and inserting the battery is only required when the battery no longer functions and needs replace- ment. Prepare the LI-600. Power off the instrument and ground yourself to avoid potential electrostatic discharge. Remove the shells. -
Page 75: Replacing The Air Intake Filter
Replacing the air intake filter The air intake filter serves to remove solid particles from air before it is drawn through the LI-600 porometry sys- tem. A 0.45 micron filter (part number 301-19838) is a direct replacement for the original 1.0 micron filter (part number 301-16918). - Page 76 Section 8. Maintenance Figure 8-5. Remove the screws to remove the filter cover. Remove the filter. Remove the filter using gloves or tweezers; oils on the skin and scratches can damage the filter. Figure 8-6. Filter part number 301-19838 is a direct replace- ment for the original filter (part number 301-16918).
-
Page 77: Calibrating The Sensors
LI-600 Porometer/Fluorometer Instruction Manual Calibrating the sensors The LI-600 includes sensors whose calibration para- meters can be adjusted by the user: relative humidity (RH) sensors, flow sensors, and a fluorescence detector. This section describes the process of setting the available parameters for each sensor. - Page 78 O buffer material. Use gloves or tweezers to remove the H O buffer material, as oils on the skin and scratches can reduce its buffering efficacy. Alternatively, turn the LI-600 over a container to col- lect the H O buffer material.
- Page 79 Figure 8-9. Attach the zero kit. Seal the leaf aperture. To seal the leaf aperture, clamp on a plastic bag or similar material. Open Instrument Calibration. Power on the LI-600. Connect it to a computer via USB then open the computer software. Click the 8-10...
- Page 80 Drierite, to provide a low dew point. Using an airstream in the RH sensor zeroing process requires the least disassembly. Prepare the LI-600. Power on the instrument. Open Instrument Calibration. 8-11...
- Page 81 LI-600 Porometer/Fluorometer Instruction Manual Connect the LI-600 to a computer via USB then open the computer software. Click the drop-down menu on the Toolbar then select Instrument Calibration. Power off the pump. Select RH Zero then click Begin RH Zero Cal- ibration to view the RH Ref and RH Sample.
- Page 82 Section 8. Maintenance Figure 8-11. Attach a tank of ultrapure dry air to the cal- ibration clamp. Figure 8-12. Visual representation of an attached air tank Dry the RH sensors. Deliver an airstream across the RH sensors for 30 minutes to 1 hour. Do not allow maximum airflow to exceed 0.25 LPM.
- Page 83 Using a user-supplied airstream on page 8-11. If delivering air- flow across the sensors via the LI-600 pump only, see Using the LI-600 pump on page 8-8. If the resulting RH is <1% and trending down after several minutes, the zero does not require resetting.
- Page 84 Take the following steps to span the RH sensors. Prepare the LI-600. Power on the instrument. Open Instrument Calibration. Connect the LI-600 to a computer via USB then open the computer software. Click the drop-down menu on the Toolbar then select Instrument Calibration. Set the H O input.
-
Page 85: Flow Sensors
Take the following steps to reset the flow sensors. No disassembly is required. Open Instrument Calibration. Connect the LI-600 to a computer via USB then open the computer software. Click the drop-down menu on the Toolbar then select Instrument Calibration. -
Page 86: Fluorescence Detector
Take the following steps to reset the fluorescence detector. Open Instrument Calibration. Connect the LI-600 to a computer via USB then open the computer software. Click the drop-down menu on the Toolbar then select Instrument Calibration. - Page 87 Take the following steps to change the RH sensors serial number. Open Factory Calibration. Connect the LI-600 to a computer via USB then open the computer software. In Explore the LI-600, select the drop-down menu on the Toolbar then select About Instrument.
-
Page 88: Section 9. Theory Of Operation
Section 9. Theory of operation The LI-600 is equipped to measure two different aspects of leaf photosynthesis. The porometer uses a mass balance for water vapor flux from the leaf to compute stomatal con- ductance. The fluorometer uses optical techniques to probe the quantum yield of photosystem II. -
Page 89: Derivation Of Equations
LI-600 Porometer/Fluorometer Instruction Manual Figure 9-1. Air flow measured before and after interaction with a leaf. Relative humidity (RH) sensors on the cuvette measure the air stream before and after it interacts with a leaf. Flow rates are measured before and after passing through the cuvette;... - Page 90 Section 9. Theory of operation where s is leaf area (m ), E is transpiration (mol m (µmol s ) are flow rates into and out of the leaf cuvette, respectively, W are water vapor mole fractions into and out of the leaf cuvette (mol H O mol ).
- Page 91 (g ) is the one-sided boundary layer conductance, both in (mol H Boundary layer conductance in the LI-600 cuvette is a function of the flow rate (equation 9-10). The actual measurements for water vapor being made in the LI-600 are done using relative humidity sensors on the inlet and outlets of the cuvette.
-
Page 92: Boundary Layer Conductance
× -6.755E-5 + 0.0292302 × flow 9-10 where flow is the cuvette flow rate in (µmol s Implementation of equations in the LI-600 The equations implemented in the LI-600 are shown below. Sensor calculations The following equations convert the sensor read-out in volts to the appropriate units. - Page 93 LI-600 Porometer/Fluorometer Instruction Manual where V is the voltage read from the sensor, Z is a user- settable zero parameter and S is a user-settable span para- meter and f(x) is a 3rd or 4th order polynomial. RH sensors The RH Sensors have a small sensitivity to temperature that must be accounted for.
-
Page 94: Matching Rh Sensors
Section 9. Theory of operation RH (%) is then computed from y with a 3rd order poly- nomial 9-14a 9-14b where a and d are factory-determined coefficients for each RH sensor. Matching RH sensors The above equations describe calculations for the RH sensors. -
Page 95: Infrared Temperature Sensor
LI-600 Porometer/Fluorometer Instruction Manual 9-18a 9-18b where a and d are factory-determined coefficients for each flow sensor. Infrared temperature sensor Leaf temperature (°C) is computed as a function of the reference temperature and the IRT sensor response 9-19 where V... -
Page 96: Stability Criteria In Auto Mode
Stability criteria in auto mode In Auto mode, the user does not manually log a meas- urement; the LI-600 automatically logs the data point when the stability criteria set in the configuration are met. The software provides flexibility in allowing a user to choose when a measurement is considered stable (see Automode Setup on page 5-6). -
Page 97: User Calibration Procedures
Since the LI-600 is designed for rapid survey meas- urements, the time period is limited to 1, 2, or 4 seconds. The LI-600 retains up to 4 seconds of 2 Hz data to cal- culate stability criteria as follows: 9-33... - Page 98 The software will accept either unit and convert to the cor- rect relative humidity at the sensor using equations 9-7, 9-21, and 9-25, with Press coming from the LI-600 pres- sure sensor and T coming from the LI-600 reference thermistor.
- Page 99 LI-600 Porometer/Fluorometer Instruction Manual 9-37 where is inverse of equations 9-14a and 9-14b, T and V are the current values read by the RH and Temperature sensors and m and other parameters are the current calibration values for the sensor from equations 9-14a, and 9-14b.
-
Page 100: Fluorometer
LI-6800 Portable Photosynthesis System fluorometer (Genty et al., 1989, Pfundel et al., 2013). Actinic light is not provided by the LI-600 fluorometer but rather by ambient light which could be natural sun- light or any number of artificial light sources. The two LEDs are both modulated at a constant frequency and provide both the measuring beam and saturating flash. -
Page 101: Implementation On The
LI-600 Porometer/Fluorometer Instruction Manual 9-40 where P is the current pulse frequency (2 to 750,000 freq Hz), P is the pulse width (667 ns) and Q is the width peakx peak intensity of the left and right LEDs, set by a factory calibration. -
Page 102: Dark-Adapted Vs Light-Adapted Measurements
Dark-adapted vs light-adapted measurements With the LI-600 fluorometer, the actinic light source is provided by external sources unknown to the instru- ment. The instrument cannot know if a given meas- urement being made is on a dark-adapted leaf or not. -
Page 103: Steady-State Fluorescence
A rectangular flash delivers a user-selectable flash intens- ity (µmol m ) for a user-selectable amount of time (ms). The LI-600 converts that to a frequency during the flash using the factory calibration value. Multiphase flash The LI-600 can perform multiphase flashes for con- ditions where it is difficult to fully saturate with rect- angular flashes (Loriaux et al, 2013). -
Page 104: Logged Variables
φ PSII comes from the flash as shown above, Q is from the ambient PAR sensor (equation 9-20), abs and PS2/1 are constants given by the user in the con- figuration. Logged Variables The LI-600 logs variables into two groups: porometry and fluorometry. 9-17... -
Page 105: Porometry Group
LI-600 Porometer/Fluorometer Instruction Manual Porometry group The porometry group includes variables in Table 9-2 below. Table 9-2. Variables logged in the porometry group. Description Label Units Equation −2 −1 Stomatal con- mol m ductance −2 −1 Boundary layer mol m... -
Page 106: Fluorometry Group
Section 9. Theory of operation Fluorometry group The fluorometry group includes variables in Table 9-3 below. Table 9-3. Variables logged in the fluorometry group. Description Label Units Equation FlashID flashID Minimum Fluor- escence in Dark Maximum Fluor- Section 9. escence in Dark Quantum Efficiency Fv/Fm 9-44... -
Page 107: Leaf Angle And Gps
LI-600 Porometer/Fluorometer Instruction Manual Leaf angle and GPS Using measurements from the accelerometer / mag- netometer and GPS receiver, the LI-600 computer soft- ware calculates the leaf angle relative to the sun at a given time and place, which is the angle of incidence. -
Page 108: Gps
Section 9. Theory of operation Roll: rotation from the horizontal in degrees (accel- erometer) Heading: rotation from North in degrees (mag- netometer) Figure 9-3. Pitch, roll, and heading. If GPS is enabled in the instrument settings and there are a minimum of 3 satellite signals, a GPS map pin will appear in the upper left of the device screen. -
Page 109: Leaf Angle Software Calculations
Leaf angle software calculations The LI-600 software application combines data from GPS and rotational information to compute parameters related to solar position and leaf angle position relative to the sun. The angle of incidence of a surface (here, a... - Page 110 The following equations are similar to those from Escribano-Rocafort et al. 2014 with modifications to fit the LI-600 framework. 9-50 9-51 Equation 4 requires additional quadrant corrections. Equation 1 requires astronomers zenith angle, 180 from the topocentric zenith angle (equation 46 R&A 2004).
-
Page 111: Clocks
0-90 solar Clocks With the addition of GPS, the LI-600 reports two dif- ferent time stamps in the data file: a date/time stamp in the SYS group, and a date/time stamp in the GPS group. The date/time stamp in the SYS group is either set manually by the user or synced to GPS time (when avail-... -
Page 112: References
Section 9. Theory of operation GPS not available If the user is unable to view enough satellites to acquire GPS, then the clock needs to be set manually (Instru- ment Settings > Set Time > Manual). In this case, the SYS Date/Time will update based on user settings. GPS time will not be available and is logged as time = '0:00:00' and date = '0000-00-00'. - Page 113 LI-600 Porometer/Fluorometer Instruction Manual phone. Methods Ecol Evol, 5: 132-140. https://- doi.org/10.1111/2041-210X.12141 Genty, B., Wonders, J. & Baker, N.R., 1990. Non-pho- tochemical quenching of Fo in leaves is emission wavelength dependent: consequences for quenching analysis and its interpretation. Photosynthesis Research, 26(2), pp.133–139.
-
Page 114: Section 10. Specifications
Section 10. Specifications General Measurement time: Porometer: 5 to 15 seconds typically, depending on species, leaf surface characteristics, and leaf conditions Fluorometer: 1 second Operating conditions: Temperature: 0 to 50 °C Pressure: 50 to 110 kPa Humidity: 0 to 85%; non-condensing Weight: 0.68 kg (porometer only);... -
Page 115: Porometer
LI-600 Porometer/Fluorometer Instruction Manual Universal charging adapter: Input: 90 to 264 VAC; 50 to 60 Hz Output: 5 VDC; 1 Amp Configuration Software: Windows® and macOS® applications Data files: Plain text data compatible with any spread- sheet application or data analysis program Output: .CSV format... -
Page 116: Fluorometer
Section 10. Specifications mol m mol m mol m mmol m kPa; VP kPa; VP kPa; VPD cham leaf leaf mmol mol mmol mol samp leaf mmol mol Fluorometer Flash types: User configurable Rectangular and Mul- tiphase Flash™ (MPF) Measuring light peak wavelength: 625 nm Measuring light peak intensity: 0 to 10,000 µmol m Flash intensity: 0 to 7500 µmol m... - Page 117 10-4...
-
Page 118: Appendix A. Flashanalysis App
Appendix A. FlashAnalysis App FlashAnalysis is an application to help optimize flash pro- tocol, and also to summarize and export data of interest. You can import downloaded and extracted flash files saved to your computer into the application, then plot and graph the flash variables for analysis (see Flash files on page 6-10.) ®... -
Page 120: Appendix B. Warranty
The defects are called to the attention of LI-COR, Inc. in Lincoln, Nebraska, in writing within one year after the shipping date of the instrument. - Page 121 No-charge repair parts may be sent at LI-COR, Inc.'s sole dis- cretion to the purchaser for installation by purchaser. LI-COR, Inc.'s liability is limited to repair or replace any part of the instrument without charge if LI-COR, Inc.'s examination disclosed that part to have been defective in material or work- manship.
- Page 122 Appendix B. Warranty months from the date of shipment to LI-COR, Inc.'s authorized distributor, whichever is earlier. This warranty supersedes all warranties for products pur- chased prior to June 1, 1984, unless this warranty is later superseded. To the extent not superseded by the terms of any extended warranty, the terms and conditions of LI-COR’s Warranty still apply.
-
Page 124: Appendix C. Index
Appendix C. Index accelerometer/magnetometer 1-2 angle of incidence 9-20, 9-20 pitch, roll, and heading 9-20 accessories kit 1-3 air intake filter 8-6 aperture 1-2, 3-2 clamp 1-2, 1-3, 3-2 barcodes configuring 5-6 generator 4-11 scanner 1-3, 3-5 battery disposal 1-6 lithium ion 1-2 removing and inserting 8-5 calibration... - Page 125 LI-600 Porometer/Fluorometer Instruction Manual fluorescence detector 8-17 in software 4-4 resetting to factory 4-4 RH sensors 8-8 user 8-8 charging 1-4 battery warnings and disposal 1-6 qualcomm quick charge 1-5 universal adapter 1-5 clocks 9-24 configuration management 4-5 configurations 5-1...
- Page 126 Appendix C. Index enter button 1-2 firmware update 7-2 flash 5-8 files 6-10 multiphase 9-16 rectangular 9-16 flow 5-3 theory of operation 9-7 fluorescence constants 5-9 fluorometer 1-2 fluorometer upgrade kit 1-3 GPS 1-1, 9-21 clock 9-24 configuring 5-4 troubleshooting 7-6 turning off 3-3 view satellites 2-5 instrument...
- Page 127 LI-600 Porometer/Fluorometer Instruction Manual leaf angle 9-20 calculations 9-22 light-adapted 5-9 lithium ion battery 3-1, 7-5 maintenance 8-1 cleaning 8-1 storing 8-1 user calibrations 8-8 match frequency 5-8 theory of operation 9-7 measurements 3-1 settings 5-7 taking 3-3 techniques 3-2...
- Page 128 Appendix C. Index quantum sensor 1-2, 3-2 remarks 5-2 adding 3-4 configuring 5-7 RH sensor changing the serial number 8-17 cleaning 8-1 flow through 9-2 user-supplied airstream 8-11 sensors cleaning 8-1 shut down 1-5 software 4-1 configuration management 4-5, 5-4 connection overview 4-1, 4-10 data management 4-7 download and install 4-1...
- Page 129 LI-600 Porometer/Fluorometer Instruction Manual theory of operation 9-1 fluorometer 9-13 leaf angle 9-22 porometer 9-1 tripod mount 1-3 troubleshooting 7-1 automatic logging 7-2 data downloads 7-6 display layout 7-2 instrument warnings 7-5 powering on 7-1 RH values 7-4 sealing 7-1...
- Page 131 Regional Offices LI-COR Biosciences GmbH Siemensstraße 25A 61352 Bad Homburg Germany Phone: +49 (0) 6172 17 17 771 envsales-gmbh@licor.com LI-COR Biosciences UK Ltd. St. John’s Innovation Centre Cowley Road Cambridge CB4 0WS United Kingdom Phone: +44 (0) 1223 422102 envsales-UK@licor.com LI-COR Distributor Network: www.licor.com/envdistributors...
Need help?
Do you have a question about the LI-600 and is the answer not in the manual?
Questions and answers