Table of Contents
Advertisement
Quick Links
Advertisement
Table of Contents

Subscribe to Our Youtube Channel
Related Manuals for Monoprice 38576


Summary of Contents for Monoprice 38576
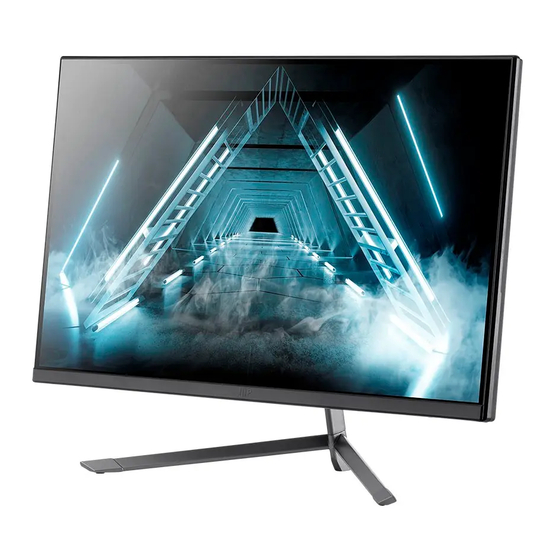
- Page 1 27" WQHD 144Hz Zero-G Gaming Monitor P/N 38576 User's Manual...
-
Page 2: Table Of Contents
CONTENTS SAFETY WARNINGS AND GUIDELINES ..........3 FEATURES ........................5 SYSTEM REQUIREMENTS ................5 CUSTOMER SERVICE ..................6 PACKAGE CONTENTS ..................6 PRODUCT OVERVIEW ..................7 Controls ........................7 Connections ....................... 8 INSTALLING THE STAND ................9 REMOVING THE STAND ................10 USING A WALL OR DESK MOUNT ............ -
Page 3: Safety Warnings And Guidelines
SAFETY WARNINGS AND GUIDELINES Please read this entire manual before using this device, paying extra attention to these safety warnings and guidelines. Please keep this manual in a safe place for future reference. This device is intended for indoor use only. ... - Page 4 Prior to operation, check the unit and power cord for physical damage. Do not use if physical damage has occurred. Before plugging the unit into a power outlet, ensure that the outlet provides the same type and level of power required by the device.
-
Page 5: Features
FEATURES 1x HDMI® 2.0, 2x HDMI 1.4, and 1x DisplayPort® 1.2a video inputs 2560 x 1440p @ 144Hz maximum video resolution 16:9 aspect ratio 4ms response time, 1ms when overdriven 1000:1 contrast ratio 400 cd/m² brightness ... -
Page 6: Customer Service
If you have any problem with your order, please give us an opportunity to make it right. You can contact a Monoprice Customer Service representative through the Live Chat link on our website www.monoprice.com or via email at support@monoprice.com. Check the website for support times and links. -
Page 7: Product Overview
PRODUCT OVERVIEW Controls MENU: If the OSD menu is not displayed, press the MENU button to access the OSD menu. If the OSD menu is displayed, press the MENU button to enter a submenu. If editing a value, press the MENU button to save the edited value. -
Page 8: Connections
POWER: Press the POWER button to turn the monitor on or off. LED INDICATOR: The LED indicates various monitor states. If the LED INDICATOR is solid blue, solid green, or solid white, the monitor is powered on and is operating normally. -
Page 9: Installing The Stand
INSTALLING THE STAND Perform the following steps to assemble the stand and attach it to the monitor. Open the package, remove the monitor with the foam packaging, then place it on a flat surface. Remove the Stand Stem, Stand Base, and Cable Clip from the packaging. -
Page 10: Removing The Stand
Remove the foam packaging from the back of the monitor. Using the included Screwdriver and two M4x10 Screws, secure the Stand Assembly to the back of the monitor. Use the two Decorative Covers to cover the connection point, as shown in the image below. Remove the monitor from the front foam packaging and place it on a flat surface. -
Page 11: Using A Wall Or Desk Mount
Place the removed screws, Screwdriver, Stand Stem, and Stand Base in a safe place for future use. USING A WALL OR DESK MOUNT Note that this monitor only includes screws to attach it to a wall or desk mount. No mount or other mounting accessories are included. REMOVING If you installed the stand, first perform the steps in the THE STAND... - Page 12 Main Menu Submenu Options Description Gamma 1.8 Gamma 2.0 Gamma Gamma 2.2 Sets the Gamma level Gamma 2.4 Gamma 2.6 Standard, Photo, Picture Sets the picture Movie, Color Setting mode Game, FPS, Setting Color Warm, Sets the color Temperature Cool, User temperature Low Blue Sets the level of blue...
- Page 13 Main Menu Submenu Options Description Reduces the image Picture Off, High, Noise noise caused by Quality Middle, Reduction signal source Setting interference Enhances the image Off, High, Super resolution when the Middle, Resolution actual resolution is Picture Compensates for Quality gray scale display Setting Dynamic...
- Page 14 Main Menu Submenu Options Description Auto Source, Selects the audio Audio Audio signal input via HDMI Source HDMI® 1, or DP HDMI 2, HDMI 3 Off, PIP Multi- Sets the multi- Mode, Window window mode PBP 2Win Selects the DP, HDMI Sub Win2 secondary input 1, HDMI 2,...
- Page 15 Main Menu Submenu Options Description English, Chinese, Korean, Sets the language Language Russian, used in the OSD Spanish, menu Japanese, French Adjusts the OSD H- 0~100 horizontal position of Position the OSD menu Adjusts the vertical OSD V- 0~100 position of the OSD Position menu Sets the overall...
-
Page 16: Troubleshooting
Main Menu Submenu Options Description DP 1.1, Sets the DisplayPort® DP Version DP 1.2 version Turns AMD FreeSync On, Off FreeSync™ support on or off Other On, Off Turns HDR on or off Resets the monitor Reset None settings to the factory default values Note: When choosing the Picture-by-Picture (PbP) mode, set the default resolution of each window to 1280x1440@60Hz. - Page 17 Q3: The screen is flashing. A3: There is an issue with the power source. Ensure that devices that could cause magnetic interference are a safe distance away. Q4: There is color bleeding, distortion, or other unusual effects. A4: Check the video cable connection. Connect to another video source for comparison.
-
Page 18: Technical Support
A11: Check the settings in the monitor's OSD menu and PC display settings. TECHNICAL SUPPORT Monoprice is pleased to provide free, live, online technical support to assist you with any questions you may have about installation, setup, troubleshooting, or product recommendations. If you ever need assistance with your new product, please come online to talk to one of our friendly and knowledgeable Tech Support Associates. -
Page 19: Specifications
SPECIFICATIONS Model 38576 1x DisplayPort® 1.2, Video Inputs 1x HDMI® 2.0, 2x HDMI 1.4 Display Size 27" Active Display Area 596.74 x 335.66 mm Panel Type Panel Model AUO M270DTN01.8 Maximum Resolution 2560x1440p Maximum Refresh Rate 144Hz VESA® Mount Size 75 x 75 AMD FreeSync™... -
Page 20: Regulatory Compliance
English, Chinese, Korean, OSD Languages Russian, Spanish, Japanese, French Input Power 12 VDC, 4A AC Adapter Input Power 100 ~ 240 VAC, 50/60 Hz Maximum: 55 watts Power Consumption Typical: 32 watts Standby: ≤ 0.5 watts Operating Temperature +32 ~ +104°F (0 ~ +40°C) Operating Temperature -4 ~ +140°F (-20 ~ +60°C) Operating Humidity... - Page 21 Modifying the equipment without Monoprice's authorization may result in the equipment no longer complying with FCC requirements for Class B digital devices. In that event, your right to use the equipment may be limited by FCC regulations, and you may be required to correct any interference to radio or television communications at your own expense.
-
Page 22: Notice For Industry Canada
Notice for Industry Canada This Class B digital apparatus complies with Canadian ICES-003. Cet appareil numérique de la classe B est conforme à la norme NMB-003 du Canada. HDMI® the HDMI Logo, and High-Definition Multimedia Interface are trademarks or registered trademarks of HDMI Licensing LLC in the United States and other countries.
Need help?
Do you have a question about the 38576 and is the answer not in the manual?
Questions and answers