Table of Contents
Advertisement
Quick Links
Advertisement
Table of Contents

Related Manuals for Fanimation Windpointe MW75 Series


Summary of Contents for Fanimation Windpointe MW75 Series
- Page 1 ® WINDPOINTE CEILING FAN MODEL #MW75** ATTACH YOUR RECEIPT HERE READ AND SAVE THESE INSTRUCTIONS Purchase Date Net Weight 10.55 kg (23.26 lbs) Questions, problems, missing parts? Before returning to your retailer, call our customer service department at 1300 469 326...
-
Page 2: Table Of Contents
Important Safety Instructions WARNING: To avoid fire, shock and serious personal injury, follow these instructions. 1. Read your owner’s manual and safety information before installing your new fan. Review the accompanying assembly diagrams. 2. Before servicing or cleaning unit, switch power off at service panel and lock service panel disconnecting means to prevent power from being switched on accidentally. -
Page 3: Unpacking Instructions
This manual is designed to make it as easy as possible to assemble, install, operate, and maintain this ceiling fan Tools Needed for Assembly Materials Wiring and connectors must be of type required by local regulations. The minimum wire would be a 3- (supplied) screwdriver conductor (2-wire with ground). -
Page 4: Energy Effi Cient Use Of Ceiling Fans
Ceiling fan performance and energy savings rely Using the Ceiling Fan Year Round heavily on the proper installation and use of the ceiling Summer Season: Use the ceiling fan in the counter- fan. Here are a few tips to ensure efficient product clockwise direction. -
Page 5: How To Assemble Your Ceiling Fan
How to Assemble Your Ceiling Fan 1. Remove the hanger ball by loosening the setscrew in the hanger ball until the ball falls freely down the downrod. (Figure 1) Remove the pin from the downrod, then remove the hanger ball. Retain the pin and hanger Hanger Ball ball for reinstallation in Step 2. -
Page 6: How To Hang Your Ceiling Fan
How to Hang This Ceiling Fan WARNING To avoid possible fire or shock, be sure electricity is turned off at the main fuse box before wiring. MAIN FUSE BOX (Figure 1) Figure 1 WARNING CEILING The fan must be hung with at least 2.1m of clearance from floor to blades. -
Page 7: How To Wire Your Ceiling Fan
How to Wire This Ceiling Fan Ceiling fans must be installed by a licensed electrician. WARNING To avoid possible re or shock, be sure electricity is MAIN FUSE BOX turned off at the main fuse box before wiring. (Figure 1) Securely connect the green/yellow earth wires from Figure 1 ceiling fan, hanger bracket and the supply green/yellow... - Page 8 Assembling and Mounting the Fan Blades and Switch Hsg INSTALLATION NOTE Motor Stop Do not connect fan blades until the fan is completely installed. Installing the fan with blades assembled may result in damage to the fan blades. ▲WARNING To reduce the risk of personal injury, do not bend the blade holders when installing, balancing the blades or cleaning the fan.
- Page 9 Assembling and Mounting the Fan Blades and Switch Hsg (continued) 5. Disassemble the cover-switch cup from the adapter- switch cup by removing three screws. Adapter-Switch Cup (Figure 5) Cover-Switch Cup Figure 5 6. Assemble the adapter-switch cup on the housing support bracket using the previously removed screw and tighten all three screws.
-
Page 10: Maintenance
Maintenance Periodic cleaning of your new ceiling fan is the only CAUTION maintenance that is needed. When cleaning, use only a soft brush or lint free cloth to Do not use water when cleaning your ceiling fan. It could damage the motor or the blades and create the avoid scratching the fi... -
Page 11: Parts List
Parts List Models MW75** Ref. # Description Part # Hanger Bracket Assembly P 610BL-220 Downrod/Hanger Ball Assembly Containing: Hanger Ball Assembly Downrod D 1 -6 -220 Hairpin Clip Clevis Pin Ceiling Canopy PG165** Motor Coupling Cover Assembly AP1115** Fan Motor Assembly AMAAUM7500** Blade Holder Cover Set AP5063**... -
Page 12: Exploded-View Drawing
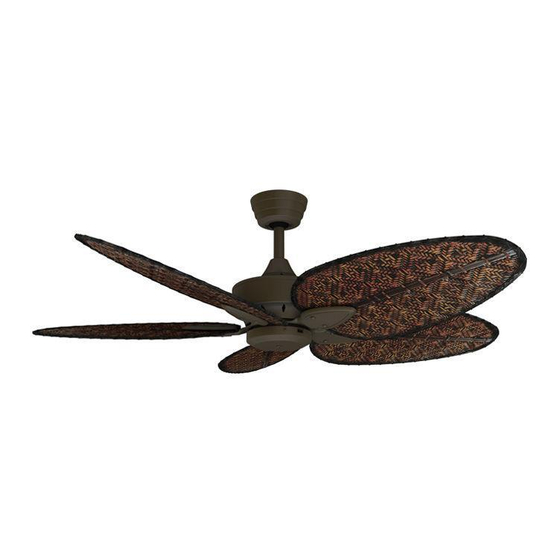
MW75** Exploded-View Drawing Optional Blade Set – Show is BPD4 (Not inculded) Figure 1 NOTE: The illustration shown is not to scale or its actual configuration may vary... -
Page 13: Trouble Shooting
Trouble Shooting ▲WARNING For your own safety turn off power at fuse box or circuit breaker before trouble shooting your fan. Trouble Probable Cause Suggested Remedy 1. Fuse or circuit breaker blown. 1. Check main and branch circuit fuses or circuit breakers. - Page 14 2016/12 V.01 Copyright 2016 Fanimation...