Table of Contents
Advertisement
Available languages
Available languages
Advertisement
Table of Contents

Related Manuals for Audio Physic TEMPO plus


Summary of Contents for Audio Physic TEMPO plus
- Page 1 Owner´s Manual Bedienungsanleitung TEMPO plus...
-
Page 2: Table Of Contents
Inhaltsverzeichnis Lieferumfang Seite 3 Begrüßung Seite 4 Allgemeine Tipps Seite 5 Auspacken und Zusammenbau Seite 6-7 Anschließen der Lautsprecher / Bi-Wiring Seite 8 Aufstellen der Lautsprecher Seite 9-10 Technische Spezifikationen Seite 11 Contents Included in the Delivery page 3 Welcome page 12 General Tips page 13... -
Page 3: Lieferumfang
Your new loudspeakers are delivered in two separate boxes. Box “A“ contains one loudspeaker and the accessory pack “1“, as well as your “Welcome to the Audio Physic Family“ package containing this Owner‘s Manual and the Final Inspection Certificate. In box “B“ box you will find the other loudspeaker and a further accessory pack (number “2“). -
Page 4: Begrüßung
Im Regelfall wird Ihnen der kompetente AUDIO PHYSIC-Fachhändler die Lautsprecher liefern und installieren. Sollten Sie dies selbst tun wollen, helfen Ihnen die auf den folgenden Seiten beschriebe- nen Tipps und Schritte bei der sicheren Inbetriebnahme. Viel Spaß mit Ihren TEMPO plus. No loss of fine detail: Wenn Sie hautnah erfahren möchten, was Ihre neuen... -
Page 5: Allgemeine Tipps
Ihr volles Klangpotenzial erreichen die Lautsprecher erst nach einer gewissen Einspielzeit. Die Chassis der TEMPO plus werden von uns vor der Montage im Werk eingespielt, daher genügen meist einige Stunden Spielzeit bei Zimmerlautstärke mit Musik, die einen möglichst breiten Fre- quenzumfang besitzt wie beispielsweise Orchesterwerke. -
Page 6: Auspacken Und Zusammenbau
Auspacken und Zusammenbau Stellen Sie die Kartons mit den Produktaufklebern nach oben auf den Fußboden. Öffnen Sie die Verpackungen vorsichtig an den Klebestellen der Längsseiten, am besten mit einem Taschen- oder Küchenmesser. Korrekt: Die Lautsprecherober- Falsch: Zeigt die Laut- seite sollte beim Auspacken nach sprecheroberseite nach unten zeigen. -
Page 7: Seite
Setzen die Deckkappen auf die Rändelmutter der Füße. Zum Entfernen der Deckkappen heben Sie diese einfach an. Jetzt können Sie beginnen, Ihre neuen TEMPO plus optimal auf den Hörplatz auszurichten. Tipps hierzu finden Sie im folgenden Kapitel „Aufstellung“ und besonders ausführlich auf der AUDIO PHYSIC-Webseite. -
Page 8: Anschließen Der Lautsprecher / Bi-Wiring
Lose Kabellitzen oxidieren leicht und eignen sich nicht für dauerhaft hohen Hörgenuss. „Bi-Wiring“-Betrieb Wenn Ihre TEMPO plus mit einem Bi-Wiring-Terminal ausgerüstet sind, und Sie diese Option nutzen möchten, schließen Sie bitte das vom Verstärker kommende Boxenkabel für die linke Box an die oberen beiden Polklemmen des linken Lautsprechers, um dessen Mittel-Hochtonbereich anzusteuern;... -
Page 9: Aufstellen Der Lautsprecher
Aufstellen der Lautsprecher Ideal ist es, wenn Sie ihre neuen Lautsprecher im Raum so positionieren, dass sie mit Ihrem Hörplatz ein gedachtes gleichschenkliges Dreieck bilden. Der Abstand zwischen den Boxen sollte etwa das 0,8- bis 1,2-fache des Abstandes zum Hörplatz betragen. -
Page 10: Seite
Die Entfernung zu den Seitenwänden beeinflusst, neben der Stärke der Basswiedergabe, insbesondere die Ortung von Schallereignissen und damit die Abbildungspräzision. Mit größerem Abstand wird die Ortung genauer und das Klangbild ausgeglichener. Sehr nahe an den Seitenwänden kommt es zu frühen Schallreflexionen, die neben einer geringeren Ortbarkeit auch zu einem tendenziell nervösen Klang führen. -
Page 11: Technische Spezifikationen
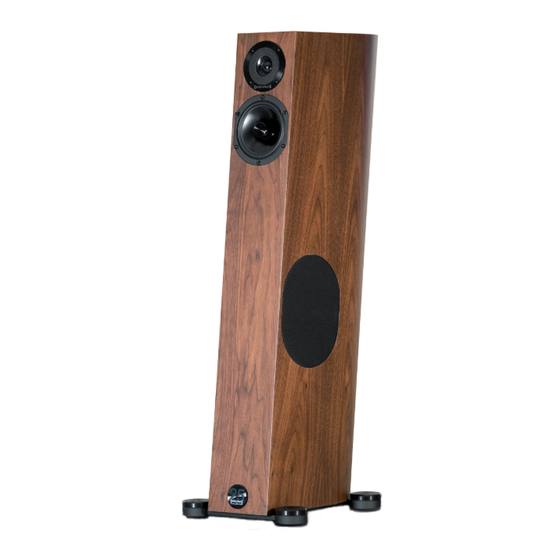
Technische Spezifikationen TEMPO plus Höhe 100,0 cm Breite 18,7 cm Tiefe 32,0 cm Breite x Tiefe 29,0 x 43,0 cm Gewicht 20 kg Empf. Verstärkerleistung 20 - 150 W Impedanz 4 Ohm Frequenzgang 32 Hz - 40 kHz Wirkungsgrad 89 dB... -
Page 12: Welcome
Have fun with your TEMPO plus. No loss of fine detail: If you want a close-up... -
Page 13: General Tips
The loudspeakers first reach their full sound potential after a specific burn-in period. We burn in the drivers of the TEMPO plus at our factory prior to assembly, meaning that they normally only need a burn-in period of a few hours at a normal room volume and with music that has a range of frequencies that is as wide as possible, for example orchestral pieces. -
Page 14: Unpacking And Assembly
Unpacking and Assembly Place the boxes on the floor, making sure that the product labels are facing up. Carefully open the packaging on the long side where it has been taped up, as shown in the illustrations below (illustration similar), preferably using a pocket knife or kitchen knife. Correct: In order to correctly False: If the top of the unpack the loudspeaker, the top of... - Page 15 Attach the foot end caps to the knurled screw of the feet. Simply lift up the foot end caps to remove them. You can now start to optimally align your new TEMPO plus to the listening position. You can find tips regarding this process in the following chapter on “Setup” and can access particularly detailed information on the AUDIO PHYSIC website.
-
Page 16: Connecting The Loudspeakers / Bi-Wiring Operation
“Bi Wiring“ Operation If your TEMPO plus is fitted with a bi-wiring terminal and you would like to use this option, please connect the loudspeaker cable from the amplifier for the left loudspeaker to the upper two connectors on the left loudspeaker in order to control its midrange area and tweeter system and a further cable to the connectors underneath in order to control the woofer system. -
Page 17: Setting Up The Loudspeakers
Setting Up the Loudspeakers The ideal placement of your loudspeakers in your room involves positioning them in an isosceles triangle arrangement including your listening seat, creating equal spacing between each loudspeaker and the listening position. The distance between the loudspeakers should be around 0.8 - 1.2 times as much as the distance between the loudspeakers and the listening position. - Page 18 Alongside the strength of the bass response, the distance from the side walls also particularly affects the localisation of sound events and therefore the precision of the spatial imaging. As the distance from the walls increases, the localisation will become more precise and the sound will be more balanced.
-
Page 19: Technical Specifications
Technical Specifications TEMPO plus Height 39.4“ Width 7.4“ Depth 12.6“ Required Space: Width x Depth 11.4“ x 16.9“ Weight 20 kg Recomm. amplifier power 20 - 150 watts Impedance 4 Ohm Frequency range 36 Hz - 40 kHz Sensitivity 89 dB... - Page 20 AUDIO PHYSIC GmbH Almerfeldweg 38 59929 Brilon / Deutschland Germany Tel. +49(0)2961/9617-0; Fax +49(0)2961/51640 info@audiophysic.de / www.audiophysic.de...
Need help?
Do you have a question about the TEMPO plus and is the answer not in the manual?
Questions and answers