Table of Contents
Advertisement
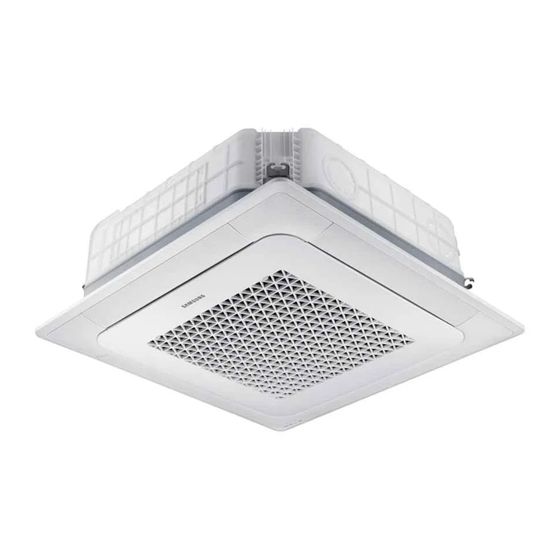
AIR CONDITIONER
SYSTEM AIR CONDITIONER
SINGLE for Europe (R32, Heat Pump)
Model : AC026RN1DKG
AC035RN1DKG
AC026RNNDKG
AC035RNNDKG
AC052RNNDKG
AC071RNNDKG
AC052RN4DKG
AC071RN4DKG
AC071RN4PKG
AC026RNLDKG
AC035RNLDKG
5. PCB Diagram
AC052RNLDKG
AC026RXADKG
AC071RNLDKG
AC035RXADKG
AC035RNMDKG
AC052RXADKG
AC052RNMDKG
AC071RXADKG
AC071RNMDKG
AC026RNADKG
AC035RNADKG
AC052RNADKG
AC071RNADKG
AC052RNCDKG
AC071RNCDKG
CONTENTS
Advertisement
Table of Contents
Troubleshooting

Related Manuals for Samsung AC026RN1DKG


Summary of Contents for Samsung AC026RN1DKG
- Page 1 SYSTEM AIR CONDITIONER SINGLE for Europe (R32, Heat Pump) INDOOR UNIT OUTDOOR UNIT Model : AC026RN1DKG AC052RNLDKG AC026RXADKG AC035RN1DKG AC071RNLDKG AC035RXADKG AC026RNNDKG AC035RNMDKG AC052RXADKG AC035RNNDKG AC052RNMDKG AC071RXADKG AC052RNNDKG AC071RNMDKG AC071RNNDKG AC026RNADKG AC052RN4DKG AC035RNADKG AC071RN4DKG AC052RNADKG AC071RN4PKG AC071RNADKG AC026RNLDKG AC052RNCDKG AC035RNLDKG...
-
Page 2: Table Of Contents
4-2-2 Eco Mode [Power Saving Mode] ...............4-13 4-2-3 Four directions cassette type ................4-14 4-2-4 Outdoor Unit ......................4-16 4-2-5 Wired remote controller ..................4-18 4-3 Troubleshooting by symptoms ..............4-21 4-3-1 Indoor temperature sensor (open/short) ............4-21 4-3-2 Indoor heat exchanger temperature sensor (open/short) ......4-22 Samsung Electronics... -
Page 3: Table Of Contents
6-1 Indoor Unit ....................6-1 6-2 Outdoor unit ....................6-9 7. Reference Sheet ..................7-1 7-1 Index for Model Name ..................7-1 7-1-1 Indoor Unit .........................7-1 7-1-2 Outdoor Unit ......................7-2 7-1-3 Panel .......................... 7-3 7-2 Refrigerating Cycle Diagram ..............7-4 Samsung Electronics... -
Page 4: Precautions
TV, video, or audio. – Otherwise, the video quality might be degraded or noise might be generated. • Do not let end users repair the products themselves. – Unauthorized disassembly might cause electric shock or fire. Samsung Electronics... -
Page 5: Precautions Related To Product Safety
– Release the high pressure and low pressure valve caps. – Close the high pressure valve completely using an L-wrench. – After about two minutes, close the low pressure valve completely. – Stop running the air conditioner. – Separate the connecting pipe. Samsung Electronics... -
Page 6: Product Specifications
2-1 CAC Single ■ S tabilize the atmosphere with broad temperature allowance and control Samsung is dedicated to supporting comfortable living and working environments based on the strength of its technologies. With a single unit, CAC Single delivers reliable comfort and control over multiple areas to ensure a pleasant atmosphere in any climate. -
Page 7: The Feature Of Product
※ Wind-Free implementation : Still air by the velocity of flow below 0.15m/s. ■ B ig blade Max. 8m Horizontal reach ※ Blade enlargement about 47% compare to conventional product ※ Reach : 8m (Height 0.6m, Wind speed 0.3m/s) Conventional product (Samsung) : 5m ※ Based on Wind-Free 1Way 7.1kW 5.5m 0.6m ※... - Page 8 Ex. Of Noise Influence Normal Cooling Cooling Sleep Library 40dB(A) Interruption Wind-Free 4Way Library Save (34~39dB(A)) Whispering Barely Influential Wind-Free 4Way(600x600) 24dB(A) (Bedroom Standard 30dB(A) Wind-Free 4Way (600X600) By WHO) Whisper (27~35dB(A)) Sound Sleep Bedroom Ticking 20dB Conventional 4way (600X600) Samsung Electronics...
- Page 9 Smart comfort operation enable to maintain optimal room condition automatically by detecting not only tem- perature but also relative humidity. If room reachs comfort zone If room get out of comfort zone Normal Cooling Wind-Free Cooling Normal Cooling Samsung Electronics...
- Page 10 Direct wind Indirect wind 2. Energy Saving 35%→50% “Wind-Free + OFF Control” Energy saving Absence Power Wind free Input Saving Wind Cooling free Stop cooling ※ MDS : Motion Detect Sensor 120mins 30mins 50mins ■ World’s Lightest Weight Company A SAMSUNG Samsung Electronics...
- Page 11 Features (Wind-Free 4Way CST) (cont.) ■ E asy Installation in 4 Different Ways Freely install anywhere without worrying about direction. (Body and Panel as well) No Limitation of direction (Both Body & Panel) ■ New Improved Design New Stylish and Aesthetic Panel Simple Display On/Off Defrost Timer Filter Samsung Electronics...
- Page 12 Check Valve on the drain pump prevents drain water from reversing → Minimize water gathering in Drain Board to prevent rusting Company A SAMSUNG Check Valve Prevents drain water from reversing Dirty Clean Drain Board Drain Board ■ E asy Maintenance Easy Air Flow Blade Cleaning Samsung Electronics...
-
Page 13: Features & Benefits
■ A dd chic flair to your interior design with a stylish yet powerful AC system Samsung’s advanced 4Way Cassette (600 x 600) builds on the aesthetic appeal and performance of the stan- dard 4Way Cassette with an enhanced design. The 4Way Cassette (600 x 600) comes in a variety of patterns to complement any interior. - Page 14 600D) which helps minimize installation time and effort. ■ L ight, robust design The Samsung 4Way Cassette (600 x 600) indoor unit is now lighter in weight at 11kg. It is the lightest indoor unit in the industry, about 35 percent lighter than our conventional products.
-
Page 15: Cassette
■ A ll round cooling and comfort The Samsung 360 Cassette air conditioner offers a brand new way of staying comfortably cool in every corner of the room. Its innovative circular design not only means it perfectly fits in everywhere, adding a sophisticated look to many different sites, but it also blows cool air in all directions, so that the whole room is the same tem- perature*. - Page 16 Intuitively control its performance and see where the air is going. The Wireless Remote Controller's* Jog shut- tle and button offer a fun way to adjust the air flow and a Circular LED Display shows its direction. Samsung Electronics 2-11...
-
Page 17: Slim Duct - Ultra-Light, Adaptable Design
2-4-4 Slim Duct - Ultra-light, adaptable design ■ T emper any environment with industry-best lightweight design and optimized airflow The new Samsung Slim Duct visually blends into the ceiling while providing powerful cool and warm airflow. It’s also easy to install and maintain in any interior regardless of the surrounding environment with its compact size and weight—the lightest in the industry. - Page 18 Slim Duct S offers the best in convenient installation and maintenance. 900mm 700mm Narrower ■ E asy access, easy maintenance Slim Duct features a flexible design that enables users to easily access its parts to maintain the unit. Samsung Electronics 2-13...
-
Page 19: Duct S
■ S mart pressure control Samsung Ducted Type units feature a smart pressure control system. This system adjusts the fan speed based on the external static pressure (ESP), delivering consistent cooling and heating power, regardless of the sur- rounding environment. -
Page 20: Ceiling Type - Slim Yet Functional Design
2-4-6 Ceiling Type - Slim yet functional design ■ D istribute refreshing airflow where needed with a compact, flexible design Samsung’s Ceiling Type indoor unit has 2-way installation options for the ceiling and floor, enabling more effi- cient use of available space. Users can enjoy crisp, powerful air throughout their entire space from the compact unit in the ceiling or floor. -
Page 21: Wall Mount Type
■ I mproved blade operation Samsung’s wide twin blade can open up to 90° for more effective cooling. The longer twin blade ensures that air reaches every corner of the room with greater control. -
Page 22: Ar9000, 7000, 5000 Series - Triangular Design, Powerful Cooling
■ E asy-access maintenance Unlike conventional filters that are often difficult to access, the Samsung wall-mounted unit filter is on the out- side, at the top of the device. Easy access means users can take out the filter, clean it and put it back without having to open a cover or pull hard to get it out. - Page 23 Product Specifications 2-5 Product Specifications Slim 1Way Model AC026RN1DKG/EU AC035RN1DKG/EU AC026RXADKG/EU AC035RXADKG/EU Indoor Unit Outdoor unit Image Remote controller cooling [W] 2.60 3.50 Performance heating [W] 3.30 4.00 cooling [kW] 0.72 1.09 Power Consumption heating [kW] 1.01 1.28 Voltqage / Frequency [Ø, #, V, Hz]...
- Page 24 01517F-194581- Standard 271A22-370000 272328-370000 27343C-370040 274750-370040 020000-100001- 020000-100001- 020000-100001- 020000-100031- Installation 1 200000-300000 200000-300000 200000-300000 200000-300000 Option Code 030000-100000- 030000-100000- 030000-100000- 030000-100000- Cycle 200000-300000 200000-300000 200000-300000 200000-300000 050000-100000- 050000-100000- 050000-100000- 050000-100000- Installation 2 200000-300000 200000-300000 200000-300000 200000-300000 Samsung Electronics 2-19...
- Page 25 Refrigerant/Factory charging [g] 1200 1700 Additional refrigerant 15g/m over 10m 25g/m over 15m Basic piping length [m] Max.piping length [m] max.level difference [m] Standard 01417F-1940A8-27343C-370000 01417F-1940C8-274750-370000 Installation 1 020000-100001-200000-300000 020000-100001-200000-300000 Option Code Cycle 030000-100000-200000-300000 030000-100000-200000-300000 Installation 2 050000-100000-200000-300000 050000-100000-200000-300000 2-20 Samsung Electronics...
- Page 26 [Mpa] Designed Pressure low pressure [Mpa] Refrigerant/Factory charging [g] 1700 Additional refrigerant 25g/m over 15m Basic piping length [m] Max.piping length [m] max.level difference [m] Standard 01017F-1940D8-274750-370000 Installation 1 020000-100000-200000-300000 Option Code Cycle 030000-100000-200000-300000 Installation 2 050000-100000-200000-300000 Samsung Electronics 2-21...
- Page 27 01C17C-1C59D0- Standard 271A21-370000 272328-370000 27343C-370000 274750-370005 020000-100000- 020000-100000- 020000-100000- 020000-100000- Installation 1 200000-300000 200000-300000 200000-300000 200000-300000 Option Code 030000-100000- 030000-100000- 030000-100000- 030000-100000- Cycle 200000-300000 200000-300000 200000-300000 200000-300000 050000-100000- 050000-100000- 050000-100000- 050000-100000- Installation 2 200000-300000 200000-300000 200000-300000 200000-300000 2-22 Samsung Electronics...
- Page 28 Max.piping length [m] max.level difference [m] 01B17C-1C5080- 01B17C-1C50F1- 01B17C-1C5436- Standard 272328-372008 27343C-374000 274750-376000 020000-100000- 020000-100000- 020000-100000- Installation 1 200000-300000 200000-300000 200000-300000 Option Code 030000-100000- 030000-100000- 030000-100000- Cycle 200000-300000 200000-300000 200000-300000 050000-100000- 050000-100000- 050000-100000- Installation 2 200000-300000 200000-300000 200000-300000 Samsung Electronics 2-23...
- Page 29 01017F-19547F- Standard 271A21-371700 272328-371700 27343C-371700 274750-371700 020000-100000- 020000-100000- 020000-100000- 020000-100000- Installation 1 200100-300000 200100-300000 200100-300000 200100-300000 Option Code 030000-100000- 030000-100000- 030000-100000- 030000-100000- Cycle 200000-300000 200000-300000 200000-300000 200000-300000 050000-100000- 050000-100000- 050000-100000- 050000-100000- Installation 2 200000-300000 200000-300000 200000-300000 200000-300000 2-24 Samsung Electronics...
- Page 30 Refrigerant/Factory charging [g] 1200 1700 Additional refrigerant 15g/m over 10m 25g/m over 15m Basic piping length [m] Max.piping length [m] max.level difference [m] Standard 01317F-1950F5-27343C-370000 01317F-195591-274750-370020 Installation 1 020000-100000-200000-300000 020000-100000-200000-300000 Option Code Cycle 030000-100000-200000-300000 030000-100000-200000-300000 Installation 2 050000-100000-200000-300000 050000-100000-200000-300000 Samsung Electronics 2-25...
-
Page 31: Specifications Of Optional Items
Q’ty Remark Ass'y drain hose DB94-02719B Cable-tie DB65-00191A Seal-drain ass'y DB62-05810A Seal-drain ass'y DB62-05810F Indoor Unit Seal-drain ass'y DB62-05810G CARD WARRANTY DB68-02596B User Manual DB68-08166A Installation Manual DB68-08158A BOLT-FLANGE 6011-003975 Installation Manual DB68-07705A Panel CARD WARRANTY DB68-02596B 2-26 Samsung Electronics... - Page 32 Product Specifications Accessories (cont.) ■ AC***RN1DKG Item Description Code No. Q’ty Remark PAD INSTALL DB69-01947A,B SEAL-DRAIN ASSY DB62-05810A HOSE DRAIN-JOINT DB94-01258C GROMMET-HANGER DB63-00237A MANUAL INSTALL DB68-08158A Indoor Unit MANUAL USERS DB68-08166A INSULATION-BASE DB72-00401C CABLE TIE DB65-10088C CARD WARRANTY DB68-02596B Samsung Electronics 2-27...
- Page 33 Remark Ass'y drain hose DB94-03287A Cable-tie DB65-10088C Seal-drain ass'y DB62-11028A Essential Offer Seal-drain ass'y DB62-11028H (Indoor Unit) Seal-drain ass'y DB62-11028J USER MANUAL DB68-08128A INSTALLATION MANUAL DB68-08129A CARD WARRANTY DB68-02596B BOLT 6011-003975 Essential Offer (Panel) INSTALLATION MANUAL DB68-03837A 2-28 Samsung Electronics...
- Page 34 USER MANUAL DB68-08130A INSTALLATION MANUAL DB68-08131A Insulation DB62-04318S Insu DRAIN HOSE DB62-11028A INSU HOSE D DB62-11028E INSU TUBE OUT DB62-11028F Indoor Unit ASSY DRAIN HOSE JOINT DB67-01191A Ass'y Drain Hose Joint DB90-06701A GROMMET-HANGER DB63-00237A CARD WARRANTY DB68-02596B Samsung Electronics 2-29...
- Page 35 Code No. Q’ty Remark Remote Control DB93-15882F Batteries for Remote Control 4301-000121 USER MANUAL DB68-08134A INSTALLATION MANUAL DB68-08135A Essential Offer (Indoor Unit) Remote Control Holder DB61-06087A M4 x 16 Tapped Screws 6002-000234 Cap Screws DB67-01404B CARD WARRANTY DB68-02596B 2-30 Samsung Electronics...
- Page 36 Description Code No. Q’ty Remark USER MANUAL DB68-08132A INSTALLATION MANUAL DB68-08133A PLATE WALL DB61-01351A Remote Control DB93-15882F Indoor Unit Remote Control Holder DB61-06087A Batteries for Remote Control 4301-000121 M4 x 16 Tapped Screws 6002-000234 CARD WARRANTY DB68-02596B Samsung Electronics 2-31...
- Page 37 ASSY DRAIN- HOSE DB94-02719B Cable tie DB65-00191A Seal-drain ass'y DB62-05810A Seal-drain ass'y DB94-05810F Standard / Indoor unit Seal-drain ass'y DB94-05810G Indoor unit installation DB68-08157A manual USER MANUAL DB68-08165A CARD WARRANTY DB68-02596B Bolt-flange 6009-001435 Standard / Panel INSTALL MANUAL DB68-05903A 2-32 Samsung Electronics...
-
Page 38: Disassembly And Reassembly
3. Disassembly and Reassembly ■ Necessary Tools Item Remarks +SCREW DRIVER Adjustable Wrench (8mm, 10mm, 13mm) M6, M8 Hex Wrench Samsung Electronics... -
Page 39: Indoor Unit
Disassembly and Reassembly 3-1 Indoor unit ■ AC026RN1DKG / AC035RN1DKG Parts Procedure Remark PANEL And 1) Open the GRILLE as shown in the FILTER WIND figure. FREE TYPE - 3point (PC1NWFMAN) 2) Remove the FILTER from the PANEL. 3) Remove the 3 COVER SCREW as shown in the figure. - Page 40 CLIP WIRE. (Continues) 7) Remove the screws fixed in COVER DISPLAY, COVER MOTOR RIGHT and then remove the COVER DISPLAY, COVER MOTOR RIGHT. (Use +Screw Driver) 8) Disconnect the connector. (Remote control receiver PBA and Display PBA) Samsung Electronics...
- Page 41 10) Remove the 4 HINGE and then separate the BLADE H. 11) Separate the SENSOR HUMIDITY. 12) Remove the 4 screws fixed in GUIDE AIR and then remove the GUIDE AIR. (Use +Screw Driver) 13) Separate the PLATE. Samsung Electronics...
- Page 42 Disassembly and Reassembly Parts Procedure Remark 2) Separate 8 connecters on the PCB of the Indoor Unit. 3) Separate the Control In from the Indoor Unit. Drain Sub 1) Push the hook on the Drain Sub to separate it. Samsung Electronics...
- Page 43 2) Separate an Indoor Sensor from the Heat Exchanger. 3) Separate the Heat Exchanger from the Indoor Unit. Cross Fan 1) Undo 3 fixing screws on the Cover Fan Motor. (Use +Screw Driver) 2) Separate the Cover Fan Motor from the Indoor Unit. Samsung Electronics...
- Page 44 3) Separate the Cross Fan from the Indoor Unit. Drain Pump 1) Separate fixing screw in the Cover Drain Pump. (Use +Screw Driver) 2) Separate the Drain Hose from the Drain Pump. 3) Separate the Drain Pump from the Indoor Unit. Samsung Electronics...
- Page 45 Disassembly and Reassembly ■ AC052RN4DKG / AC071RN4DKG Parts Procedure Remark Panel 1) Pull two levers below Samsung logo to open the grille. 2) Detach the safety clip and white link from the panel. 3) Remove the 2 fixed screws to remove the Control-B ox Cover.
- Page 46 1) Disconnect the Connector Wire that is connected to the indoor unit’s PBA from the PBA. 2) Unscrew the 2 fixed screws on both sides of the Control Box, and disassemble the Control Box from the indoor unit. (Use +Screw Driver) Samsung Electronics...
- Page 47 Control-Box to remove it. Drain Pan 1) Unscrew the screws on the 4 corners of the indoor unit. (Use +Screw Driver) 2) Remove the Drain Pan from the indoor unit. 3-10 Samsung Electronics...
- Page 48 Drain- Hose fixed on the side of the indoor unit. (Use +Screw Driver) Evap. 1) Use your hand to remove the Temperature temperature sensor attached to the Sensor Evap Pipe along with the fixing clip. Samsung Electronics 3-11...
- Page 49 1) Remove the screws of the 2 Steel Holder Evaps that are used to fix the Heat Exchanger, and then remove it. (Use +Screw Driver) 2) Remove the 2 fixing screws of the Partition Evap at the Heat Exchanger’s In/Out Pipe. (Use +Screw Driver) 3-12 Samsung Electronics...
- Page 50 Disassembly and Reassembly Parts Procedure Remark 3) Remove the screw of the Cover Pipe that is used to fix the In/Out Pipe. Remove the In/Out Pipe. (Use +Screw Driver) 4) Remove the Heat Exchanger from the indoor unit’s cabinet. Samsung Electronics 3-13...
- Page 51 Panel. (Use +Screw Driver) 3) Pull the hook of Panel and then separate the Panel from the Indoor Unit. Panel ▶ Open type Panel 1) Rotate the outside Panel to counterclockwise direction and then separate it. 3-14 Samsung Electronics...
- Page 52 4) Pull up the Filter from the Grill and separate it. Control Box 1) Remove 2ea of screws which is fixed to the Indoor Unit upper part. (Use +Screw Driver) 2) Rotate the Guard Fan to counterclockwise direction and separate it Samsung Electronics 3-15...
- Page 53 (Use +Screw Driver) 4) Put finger in the "PULL" marked groove and then pull up the Cover 5) Put finger in the "PULL" marked groove and then avoids the hook and it opens the Control Box Cover 3-16 Samsung Electronics...
- Page 54 Drain Pan (Use +Screw Driver) 2) Push the hook and separate the Cover. Damage can occur to product in case of use a sharp tool. 3) Remove the screw which is fixed to Booster Fan. (Use +Screw Driver) Samsung Electronics 3-17...
- Page 55 Disassembly and Reassembly Parts Procedure Remark Top Cover & 4) Pull the Booster Fan connector and separate the connector. Drain Pan 5) Remove the 4ea of screws (Use +Screw Driver) 6) Push the hook and separate the Cover. 3-18 Samsung Electronics...
- Page 56 (Use +Screw Driver) 8) Remove the 2ea of screws. (Use +Screw Driver) 9) Push the hook and separate the Cover. 10) Remove 8ea of screws. (Use +Screw Driver) 11) Separate the Indoor Unit upper part from the Body. Samsung Electronics 3-19...
- Page 57 12) Remove the 3ea of screws. Drain Pan (Use +Screw Driver) 13) Pull the hook that is on the side and separate the Cover. Drain Pump & 1) Separate the Drain Hose from the Hose Drain Pump. 3-20 Samsung Electronics...
- Page 58 (Use Monkey Spanner) Temperature 1) Remove 6ea of screws which are Sensor fixed to Evaporator and separate the Partition. 2) Separates the Temperature Sensor which is fixed to Evaporator Pipe with the fixing clip together by the hand. Samsung Electronics 3-21...
- Page 59 When assemble, be careful with the interference structure of piping projecting p 3) Separate the Evaporator from the Indoor Unit. If you remove the Evaporator with bare hands, it may injure your hands, gloves must be worn. 3-22 Samsung Electronics...
- Page 60 1) Open the Grille by pressing 3 position. FILTER WIND (center and both side) FREE TYPE (PC1NWFMAN) 2) Detach the Air lnlet Grille. 3) Open the Cover of component Electrical Box removing 3 screws. (center and both side) Samsung Electronics 3-23...
- Page 61 Disassembly and Reassembly Parts Procedure Remark Fan & Motor 1) Detach the screw and untie earth wire of Motor. 2) Disconnect of housing of Motor Wire. 3) Disconnect the Capacity Wire. 3-24 Samsung Electronics...
- Page 62 Parts Procedure Remark 4) Loosen the Guard Safety by removing 6 screws. 5) Detach the Upper Case of Fan. (2EA) 6) Loosen the 4 screws what is fix the Motor. 7) Detach the Fan and Motor assembly. Samsung Electronics 3-25...
- Page 63 9) Detach the Fan. Drain Pan 1) Disconnect the Display PCB Wire as shown in picure. (White housing) 2) Disconnect the Step Motor Wire as shown in picture. (blue housing) 3) Dosassemble the Hanger Bracket by removing the 1 screw. 3-26 Samsung Electronics...
- Page 64 4) Loosen the 3 screws of Front Side. 5) Disassemble the assembly Front Cover Part. 6) Disconnect the Step Motor Wire as shown in picture. 7) Detach Wire Clamp fixed in Base Part. 8) Detach the Front Cover assembly completely. Samsung Electronics 3-27...
- Page 65 9) Loosen the screw what is fix with Base Part and Drain Pan. (Upper Sied:2EA) 10 ) Loosen the screw what is fix with Base Part and Drain Pan. (Lower Side:2EA) 11) Detach the Drain Pan completely. 3-28 Samsung Electronics...
- Page 66 3) Loosen the 2 screw shown in picture and and remove Plastic Part. (white) 4) Loosen the 2 screw shown in picture and remove Steel Bracket. 5) Disassemble the 4 screws Steel Plate in rear side of the unit. Samsung Electronics 3-29...
- Page 67 2) Detach FILTER PRE from the PANEL FRONT. 3) Cover Panel is assembled on bottom of indoor unit as shown in the figure. Remove the Cap Screw as shown on the right side and then remove the screw and separate the Cover Panel. 3-30 Samsung Electronics...
- Page 68 5) Separate the hook after pushing both end of Cover Panel as shown in the figure. (Watch out for the damage of the hook) 6) Raise front part upward obliquely as shown in the figure and then remove the hooks. Samsung Electronics 3-31...
- Page 69 Assembly of Cover Panel after service end. - Reassembly is in the reverse order of the removal. - Piping and drain hose must be careful not to damage and Progress must be done with both hands. Hook (Side) Hook (Center) Screw Cap Screw 3-32 Samsung Electronics...
- Page 70 4 HOOK Structures. When separate the hook : Use the (-) screw Driver. (-)Screw Driver Insert the hook and then pull the hook as shown on the right side. (Watch out for the damage of the hook) Samsung Electronics 3-33...
- Page 71 Disassembly and Reassembly Parts Procedure Remark 9) Remove the Panel Frame from the Main Frame as shown on the right side. 3-34 Samsung Electronics...
- Page 72 2) Disconnect Stepping Motor, EEV, Display, Sensor, SPI, Fuse Wire. When you separate the connector, pull pressing the locking button. 3) Disconnect Motor, Terminal Wire. When you separate the connector, pull pressing the locking button. 4) Loosen Earth Wire. Samsung Electronics 3-35...
- Page 73 Disassembly and Reassembly Parts Procedure Remark Tray Drain 1) To detach TRAY-DRAIN from the main frame, pull the bottom of the TRAY- DRAIN towards you. 3-36 Samsung Electronics...
- Page 74 2) Unfasten the screw at the left side. (use + Screw Driver) 3) Unfasten the screw at the right side. (use + Screw Driver) 4) To detach Evaporator from the main frame, pull the bottom of the Evaporator towards you. Samsung Electronics 3-37...
- Page 75 Fan motor & 1) Unfasten the screw. Cross fan (use + Screw Driver) 2) Detach the FAN Motor case. 3) Unfasten the screw a little. (use + Screw Driver) 4) Pull the CROSS-FAN to the left side. 3-38 Samsung Electronics...
- Page 76 Disassembly and Reassembly ■ AC026RNLDKG / AC035RNLDKG Parts Procedure Remark Motor & Blower 1) Disassemble the Cabinet Top Motor. - Unscrew 8 screws 2) Disassemble the Cover Blower Upper with pushing its hook. 3) Disassemble the Cover Control. - Unscrew 2 screws Samsung Electronics 3-39...
- Page 77 5) Disassemble the Motor wire with pushing the clip. 6) Disassemble the band Motor for fixing the Motor. - Unscrew 2 screws 7) After disassembling the Motor and Blower for the set, disassemble the Blower by use of 3mm wrench. 3-40 Samsung Electronics...
- Page 78 1) Disassemble the Cabinet Top Evap. - Unscrew 11 screws 2) Disassemble the Bracket Outlet Sub that fixes the Drain Pan equipped on the front of the set. - Unscrew 6 screws 3) Disassemble the Drain Cushion from the set. Samsung Electronics 3-41...
- Page 79 Inlet air temperature sensor, and EEV wire that connected to the inside of PCB. 3) Disassemble the Support Evap. LF that fixes the Evaporator. - Unscrew 2 screws 4) Disassemble the Support Evap RH. - Unscrew 2 screws 3-42 Samsung Electronics...
- Page 80 - Unscrew 1 screw 3) In case of disassembling the Case Control, disassemble the Case Control from the set after unscrewing the screw connected to the direction of Blower. - Disassemble if after disassembling the Cabinet Top Motor 1-1. Samsung Electronics 3-43...
- Page 81 Disassembly and Reassembly Parts Procedure Remark Bracket Outlet 1) Disassemble the Bracket Outlet assembled on the Cabinet. - Unscrew 10 screws 3-44 Samsung Electronics...
- Page 82 Motor & Blower 1) Disassemble the Cabinet Bottom Fan. - Unscrew 10 screws 2) Disassemble the Case Filter Pre. 3) Disassemble frame-up. - Unscrew 2 screws 4) Disassemble the case blower. - Unscrew 3 screws 5) Disassemble cover control. - Unscrew 2 screws Samsung Electronics 3-45...
- Page 83 7) Disassemble the 2 Holder Motor. - Unscrew 2 screws 8) After disassembling the Motor and Blower for the set, disassemble the Blower by use of 3mm wrench. 9) Disassemble the both of Case Blower Out. - Unscrew 6 screws 3-46 Samsung Electronics...
- Page 84 2) Pull the Drain Pan Out. EVAP 1) Disassemble the Cover Pipe. - Unscrew 2 screws 2) 1)Disassemble the Support Evap and hold evap. - Unscrew 3 screws 3) Disconnect the wire between assy control out and Evap. Samsung Electronics 3-47...
- Page 85 Parts Procedure Remark 4) Then pull the Evap out. Cushion 1) Pull out the seal Cushion front. 2) Disassemble the Seal Cushion Right. - Unscrew 1 screws. 3) Disassemble the Assy Cushion LF. - Unscrew 1 screws. 3-48 Samsung Electronics...
- Page 86 1) Loosen 2 screws of Assy control in and Remove the assy control in. 2) Remove wires from wire saddle. 3) clip cable tie. (It is necessary to re-tie “cable tie” on re-assembly,then place in wire saddle .) Samsung Electronics 3-49...
- Page 87 Disassembly and Reassembly Parts Procedure Remark Frame 1) Disassemble the Frame. - Unscrew 4 screws 3-50 Samsung Electronics...
- Page 88 Motor & Blower 1) Disassemble the Cabinet Bottom Fan. - Unscrew 10 screws 2) Disassemble the Case Filter Pre. 3) Disassemble the 2 Case Blower Bottom. - Unscrew 4 screws 4) Disassemble the Cover Control. - Unscrew 2 screws 5) Cut the cable-tie Samsung Electronics 3-51...
- Page 89 7) Disassemble the 2 Holder Motor. - Unscrew 2 screws. 8) After disassembling the Motor and Blower for the set, disassemble the Blower by use of 3mm wrench. 9) Disassemble the both of Case Blower Out - Unscrew 4 screws 3-52 Samsung Electronics...
- Page 90 - Unscrew 7 screws 2) Pull the Drain Pan Out. EVAP 1) Disassemble the Support Evap. - Unscrew 1 screws 2) Disassemble the Cover Pipe. - Unscrew 2 screws 3) Disconnect the wire between assy control out and Evap. Samsung Electronics 3-53...
- Page 91 4) Disassemble the Evap. - Unscrew 3 screws. Then pull the Evap out Cushion 1) Pull out the Cushion. 2) Disassemble the Seal Cushion LF. - Unscrew 1 screws 3) Disassemble the Assy Cushion Right. - Unscrew 1 screws 3-54 Samsung Electronics...
- Page 92 1) Disassemble the both of Case Blower Out. Bracket Motor - Unscrew 4 screws 2) Disassemble the Bracket Motor. - Unscrew 6 screws Control 1) Disassemble the Case Control. - Unscrew 2 screws Frame 1) Disassemble the Frame. - Unscrew 6 screws Samsung Electronics 3-55...
- Page 93 3) Remove the 2 fixed screws to remove the Control-Box Cover. (Use +Screw Driver) 4) Remove the remote control-receiver, blade conector and humidity sensor wires from the PBA. (4EA) 5) Push the 4 panel corners and cover downwards to remove it. 3-56 Samsung Electronics...
- Page 94 Remove the panel from the indoor unit. Blade 1) Remove the hinge-blade and blade. Display PBA 1) Remove the cover display. 2) Remove the cover PBA from the cover display. Samsung Electronics 3-57...
- Page 95 1) Remove the humidity sensor from the Sensor panel. Step motor 1) Unscrew 2 screws on cover motor. (Use +Screw Driver 2) Remove 2 cover motor. 3) Remove the 2 fixed screws and disassemble the step motor. (Use +Screw Driver) 3-58 Samsung Electronics...
- Page 96 1) Disconnect the Connector Wire that is connected to the indoor unit’s PBA. 2) Unscrew the 2 fixed screws on both sides of the Control Box, and disassemble the Control Box from the indoor unit. (Use +Screw Driver) Samsung Electronics 3-59...
- Page 97 Control-Box to remove it. Drain Pan 1) Unscrew the screws on the 4 corners of the indoor unit. (Use +Screw Driver) 2) Remove the Drain Pan from the indoor unit. 3-60 Samsung Electronics...
- Page 98 Drain- Hose fixed on the side of the indoor unit. (Use +Screw Driver) Evap. 1) Use your hand to remove the Temperature temperature sensor attached to the Sensor Evap Pipe along with the fixing clip. Samsung Electronics 3-61...
- Page 99 1) Remove the screws of the Steel Holder Evaps that are used to fix the Heat Exchanger, and then remove it. (Use +Screw Driver) 2) Remove the 2 fixing screws of the Partition Evap at the Heat Exchanger’s In/Out Pipe. (Use +Screw Driver) 3-62 Samsung Electronics...
- Page 100 Disassembly and Reassembly Parts Procedure Remark 3) Remove the screw of the Cover Pipe that is used to fix the In/Out Pipe. Remove the In/Out Pipe. (Use +Screw Driver) 4) Remove the Heat Exchanger from the indoor unit’s cabinet. Samsung Electronics 3-63...
-
Page 101: Outdoor Unit
1) loosen 1 pcs screw of cover control, and detach it. 2) loosen 5 pcs screws on both right and left cabniet side edges and to detach the cover-top. 3) Loosen 7 screwsfixed to disassemble cabi-front, and detach it. 3-64 Samsung Electronics... - Page 102 Disassembly and Reassembly Parts Procedure Remark common work 4) loosen 2 screws to disassemble steel-bar. 5) Loosen 2 screws to disassemble the cabi left and detach it. Samsung Electronics 3-65...
- Page 103 & motor 1) loosen 1 screw as indication and detached the fan. 2) loosen 4 pcs motor screws and disconnect the wire between assy control out and motor. 3) loosen 2 pcs bracket-motor screw and detach it. 3-66 Samsung Electronics...
- Page 104 Heat 1) Release the refrigerant at first exchanger 2) Looosen fixing screw on both side. 3) disaessembly the pipes in both inlet and outlet with welding torch. 4) detach the heat exchanger. Samsung Electronics 3-67...
- Page 105 1) disconnect the compressor lead wire. 2) disassembly the felt comp sound. loosen the 3 bolts at the bottom. When removing the compressor, Heat Exchanger, and Pipe, purge the refrigerant inside the Compressor completely and remove the pipe with a welding flame. 3-68 Samsung Electronics...
- Page 106 1) Unscrew 2 fix screws under cable communication holders and remove. cable 2) Get rid of cable tie of communication cable. 3) Unscrew the numbers of screws on terminal block and separate power and communication ‘Ring’cables from terminal block. Samsung Electronics 3-69...
- Page 107 Disassembly and Reassembly Parts Procedure Remark ASS’Y 1) Unscrew and remove 9 screws on CABINET SIDE Cabinet-side rh. (Use + Screw Driver) ASS’Y 1) Unscrew and remove 8 screws on Assy CABINET Cabinet Front. FRONT (Use + Screw Driver) 3-70 Samsung Electronics...
- Page 108 3) Unscrew and remove 2 screws on of Assy Control out. 1) Take Fan Propeller apart. PROPELLER + MOTOR 2) Unscrew and remove 4 screws on Motor to take apart Motor. (Use + Screw Driver) Samsung Electronics 3-71...
- Page 109 3) Separate the pipe from the Entrance and Exist by using a welder. 4) Separate Heat Exchanger from Unit. When removing the Compressor, Heat Exchanger, and Pipe, Purge the Refrigerant inside the Compressor completely and remove the pipe with a weld-ing flame. 3-72 Samsung Electronics...
- Page 110 1) Unscrew 2 fix screws under cable communication holders and remove. cable 2) Get rid of cable tie of communication cable. 3) Unscrew the numbers of screws on terminal block and separate power and communication ‘Ring’cables from terminal block. Samsung Electronics 3-73...
- Page 111 Parts Procedure Remark Ass’y cabinet 1) Unscrew and remove 10 screws on side rh Cabinet-side rh. (Use + Screw Driver) Ass’y cabinet 1) Unscrew and remove 7 screws on Assy front Cabinet Front. (Use + Screw Driver) 3-74 Samsung Electronics...
- Page 112 3) Unscrew and remove 2 screws on of Assy Control out. Fan propeller 1) Take Fan Propeller apart. + Motor 2) Unscrew and remove 4 screws on Motor to take apart Motor. (Use + Screw Driver) Samsung Electronics 3-75...
- Page 113 4) Separate Heat Exchanger from Unit. When removing the Compressor, Heat Exchanger, and Pipe, Purge the Refrigerant inside the Compressor completely and remove the pipe with a weld-ing flame. Reassembly procedures are in the reverse order of dissasembly procedures. 3-76 Samsung Electronics...
-
Page 114: Troubleshooting
• Set the SEG2~SEG6, SEG8~SEG12 in the ON status and SEG14~18, SEG20~24 in the OFF status. SEG1 SEG2 SEG3 SEG4 SEG5 SEG6 SEG7 SEG8 SEG9 SEG10 SEG11 SEG12 On(SEG1~12) Off(SEG13~24) SEG13 SEG14 SEG15 SEG16 SEG17 SEG18 SEG19 SEG20 SEG21 SEG22 SEG23 SEG24 Samsung Electronics... -
Page 115: The Procedure Of Setting Option
11. Setting SEG14, SEG15 option Press Low Fan button( ) to enter SEG14 value. Press High Fan button( ) to enter SEG15 value. Each time you press the button, … will be selected in rotation. SEG14 SEG15 Samsung Electronics... - Page 116 19. Setting SEG23, SEG24 mode Press Low Fan button( ) to enter SEG23 value. Press High Fan button( ) to enter SEG24 value. Each time you press the button, … will be selected in rotation. SEG23 SEG24 Samsung Electronics...
- Page 117 Check operation Step 5 1) Reset the indoor unit by pressing the RESET button of indoor unit or outdoor unit. 2) Take the batteries out of the remote controller and insert them again and then press the operation button. Samsung Electronics...
-
Page 118: Order For Setting Options
▶ Press the Esc button to exit to normal mode. • While setting the data, you can use the [<]/[>] buttons to set the range of Data bit. • While configuring the setting, press the Esc button to exit to the setting sub-menu without saving your changes. Samsung Electronics... -
Page 119: Setting An Indoor Unit Installation Option
Use of drain pump Wind-Free mode Remote Controller Display Indication Details Indication Details Indication Details RESERVED RESERVED RESERVED Disuse Maintain blade status in Wind- Indication Free mode and Details (Default) Use + Cooling 3minute Operation delay by Opening the bla Samsung Electronics... - Page 120 ∙ If you set the Maximum filter usage time (SEG18) option to a value other than 2 and 6, it is automatically set to 2 (1000 hours). ∙ If you set the Individual control with remote control (SEG20) option to a value other than 0 to 4, it is automatically set to 0 (Indoor 1). Samsung Electronics...
-
Page 121: Changing A Particular Option
SEG4 SEG5 SEG6 The option The tens’ digit of The unit digit of Explanation PAGE MODE mode you want an option SEG an option SEG The changed value to change you will change you will change Indication Ex) When setting the 'buzzer control' into disuse status. Samsung Electronics... -
Page 122: Option Code For Each Model
Troubleshooting 4-1-6 Option code for each model AC026RN1DKG 01717C-1930F8-271A21-371120 AC035RN1DKG 01717C-19344D-272328-371120 AC026RNNDKG 01517F-1910C8-271A22-370000 AC035RNNDKG 01517F-1930F9-272328-370000 AC052RNNDKG 01517F-19345D-27343C-370040 AC071RNNDKG 01517F-194581-274750-370040 AC052RN4DKG 01417F-1940A8-27343C-370000 AC071RN4DKG 01417F-1940C8-274750-370000 AC071RN4PKG 01017F-1940D8-274750-370000 AC026RNLDKG 01C17C-1C1914-271A21-370000 AC035RNLDKG 01C17C-1C3936-272328-370000 AC052RNLDKG 01C17C-1C1924-27343C-370000 AC071RNLDKG 01C17C-1C59D0-274750-370005 AC035RNMDKG 01B17C-1C5080-272328-372008 AC052RNMDKG 01B17C-1C50F1-27343C-374000 AC071RNMDKG 01B17C-1C5436-274750-376000 AC026RNADKG... -
Page 123: Items To Check Before Diagnostics
1: Heating 2: Down defrosting 3: Up_limit 3 : Over-load 4: Down_limit 4 : Discharge 5 : Total electric current IPM temperature Hundreds digit Tens digits Units digit The number of Tens digits Units digit connected indoor units 4-10 Samsung Electronics... - Page 124 Example) • After selecting the function for options, press and hold the K2 switch for 2 seconds. Edited value of the option will be saved when entire segments blinks and tracking mode begins. Samsung Electronics 4-11...
- Page 125 – If you press and hold the K4 button, setting will be restored to factory default but it doesn't mean that restored setting is saved.Press and hold the K2 button. When the segments shows that tracking mode is in progress, setting will be saved. 4-12 Samsung Electronics...
-
Page 126: Eco Mode [Power Saving Mode]
Segment 3 Segment 4 Eco Mode BLANK BLANK BLANK BLANK Press K3 to go out from the eco mode. Eco Mode Exit At the driving signal or test run (cooling/heating) of the user, the mode is released. Samsung Electronics 4-13... -
Page 127: Four Directions Cassette Type
MDS (Motion Detecting Sensor) Error • Check MDS Error due to connecting outdoor units • Check outdoor main PBA S/W Check outdoor EEPROM that do not support the Wind-Free function : On : Blink X : Off 4-14 Samsung Electronics Samsung Electronics 4-15... - Page 128 Reverse phase or open phase Check whether 3 phase is reversed or opened. 1. Check the range of temperature limited for heating Heating operation restricted at outdoor temperature E440 operation over Theat_high value (default:30°C) 2. Check the outdoor temperature sensor 4-16 Samsung Electronics...
- Page 129 Check the refrigerant Error due to mismatching capacity of indoor and E556 Check the indoor and outdoor unit capacity outdoor unit E557 DPM remote controller option error Check the indoor option code E590 Inverter EEPROM Checksum error Samsung Electronics 4-17...
-
Page 130: Wired Remote Controller
Check whether the outdoor unit service valve is High pressure blockage error open. Self diagnostic (Refrigerant completely Check the connection of the pipes. Operation Off error Leakage error) Check the operation of the EEV. Check for refrigerant leakage. (Completely leakage). 4-18 Samsung Electronics... -
Page 131: Wired Remote Controller
Check the input power connection Outdoor unit [Inverter] DC LINK voltage Check the status of RY21 and R200 in the INVERTER Operation Off protection sensor error control error Outdoor unit EEPROM Read/Write error Operation Off protection control error Samsung Electronics 4-19... - Page 132 Normal operation installation error the COM2 terminal of the indoor unit controller error Wired remote controller Check that Com1, Com2 setting DIP switch is set to Wired remote Normal operation COM2 option setting error Com2 controller error 4-20 Samsung Electronics...
-
Page 133: Troubleshooting By Symptoms
In this case, is the resistance 8.300 value out of range in the temperature table on the right? 10.00 12.10 Indoor temperature sensor 14.70 failure (replace) 18.00 Restart the system after replacing the PCB 22.00 28.30 33.90 42.30 Samsung Electronics 4-21... -
Page 134: Indoor Heat Exchanger Temperature Sensor (Open/Short)
In this case, is the resistance 8.300 value out of range in the temperature table on the right? 10.00 12.10 Failure of the indoor heat exchanger 14.70 temperature sensor (replace) 18.00 Restart the system after replacing the 22.00 28.30 33.90 42.30 4-22 Samsung Electronics... -
Page 135: Indoor Fan Error
Is the RPM of motor less output. than 120? Motor ③↔⑤ : ↓ ↓ Is voltage of DC 0V~DC 6V displayed? 1 2 3 4 5 6 Check the motor and Check the PCB and replace it. replace it Samsung Electronics 4-23... -
Page 136: Communication Error After Finishing Tracking
PCB and replace the PCB Reconnect the cable connecting the outdoor unit to the indoor unit and restart the unit. If the communication still doesn’t work, replace the indoor unit PCB. Good +0.7V -0.7V 4-24 Samsung Electronics... -
Page 137: Indoor Unit Float Sensor Error
AC 220V? Is the water level in drain pan decreasing? Replace the drain pump Replace the indoor unit PCB Normal operation • Float sensor error is cleared only when Replace the drain pump the indoor power is reset Samsung Electronics 4-25... -
Page 138: Eeprom Circuit Failure
EEPROM component failure, EEPROM circuit parts missing/damaged/soldering failure Power on. E162 occurs. Are EEPROM SUM PBA correctly assembled? Reassemble EEPROM PBA. Is there a problem in soldering failure or short of between EEPROM PIN? Remove short or soldering failure. Replace EEPROM PBA. 4-26 Samsung Electronics... -
Page 139: E407
Check the Connection of the CN003 on the MAIN-OUT PBA E407 occurs Is the CN003 connector of MAIN PCB correctly Connected? Re-operation after connecting Check the Pressure of the Comp And High Pressure Swich (Nomal : Short / Fault : Open) Samsung Electronics 4-27... - Page 140 1. Is there a fault in the connection of the power 1. Connect the power wire. supply to Main PCB and EMI PCB? 2. Turn on the Terminal Box and check whether normal power is supplied to the outdoor unit. Continue 4-28 Samsung Electronics...
-
Page 141: Initial Diagnosis : 3-Phase Products
Terminal Box! When detaching and attaching the connector 2. Turn on the Terminal Box and check whether during power supply, the motor can be damaged.) normal power is supplied to the outdoor unit. → If it is normal, replace the Fan Motor. Samsung Electronics 4-29... - Page 142 1. Is there a fault in the connection of the power 1. Connect the power wire. supply to Main PCB 2. Turn on the Terminal Box and check whether and EMI PCB? normal power is supplied to the outdoor unit. Continue 4-30 Samsung Electronics...
- Page 143 Terminal Box! When detaching and attaching the 2. Turn on the Terminal Box and check whether connector during power supply, the normal power is supplied to the outdoor unit. motor can be damaged.) → If it is normal, replace the Fan Motor. Samsung Electronics 4-31...
- Page 144 Check the communication circuit of the Main PCB of the outdoor unit. Replace the Main PCB of the outdoor unit. 1. Is there a fault in communication IC? 2. Is there a fault in TVS-Diode? Continue 4-32 Samsung Electronics...
-
Page 145: Indoor/Outdoor Communication Error (1Min.) (Error Code : E202)
COM 1(RED) #6 - #5 0.9kΩ ~ 1.2kΩ Measuring after separating the communicatio #7 - #5 0.9kΩ ~ 1.2kΩ connection #8 - #5 4.7Vdc ~ 5.3Vdc TVS-Diode Measuring Steady-state Measuring Value Both ends of diode 1kΩ or above Samsung Electronics 4-33... - Page 146 2. If Red - ON, Green - OFF, and Yellow - Blink are displayed in the LED display of outdoor unit Inverter, and there is no indication in 7-segment of outdoor unit Main PCB, replace the Main PCB → The outdoor unit Inverter PCB is normal. 4-34 Samsung Electronics...
-
Page 147: Outdoor Sensor Error (Error Code : E221, E231, E251, E320)
Current temp(°C) Resistance(kΩ) Current temp(°C) Resistance(kΩ) - Resistance : 205.4KΩ After checking normal operation, Does same error occur again after power end the service. Replace the outdoor unit PCB. → Power ON → After confirming the state is normal, end the service. Samsung Electronics 4-35... - Page 148 3) If 3-phase power is normal check the phase of the power wire using 3-phasetester. If it shows reverse phase, change the current power wire connection. 4) After completing above, press reset key (K3) then check the power again. 3-phase tester 4-36 Samsung Electronics...
-
Page 149: Compressor Down Due To Freezing Control (Error Code : E403)
Is the indoor Fan/Motor normal operation? Check the relevant indoor Fan Is the sensor on indoor heat exchanger display the temperature correctly? Refer to other temperature sensor error section to check for error. Check the clogging of indoor air inlet part. Samsung Electronics 4-37... -
Page 150: Outdoor Unit Fan Error (Error Code : E458, E475)
→ If the error is indicated on 7-segment of the Main PCB of the outdoor unit, the Main PCB of the outdoor unit has no fault. → In case of a control problem, it is possible to solve with S/W update. 4-38 Samsung Electronics... - Page 151 3. Replace the compressor : When loud abnormal from compressor rotation? noise generates (metal cutting or grinding noise), or severe vibration. Is there a reading of MegaΩ of resistance Replace the compressor. between compressor body and chassis? Continue Samsung Electronics 4-39...
-
Page 152: Compressor Starting Error / Rotation Error (Error Code : E461, E467)
→ This error is related to the compressor and Inverter PCB. (Not related to the above PCB) ※ Ensure that the service valve is open! → When the service valve is closed, the defects may be caused by differential pressure when starting the compressor. 4-40 Samsung Electronics... -
Page 153: Full Current Error / Pfc Over-Current Error (Error Code : E462, E484)
2. Remove obstacle on the outlet and secure the space. Is service valve fully opened? Open the valve. Is compressor running properly? Replace the compressor. After replacing the Inverter PCB of the outdoor unit, check for normal startup. → End the service. Samsung Electronics 4-41... - Page 154 Is the indoor unit installed properly? the space. 2. Remove obstacle on the outlet and secure the space. Install again by following the standard Is indoor and outdoor unit wiring/piping specifications. installed properly? ① ② ③ Piping Bad installation Wiring Continue 4-42 Samsung Electronics...
-
Page 155: Ipm Over Current Error (Error Code : E464)
Is there a reading of MegaΩ of resistance Replace the compressor. between compressor body and chassis? Turn off the power and change the location of Are the position and measuring value of the the temperature sensor or replace it. temperature sensor normal? Continue Samsung Electronics 4-43... - Page 156 → This error is related to the Inverter PCB. (Not related to the above PCB) ※ Ensure that the service valve is open! → When the service valve is closed, the defects may be caused by differential pressure when starting the compressor. 4-44 Samsung Electronics...
-
Page 157: Ac Input Voltage Sensor Error (Error Code : E488)
2. Are the power wire of the Power Terminal Box and Terminal Box and the power wire. → Check terminal firmly assembled? the normal operation. → End the service. After replacing the Inverter PCB of the outdoor unit, check for normal startup. → End the service. Samsung Electronics 4-45... - Page 158 3. Replace the compressor : When loud abnormal noise generates (metal cutting or grinding noise), or severe vibration. Install again by following the standard Is indoor and outdoor unit wiring/piping specifications. installed properly? ① ② ③ Bad installation Piping Continue Wiring 4-46 Samsung Electronics...
-
Page 159: Gas Leakage Error (Error Code : E554)
Gas leakage error (Error Code : E554)(Cont.) Continue Open the valve. Is service valve fully opened? Is the indoor EVA sensor correctly Reconnect the sensor connector. connected? Charge the refrigerant. Is refrigerant charged? Replace the inverter PCB. Samsung Electronics 4-47... -
Page 160: Pipe Blockage Error (Error Code : E422)
After that, recharge. or EEV appear? Check the temperature value through S-NET, Is it defect of indoor etc. and then if there is a fault, machine EVA sensor replace and reconnect. and connection state? 4-48 Samsung Electronics... -
Page 161: Smart Install Mode Was Not Carried Out (Error Code : E508 )
It will enter the general operation stand by mode. ▶ Smart Install failure: Error code blink ※ In the event of Error Error code reference, please carry a house from scratch after an action mode for the Smart Install Error. Samsung Electronics 4-49... - Page 162 E508 (Smart install mode was not carried out).Upon resolving the problem, try to complete running the installation smart install mode. ※ Displayed E508 is not a malfunction, it is indication that did not carried out the smart Install mode after air conditioner installation. 4-50 Samsung Electronics...
-
Page 163: Others
- Use by referring to the temperature scope of use on the product manual, etc. 14. OLP overheating and compressor stop : E463 - Check the opening of the sub valve. - Check the amount of the cooling water. - Check the OLP sensor. Samsung Electronics 4-51... - Page 164 IPM overheat error for outdoor unit inverter compressor : E500 - Check whether IPM is correctly assembled on the heatproof plate. - Check whether the inlet is blockage. - If there is a defect, replace the IPM. 4-52 Samsung Electronics...
-
Page 165: Pcb Diagram
5. PCB Diagram and Parts List 5-1 Indoor Unit 5-1-1 MAIN PCB ■ AC026/035RN1DKG AC052/071RN4DKG AC052/071RNCDKG AC026/035/052/071RNNDKG This Document can not be used without Samsung’s authorization. Samsung Electronics... - Page 166 ㉒ CN401 -HUMAN ㉓ ㉔ SENSING #1: GND #1: COM1(F1) #1: DC12V #2: GND #2: COM1(F2) #2: MAIN-HUMAN #3: SPI SIGNAL (DC12V) #3: V1(DC12V) SENSOR COMM(TXD) #4: V2(GND) #3: MAIN-HUMAN #5: COM2(F3) SENSOR #6: COM2(F4) COMM(RXD) #4: GND Samsung Electronics...
- Page 167 PCB Diagram and Parts List ■ AC071RN4PKG This Document can not be used without Samsung’s authorization. Samsung Electronics...
- Page 168 #9 : GND #10 : DV5V CN411-FLOAT S/W CN230-DOWNLOAD CN412-ROOM SENSOR CN809-AUTO GRILL #1 : F/S SIGNAL #1 : INDOOR THERMISTOR #1 : DC 12V #2 : GND #2 : GND #4 : REMOCON SIGNAL #5 : GND Samsung Electronics...
- Page 169 PCB Diagram and Parts List ■ AC026/035/052/071RNADKG This Document can not be used without Samsung’s authorization. Samsung Electronics...
- Page 170 #4~7 : EEPROM SIGNAL #12~16 : DOWNLOAD SIGNAL #6 : COMP CHECK SIGNAL #17 : GND #7 : ERROR CHECK SIGNAL #18~20 : DOWNLOAD SIGNAL #8 : DC 5V #9 : GND #10 : DC 12V #11~14 : COMMUNICATION SIGNAL Samsung Electronics...
- Page 171 PCB Diagram and Parts List ■ AC026/035/052/071RNLDKG 6 7 8 Samsung Electronics...
- Page 172 #1 : COM1(F1) #1 : DC310V #2 : VENTILATOR SIGNAL #2 : COM1(F2) #3 : GND OUTPUT(GND) #3 : V1(DC12V) #4 : DC15V #4 : V2(GND) #5 : FAN RPM #5 : COM2(F3) #6 : RPM EFFDBACK #6 : COM2(F4) Samsung Electronics...
- Page 173 PCB Diagram and Parts List ■ AC035/052/071RNMDKG This Document can not be used without Samsung’s authorization. Samsung Electronics...
- Page 174 CN302 : COMM. ⑰ ⑱ #1 : GND #1 : COM1(F1) #2 : GND #2 : COM1(F2) #3 : SPI SIGNAL #3 : V1(DC12V) #4 : NOT USED #4 : V2(GND) #5 : COM2(F3) #6 : COM2(F4) 5-10 Samsung Electronics...
-
Page 175: Display Pcb
#3: LED_1 #4: LED_2 #5: LED_3 #6: LED_4 #7: - #8: REMOCON Signal Out #9 : PANEL SELECTION #10: REMOCON Signal In #11: GND #12: DC5V #13: - This Document can not be used without Samsung’s authorization. Samsung Electronics 5-11... - Page 176 #3: LED_Defrost #4: LED_Timer #5: - #6: LED_Filter #7: - #8: Remocon Signal Out #9 : Panel Select #10: Remocon Signal In #11: GND #12: DC5V #13: - This Document can not be used without Samsung’s authorization. 5-12 Samsung Electronics...
- Page 177 #5 : CENTER 3 COLOR LED - RED #6 : CENTER LED – ICE BLUE #7 : VISUALIZATION LED_SECTION1, LAYER1 #8 : VISUALIZATION LED_SECTION1, LAYER2 #9 : VISUALIZATION LED_SECTION1, LAYER3 #10 : VISUALIZATION LED_SECTION2, LAYER1 This Document can not be used without Samsung’s authorization. Samsung Electronics 5-13...
-
Page 178: Sub Pcb
PCB Diagram and Parts List 5-1-3 Sub PCB ■ AC026/035/052/071RNADKG ① CN1-2WIRES COMM. #1,#2,#19,#20:COMM. SIGNAL #3,#18:EXTERNAL CONTROL #4,#17:COMP CHECK #5,#16:ERROR CHECK #6:VCC(DC5V) #7,#14:GND #8,#13,#15:DC12V #9~#12:COMM. SIGNAL This Document can not be used without Samsung’s authorization. 5-14 Samsung Electronics... -
Page 179: Bldc Pba
#4 : BLDC POWER RELAY #5 : NOT USED #6 : NOT USED #7 : GND #8 : FAN FEEDBACK #9 : NOT USED #10 : FAN RPM This Document can not be used without Samsung’s authorization. Samsung Electronics 5-15... - Page 180 PCB Diagram and Parts List 5-2 Outdoor Unit 5-2-1 MAIN PCB ■ AC026/035/052/071RXADKG/EU 20 21 This Document can not be used without Samsung’s authorization. 5-16 Samsung Electronics...
- Page 181 #8: AC LOAD2 CM302- SOLUTION CN202-EEPROM CN305-EARTH ㉑ ㉒ ㉓ CM301-INDOOR- ㉔ OUTDOOR COMM #1 : R1+ #1~7 : EEPROM #1: EARTH #2 : R2- #1: F1 #2: F2 This Document can not be used without Samsung’s authorization. Samsung Electronics 5-17...
-
Page 182: Inverter Pcb
PCB Diagram and Parts List 5-2-2 INVERTER PCB ■ AC026/035RXADKG/EU This Document can not be used without Samsung’s authorization. 5-18 Samsung Electronics... - Page 183 #1 : N CNP401 – COMP CNP051,CNP052 –REACTOR DOWNLOAD ⑨ ⑩ ⑪ #1 : W Phase #1 : REACTOR #1~#20 : DOWNLOAD #2 : V Phase #3 : U Phase This Document can not be used without Samsung’s authorization. Samsung Electronics 5-19...
- Page 184 CN581-ECO COMM CN401, 402, 403-COMP CN051, 052-REACTOR CN551-DOWNLOAD ⑨ ⑩ ⑪ ⑫ #1~7: ECO COMM port #CN401: U, RED #CN501,052: REACTOR #1~20: DOWNLOAD #CN402: V, BLU #CN403: W, YEL This Document can not be used without Samsung’s authorization. 5-20 Samsung Electronics...
-
Page 185: Wiring Diagram
6. Wiring Diagram 6-1 Indoor Unit ■ AC026/035RN1DKG This Document can not be used without Samsung’s authorization. Samsung Electronics... - Page 186 Wiring Diagram Indoor Unit (cont.) ■ AC052/071RN4DKG This Document can not be used without Samsung’s authorization. Samsung Electronics...
- Page 187 Wiring Diagram Indoor Unit (cont.) ■ AC071RN4PKG This Document can not be used without Samsung’s authorization. Samsung Electronics...
- Page 188 Wiring Diagram Indoor Unit (cont.) ■ AC026/035/052/071RNADKG This Document can not be used without Samsung’s authorization. Samsung Electronics...
- Page 189 Wiring Diagram Indoor Unit (cont.) ■ AC026/035/052/071RNLDKG This Document can not be used without Samsung’s authorization. Samsung Electronics...
- Page 190 Wiring Diagram Indoor Unit (cont.) ■ AC035/052/071RNMDKG This Document can not be used without Samsung’s authorization. Samsung Electronics...
- Page 191 Wiring Diagram Indoor Unit (cont.) ■ AC026/035/052/071RNNDKG This Document can not be used without Samsung’s authorization. Samsung Electronics...
- Page 192 Wiring Diagram Indoor Unit (cont.) ■ AC052/071RNCDKG This Document can not be used without Samsung’s authorization. Samsung Electronics...
- Page 193 Wiring Diagram 6-2 Outdoor unit ■ AC026/035RXADKG This Document can not be used without Samsung’s authorization. Samsung Electronics...
- Page 194 Wiring Diagram Outdoor unit (cont.) ■ AC052/071RXADKG This Document can not be used without Samsung’s authorization. 6-10 Samsung Electronics...
-
Page 195: Reference Sheet
Cooling only PREMIUM Heat Pump R410A DELUXE <- Basic Heat Recovery STANDARD Cooling only Heat Pump Cooling only R134A Heat Pump Heat Pump ※ "/" can be removed from the buyer card if there are not enough digits. Samsung Electronics... - Page 196 R410A DELUXE <- Basic Heat Recovery STANDARD Cooling only Heat Pump Cooling only R134A Heat Pump Heat Pump ★ ※ MCD: Dummy mock-up model ※“/” can be removed from the buyer card if there are not enough digits. Samsung Electronics...
-
Page 197: Panel
8 Languages English ★ Only display the Global 4 way with Korean/ English K separator. Pattern Waffle Stripe Korean Global market use 4 Way Export/ Panel foreign market use ※ Model name for the column/bundle packaging is “~S”. Samsung Electronics... -
Page 198: Refrigerating Cycle Diagram
You can open the valve by turning the need valve counterclockwise using hex wrench, and it is used for vacuum, gas purging, refrigerant injection, refrigerant purging, and indoor-outdoor unit connection. ■ ACCUMULATOR Accumulator prevents the flow of liquid-state refrigerant into the compressor. (Liquid-state refrigerant flowing into the compressor will overload the compressor.) Samsung Electronics... - Page 199 China china.samsungportal.com © Samsung Electronics Co., Ltd. January. 2019. This Service Manual is a property of Samsung Electronics Co., Ltd. Printed in Korea. Any unauthorized use of Manual can be punished under applicable International and/or domestic law. Code No. AC-00232E_1...
Need help?
Do you have a question about the AC026RN1DKG and is the answer not in the manual?
Questions and answers