
Related Manuals for Samsung AC RN DKG Series


Summary of Contents for Samsung AC RN DKG Series
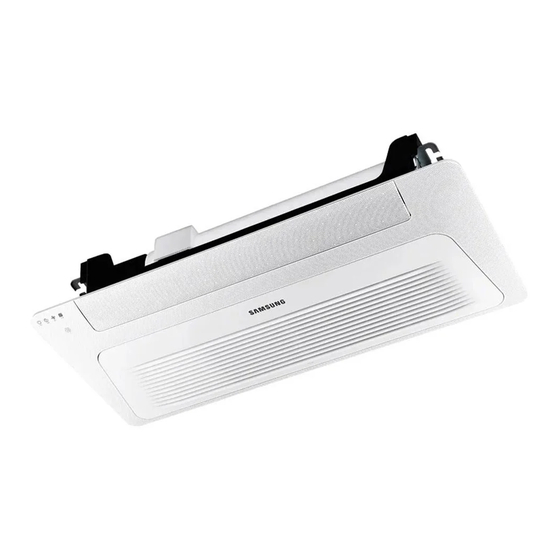
- Page 1 Air conditioner Installation manual AC***RN*DKG Thank you for purchasing this Samsung air conditioner. Before operating this unit, please read this manual carefully and retain it for future reference.
-
Page 2: Table Of Contents
Contents Safety Information Safety Information Installation Procedure Step 1 Checking and preparing accessories Step 2 Choosing the installation location Step 3 Optional: Insulating the body of the indoor unit Step 4 Installing the indoor unit Step 5 Purging inert gas from the indoor unit Step 6 Cutting and flaring the pipes Step 7 Connecting the assembly pipes to the refrigerant pipes Step 8 Performing the gas leak test... -
Page 3: Safety Information
This manual explains how to install an indoor unit Do not pierce or burn. with a split system with two SAMSUNG units. The use Be aware that refrigerants may not contain an odour. of other types of units with different control systems may damage the units and invalidate the warranty. - Page 4 Safety Information Do not install the air conditioner in following places. Installing the unit Place where there is mineral oil or arsenic acid. Resin parts flame and the accessories may drop or water WARNING may leak. The capacity of the heat exchanger may reduce or the air conditioner may be out of order.
- Page 5 Always verify that electric connections (cable entry, section of leads, protections…) are compliant with the electric specifications and with the instructions provided in the wiring scheme. Always verify that all connections comply with the standards applicable to the installation of air conditioners. Devices disconnected from the power supply should be completely disconnected in the condition of overvoltage category.
-
Page 6: Installation Procedure
Installation Procedure Installation Procedure 4 way Cassette Step 1 Checking and preparing accessories Pattern sheet (1) Drain hose (1) The following accessories are supplied with the indoor unit. The type and quantity may differ, depending on the specifications. 1 way Cassette Insultaion pipe Insultaion drain hose (1) Pattern sheet A (1) -
Page 7: Step 2 Choosing The Installation Location
Step 2 Choosing the installation m (kg) Ceiling-mounted type (A, m²) location 10.1 11.2 Installation location requirements 12.3 13.4 There must be no obstacles near the air inlet and outlet. 14.6 Install the indoor unit on a ceiling that can support its weight. - Page 8 Installation Procedure Indoor unit dimensions 1 way Cassette (Unit: mm) 1150 (Ceiling opening dimension) 1036 (Space of suspension bolts) Ceiling 1198 AC026RN1DKG / AC035RN1DKG Model Small Chassis 970 x 410 x 135 Net dimension (W × D × H) Net weight 6.35 Liquid pipe connection 9.52...
- Page 9 4 way Cassette (Unit: mm) 890~910 (Ceiling opening) 735 (Space of suspension bolts) The sub duct hole is not applicable to the Wind-Free models. AC052RN4DKG AC071RN4DKG AC100RN4DKG AC120RN4DKG AC140RN4DKG Model Small Large Large+ Chassis Net dimension (W × D × H) 840 x 840 x 204 840 x 840 x 204 840 x 840 x 288 840 x 840 x 288 840 x 840 x 288 Net weight Liquid pipe connection...
- Page 10 Installation Procedure 4 way Cassette Spacing requirements 1500 mm or more 2500 mm or more 20 mm Obstruction C: 1500 mm or more AC100RN4DKG AC026RN1DKG AC052RN4DKG CAUTION Model AC120RN4DKG AC035RN1DKG AC071RN4DKG AC140RN4DKG Comply with the length and height limits described in the figure above.
-
Page 11: Step 3 Optional: Insulating The Body Of The Indoor Unit
Step 3 Optional: Insulating the body of the indoor unit If you install a cassette type indoor unit on the ceiling when temperature is over 27°C and humidity is over 80%, you must apply an extra 10 mm thick polyethylene insulation or a similar type of insulation to the body of the indoor unit. Cut away the part where pipes are pulled out for the insulating work. -
Page 12: Step 4 Installing The Indoor Unit
Installation Procedure Step 4 Installing the indoor unit CAUTION When deciding on the location of the air conditioner the Make sure that the ceiling is strong enough to support following restrictions must be taken into account. the weight of the indoor unit. Before hanging the unit, test the strength of each attached suspension 1 Place the pattern sheet on the ceiling at the spot bolt. -
Page 13: Step 5 Purging Inert Gas From The Indoor Unit
7 Adjust the unit to the appropriate position, taking into Step 5 Purging inert gas from the account the installation area for the front panel. indoor unit Place the pattern sheet on the indoor unit. The indoor unit comes with nitrogen gas (inert gas) Adjust the space between the ceiling and the charged at the factory. -
Page 14: Step 6 Cutting And Flaring The Pipes
Installation Procedure 5 Check that the flaring is correct, referring to the Step 6 Cutting and flaring the pipes illustrations below for examples of incorrect flaring. 1 Make sure that you have the required tools available: pipe cutter, reamer, flaring tool, and pipe holder. 2 If you wish to shorten the pipes, cut them with a pipe cutter, ensuring that the cut edge remains at a 90°... -
Page 15: Step 8 Performing The Gas Leak Test
Step 8 Performing the gas leak test Outer Diameter (mm) To identify potential gas leaks on the indoor unit, inspect Ø6.35 14 to 18 the connection area of each refrigerant pipe using a leak detector for R-410A. Ø9.52 34 to 42 Before recreating the vacuum and recirculating the Ø12.70 49 to 61... - Page 16 Installation Procedure 5 Select the insulation of the refrigerant pipe. NOTE Insulate the gas side and liquid side pipe, noting Always make the seam of pipes face upwards. the insulation thickness that must differ according to the pipe size. 2 Wind insulating tape around the pipes and drain hose Standard: Less than an indoor temperature of 30°C, avoiding compressing the insulation too much.
-
Page 17: Step 10 Installing The Drain Hose And Drain Pipe
Install air ventilation to drain condensation smoothly. Step 10 Installing the drain hose and drain pipe Air ventilation 1 Push the supplied drain hose as far as possible over the drain socket. 2 Tighten the metal clamp as shown in the picture. Ceiling If it is necessary to increase the height of the drain pipe, install the drain pipe straight within 300 mm... -
Page 18: Step 11 Performing The Drainage Test
Installation Procedure Install horizontally. Water leakage Be horizontal check part Flexible hose Indoor unit Hose Flexible hose b After pouring some water, reassemble the rubber cap on the connection part of a flexible hose of Max. allowable axis gap. the indoor unit and firmly tighten it with a band to prevent leakage. -
Page 19: Step 12 Optional: Installing Dpm (Digital Packaged Multi)
If DPM model is not set, communication error may CAUTION occur. Only in the Cool mode, you can check the correct While the outdoor unit is tracking the indoor unit for operation of the drain pump. one minute after the power supply is turned on, the operation may stop if the remote control reception When the electric cable connection has not been signal of the installed indoor unit is different. - Page 20 Installation Procedure 4 Reassemble the electrical component box cover, Indoor power supply carefully tightening the screw. Power supply Max/Min(V) Indoor power cable 1 phase ±10% 220 to 240V, 50 Hz 0.75 mm² , 3 wires Communication cable 0.75 mm², 2 wires Indoor Unit 1(L) (Unit: mm)
-
Page 21: Step 14 Optional: Extending The Power Cable
3 Insert both sides of core wire of the power cable into Step 14 Optional: Extending the the connection sleeve. power cable Method 1: Push the core wire into the sleeve from 1 Prepare the following tools. both sides. Method 2: Twist the wire cores together and push Tools Spec Shape... -
Page 22: Step 15 Setting The Indoor Unit Addresses And The Installation Options
Installation Procedure 6 Apply heat to the contraction tube to contract it. Step 15 Setting the indoor unit addresses and the installation options Contraction tube You cannot set both of the indoor unit addresses and the installation options in a batch: set both of them respectively. - Page 23 2 Set the option values. SEG1 SEG2 SEG3 SEG4 SEG5 SEG6 CAUTION SEG7 SEG8 SEG9 SEG10 SEG11 SEG12 The total number of available options are 24: SEG1 to SEG24. Because SEG1, SEG7, SEG13, and SEG19 are the page SEG13 SEG14 SEG15 SEG16 SEG17...
- Page 24 Installation Procedure Steps Remote control display 3 Set the SEG4 and SEG5 values: a Set the SEG4 value by pressing the (Low Fan) button repeatedly until the value you want to set appears on the remote control display. SEG4 b Set the SEG5 value by pressing the (High Fan) button repeatedly until the value you want to set appears on the remote control display.
- Page 25 Steps Remote control display 8 Press the (Mode) button. Heat and On appear on the remote control display. 9 Set the SEG11 and SEG12 values: a Set the SEG11 value by pressing the (Low Fan) button repeatedly until the value you want to set appears on the remote control display. SEG11 b Set the SEG12 value by pressing the (High Fan) button repeatedly until the...
- Page 26 Installation Procedure Steps Remote control display b Set the SEG17 value by pressing the (High Fan) button repeatedly until the value you want to set appears on the remote control display. When you press the (Low Fan) or (High Fan) button, values appear in the SEG17 following order: 14 Press the...
- Page 27 Steps Remote control display 19 Set the SEG23 and SEG24 values: a Set the SEG23 value by pressing the (Low Fan) button repeatedly until the value you want to set appears on the remote control display. SEG23 b Set the SEG24 value by pressing the (High Fan) button repeatedly until the value you want to set appears on the remote control display.
- Page 28 Installation Procedure Setting the indoor unit addresses Option No. for an indoor unit address: 0AXXXX-1XXXXX-2XXXXX-3XXXXX Before installing an indoor unit, be sure to set an address for the indoor unit by taking the following steps: 1 Make sure that the power is supplied to the indoor unit.
- Page 29 Setting the installation options in a batch Option No. for an indoor unit address: 02XXXX-1XXXXX-2XXXXX-3XXXXX 1 Make sure that the power is supplied to the indoor unit. If the indoor unit is not plugged in, it must include a power supply. Indoor Unit 2 Set the installation options of indoor units, by referring to the following table and by following the steps in Common steps for setting the addresses and options on page 22.
- Page 30 Installation Procedure Option SEG13 SEG14 SEG15 SEG16 SEG17 SEG18 Setting the Maximum filter Function Page Use of external control output of S-Plasma ion Buzzer control usage time external control Indication Indication Details Indication Details Indication Details Indication Details Indication Details Details Disuse Slave,...
- Page 31 Even if you set the Use of drain pump (SEG8) option to 0, it is automatically set to 2 (the drain pump is used with 3 minute delay). If you set the Maximum filter usage time (SEG18) option to a value other than 2 and 6, it is automatically set to 2 (1000 hours).
- Page 32 Installation Procedure Emergency Temperature Output (ETO) function CAUTION In order to deploy the ETO function, the MIM-B14, an external contact interface module, must be installed in each indoor unit. – The ETO is a concept of emergency operation of indoor units. If the indoor unit 1 (main indoor unit) stops because of an error, the indoor unit 2 (sub indoor unit) starts to operate.
- Page 33 ETO operation specifications 1 Main indoor unit – Based on the external contact control settings, the main indoor unit decides whether to generate output when an error (indoor unit stop) occurs. – Based on the ETO settings, the main indoor unit decides whether to generate output according to the temperature and time conditions.
-
Page 34: Appendix
Troubleshooting Troubleshooting 1 way Cassette LED lamp display Operation Defrost Filter Timer Abnormal conditions reset Remarks Blue Yellow Power reset Error of temperature sensor in the indoor unit (Open/ Short) Error of heat exchanger sensor in the indoor unit Error of the outdoor temperature sensor Error of the condensor temperature sensor Error of the discharge temperature sensor 1. - Page 35 4 way Cassette LED lamp display Operation Defrost Timer Filter Abnormal conditions Remarks Power reset Error of temperature sensor in the indoor unit (Open/ Short) Error of heat exchanger sensor in the indoor unit (Open/Short) Error of fan motor in the indoor unit Error of the outdoor temperature sensor Error of the condensor temperature sensor Error of the discharge temperature sensor...
- Page 36 This appliance is filled with R-32.
Need help?
Do you have a question about the AC RN DKG Series and is the answer not in the manual?
Questions and answers