Table of Contents
Advertisement
Quick Links
Advertisement
Table of Contents

Related Manuals for Nipponia BRIO 125-3


Summary of Contents for Nipponia BRIO 125-3
- Page 1 Owner’s manual BRIO 125-3 Nipponia S.A.
-
Page 2: Introduction
Please read it carefully and thoroughly. Correctly operating, maintaining and repairing your motorcycle will minimise any possible risks and result in its best performance. The authorised Nipponia service points will be glad to provide you with more detailed instructions. -
Page 3: Table Of Contents
CONTENTS Gear display Introduction Left turning signal indicator Contents EFI trouble indicator Safety Information Odometer Safe riding Controls Protective clothing Main/Ignition switch Vehicle modifications Steering lock Loading Anti-theft switch Accessories Start button Warning labels Dimmer switch Vehicle Identification Turn signal switch Horn button Vehicle Description Seat... - Page 4 CONTENTS Driving Clutch Braking Drive chain Drive chain inspection Parking Drive chain adjustment Engine Break-in Drive chain lubrication Gear shifting Adjustment of the rear brake light Service and Maintenance Throttle grip Maintenance Schedule Care and Storage Guide Engine oil Long-term storage Engine oil level inspection Cleaning Engine oil replacement...
-
Page 5: Safety Information
SAFETY INFORMATION Safe riding 1. Always perform the pre-operation inspection before driving. 2. The motorcycle should not be used by anyone who does not hold a valid driving license. 3. Many accidents involve motorcycles not seen by other drivers, so please pay attention to the following: •... -
Page 6: Protective Clothing
SAFETY INFORMATION Protective clothing 1. For your safety, the driver and passenger should both wear helmets. Use of additional safety apparel (gloves, glasses, protective wear) is recommended. 2. Do not wear loose clothing, as it may be caught by the handle levers, the kick starter or the wheels and could lead to an accident. -
Page 7: Accessories
(160kg). Accessories When installing accessories not approved by Nipponia, attention should be paid to the following points: 1. The installation of the accessories must not affect the suspension travel, the light position and the steering angle. -
Page 8: Vehicle Identification
NOTE: - Please make a note of your motorcycle’s VIN and Engine number, so you can place your orders quickly when purchasing spare parts from Nipponia. You can write your motorcycle’s identification numbers here: Vehicle identification number: …………………………………………………………………... -
Page 9: Vehicle Description
VEHICLE DESCRIPTION Left view 1: Gearshift, 2: Left driver footstep, 3: Main stand, 4: Side stand, 5: Left pillion step, 6: Seat lock, 7: Helmet hook... -
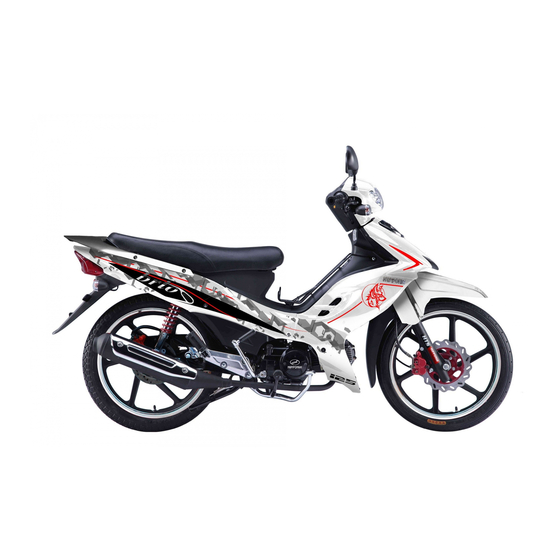
Page 10: Right View
VEHICLE DESCRIPTION Right view 1: Kick starter arm, 2: Rear brake pedal, 3: Foot step, 4: Right pillion step, 5: Exhaust muffler... -
Page 11: Instruments And Controls
VEHICLE DESCRIPTION Instruments and controls 1: Instrument panel, 2: Throttle grip, 3: Front brake lever, 4: Start button, 5: Ignition switch, 6: Horn button, 7: Turn signal switch, 8: Dimmer switch... -
Page 12: Main Components
MAIN COMPONENTS Instrument Panel Speedometer (1) This meter displays the current driving speed in km/h and mph. Fuel gauge (2) This gauge indicates the amount of fuel left in the fuel tank. When the hand reaches the F (Full) mark, there are 3.5L in the tank. When it reaches the red area, there is about 1L left in the tank and it needs to be refilled. -
Page 13: Efi Trouble Indicator
MAIN COMPONENTS EFI trouble indicator (8) When the engine starts, the indicator lights for 3 seconds. Odometer (9) This meter displays the accumulated mileage of the motorcycle in km. Controls Main/Ignition switch (1) The main switch is located at the upper right part of the frame body. -
Page 14: Steering Lock
MAIN COMPONENTS Steering lock To lock the steering, turn the handlebars all the way to the left and insert the key in the main switch (1). Then press down and, while pressing, turn to “ ” position to lock. To unlock the steering, insert the key and turn it to “... -
Page 15: Start Button
MAIN COMPONENTS Right handlebar switches Start button (1) To start the engine, using the starting button, make sure that you shift the gear to neutral and you raise the side stand. Press the start button to start the engine. Left handlebar switches Dimmer switch (1) This switch controls the headlight beam (with the light switch in “... -
Page 16: Seat
MAIN COMPONENTS Seat To open the seat, first unlock it from the seat lock (at the left side) turning the key clockwise and then lift it up. To close the seat, lower it down and push the rear part of the seat until you hear a clicking sound. This indicates that the seat is locked. -
Page 17: Helmet Hook
MAIN COMPONENTS Helmet hook Your motorcycle is provided with two helmet hooks (one for the driver and one for the pillion passenger). To hang your helmet, first open the seat, hang the helmet on the hook (1), close and lock the seat. To unhang your helmet, open the seat, take the helmet off the hook and lock the seat. -
Page 18: Fuel Valve
MAIN COMPONENTS ! WARNING: - When refuelling, be careful not to spill any gasoline out of the tank. After refuelling, please check around the fuel tank for any gasoline and make sure it is dry before starting the engine. - Avoiding breathing any gasoline vapours. - Keep away from children. -
Page 19: Driving Instructions
DRIVING INSTRUCTIONS Pre-operation Inspection Always perform the pre-operation inspection, before driving your motorcycle. Failure to do so may result in vehicle damage or an accident. The time required to perform the necessary inspection is very short. However, it both ensures your safe driving and, in the long term, saves you time from vehicle repairs. -
Page 20: Starting The Engine
If you need assistance on how to perform any of the above-mentioned tasks, do not hesitate to contact an authorised Nipponia service point. ! WARNING: - If any item in the pre-operation inspection list is not functioning properly, have it inspected and repaired before operating the motorcycle. -
Page 21: Start Button / Kick Starting
DRIVING INSTRUCTIONS A. The start button 1. Turn the main switch to “ ” position 2. Make sure that the shift is turned to the neutral gear (the “N” gear indicator lights on the instrument panel). 3. Make sure that the choke lever is closed. 4. -
Page 22: Driving
DRIVING INSTRUCTIONS NOTE: - If the engine does not start after pressing the start button for 3-4 seconds, turn the throttle grip open a little. It may make the engine easier to start. - After long term inactivity periods it may be difficult to start the engine. In such a case, hold the start button a little more than usual and turn the throttle grip open a little. -
Page 23: Braking
DRIVING INSTRUCTIONS 4. Adjust the rear-view mirrors 5. Shift into 1 gear 6. Before taking off, turn on the signal light and make sure it is safe to go 7. Release the brake and gradually twist the throttle grip open ... -
Page 24: Parking
DRIVING INSTRUCTIONS ! ATTENTION: - When driving downhill, close the throttle grip and use both brakes alternatively, maintaining a low speed. - Do not hold the brake lever and do not rest your foot on the brake pedal while driving, as it may cause abnormal wear to the brakes. -
Page 25: Engine Break-In
DRIVING INSTRUCTIONS Engine Break-In ! WARNING: - Park the motorcycle on a flat and stable surface to prevent it from falling. - When you park on a slope, position the motorcycle facing upwards to prevent it from falling. - Do not turn the ignition switch to “ ”... -
Page 26: Gear Shifting
DRIVING INSTRUCTIONS Gear shifting Two shifting modes can be used on your motorcycle. The first shifting mode (A) can be used when your motorcycle is parked and the second shifting mode (B) when your motorcycle is on driving mode. When your motorcycle is stopped, e.g. -
Page 27: Service And Maintenance
SERVICE AND MAINTENANCE Maintenance Schedule Period of maintenance in km Item First 500 Every 1000 Every 3000 Every 6000 Every 12000 Fuel system Throttle controlling system Air Cleaner Spark plug Valve clearance Oil screen Battery The vehicle must be serviced according to the Braking pad and shoe wear maintenance and service schedule. -
Page 28: Engine Oil
SERVICE AND MAINTENANCE Engine oil This motorcycle should use four-stroke engine oil. There is no need for any additives. Do not use common oil, vegetable oil or castor oil. The viscosity of the engine oil varies according to local average environmental temperature. -
Page 29: Engine Oil Replacement
SERVICE AND MAINTENANCE ! ATTENTION: - After the engine has been running, the oil temperature is high. Exercise care to avoid injury from burning. - If oil comes into contact with the skin, wash it away with soap or a cleaning agent. ! WARNING: - Never fill with oil over the MAX mark. -
Page 30: Air Cleaner
SERVICE AND MAINTENANCE 5. Inspect the drain bolt, seal, oil screen spring, oil screen and confirm that they are in good condition. Then re-assemble them as shown and tighten the drain bolt. 6. Pour 0.9L of new oil into the crankcase from the filling port and then tighten the oil scale plug. 7. -
Page 31: Spark Plug
SERVICE AND MAINTENANCE 3. Clean or replace filter element. 4. Clean the air cleaner case and cover. Re-install the air cleaner in reverse order. ! ATTENTION: - This model uses a sponge-type filter element. Use solvent to clean it. After cleaning, apply 2-3 drops of engine oil to it. -
Page 32: Tyres
SERVICE AND MAINTENANCE 5. Put on the spark plug cap. ! WARNING: - The spark plug must be screwed in fully. Otherwise, leakage from spark plug base and temperature increase may occur resulting in engine damage. - Do not use a spark plug with incorrect heat value; otherwise the engine could be severely damaged. Tyres The inflated tyre pressure must be checked daily and regulated according to the following table. -
Page 33: Brakes
SERVICE AND MAINTENANCE ! ATTENTION: - If tyre pressure exceeds the standard value, the tyre can easily be damaged; if tyre pressure is below the standard value, it may cause loss of control while driving or the tyre being dislodged from the rim. Brakes This motorcycle is equipped with hydraulic disk type front brake and rear brake. -
Page 34: Front Brake Inspection
SERVICE AND MAINTENANCE 1. Remove the reservoir cap, pad and diaphragm for the front brake (3, 4, 5) or the reservoir cap (3) from the rear brake pump. 2. Add DOT3 or DOT4 brake fluid from a sealed closed container into the reservoir until the fluid level is at the MAX mark (4) or (6) 3. -
Page 35: Rear Brake Inspection
(>20-30mm) and the brake pad wear is within its specified limits, air may be trapped in the braking system. It must be expelled. Take your motorcycle to an authorized Nipponia service point for brake maintenance. 1: Front brake lever Rear brake check The brake pedal free-play is about 20-30mm. -
Page 36: Wear Condition Of The Brakes
SERVICE AND MAINTENANCE Wear condition of the brake Wear condition of brake pads varies according to the use of the vehicle, riding style and road conditions. Generally speaking, the brake pads may wear faster when driving on wet and dirty roads. Brake pad wear should be checked at every scheduled maintenance. -
Page 37: Battery Removal
SERVICE AND MAINTENANCE 3. Battery poles erode easily. Brush them clean with a needle brush then apply a film of Vaseline or grease. 4. When installing the battery, terminal bolts must be screwed tightly. ! ATTENTION: - When starting the engine, do not use the starter motor for more than 5 seconds at a time. Alternatively, the kick-starter can be used. -
Page 38: Electric Fuse
SERVICE AND MAINTENANCE ! ATTENTION: - Check the level of the electrolyte every month. If the level of the electrolyte is under the min mark, then fill-in only with distilled water. Do not use electrolyte or tapped water. Electric fuse The fuse is located in the battery case and can withstand up to 30A. -
Page 39: Drive Chain
3. Tighten the fixing nut, by keeping the position of the adjusting screw unchanged. 4. Test the condition of the clutch by shifting gears for several times. If the problem still exists you should visit an authorised Nipponia service point. ! WARNING: - To avoid injuring do not touch the engine or the exhaust muffler when they are warm during the adjustment of the clutch. -
Page 40: Drive Chain Adjustment
SERVICE AND MAINTENANCE Drive chain adjustment 1. Loosen the nut of the rear axle. 2. If the drive chain is loose, tighten the adjusting nut (4) 3. If the drive chain is too tight, unscrew (loosen) the adjusting nut (4) 4. -
Page 41: Adjustment Of The Rear Brake Light
SERVICE AND MAINTENANCE Adjustment of the rear brake light switch The switch of the rear brake must be adjusted, in order for the brake light to come on when you press the brake pedal. The free play of the brake pedal must be adjusted before the adjustment of the brake switch. -
Page 42: Care And Storage Guide
CARE AND STORAGE GUIDE Long-term storage When stored for a long time, your motorcycle must be protected against moisture, sunlight and rain. Before storing, the following steps should be taken: 1. Replace the engine oil. 2. Drain the fuel completely out of the fuel tank and carburettor and fill the fuel tank with anti-rust fluid. 3. -
Page 43: Cleaning
CARE AND STORAGE GUIDE Cleaning Cleaning the motorcycle periodically will help keeping the painting coat bright. 1. The motorcycle should be washed after it is stored in order to wash off the accumulated dust. The plastic parts should be cleaned with a cloth or sponge using a neutral cleaning agent. 2. -
Page 44: Efi Using Instruction
EFI CARE AND INSTRUCTIONS System parts description 1. ECU: The ECU is the core part of E.F.I. system. Avoid hard contact of it with any object and also excessive contact with water. Its ambient temperature should not exceed 70℃,and interference by electromagnetic fields or forces should be avoided. 2. -
Page 45: Oxygen Sensor
EFI CARE AND INSTRUCTIONS 4. Oxygen sensor: The oxygen sensor is a delicate component. Avoid hard contact of it with any object or surface. 5. Temperature sensors: The intake temperature sensor is used to monitor the fuel temperature within the cylinder. It is one of major components used to determine the actual fuel quantity within cylinder as the fuel intensity may be affected by the variation of the fuel temperature. -
Page 46: Service And Maintenance
EFI CARE AND INSTRUCTIONS Service and Maintenance 1. All electrical components should be treated as fragile. 2. Additionally, strict precautions should be taken against water, oil etc. and materials that infiltrate into electrical parts and onto terminals. 3. In order to avoid damage, do not allow the battery to come into contact with the injector. 4. - Page 47 EFI USING INSTRUCTION Service and Maintenance 9. Whether the engine is running or not, do not remove the ECU or other sensitive parts when ignition switch is in the “ON” position. 10. When performing an ignition test, the injector connector should be disconnected to prevent starting difficulties caused by over rich fuel-mixture within the cylinder or by allowing fuel-mixture to flow into the 3-way catalytic converter twice.
-
Page 48: Troubleshooting And Counteractions
EFI USING INSTRUCTION Troubleshooting and counteractions Symptom Cause Counteraction Fuel level is too low Refill fuel Pump fuel doesn’t work Check the fuse and pump relay No fuel flows out of fuel pump injector No apparent cause (fuel pump works and fuel Check for kinks in fuel hose flow is sufficient) Poor fuel pump contact... -
Page 49: Diagnostic System Instructions
EFI USING INSTRUCTION Diagnostic system instructions The diagnostic system function is to inform the driver in time when the electrical controlling system sensor or implementing unit fails. The user can perform the inspection and consequently take the motorcycle to an authorized workshop to be repaired in accordance with the display on the diagnostic system. - Page 50 communication between these two components. Thus, the fault codes can be read from the instrument. Values of various sensors and controlling parameters are also displayed.
-
Page 51: Specifications
SPECIFICATIONS Brio 125 Item Data Item Data Displacement (ml) Overall length (mm) 1900 Max Power (kW/rpm) 6.1 / 8000 Overall width (mm) Max Torque (Nm /rpm) 8.3 / 5500 Overall height (mm) 1080 Idling speed 1500±100 Wheel base (mm) 1230 Weight with oil and fuel (kg) Fuel consumption (L/100km) ≤1.8... -
Page 52: Service Schedule
SERVICE SCHEDULE Please refer to the owner’s manual for the maintenance schedule of your vehicle VIN:…………………………………………………………………………. - Page 53 SERVICE SCHEDULE Please refer to the owner’s manual for the maintenance schedule of your vehicle VIN:………………………………………………………………………….
- Page 54 SERVICE SCHEDULE Please refer to the owner’s manual for the maintenance schedule of your vehicle VIN:………………………………………………………………………….
Need help?
Do you have a question about the BRIO 125-3 and is the answer not in the manual?
Questions and answers