Table of Contents
Advertisement
Advertisement
Table of Contents

Related Manuals for Sunways REVO-II Series


Summary of Contents for Sunways REVO-II Series
- Page 1 User Manual REVO-II 3-5KVA INVERTER ...
-
Page 2: About This Manual
ABOUT THIS MANUAL Purpose This manual describes the assembly, installation, operation and troubleshooting of this unit. Please read this manual carefully before installations and operations. Keep this manual for future reference. Scope This manual provides safety and installation guidelines as well as information on tools and wiring. SAFETY INSTRUCTIONS WARNING: This chapter contains important safety and operating instructions. Read and keep this manual for future reference. -
Page 3: Basic System Architecture
INTRODUCTION his is a multi‐function inverter/charger, combining functions of inverter, solar charger and battery charger to offer uninterruptible power support with portable size. Its comprehensive LCD display offers user‐configurable and easy‐accessible button operation such as battery charging current, AC/solar charger priority, and acceptable input voltage based on different applications. Features 1. Hybird solar inverter( on/off grid inverter) 2. Output power factor PF=1.0 3. On‐grid with enegy storage 4. Configurable AC/Solar Charger priority via LCD setting 5. Smart battery charger design for optimized battery performance 6. Compatible to mains voltage or generator power 7. Enegy generated,load,history information and fault record 8. External Wifi device (optinal) 9. Parallel operation with up to 6 units Basic System Architecture The following illustration shows basic application for this inverter/charger. It also includes following devices to have a complete running system: Generator or Utility. PV modules Consult with your system integrator for other possible system architectures depending on your requirements. This inverter can power all kinds of appliances in home or office environment, including motor‐type appliances such as tube light, fan, refrigerator and air conditioner. ... -
Page 4: Product Overview
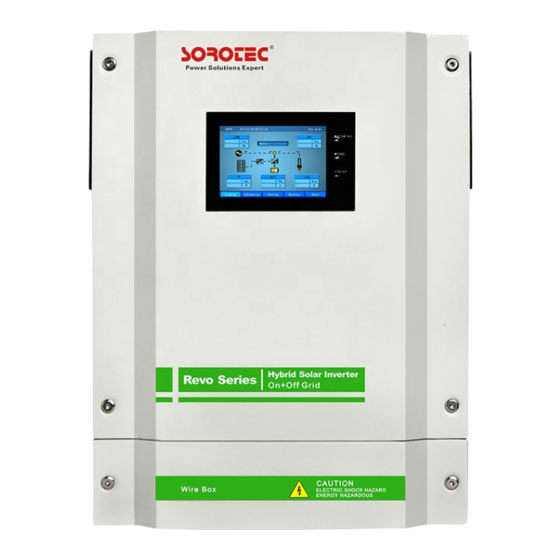
Product Overview 15: AC input 16: AC Output 17: PV input 18: ON/OFF switch 19: DC input 20: Parallel connection terminal 21: RS232/USB terminal 22: Dry contactor ... -
Page 5: Installation
INSTALLATION Unpacking and Inspection Before installation, please inspect the unit. Be sure that nothing inside the package is damaged. You should have received the following items inside of package: The unit x 1 User manual x 1 Preparation Before connecting all wirings, please take off bottom cover by removing two screws . Mounting the Unit Consider the following points before selecting where to install: 1.Do not mount the inverter on flammable construction materials. 2.Mount on a solid surface 3.Install this inverter at eye level in order to allow the LCD display to be read at all times. 4.For proper air circulation to dissipate heat, allow a clearance of approx. 20 cm to the side and approx. 50 cm above and below the unit. 5.The ambient temperature should be between 0°C and 55°C to ensure optimal operation. 6.The recommended installation position is to be adhered to the wall vertically. guarantee sufficient heat 7.Be sure to keep other objects and surfaces as shown in the diagram to dissipation and to have enough space for removing wires. ... -
Page 6: Ac Input/Output Connection
CAUTION!! Before making the final DC connection or closing DC breaker/disconnector, be sure positive (+) must be connected to positive (+) and negative (‐) must be connected to negative (‐). AC Input/Output Connection CAUTION!! Before connecting to AC input power source, please install a separate AC breaker between inverter and AC input power source. This will ensure the inverter can be securely disconnected during maintenance and fully protected from over current of AC input. The recommended spec of AC breaker is 32A for 3KVA and 50A for 5KVA. There are two terminal blocks with “IN” and “OUT” markings. Please do NOT mis‐connect input and output connectors. WARNING! All wiring must be performed by a qualified personnel. It's very important for system safety and efficient operation to use appropriate cable for AC input connection. To reduce risk of injury, please use the proper recommended cable size as below. Model Gauge Cable (mm2) Torque Value 3KVA 12 AWG 1.2 Nm 4/5KVA 10 AWG 1.2 Nm PV Connection CAUTION: Before connecting to PV modules, please install separately a DC circuit breaker between inverter and PV modules. WARNING! It's very important for system safety and efficient operation to use appropriate cable for PV module connection. To reduce risk of injury, please use the proper recommended cable size as below. ... - Page 7 WARNING: Because this inverter is non‐isolated, only three types of PV modules are acceptable: singlecrystalline, poly crystalline with class A‐rated and CIGS modules. To avoid any malfunction, do not connect any PV modules with possible current leakage to the inverter. For example, grounded PV modules will cause current leakage to the inverter. When using CIGS modules, please be sure NO groundin CAUTION: It’s requested to use PV junction box with surge protection. Otherwise, it will cause damage on inverter when lightning occurs on PV modules. CAUTION: It’s requested to use PV junction box with surge protection. Otherwise, it will cause damage on inverter when lightning occurs on PV modules. PV Module Selection: When selecting proper PV modules, please be sure to consider below parameters: 1. Open circuit Voltage (Voc) of PV modules not exceeds max. PV array open circuit voltage of inverter. 2. Open circuit Voltage (Voc) of PV modules should be higher than min. battery voltage. INVERTER MODEL 3‐5KVA Max. PV Array Open Circuit Voltage 500Vdc PV Array MPPT Voltage Range 120Vdc~450Vdc Take 250Wp PV module as an example. After considering above two parameters, the recommended module configurations are listed as below table SOLAR INPUT Q'ty of panels Total input Solar Panel Spec. power (Min in serial: 6 pcs, max. in serial: 12 pcs) 250Wp 6 pcs in serial ...
-
Page 8: Final Assembly
Final Assembly fter connecting all wirings, please put bottom cover back by screwing screws Communication Connection Please use supplied communication cable to connect to inverter and PC,follow on‐screen instruction to install the monitoring software. For the detailed software operation, please check user manual OPERATION Power ON/OFF Once the unit has been properly installed and the batteries are connected well, simply press On/Off switch (located on the button of the case) to turn on the unit Operation and Display Panel The operation and display panel, shown in below chart, is on the front panel of the inverter. -
Page 9: Lcd Display Icons
LCD Display Icons Icon Description Product model and operation time Operation information include fault and warning code Input voltage and frequency information Output voltage and frequency information PV voltage and power information Battery voltage and current information Load power and precent information Indicates unit connects to the mains. Indicates unit connects to the PV panel. - Page 10 Indicates the DC/AC inverter circuit is working. Indicates the utility charger circuit is working. Indicates battery level Indicates the load Function Button Description This button for back to default display screen The setting button include language, working mode, input ,output, battery,AC charging, MPPT, parallel, date&time,peak valleg,other function setting This button include generate and event This button include LCD,inverter,MPPT version...
-
Page 11: Lcd Setting
LCD Setting After pressing function button, the unit will enter setting mode. Button Function Desricption Back to default display screen Diagram Main display interface Chinese language display Chinese: Language Enlish language display English: Utility will provide power to the loads as first Line: priority,solar charing for the battery. - Page 12 Lead acid, Lithium,User Bat type: Battery 1.BAT low:This parameter can Cut off VOL: be set, Setting range is from 36V to46V, Increment of each click is 0.1V. 2.Cut off: 1.BAT low:This parameter can be set, Setting range is from 36V to46V, Increment of each click is 0.1V.
-
Page 13: Fault Reference Code
Fault Reference Code Fault code Fault event Fan is locked when inverter is off Over temperature Battery voltage is too high Battery voltage is too low Output short circuited or over temperature is detected by internal converter components. Output voltage is too high Overload time out Bus voltage is too high Bus soft start failed... -
Page 14: Warning Indicator
Warning Indicator Warning Event Warnning code Fan is locked when inverter is on Over temperature Battery is over-charged Low battery Overload Output power derating PV energy is low. High AC input (>280VAC) during BUS soft start... -
Page 15: Troubleshooting
TROUBLE SHOOTING Problem LCD/LED/Buzzer Possible cause What to do Unit shuts down LCD/LEDs and automatically buzzer will be The battery voltage is too 1. Re-charge battery. during startup active then 2. Replace battery process complete off 1. The battery voltage is 1. - Page 16 Output abnormal (Inverter 1. Reduce the connected Fault code 06/15 voltage below than 190Vac load. or is higher than 260Vac) 2. Return to repair center Fault code Return to repair center Internal components failed 08/09/12/14 Fault code 10 Over current or surge. Restart the unit, if the error Fault code 11 Bus voltage is too low.
-
Page 17: Specifications
SPECIFICATIONS MODEL REVO II 3K-48 REVO II 4K-48 REVO II 5K-48 Max PV Array Power 4500W Rated Output Power 3000W 4000W 5000W Max PV open circuit voltage 500VDC MPPT operating voltage range 120-450VDC MPPT tracker number Grid-tie operation Nominal output 220/230/240VAC voltage Output voltage range... - Page 18 Output wave form Pure sine wave Efficiency(DC/AC) Charger Nominal DC voltage 48VDC Max solar charge current Max AC charge current Max charger current General Parallel function Communication USB or RS232 Humidity 0-90% RH( No- condensing) ℃ Operation 0-50 temperature...
Need help?
Do you have a question about the REVO-II Series and is the answer not in the manual?
Questions and answers