
Related Manuals for Sunways NT 2500


Summary of Contents for Sunways NT 2500
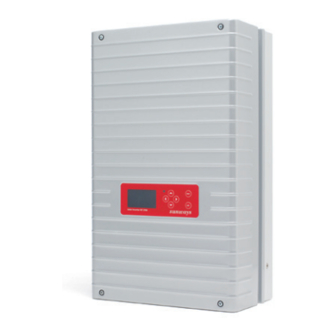
- Page 1 User Manual Sunways Solar Inverter NT 2500, NT 3700, NT 4200, NT 5000 english...
- Page 2 This user manual may only be reprinted or copied in whole or in part with the express, written approval of Sunways AG. Any type of reproduction, distribution or storage on data carriers in any form and of any kind not authorised by Sunways AG represents a violation of the applicable copyright laws and will be prosecuted.
- Page 3 Introduction Thank you for deciding in favour of a Sunways Solar This user manual contains explanations on using the Inverter of the NT series! Sunways Solar Inverter. You will learn to recognise the many possibilities of the Solar Inverter. Informa-...
-
Page 4: Table Of Contents
Content Product description Proper use Function description Integration in solar system Design of solar generator Standard components of a solar system Assembly description Delivery scope Safety precautions General safety precautions Explanation of symbols and warnings Warnings and symbols used in this user manual Symbols used in this user manual Warnings and symbols on device... - Page 5 Content Commissioning Connecting and disconnecting Solar Inverter Connecting Switching off Commissioning Commissioning single device Commissioning several networked devices Later commissioning Operation Operating elements Operating field LCD display Operating LED Standard screen (single device) Standard screen (system) Access rights Customer area Installer area Country password Menu structure...
- Page 6 Content Remote access via a DSL router Connection via the Sunways Modem Dial-up connection from a PC to the Solar Inverter Sunways Browser General information Access protection Overview – Menu Language selection Setting the date/time Software update Internet dial-up via modem...
-
Page 7: Product Description
Proper use Data logging The NT Solar Inverter is equipped with internal data The Sunways NT Solar Inverter is the link between your solar generator and the public power grid. logging for recording and saving system data: The energy from the connected solar generator is converted to grid-conformant AC current and fed ·... -
Page 8: Integration In Solar System
This can lead to major decreases in yield. The design program Sunways Sundim may be help- ful to you. Sunways Sundim is available on the included CD-ROM or at our homepage www.sunways.de. Be sure to take the following points into account before planning your system: ·... -
Page 9: Standard Components Of A Solar System
1 Product description Standard components of a solar system Assembly description Depending on the recommendations of your PV planning expert, your PV system consists of the fol- lowing components: Solar Inverter NT 5000 – 1 Solar generator – 2 Solar Inverter with integrated DC load break switch 3 Mains fuse and energy meter Options... -
Page 10: Delivery Scope
The delivery consists of: proper condition. Despite careful, recyclable pack- ing, transport damage may occur, for which the transport company is generally responsible. · Sunways Solar Inverter of the NT-Series · Wall bracket · 2 pairs of Tyco Solarlok plug-in connectors Please check the delivered Solar Inverter thoroughly! ·... -
Page 11: Safety Precautions
Safety precautions Warranty and liability General safety precautions The Sunways AG „General Terms and Conditions of Sale and Delivery« always apply. Warranty and liabil- Observe information in operating manual! ity claims for personal injury or damage to property The condition for the safe handling and malfunc-... -
Page 12: Explanation Of Symbols And Warnings
2 Safety precautions Explanation of symbols and warnings Warnings and symbols on device To help you quickly understand this manual and The following warnings on the housing of the Solar safely use the Solar Inverter, the following warnings Inverter point out dangers. Always observe the and symbols are used. -
Page 13: Basic Safety Measures
VDE regulations, national and other regulations. inverter controller: The Solar Inverter may only be opened by persons · DC overvoltage authorised by Sunways AG to do so. · Overvoltage L1, L2, L3 · Undervoltage L1, L2, L3 When circuit breakers are tripped, the fault cause ·... -
Page 14: Installation
Installation Mechanical load-bearing capacity · Note during installation that the Solar Inverter Mechanical installation weighs 26 kg. The installation surface must be firm and able to carry this weight in the long Requirements for installation location term. Thermal interaction · The installation surface must consist of flame- retardant material (not suitable: surface of wood or plastic;... -
Page 15: Installation
3 Installation Installation 6. Secure the Solar Inverter by tightening the lock- Proceed as follows to install the Solar Inverter: ing screw. 1. Hold the wall bracket at the point at which you want to attach the Solar Inverter and mark the mounting holes. -
Page 16: Electrical Installation
3 Installation Electrical installation · Always separate the grid connection first by switching off the corresponding mains fuse and Solar generator connection then the solar generator side by quickly opening the DC load break switch. Survey The solar generator can be directly connected to the Solar Inverter with two strings. - Page 17 3 Installation Tyco Solarlok plug-in connection system · During preassembly, the connectors must be The Solarlok plug-in connection system is used for separated from all other voltage sources. the simple, reliable connection of individual solar generators up to the Solar Inverter. ·...
- Page 18 3 Installation The following sequence must be observed during assembly: 1. Stripping the voltage-free line. CAUTION The connectors may not be separated while under load. The circuit must be opened at a suitable point for this purpose. 2. Crimping on the circular contact with the Tyco Release the locking device by pressing on the rib- Solarlok hand crimping pliers.
- Page 19 3 Installation Connection example – – – – – 1 Solar module box 2 Negatively coded socket 3 Negatively coded plug 4 Positively coded socket 5 Neutral connector 6 Solar inverter...
-
Page 20: Grid Connection
3 Installation Grid connection Survey An AC bayonet connector on the underside of the unit is used for the three-wire grid connection (L, N, PE) of the Solar Inverter. The grid connection should always be 1-phase. Feeding is single-phase via AC terminal 2. - Page 21 Inverter 3 A corresponding circuit breaker is recommended as a line protection element in the grid feed direction: CAUTION NT 2500: 16 A NT 3700: 25 A Incorrect pin assignment may result in destruction of NT 4200: 32 A the unit!
-
Page 22: Installing Communication
3 Installation Pin assignment for AC bayonet connector Installing communication The interfaces are located behind the weather- proof connection box on the underside of the Solar Inverter. The diagram shows the connections inside the AC connector, as indicated by the cut-out at the PE connection. -
Page 23: Networking Solar Inverters Via Can Bus
The connectors for the CAN interfaces CAN IN and The rate can be set via the Solar Inverter display or CAN OUT and for the modem interface have the the Sunways Browser. following pin assignment Setting the bit rate via the display menu: «Settings –... - Page 24 Network length / number of nodes / cable cross-section outside the table values – 1 or several CAN bridge(s) The CAN bridge is available from Sunways. For further information please contact the Technical Hotline. The CAN bridge subdivides the bus into two physi- cally independent segments.
-
Page 25: Networking Solar Inverters Via Rs485 Interface
CAN bridge can be integrated directly in the PT Solar Inverter and supplied via the 24 V DC power For joint monitoring of a solar system with Sunways supply unit of the inverter. In systems with AT Solar Solar Inverters from the older NT generation (750 V... -
Page 26: S0 Interface
Connection of temperature and irradiation sensor The S0 pulse output enables, for example, the con- The optional addition of an irradiation sensor nection of a large display (Sunways Display) for (model Si-01TC-K from Ingenieurbüro Mencke & displaying the momentary output, the energy yields... -
Page 27: Connecting Alarm Relay
3 Installation Assignment of sensor connection Wiring diagram for a single device Sensor Sensor Solar Inverter connector pin connection connection assignment designation Pin 1 Plus signal Temp temperature Pin 2 Plus signal Solar irradiance Wiring diagram for several devices Pin 3 Reference earth Pin 4 Plus connection for... -
Page 28: Commissioning
Commissioning Connecting Connecting and disconnecting Solar Inverter 1. Switch on the grid connection with the external circuit breakers. 2. Switch on the solar generator voltage by quickly closing the DC load break switch (switching posi- tion 1). The Solar Inverter takes up operation CAUTION when sufficient input voltage is available. -
Page 29: Commissioning
4 Commissioning Commissioning Commissioning single device The commissioning menu is automatically opened System with one Solar Inverter the first time the Solar Inverter is connected. It helps you make the standard settings. Single device For a better understanding of keyboard operation, please also see the chapter Operation. -
Page 30: Commissioning Several Networked Devices
4 Commissioning 4. Set date and time. 6. Completion of commissioning Confirm overview with Please proceed with caution for time settings, as Commissioning several networked devices they directly affect data logging. For example, if you set the time back by 1 hour, then the existing data System with several Solar Inverters for the last hour will be overwritten. - Page 31 4 Commissioning Compatibility between Sunways Solar Inverters The following table provides an overview of which devices can be networked with each other and how, and lists any special considerations: NT Series (900 V) PT series AT series NT series (850 V)
- Page 32 4 Commissioning Commissioning the master 4. Set the data and time centrally for all connected 1. The commissioning process starts with setting of devices. the display language. Select required language with Confirm selected language with Please proceed with caution for time settings, as 2.
- Page 33 4 Commissioning Depending on the size of the network, it may take a moment until the master has found all slaves and added them to the list. Confirm password with 7. Completion of commissioning Devices = total number of devices found in CAN network, including master Confirm overview with In network = number of configured devices,...
-
Page 34: Later Commissioning
The data for the individual slaves can be assigned your solar system, then you can display the device in the Sunways Browser and in the menu of the list in the display on the master under «Settings – master based on the IDs. -
Page 35: Operation
Operation Keyboard Operating elements The keyboard can be used to navigate in the menu, edit text fields, select entries from lists and enter numbers consecutively and digit by digit. User Operating field entries can only be made if the value to be changed The Solar Inverter is operated via the operating field is selected. -
Page 36: Standard Screen (Single Device)
5 Operation Standard screen (single device) MenSUpd. The menu structure is being updated The standard screen is always shown when no MenEUpd. The menu error texts are being keyboard entry is made for more than 1 minute. It updated can also be called up manually with the menu item «Solar Inverter –... -
Page 37: Standard Screen (System)
5 Operation Standard screen (system) Access rights This screen shows the system data for a CAN-net- Operation of the Solar Inverter is divided into vari- worked system. ous areas protected with passwords. The password has 8 digits or characters. The password can be entered in the menu item «Set- tings –... -
Page 38: Installer Area
Solar Inverter which are available after consult- ing the Technical Hotline. Request a device-specific password from the Technical Hotline. These pass- words are only relevant for the Sunways Browser. All commissioning procedures are accessible from the customer area. Technical Hotline +49 (0)7531 996 77-577... -
Page 39: Menu Structure
5 Operation Menu structure The menu provides access to all Solar Inverter screens. Open the main menu by pressing the left arrow key twice from the standard screen. START Standard screen Instantaneous values 1 Instantaneous values 2 Yield for week Yield for 15 days Yield for month AC output... -
Page 40: Overview Of Screen Displays
5 Operation Overview of screen displays Display Description Menu selection Instantaneous Values – Device Current feed-in power, daily energy The screen appears automatically yield and device status when you have not made any entries with the keyboard for several minutes. MPP:Feeding in MPP mode Solar Inverter –... - Page 41 5 Operation Display Description Menu selection Events – Device Select starting data for event display Solar Inverter – Events Display event list Solar Inverter – Events – Display event details (error number, Solar Inverter – Events – – data, starting time, duration and number of occurrences per day) History –...
- Page 42 5 Operation Display Description Menu selection DC current (5-min. values) Solar Inverter – History – DC values – AC voltage (5-min. values) Solar Inverter – History – AC values AC current (5-min. values) Solar Inverter – History – AC values –...
- Page 43 5 Operation Display Description Menu selection Yields – Solar system (only on master) AC system yields and operating hours Solar system – Energy yield from today, yesterday and Day before yesterday AC system yields for the current week, Solar system – Energy yield – the previous week, the current month and the previous month AC system yields for the current year...
- Page 44 5 Operation Display Description Menu selection Solar system monthly yields Solar system – System history – Yield for month Solar system AC output Solar system – System history – AC (5-min. values) output Maximum system output Solar system – System history – Max. Daily maximum values output System info –...
- Page 45 5 Operation Display Description Menu selection Settings – General Display language Settings – General – Language LCD contrast Settings – General – LCD contrast Set date/time Settings – General – Date/Time (only possible with customer password) Set receiving time (starting time and Settings –...
- Page 46 5 Operation Display Description Menu selection Settings – Network (only possible with customer password) Network settings (Screen 1) Settings – Network – Ethernet Network settings (Screen 2) Settings – Network – Ethernet – Only for secondary unit Settings – Network – CAN bus Only for secondary unit with manual Settings –...
- Page 47 5 Operation Display Description Menu selection Setting of the irradiation and temper- Settings – Network – Interfaces ature sensor and configuration of the S0 pulse output...
-
Page 48: Malfunction Displays
5 Operation Malfunction displays The Solar Inverter indicates malfunctions in the LCD display and saves these in the internal error memory. · A restart may be attempted in the event of an error message. The malfunction display consists of a number and a short designation. -
Page 49: Ac Network Fault
5 Operation Display message Description Cause and possible remedies 103:AFI>30mA Your Solar Inverter is equipped with a A residual current jump has occurred 105:AFI>60mA universally sensitive AFI according to DIN during operation of the Solar Inverter. 106:AFI>150mA VDE 0126-1-1. This monitoring device has detected a relative residual current jump. - Page 50 5 Operation Display message Description Cause and possible remedies 203:UAC1>Max Your Solar Inverter continually monitors The cable cross-section in the AC supply 205:UAC2>Max the voltage level of the phases L1, L2 line to the Solar Inverter is too small. 207:UAC3>Max and L3.
-
Page 51: Inverter Fault
5 Operation Display message Description Cause and possible remedies 224:AC P. fail Your Solar Inverter has detected a mains · Ask your Electric Utility about grid power failure. stability and design. 225:UV excon You Solar Inverter is equipped with a ·... - Page 52 5 Operation Display message Description Cause and possible remedies 304:Grid re. The NT Solar Inverter checks the opera- · Restart the Solar Inverter. tion of the mains relay prior to every switch-on. An error was detected during If the error still occurs, please contact the this check.
-
Page 53: Interface/Communication Fault
5 Operation Display message Description Cause and possible remedies 308:M incom The software version of the control and · Carry out a software update. 309:Control the monitoring software is incompatible. 310:no config No country is set. Contact the technical hotline for the installer password. -
Page 54: Communication Warnings
(solar). · Check the connection to your sensor. If you have not connected a sensor: · Check the configuration with the Sunways Browser. 502:Temp. No sensor found on sensor channel 2 If you have connected a sensor: (Warning) (temperature). ·... - Page 55 508:DNS fehl. Warning: DNS has failed. Communication fault between the (Warning) integrated web server and an Internet browser in conjunction with the Sunways Browser. 509:HTTP con. Warning: HTTP client connection has (Warning) failed. These warnings are non-critical and can be ignored if they only occur occasionally.
-
Page 56: Service Fault
5 Operation Display message Description Cause and possible remedies 518:CAN init. Warning: CAN initialisation error. CAN bus initialisation fault during device (Warning) startup. · Restart the Solar Inverter. If the error persists, please contact the technical hotline. The phone number is provided on the back of the manual. -
Page 57: System Monitoring
Operating data (5-min. mean values) ent via e-mail. Number Value 4500 DC current · With the Sunways Portal connection the NT Solar 4500 DC voltage Inverter can send the operating data of your 4500 AC current solar system to the Sunways Portal daily without... -
Page 58: Direct Ethernet Connection
6 System monitoring Direct Ethernet connection The Solar Inverters are equipped with an Ethernet interface as standard for system monitoring and configuration with a PC. Connect your PC and the Solar Inverter with the included Ethernet cable. X-patch cables can also be used. -
Page 59: Network Settings On Solar Inverter
2. Enter the default password (******** = 8 times star key) or your chosen password. After the network configuration is completed you can start the Sunways Browser by entering the IP address of the Solar Inverter in the address line of your web browser. -
Page 60: Network Settings On The Pc
6 System monitoring Network settings on the PC 5. Select «Internet Protocol (TCP/IP)» and click «Properties» again. To enable your PC to communicate with the Solar Inverter certain network settings are required. The procedure differs slightly depending on the operating system. A configuration example for Windows XP is shown below.. - Page 61 8. In the «Status» menu item you can check the After the network configuration is completed you correctness of your entries and the status of your can start the Sunways Browser by entering the IP connection address of the Solar Inverter in the address line of your web browser.
-
Page 62: Connection Via An Existing Ethernet
Ask your network administrator for suitable settings for IP address, net mask and gateway. After the network configuration is completed you can start the Sunways Browser by entering the IP address of the Solar Inverter in the address line of your web browser. -
Page 63: Remote Access Via A Dsl Router
Solar Inverter distances during system monitoring and configura- accessible via the Internet. tion. Connect the Sunways Modem with the Solar Inverter. The Sunways Modem is available as an Requirement: analog, ISDN and GSM type. -
Page 64: Dial-Up Connection From A Pc To The Solar Inverter
6 System monitoring Connecting a Sunways Modem Dial-up connection from a PC to the Solar Inverter To establish a connection between your Solar INVERTER Inverter and a PC via the modem you have to estab- lish a dial-up connection in Windows. The procedure under Windows XP is described below. - Page 65 «Start – Settings – Network Connections».) Further settings are required in the «Properties» section. 6. Specify the phone number for your Sunways Solar Inverter. When entering the telephone number, you may have to include one or more digits to connect to an outside line.
- Page 66 Select «Properties». 13. Click «Dial» to establish the connection. After the connection is established you can start the Sunways Browser by entering the IP address of the Solar Inverter in the address line of your web browser. 11. Enter the following data:...
-
Page 67: Sunways Browser
Low- and Medium-Voltage Directive · Communication software update (LCD dis- The Sunways Browser can be called up via a stand- play, interfaces,communication and Sunways ard Internet browser, e.g. Mozilla Firefox. One of the four possible connections between a PC and the... -
Page 68: Overview - Menu
7 Sunways Browser · If you cannot remember the password you can Overview – Menu request a device-specific password from the Technical Hotline +49 (0)7531 996 77-577 so that Home – Displays the start page you can access your Solar Inverter again. In this case you need the serial number and the MAC address, which can be found on the type label. -
Page 69: Setting The Date/Time
2. The upper screen section shows the current software versions. If a new version is available on our website (www.sunways.de), you can download the file and load it via the Sunways Browser. Select the file on your hard disk via the «Browse...» button and confirm with OK. -
Page 70: Internet Dial-Up Via Modem
Solar Inverter’s LCD display. The display Modem settings messages have the following meaning: If you use a modem to connect to the Internet, the modem must be set up via the Sunways Browser. Display text Update type First establish a connection between your PC and Cnt. -
Page 71: E-Mail Settings
To enable the Solar Inverter to send E-mails, the code. E-mail settings must be stored via the Sunways Browser. The settings can be accessed via «Settings – Network» in the «Email Settings» section. -
Page 72: Active Alerting
The master must be connected to the Internet via a network or modem. · When dialling in via modem, the correct dial-up settings must be stored (see Internet dial-up via modem). · Correct e-mail settings must be stored in the Sunways Browser (see «Email settings»). -
Page 73: Alerting Settings
Sunways Portal. After activation the operating data are e-mailed to the Sunways Portal on a daily basis before the master is switched off for the night. Alternatively a shorter interval can be selected. If a change is made to your solar system (e.g. -
Page 74: Setup
Inverter. Portal address Preset for the Sunways Portal To view your system data in the Sunways Portal, you require a user account. This will be issued to you if Mailbox file you follow the link in the confirmation e-mail and Preset for the Sunways Portal fill out the registration form. -
Page 75: Appendix
Appendix Technical data Model NT 2500 NT 3700 NT 4200 NT 5000 Article no. SI225NT0C SI237NT0C SI242NT0C SI250NT0C DC Input Rated DC power 2625 W 3885 W 4410 W 5250 W Maximum DC current 7,5 A 11,0 A 13,0 A... - Page 76 S0 pulse output, modem Sensor interfaces irradiation, temperature Display LCD, backlit, 128 x 64 pixels Plant supervision Active alarm via e-mail, Sunways Browser, Sunways Communictor, Sunways Portal IP degree of protection IP 54 according to IEC 60529 Max. relative humidity...
-
Page 77: Drilling Template For Wall Bracket
8 Appendix Drilling template for wall bracket You can use the following template to install the wall bracket. All distances and measures are shown on this drawing. Ø 10... -
Page 78: General Liability Disclaimer
Sunways AG and the Sunways licensors. Registered trademarks The Sunways logo is a registered trademark of Sun- ways AG, Konstanz. HERIC is a registered trademark of Fraunhofer ®... - Page 79 C&F | Werbung und Dokumentation, Villingen-Schwenningen · www.cundf.de...
- Page 80 8 Appendix Sunways AG Photovoltaic Technology Macairestraße 3 - 5 D - 78467 Konstanz Telefon +49 (0)7531 996 77-0 Fax +49 (0)7531 996 77-444 E-Mail info@sunways.de www.sunways.de Technische Hotline +49 (0)7531 996 77-577...
Need help?
Do you have a question about the NT 2500 and is the answer not in the manual?
Questions and answers