BK Precision 8500B Series User Manual
Programmable dc electronic loads
Hide thumbs
Also See for 8500B Series:
- Programming manual (63 pages) ,
- User manual (58 pages) ,
- User manual (77 pages)
Table of Contents
Advertisement
Quick Links
Advertisement
Table of Contents

Related Manuals for BK Precision 8500B Series


Summary of Contents for BK Precision 8500B Series
-
Page 2: Table Of Contents
Contents General Information Product Overview Package Contents Product Dimensions Rackmount Installation Front Panel Overview 1.5.1 Combination Keys Rear Panel Overview Display Overview Getting Started Input Power Fuse Requirements 2.2.1 Fuse Replacement Input Connections Preliminary Check 2.4.1 Verify AC Input Voltage 2.4.2 Self-test Errors 2.4.3... - Page 3 Advanced Functions Short Operation Short-circuit Analog Function Transient Operation 6.3.1 CC Mode 6.3.2 CV, CW, and CR modes LIST Operation 6.4.1 Configure List 6.4.2 Run List 6.4.3 Disable List Mode Battery Test Function 6.5.1 Test Configuration 6.5.2 Enable Battery Test Mode 6.5.3 Recall Battery File 6.5.4...
- Page 4 8.5.18 Overvoltage Protection (OVP) 8.5.19 Overtemperature Protection (OTP) 8.5.20 Reverse Voltage Protection (LRV/RRV) 8.5.21 Configure Timed Input 8.5.22 Measurement Configurations 8.5.23 CR LED Function 8.5.24 Remote Sensing 8.5.25 External Triggering 8.5.26 Current Monitoring (I Monitor) Protection Functions OCP Test Function OPP Test Function OPP TEST Over Voltage Protection (OVP)
-
Page 5: General Information
General Information 1.1 Product Overview The 8500B Series DC Electronic Loads are versatile instruments used for static and dynamic testing of DC power supplies, batteries, DC-to-DC converters, battery chargers, and other applications including fuel-cell, and solar cell test. Primary modes include constant voltage (CV), constant current (CC), constant resistance (CR), and constant power (CW). A wide range of dynamic loading applications can also be simulated through user-programmable slew rates, load levels, duration, and conducting voltage. -
Page 6: Product Dimensions
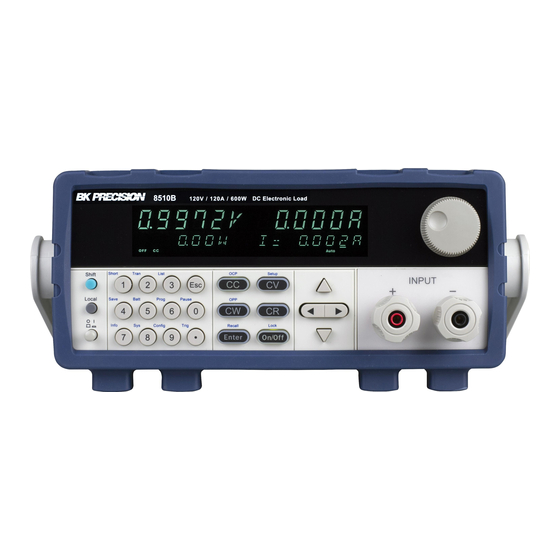
Verify that all items above are included. If anything is missing, please contact B&K Precision. 1.3 Product Dimensions All models are designed to fit in a standard 19-inch rackmount. The dimensions are shown in Figure 1.1. Figure 1.1 External Dimensions - Half-rack models 1.4 Rackmount Installation The instrument can be installed in a standard 19 inch rack. - Page 7 Item Description VFD Display Power Switch and Function Keys Numeric Input and Advanced Functions Mode keys and Input Control Navigation Keys Input Terminals Rotary Input Knob Figure 1.3 Front Panel Start or stop transient condition. Set LIST operation parameters. Store the DC Load state in non-volatile memory. Turn on or off...
-
Page 8: Rear Panel Overview
1.6 Rear Panel Overview Item Description Power Input and Fuse Holder AC Voltage Switch Current Monitor Output Remote Sense and Trigger Input TTL (5V) Communication DE-9 Connector 1.7 Display Overview... - Page 9 Item Description Measured Voltage Measured Current Measured Power Set Value Input Off indicator, lit when input is off Operation mode indicators (CC, CV, CW, CR) Remote control active indicator Error indicator Waiting for Trigger indicator Timer indicator External indicator Remote Sense active indicator Protection event indicator Auto range Key Lock indicator...
-
Page 10: Getting Started
Getting Started Before connecting and powering up the instrument, please review and go through the instructions in this chapter. 2.1 Input Power The load has a selectable AC input that accepts line voltage input within: Voltage Frequency 115 V (+/-10%) or 230 V (+/- 10%) 47 Hz – 63 Hz Table 2.1 Input Power Requirements Use the line voltage selector switch in the back to switch between 110 V and 220 V operation. -
Page 11: Input Connections
2.3 Input Connections The main DC input terminal is a screw type binding post terminal located in the front panel, holes are included for inserting wires, and the binding post also includes “banana jack” connections. Each connection allows for different current levels. -
Page 12: Input Check
are reported during the power-up procedure. See Section 11 for troubleshooting and error information details. During self-test, the display displays “System Init”, and dots are displayed showing the test progress level. 2.4.3 Input Check Follow the steps below to check that the load is operating correctly, and that the load elements (power transistors) are not damaged. -
Page 13: Front Panel Operation
3.1 Local Mode/Remote Mode The 8500B series can either be operated locally or remotely. When in “Remote” mode, the RMT indicator will be lit. When in this mode, the front panel of the load is disabled and all commands are issued via the serial interface. In order to exit “Remote”... -
Page 14: Slew Rate Measurement And Actual Transition Time
3.3 Slew Rate Measurement and Actual Transition time Current slew rate is defined as the change in current over time. A programmable slew rate allows a controlled transition from one load setting to another. The actual transition time is defined as the time for the input to change from 10% to 90%, or 90% to 10% of the programmed current values. -
Page 15: Constant Resistance (Cr) Mode
3.6 Constant Resistance (CR) Mode In this mode, the electronic load approximates a resistor. The current draw is varied by the load according to the input voltage. The performance of this mode is not as fast as in CC or CV mode. This is because it is a sampled system and response to changing input takes a finite amount of time. -
Page 16: Front Panel Operation
4.1 Local Mode/Remote Mode The 8500B series can either be operated locally or remotely. When in “Remote” mode, the RMT indicator will be lit. When in this mode, the front panel of the load is disabled and all commands are issued via the serial interface. In order to exit “Remote”... -
Page 17: Slew Rate Measurement And Actual Transition Time
4.3 Slew Rate Measurement and Actual Transition time Current slew rate is defined as the change in current over time. A programmable slew rate allows a controlled transition from one load setting to another. The actual transition time is defined as the time for the input to change from 10% to 90%, or 90% to 10% of the programmed current values. -
Page 18: Constant Resistance (Cr) Mode
4.6 Constant Resistance (CR) Mode In this mode, the electronic load approximates a resistor. The current draw is varied by the load according to the input voltage. The performance of this mode is not as fast as in CC or CV mode. This is because it is a sampled system and response to changing input takes a finite amount of time. -
Page 19: Rear Panel Functions
Rear Panel Functions Item Description Power Input Fuse Holder AC Input Voltage Selection Current Monitor Output Remote Sense/Trigger Input Remote Interface Figure 5.1 Rear Panel 5.1 Remote Sensing Remote sensing is used to counteract the effect of lead resistance. For example, if you connect a power supply to the DC Load, the voltage at the power supply’s terminals will not be the same as the voltage at the DC Load’s terminals if there is a current flowing because of the finite resistance from the wires. -
Page 20: Current Monitoring (I Monitor)
5.3 Current Monitoring (I Monitor) The current monitor output, the bnc connector, outputs a scaled voltage relative to the current flowing. The relationship is �� . For example, the 8542B maximum current is 30 A. When a current of 1 A is flowing, the current ��������... -
Page 21: Advanced Functions
Advanced Functions In addition to the 4 general modes of operation, there are a number of other more application specific functions. These functions enable more advanced testing. 6.1 Short Operation The electronic load can simulate a short circuit at its input. During front panel operation, press to switch the short on/off... -
Page 22: Cc Mode
1. First, select the load’s mode of operation, which will determine which type of transient operation will be configured. Press or to select between CC, CV, CW, or CR mode. Verify the selection by the backlight behind its corresponding button, which will be lit when selected. 2. -
Page 23: Configure List
Figure 6.1 List Mode Current Waveform 6.4.1 Configure List Lists are run exclusively from internal memory only. As in other menus, an active field is denoted by an underline cursor or flashing. To enter a list into memory, complete the following: 1. -
Page 24: Disable List Mode
The “Trig” indicator will disappear. 6.5 Battery Test Function The 8500B series products include battery test capabilities. This function provides a constant current load. The test records the time, and charge consumed in Amp-hours. Three independent conditions are available to customize the test. -
Page 25: Enable Battery Test Mode
Stop Timer The maximum test time. 4. When the settings are entered, the last step is to set the memory location. Set the value (1 - 10) and press complete the configuration entry. 6.5.2 Enable Battery Test Mode 1. Press to enter the system menu. - Page 26 1. Press (Prog). ACTIVE =0987654321 2. Press and press enter to confirm. ACTIVE =0987654YYY 3. Select the step that should pause during the test. When paused, press [downarrow] continue the test. PAUSE=NNNNNNN32Y 4. Step 3 short circuit testing, press , and press to confirm.
- Page 27 Ton, Toff and Tpf (P/F) Relation: the delay time for a step 15. Set stop conditions: COMP means stop test when all the steps are completed, FAILURE means stop test when the testing fails. Press to confirm. STOP COMP FAILURE 16.
- Page 28 Set the steps of a test file in the example CC Mode, 1.2A, Voltage Range 4.4V-4.6V 1. Press [[Shift)+[CC] buttonand then [CV] (Setup) to enter the setting interface. RANGE=30.000A 2. Set the current rangepress to confirm. RANGE =1.2A CC 3. set the upper limit of voltage, press to confirm.
- Page 29 1. Press [CW] buttonpress to set related +[parameters] RANGE=150.00W 2. Set the power rangepress to confirm. RANGE =1.00W 3. Set the upper limit of voltagepress to confirm. HIGH=120.00V 4. Set the lower limit of voltagepress to confirm. LOW=0.000V 5. Finish the setup 10.0000V 0.000A 0.00W CW=1.00W CR Mode...
-
Page 30: Start Auto Test File
6.7 Measurement of Voltage Rise Time The 8500B series electronic load is provided with special voltage rise/drop time measurement function. This function gives a simple analog of voltage rise/drop speed of oscilloscope test power. Operation methods: 1 Set initial Voltage and Final Voltage 1. -
Page 31: Ripple Function
13. Close the power output. The electronic load VFD will display voltage drop time. 6.8 Ripple Function The 8500B series DC electronic loads have test ripple function. You can read ripple voltage and ripple current by sending instructions. See the programming manual for more information. -
Page 32: Configuration Functions
Configuration Functions 7.1 VON Function The DC load can be set to only turn on if the voltage is above a set value (VON set) under configure menu by pressing . There are two types of VON function: “Living” and “Latch”. The following will have detailed description for the two types. -
Page 33: System Menu (System)
7.5 System Menu (System) Press to enter the system menu. POWER-ON : POWER-ON Power on state of instrument RST (default) Do not remember state in SAVE 0. Customer can save a often used data in SAVE 0 to recall when power on the DC load next time. SAV0 Remember state in SAVE 0 BUZZER : BUZZER... -
Page 34: Config Menu
7.6 Config Menu Press to enter the menus. PROTECT - Max-P Set hardware power protection MAX POWER=150.00 W Set hardware OPP value A-LIMIT Set software current protecting state A-LIMIT Enable software over current protection function A-LIM POIN=30.00 0 A Set the software OCP level A-LIM DELAY= 3 S Set the OCP delay time Disable the software OCP funtion... -
Page 35: System Settings
System Settings 8.1 Run Recall Edit 1. Select “Edit” and press . Enter a value using the numeric keypad or rotary knob for “Voltage On Level”. The value must be within the maximum input limits of the load. Press to continue. 2. -
Page 36: Restore Factory Default Settings
1. Press ) and then ( ). A “*” indicator will light up on the display, indicating that the front panel keys are lock. At this point, all keys are disabled except for the Lock function. 2. To unlock the keys again, press ) and then ( )again. The “*” indicator will disappear and all keys will be enabled. 8.5 Restore Factory Default Settings All instrument settings are reset back to their factory default values by doing the following: Note: Restoring the instrument to factory default will change all current instrument settings and parameters back to... -
Page 37: Load On Knob
8.5.2 Load On Knob This setting controls the behavior of the knob. 1. From the “SYSTEM” menu, select “Knob” and press 2. There are two options: Update(default) Real time update. No update (when turning load ON/OFF, original value before use of rotary knob will be set) 3. -
Page 38: Select Storage Group
Storage Group Memory locations 1 – 10 11 – 20 21 – 30 31 – 40 41 – 50 51 – 60 61 – 70 71 – 80 81 – 90 91 - 100 When recalling settings, each of the numeric keypad numbers corresponds to the memory locations based on the storage group selected according to the table above. -
Page 39: Display Input On Timer
1. First, consider the memory locations you want to recall from. As they are grouped together, select the appropriate storage group from the “SYSTEM” menu first by following the instructions in previous section. 2. Once selected, press (b- ) and (or press (recall) ) and it will light up to indicate the instrument is in “Recall”... -
Page 40: Config Menu
Parity: N (None), E (Even), O (Odd) Stop bit: 1 Flow control: NONE, CTS/RTS, XON/XOFF Note: The default is 4800, 8, N, 1, NONE. *Setting the baud rate to 115200 may provide unstable results during remote communication. Select a lower baud rate if communication errors occur. -
Page 41: Overcurrent Protection (Ocp)
8.5.15 Overcurrent Protection (OCP) The electronic load includes both hardware and software overcurrent protection features. “Hardware OCP” - The electronic load’s maximum input current will be limited to approximately 110% of the current range. Once the hardware OCP is triggered, the status register’s OC bit will be set. When the hardware OCP is removed, the status register’s OC bit will be reset. -
Page 42: Overpower Protection (Opp)
Operation - Display on front pannel 1. Press “[ ]+ [ 8 ]” (system) enter into sysmtem menu - 0.0000V 0.000A POWER-ON BUZZER 2. Press right key,select RUNMODE and confirm - 0.0000V 0.000A RUN <NORMAL with button - 3. Press direction key to select OCP_TEST,Press “ ”... -
Page 43: Recall Opp File
Check whether the input power is within the rated power range or the programmed protection ranges. If it is out- side the range, disconnect the device under test. Then press any key on the front panel or remotely send command PROTection:CLEar. -
Page 44: Overvoltage Protection (Ovp)
(system)——RUNMODE—- ——select “NORMAL” mode—- 8.5.18 Overvoltage Protection (OVP) The instrument’s maximum OVP limit is 110% of the maximum rated voltage. If the OVP circuit has triggered, input will turn off, buzzer alarm will go off, and the status register’s OV and VF bit will be set. -
Page 45: Measurement Configurations
4. It will then prompt to enter a value for “Delay”. This is the amount of time to enable the input from when the is pressed (or when input is turned ON remotely). Once this time is past, input will be disabled (OFF). Use the numeric keypad or rotary knob to enter the value. -
Page 46: Cr Led Function
8.5.23 CR LED Function CR LED is a function that allows the instrument to simulate the loading behavior of typical LEDs, which is used for testing LED drivers. When the function is enabled, the load allows the user to configure the LED’s operating resistance and forward voltage along with the voltage range (same as CR operation). -
Page 47: External Triggering
Wiring Diagram for Remote Sensing: 8.5.25 External Triggering EXTERNAL:An external trigger is a TTL low signal applied to the Trigger connection on the back panel. This TTL signal must last for more than 5 ms. A trigger applied to this input is used to change settings (voltage, current , resistance), toggle between settings in transient- toggle mode, or generate a pulse in pulse mode. -
Page 48: Protection Functions
Protection Functions 1 OCP Test Function The load has a built-in OCP test function that can be used to automate testing for OCP conditions. The load can save up to 5 OCP test programs into internal memory, which can be recalled and run. The OCP Test program requires the following parameters be configured before it can be run. -
Page 49: Opp Test Function
6. Finally, enter a value for “Max Trip Current”, and then “Min Trip Current”. Press (enter) after each settings to continue. 7. The load will prompt to “Save OCP File”. Select a number between 1 and 5. Then press (enter) to save all settings to the selected location. Note: At any time when configuring any parameters for the test, you can press the key to select the previous parameter to edit. -
Page 50: Over Current Protection (Ocp)
“Step Delay” This is the delay time to hold each power step in the test. This determines how fast or slow to run through the test. “End Power” This is the ending power value before OPP test ends. The test will only run through in steps from “Start Power”... -
Page 51: Reverse Voltage Protection (Lrv)
8 Reverse Voltage Protection (LRV) This feature protects the DC load in case the DC input terminals are connected to a power source with reversed polarity. If a reverse voltage condition is detected, the buzzer will sound and will be displayed on the VFD. Operations to Clear the Reverse Voltage State Check whether the connection is reversed;... -
Page 52: Remote Operation
Remote Operation 10.1 Interface Connection 10.2 Serial Interface PIN Description Transmit Data Receive Data A straight pin-to-pin DB9 female to DB9 male serial cable is required for using the RS-232 interface. Do not use a null modem or crossover DB9 serial cable. 10.2.1 GPIB The load can be configured with a GPIB address from 0 –... -
Page 53: Troubleshooting Guide
Troubleshooting Guide Below are some frequently asked questions and answers. Please check if any apply to your instrument before contacting B&K Precision. 1 General Q: I cannot power up the instrument. Check that the power cord is securely connected to the AC input and there is live power from your electrical AC outlet. Verify that the AC power coming from the mains have the correct voltage. - Page 54 2. Check whether the fuse of electronic fuse is burned out. If yes, change fuse. Detailed steps: • Pull out power line and take out the fuse box at power line jack with a small screw driver. As shown below. •...
-
Page 55: Service Information
Service Information Warranty Service: Please go to the support and service section on our website at bkprecision.com to obtain an RMA #. Return the product in the original packaging with proof of purchase to the address below. Clearly state on the RMA the performance problem and return any leads, probes, connectors and accessories that you are using with the device. -
Page 56: Limited Three-Year Warranty
LIMITED THREE-YEAR WARRANTY B&K Precision Corp. warrants to the original purchaser that its products and the component parts thereof, will be free from defects in workmanship and materials for a period of three years from date of purchase. B&K Precision Corp. will, without charge, repair or replace, at its option, defective product or component parts. Returned product must be accompanied by proof of the purchase date in the form of a sales receipt.
Need help?
Do you have a question about the 8500B Series and is the answer not in the manual?
Questions and answers