
Related Manuals for Toshiba SureMark 4610 1NR


Summary of Contents for Toshiba SureMark 4610 1NR
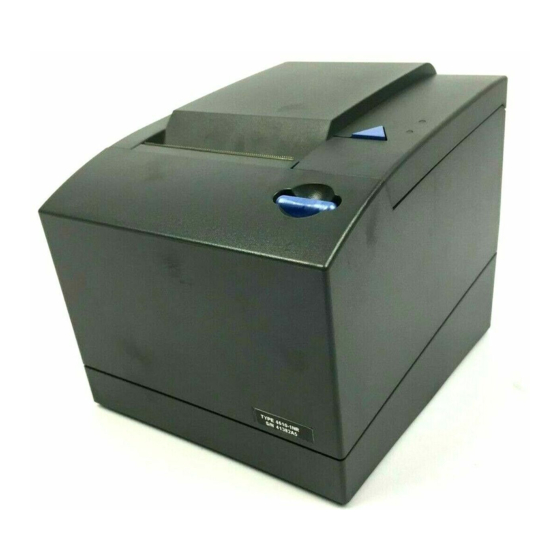
- Page 1 Toshiba Global Commerce Solutions SureMark 4610 Printers Hardware Guide Model 1NR TC62-0011-01...
- Page 2 This edition applies to Toshiba SureMark Printer Model 1NR. If you send information to Toshiba Global Commerce Solutions (Toshiba), you grant Toshiba a nonexclusive right to use or distribute whatever information you supply in any way it believes appropriate without incurring any obligation to you.
-
Page 3: Table Of Contents
Setting WiFi IP parameters..........40 Product recycling and disposal..........55 Changing default passwords for WiFi......40 Battery safety................56 Configuring a network printer (WiFi and Ethernet)..41 Battery return program............57 Before you begin...............41 For Taiwan:................ 57 Copyright Toshiba Global Commerce Solutions, Inc. 2017 ©... - Page 4 For the European Union:..........57 For California:..............58 Flat panel displays..............58 Monitors and workstations............58 Trademarks................59 Hardware Guide for Model 1NR...
-
Page 5: Figures
18. Example of a test receipt..........37 19. Wireless network icon............37 20. Select the printer network..........38 21. Quick Setup Page.............. 39 22. Overview page..............42 23. Set printer IP parameters..........43 24. Receipt showing usage statistics........47 Copyright Toshiba Global Commerce Solutions, Inc. 2017 ©... - Page 6 Hardware Guide for Model 1NR...
-
Page 7: Tables
4. Paper supply LED indicator..........23 5. Printer ready LED indicator ..........23 6. Ethernet LED indicator............23 7. WiFi LED indicator............. 23 8. Summary of dimensions............ 27 9. Example of a test/status receipt........37 Copyright Toshiba Global Commerce Solutions, Inc. 2017 ©... - Page 8 Hardware Guide for Model 1NR...
-
Page 9: Safety
Les sikkerhetsinformasjonen (Safety Information) før du installerer dette produktet. Antes de instalar este produto, leia as Informações sobre Segurança. Antes de instalar este producto, lea la información de seguridad. Läs säkerhetsinformationen innan du installerar den här produkten. Copyright Toshiba Global Commerce Solutions, Inc. 2017 ©... - Page 10 Hardware Guide for Model 1NR...
-
Page 11: About This Guide
This guide is intended for use by personnel who are installing and using the SureMark 4610 Model 1NR printers. Where to find more information Current versions of Toshiba publications are available on the Toshiba Global Commerce Solutions website at www.toshibacommerce.com/support/publications. The publications listed under the General tab are available to the public. - Page 12 DANGER These statements indicate situations that can be potentially lethal or extremely hazardous to you. A danger statement is placed just before the description of a potentially lethal or extremely hazardous procedure step or situation. Hardware Guide for Model 1NR...
-
Page 13: Summary Of Changes
This edition of the SureMark 4610 Printers Hardware Guide includes the addition of the following information: • Setting up and configuring a WiFi adapter • WiFi configuration and management • Setting up, managing, and configuring a network printer Copyright Toshiba Global Commerce Solutions, Inc. 2017 ©... - Page 14 Hardware Guide for Model 1NR...
-
Page 15: Chapter 1. Introducing The 4610 Model 1Nr
• 3 MB flash memory for storing messages, logos, code pages, and electronic journal data • DBCS thermal font - 24x24 matrix • Bar code generation • Downloadable fonts and code pages • Downloadable microcode • Small footprint • Wall mount Copyright Toshiba Global Commerce Solutions, Inc. 2017 ©... -
Page 16: Communication And Power
Table 1. Model feature description Features SureMark 4610 Model 1NR Print method Thermal Command sets Native, Epson emulation (RS-232, and network attached), direct, compatibility mode (Tx6/Tx7) Communication RS-232 - 115 kbps interface RS-485 - 187 kbps USB 1.1 (USB 2.0 compatible) Ethernet - 10/100 Mbps WiFi - 802.11 a/b/g/n/ac Paper support... -
Page 17: Usb Interface Card
HID; Bulk transfers at 12 Mbps separate power supply if standard (Mega bits per second) USB connector is used RS-485 Toshiba proprietary System unit input voltage +38 V or +24 V (Japan only) RS-232 9.6K - 115.2K (selectable using Separate power supply... -
Page 18: Rs-232 Interface Card
Figure 3. RS-232 interface card Device Description Cash drawer RS-232 Power supply Figure 4 illustrates the communications connections on the RS-485 interface card. Figure 4. RS-485 interface card Device Description Cash drawer RS-485 Figure 5 illustrates the communications connections on the Ethernet interface card. Hardware Guide for Model 1NR... -
Page 19: Ethernet Interface Card
Figure 5. Ethernet interface card Device Description Cash drawer Ethernet Ethernet status indicators Power supply Figure 6 illustrates the communications connections on the WiFi interface card: • Frequency Band of 802.11 b/g/n - 2.4 Ghz, power 18.30 dBm •... -
Page 20: Network Interface Adapter Prerequisites
MLC is back level and cannot be used with the installed adapter. Operating system requirements You can download drivers from the Toshiba Global Commerce Solutions support website: www.toshibacommerce.com/support. The printer provides a compatibility mode to enable use of older drivers and applications with only minor modifications. -
Page 21: Hardware Requirements
PC DOS 2000 RS232 Note: Toshiba 4610 Ethernet Printer iOS SDK is supported with iOS 8.x or later for use with the Ethernet and WiFi interface adapters. Toshiba 4610 Ethernet Printer Android SDK is supported with Android 4.0 or later for use with the Ethernet and WiFi interface adapters. -
Page 22: Understanding The Controls And Indicators
• 4694 systems • 4695 systems (RS-232 connection only and with power supply) • PC or other store controller with an RS-232, Ethernet, WiFi, or USB port • SurePOS ™ 100 Series systems • SurePOS 300 Series systems • SurePOS 500 Series systems •... -
Page 23: Locating The Power Button
Device Description Paper door release button Table 4. Paper supply LED indicator LED indicator ( Amber Paper out Paper sufficient Blinking Critically low paper supply Table 5. Printer ready LED indicator Printer ready ( Amber Blinking (0.5s Station not ready; recoverable error - paper jam, cover open, on / 0.5s off) cutter jam Blipping (0.25s... -
Page 24: Calling For Service
Figure 8. Power button Calling for service When you call Toshiba for warranty information or service, be sure to have the serial number and model number of the printer available. The serial number and model number are located beside the flipper door (see ... -
Page 25: Location Of Serial Number
Figure 9. Location of serial number Chapter 1. Introducing the 4610 Model 1NR... - Page 26 Hardware Guide for Model 1NR...
-
Page 27: Chapter 2. Product Specifications
Table 8. Summary of dimensions Width: 145 mm (5.71 in.) footprint Height: Cover closed: 159 mm (6.26 in.) Cover open: 260 mm (10.24 in.) Depth: 177 mm (6.97 in.) Weight: 1.4 kg (3.09 lb) Copyright Toshiba Global Commerce Solutions, Inc. 2017 ©... -
Page 28: Temperature And Humidity Limits
Temperature and humidity limits Shipping -40° to 60° C (-40° to 140° F) with 5% to 100% relative humidity including condensation, but excluding rain Storage 0° to 60° C (32° to 140° F) with 5% to 80% relative humidity Operating 5°... -
Page 29: Chapter 3. Installing And Configuring The 4610 Printer
• Customer options, such as fillers, cables, and power bricks (packaged separately) Installing the interface card The interface card (either an RS-232, RS-485, USB, Ethernet, or WiFi interface) is shipped in a separate box with your printer. Install the interface card as follows: Copyright Toshiba Global Commerce Solutions, Inc. 2017 ©... -
Page 30: Routing The Cash Drawer And Rs-485 Cables
Figure 11. Installing the interface card As shown in Figure 11, place the printer unit upside down. Insert the tab of the interface card ( ) into the slot on the base of the printer ( Press down on the side of the interface card opposite the tab until the blue release button slider snaps into place. -
Page 31: Cash Drawer Cable Routing
Figure 12. Cash drawer cable routing Route the RS-485 cable (see Figure 13). Place the RS485 cable completely down on the base Route the cable under the notch Route the RS485 cablle through the back cable slot and ... -
Page 32: Installing The Fillers
Figure 14. Installed WiFi interface with cable routing Installing the fillers The fillers are an important part of your integrated system. They securely position your printer into position with the system unit and other peripherals. Refer to the installation documentation for your system unit for complete instructions. Wall (or 45-degree) mounting Attention: Printer must be powered off. -
Page 33: Position Selector
Figure 15. Position selector Align the two rounded slots on the base of the printer unit ( in Figure 16 ) with the two D-shaped posts on the mount. Also, ensure that the hook near the corner of the mount aligns with the slot at the corner of the printer unit ( ... -
Page 34: Wall-Mount Slots
Figure 16. Wall-mount slots Slide the printer unit down (or up) until the mount-release button snaps into place. To remove the printer unit from the wall mount: Press the door-release button ( in Figure 7) and pull (or push) the door fully open. While pushing the mount-release button ( ... -
Page 35: Configuring A Wifi Adapter
Figure 17. Mount-release button Configuring a WiFi adapter This section provides guidance for setup of the 4610 WiFi Interface Adapter. After completion of WiFi setup, Printer IP setup may be required. See “Configuring a network printer (WiFi and Ethernet)” on page 41 for additional setup instructions. The Printer IP setup is common to both the WiFi and Ethernet adapters. -
Page 36: Before You Begin
After completion of WiFi setup, it is highly recommended that default passwords be changed and/or unused interfaces disabled. The 4610 WiFi interface adapter provides a WLAN client connection for normal printer operation and management, plus a separate local connection for setup through a built in access point (referred to as the Printer Access Point or Printer AP). -
Page 37: Connecting To The Printer Access Point (Ap)
Table 9. Example of a test/status receipt AP SSID-- The network name for the Printer Access Point (AP). Connect to this network to access WiFi setup functions. Client ID-- The client identifier used by the WiFi adapter for DHCP Option 61. This will also be needed to derive the Printer AP network password. -
Page 38: Logging Into The Wifi Configuration And Management Interface
Figure 20. Select the printer network Once the device indicates it has established a network connection, it is ready to log into the WiFi Configuration and Management interface. Note: Some systems report a warning when connecting to the printer AP because there is no internet connection provided. -
Page 39: Setting Up The Wifi Client
Figure 21. Quick Setup Page Setting up the WiFi client The WiFi client setup is performed from the quick setup page shown in the previous step. Select the target network from the list of available networks. Enter the required information and click Submit. The data entry screens will vary based on the target network and its security settings. -
Page 40: Setting Wifi Ip Parameters
Setting WiFi IP parameters By default IP parameters are obtained by DHCP. If this is the intended operating mode then no further setup is required. However, if all settings are not obtained by DHCP, then IP parameters may be set via the Quick Setup page or Wireless Network Interface Configuration page. •... -
Page 41: Configuring A Network Printer (Wifi And Ethernet)
Configuring a network printer (WiFi and Ethernet) This section provides guidance for setup of a 4610 Network printer (WiFi or Ethernet interface adapter installed). When using a WiFi adapter, it is assumed that WiFi configuration has been completed. See “Configuring a WiFi adapter” on page 35 for information on configuring the WiFi Adapter. -
Page 42: Setting Printer Ip Parameters
Figure 22. Overview page Setting printer IP parameters By default IP parameters are obtained by DHCP. If this is the intended operating mode then no further setup is required; however, if all settings are not obtained by DHCP then IP parameters may be set via the Network page. -
Page 43: Change Default Passwords For Printer
Figure 23. Set printer IP parameters Click Save. Navigate to other pages and complete other setup as required. Reset the printer using the Reset Printer menu item to activate the settings. Note: If the printer is powered off/on before resetting it via the menus, all settings will be lost. - Page 44 Hardware Guide for Model 1NR...
-
Page 45: Chapter 4. Using And Maintaining The 4610 Printer
79.5 ± 0.5 mm (3.13 ± 0.02 in.) or 57.5 ± 0.5 mm (2.26 ± 0.02 in.) Outside Diameter 102 mm (4.0 in.) maximum Thickness 60 μm (0.00225 in.) optimal. Range: 41 μm minimum to 99 μm maximum. Copyright Toshiba Global Commerce Solutions, Inc. 2017 ©... -
Page 46: Installing Large Paper Rolls
Installing large paper rolls The 4610 can accommodate extra-large rolls (up to 15 in.) of paper below the printer. Mounting hardware is necessary to avoid placing undue strain on the paper feed motor. See your Toshiba representative for additional information. -
Page 47: Retrieving Printer Statistics
Retrieving printer statistics The Model 4610 2CR and 2NR printers retain usage statistics to help you evaluate your printer usage and performance. The statistics available for your printer are defined during printer configuration. Figure 24 is an example of a printed receipt with usage statistics for the Model 1NR. - Page 48 • Number of steps performed by the CR paper feed motor (200 steps per inch of paper) • Number of times the customer receipt cover was opened • Number of failed paper cuts • Number of Flash Erase commands performed (NVRAM write count) •...
-
Page 49: Notices
Web sites. The materials at those Web sites are not part of the materials for this Toshiba Global Commerce Solutions product and use of those Web sites is at your own risk. -
Page 50: Telecommunication Regulatory Statement
Properly shielded and grounded cables and connectors must be used in order to meet FCC emission limits. Toshiba Global Commerce Solutions is not responsible for any radio or television interference caused by using other than recommended cables and connectors or by unauthorized changes or modifications to this equipment. -
Page 51: Avis De Conformité À La Réglementation D'industrie Canada
Mitgliedsstaaten und hält die Grenzwerte der EN 55032 Klasse A ein. Um dieses sicherzustellen, sind die Geräte wie in den Handbüchern beschrieben zu installieren und zu betreiben. Des Weiteren dürfen auch nur von der Toshiba Global Commerce Solutions empfohlene Kabel angeschlossen werden. Toshiba Global Commerce Solutions übernimmt keine Verantwortung für die Einhaltung der Schutzanforderungen, wenn das Produkt ohne... -
Page 52: Australia And New Zealand Class A Statement
Toshiba Global Commerce Solutions, Inc. Brand Manager - Europe, Middle East & Africa Toshiba Court, Weybridge Business Park, Addlestone Road, Weybridge, Surrey, KT15 2UL, UK Generelle Informationen: Das Gerät erfüllt die Schutzanforderungen nach EN 55024 und EN 55032 Klasse A. -
Page 53: Russian Electromagnetic Interference (Emi) Class A Statement
Russian Electromagnetic Interference (EMI) Class A statement Japanese Electrical Appliance and Material Safety Law statement Japanese power line harmonics compliance statement Japan Voluntary Control Council for Interference Class A statement Attention: This is a Class A product based on the standard of the Voluntary Control Council for Interference (VCCI). -
Page 54: Japan Electronics And Information Technology Industries Association (Jeita) Statement
Japan Electronics and Information Technology Industries Association (JEITA) statement Japan Electronics and Information Technology Industries Association (JEITA) Confirmed Harmonics Guidelines with Modifications (products greater than 20 A per phase). Korean communications statement This is electromagnetic wave compatibility equipment for business (Type A). Sellers and users need to pay attention to it. -
Page 55: Cable Ferrite Requirement
(TI) que reciclen responsablemente sus equipos cuando éstos ya no les sean útiles. Toshiba Global Commerce Solutions dispone de una serie de programas y servicios de devolución de productos en varios países, a fín de ayudar a los propietarios de equipos a reciclar sus productos de TI. -
Page 56: Battery Safety
EEE on the environment and human health due to the potential presence of hazardous substances in EEE. For proper collection and treatment, contact your local Toshiba Global Commerce Solutions representative. Disposal of IT products should be in accordance with local ordinances and regulations. -
Page 57: Battery Return Program
Battery return program This product may contain sealed lead acid, nickel cadmium, nickel metal hydride, lithium, or lithium ion battery. Consult your user manual or service manual for specific battery information. The battery must be recycled or disposed of properly. Recycling facilities may not be available in your area. -
Page 58: For California
Customer participation is important to minimize any potential effects of batteries and accumulators on the environment and human health due to the potential presence of hazardous substances. For proper collection and treatment, contact your local Toshiba Global Commerce Solutions representative. -
Page 59: Trademarks
Washington, go to the Department of Ecology Website at fortress.wa.gov/ecy/recycle/ or telephone the Washington Department of Ecology at 1-800-Recycle. Trademarks The following are trademarks or registered trademarks of Toshiba, Inc. in the United States or other countries, or both: Toshiba... - Page 60 Hardware Guide for Model 1NR...
- Page 61 Ethernet mercury-added statement safety information interface card model and feature description serial number location European Union battery recycling model number location statistics, printer statement models and features supported paper types mounting Copyright Toshiba Global Commerce Solutions, Inc. 2017 ©...
- Page 62 Taiwanese battery recycling statement Telecommunications regulatory statement temperature requirements thermal paper specifications Toshiba Global Commerce Solutions support site website trademarks understanding the controls and indicators understanding your configuration unpacking the printer interface card wall mounting weight, all models WiFi WiFi interface card...
- Page 64 TC62-0011-01...
Need help?
Do you have a question about the SureMark 4610 1NR and is the answer not in the manual?
Questions and answers
paper feed failure