Table of Contents
Advertisement
Advertisement
Table of Contents

Subscribe to Our Youtube Channel
Related Manuals for Riken Keiki OX-03


Summary of Contents for Riken Keiki OX-03
- Page 1 PT0E-1288 Personal Oxygen Gas Monitor OX-03 Operating Manual...
-
Page 2: Safety Information
Safety information The Personal Gas Monitor Model 03 series (GP-03, List of standards • IEC 60079-0:2011 • EN60079-0:2012 OX-03, CO-03, HS-03) are a gas monitor designed to • IEC 60079-11:2011 • EN60079-11:2012 provide continuous exposure monitoring of combustible • IEC 60079-26:2006 •... -
Page 3: Table Of Contents
<Contents> 1. Outline of the Product ......3 4-4. How to detect ........14 1-1. Preface ..........3 4-5. Seeing information ......15 1-2. Purpose of use ......... 3 5. Operations and Functions ..... 17 1-3. Definition of DANGER, WARNING, 5-1. - Page 4 7-2. Procedures to use the gas monitor again ..........29 7-3. Disposal of products ....... 30 8. Troubleshooting ........32 9. Product Specifications......33...
-
Page 5: Outline Of The Product
1-2. Purpose of use Thank you for choosing our personal oxygen This product is a single gas monitor used to gas monitor OX-03 (hereinafter referred to as detect oxygen in the air. the gas monitor). Please check that the model number of the product you purchased... -
Page 6: Definition Of Danger, Warning, Caution, And Note
1-3. Definition of DANGER, WARNING, CAUTION, and NOTE Throughout this manual, the following indications are used to ensure safe and effective work. This message indicates that improper DANGER handling may cause serious damage on life, health or assets. This message indicates that improper WARNING handling may cause serious damage on health or assets. -
Page 7: Important Notices On Safety
Replace the batteries in a non-hazardous area. Use only the batteries specified by RIKEN KEIKI on this gas monitor. -
Page 8: Precautions
CAUTION WARNING Do not place the gas monitor where water or dirt Others gets accumulated. The gas monitor placed at such Do not throw the gas monitor into fire. a location may cause malfunction due to water or ... - Page 9 CAUTION Others Pressing buttons unnecessarily may change the settings, preventing alarms from activating correctly. Operate the gas monitor using only the procedures described in this operating manual. Do not drop or give shock to the gas monitor. The water-proof and explosion-proof properties and accuracy may be deteriorated.
-
Page 10: Product Components
3-1. Checking the package After unpacking, be sure to check that all the accessories are included in the package. OX-03 (the main unit) Rubber protection cover (pre-attached to the main unit) Alligator clip (pre-attached to the main unit) ... -
Page 11: Names And Functions For Each Part
3-2. Names and functions for each part <Appearance> Communication port * Used for the data logger Alarm lamp function. For details, see "5-3. About data logger function". * Blinks (red) at an alarm state. Sensor part Buzzer sound opening * Has a gas sensor at the far end of the dust filter. -
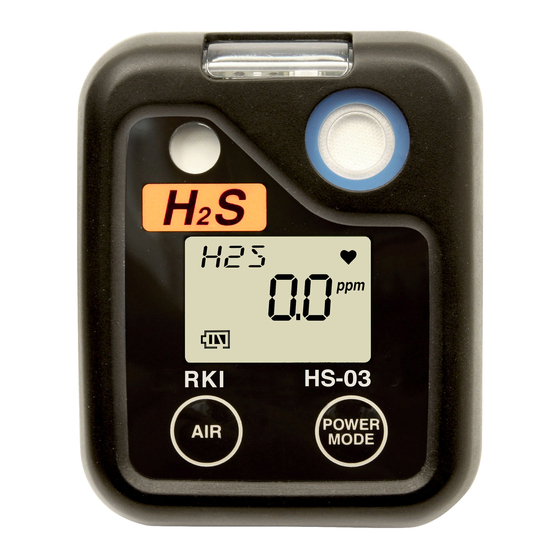
Page 12: Information Display
<Appearance> <Display> Gas name and information indication Operation display * Indicates a gas to be detected Alligator clip by the gas monitor and * Blinks the heart mark * Used to attach the gas information such as modes. at a normal state. monitor to the top of the pocket. -
Page 13: How To Use
Pay attention to the polarities of the batteries when explosion-proof performance. replacing them. Use only the batteries specified by RIKEN KEIKI on Before starting gas detection, check the this gas monitor. followings Replace the batteries in a non-hazardous area. -
Page 14: Power-On And Power-Off
NOTE When powering on after leaving the gas monitor for more than five minutes with the batteries removed, such as when powering on for the first time or replacing the batteries, the monitor enters the clock adjustment mode. In this case, see "6-2-1. Time settings"... -
Page 15: Performing Air Calibration
4-3. Performing air calibration Item Details * Check that the gas Detection WARNING monitor is in the Mode detection mode. When the air calibration is performed in the atmosphere, check the atmosphere for freshness before beginning the air calibration. If other gases AIR exist, the adjustment cannot be performed properly, thus leading to dangers when the gas leaks. -
Page 16: How To Detect
4-4. How to detect NOTE Open the clip as shown in the right After air calibration, attach the gas monitor to figure and attach it to the top of the the top of the breast pocket with the alligator breast pocket, etc. -
Page 17: Seeing Information
4-5. Seeing information MODE Press the MODE button to enter the display mode. Every time the MODE button is Displays maximum pressed, various pieces of information are value detected displayed in turn. The gas detection is from power-on to the present. running in the background in this mode. - Page 18 NOTE If no switch operations are performed, the monitor automatically returns to the detection mode in about 20 seconds. If no switch operations are performed, the backlight is automatically turned off in about 30 seconds (except at an alarm state). ...
-
Page 19: Operations And Functions
Operations and Functions 5-1. Gas alarm activation Buzzer: Fast Second alarm intensity An alarm is triggered when the concentration Setting: 23.5% change of the detected gas reaches or exceeds the Lamp/Vibration: Fast and alarm setpoint value <Self-latching intermittent operations>. Display: Concentration <Alarm activation>... - Page 20 <How to reset the alarm> After the concentration of detected gas settles below the alarm setpoint value, press any button to reset the gas alarm. NOTE Even if the concentration of detected gas exceeds the alarm setpoint value, the operations of buzzer, lamp and vibration continue (self-latching) until any button is pressed (the alarm is reset).
-
Page 21: Fault Alarm Activation
The data logger management program (example) (option) is required to use this function. Buzzer: Intermittent Low battery Contact RIKEN KEIKI if it is needed. Lamp: Blinking voltage alarm Vibration: None * For details on the operation, see Operating Manual Display: "Data Logger Management Program". -
Page 22: Maintenance
To maintain the performance of the gas a safety unit. monitor and improve the reliability of safety, perform a regular maintenance. Contact RIKEN KEIKI if it is needed. Daily Monthly Regular Maintenance Maintenance... - Page 23 Alarm test Check that the alarm lamp and buzzer operate ○ ○ normally by using the alarm test function Span Perform the span adjustment adjustment by ○ using the calibration gas Gas alarm Check that the gas alarm is correctly ○...
-
Page 24: User Mode
6-2. User mode Item Details The user mode is used for maintenance such See "6-2-3. Auto A-CAL calibration" as setting the time. Auto calibration Press the POWER button while pressing the AIR button, and release the buttons when the buzzer See "6-2-4. - Page 25 6-2-1. Time settings 6-2-2. Air calibration Set the date/time of the internal clock. Perform air calibration in fresh air. Item Details Item Details DATE POWER POWER * Use the AIR button to * Press and hold the Date and change the blinking AIR button until the time Concentration...
- Page 26 6-2-3. Auto calibration * Waiting for gas A-CAL introduction. This is how to preset the concentration of the (Blinking) prepared span calibration gas to the gas monitor and perform calibration in a single * Starts the gas step. supply. After 60 seconds, press the POWER button.
- Page 27 6-2-4. Manual calibration * Starts the gas supply. After 60 This is how to perform calibration with seconds, press the manually set to the concentration value of the AIR button to adjust the value and then prepared span calibration gas. press the POWER button to confirm it.
- Page 28 Stopwatch <Equipment required for gas calibration> Calibration cap (option) *1 Span calibration gas *1 Use a dedicated calibration cap (option). 99.9 vol% or more The customer is required to provide all except for (recommended) Gas sampling bag ...
-
Page 29: How To Clean
6-3. How to clean NOTE The replacement intervals are recommendation only. The Clean the gas monitor if it becomes intervals may change depending on the operating extremely dirty. The gas monitor must be conditions. turned off while cleaning it. Use a waste cloth These intervals do not mean the warranty periods either. -
Page 30: Filter Replacement
6-5. Filter replacement (4) Open the case. (5) Remove the rubber seal and filter Replace the filter if it is contaminated. Follow referring to the below figure, and the replacement procedure given below. replace them with new ones. CAUTION Turn off the power of the gas monitor before replacing CAUTION Rubber seal the filter. -
Page 31: Storage And Disposal
Store the gas monitor in a shipping carton, if calibration. For information on readjustment any, in which the product was delivered. including gas calibration, please contact Store the gas monitor away from dust, etc., if RIKEN KEIKI. the shipping carton is not available. -
Page 32: Disposal Of Products
• When disposing of the gas monitor in EU member states, sort the batteries as specified. Handle the removed batteries according to the classified refuse collection system and recycling system based on the regulations of EU member states. Contact RIKEN KEIKI to dispose of the gas monitor. - Page 33 Removing batteries See Section 4-1 "Preparation for start-up" and take out the batteries. Batteries Specifications Type Dry battery Alkaline dry battery Rechargeable battery Nickel metal hydride battery NOTE The gas monitor contains batteries. Crossed-out recycle dustbin mark This symbol mark is indicated on the products which contain the batteries which fall under EU Battery Directive 2006/66/EC.
-
Page 34: Troubleshooting
AIR FAIL are taken, please contact RIKEN KEIKI. Span Span calibration Supply span adjustment gas with calibration gas with... -
Page 35: Product Specifications
Product Specifications <Disposal of Batteries> Detection Galvanic cell type Gas alarm Lamp blinking, intermittent buzzer principle display sounding, gas concentration display blinking, and vibration Gas to be detected *1 Gas alarm Self-latching (Non latching after reset) Concentration LCD digital display (seven-segment + activation display symbol) - Page 36 Operating 0 to 95%RH (Non-condensing) humidities Operating Atmospheric pressure (80kPa~110kPa) pressure Explosion-pro Intrinsically safe explosion-proof of structure structure Explosion-pro Ⅱ1GExiaⅡCT4/T3Ga,ⅠM1ExiaⅠMa of class *1 Authentications ATEX, IECEx Protection Compliant with IP67 class External Approx. 54 (W) x 67 (H) x 24 (D) mm dimensions (projection portions excluded) Weight...
Need help?
Do you have a question about the OX-03 and is the answer not in the manual?
Questions and answers