
Related Manuals for Riken Keiki RX-8500


Summary of Contents for Riken Keiki RX-8500
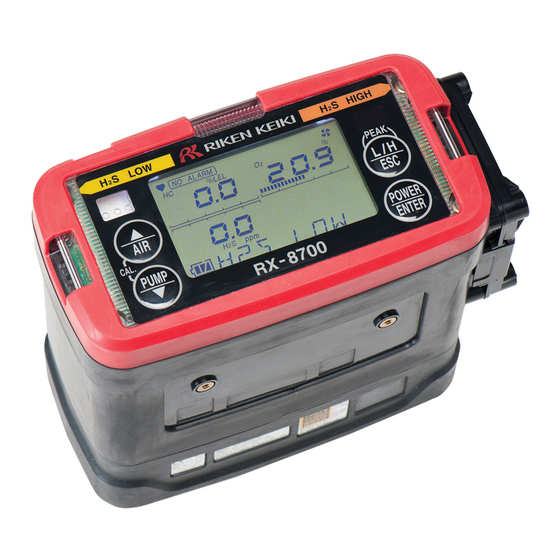
- Page 1 PT0E-1371 Portable Multi-Gas Monitor RX-8500/RX-8700 Data Logger Management Program SW-RX-8500/8700(EX) Operating Manual...
-
Page 2: Preface
1 Preface 1-1. Purpose and features of this program Preface The operation procedures and precautions mentioned in this operating manual apply only for the specified use of the program. We do not hold ourselves responsible for uses not described in this operating manual. This operating manual will not explain the basic common operations of Microsoft Windows 7, Windows 8 and Windows 10, such as selecting commands or setting dialog boxes. -
Page 3: Purpose And Features Of This Program
1-1. Purpose and features of this program 1-1. Purpose and features of this program This program is used to download data collected by the data logger function featured in RX-8500/8700 to a PC to use the data effectively. There are the following advantages in downloading data collected by the data logger function: •... -
Page 4: Table Of Contents
Download instrument information ..................16 Download various data ......................17 Complete download ......................18 Clear data in the RX-8500/8700 main unit ................19 Turn off the power of the RX-8500/8700 main unit ............19 Switch to automatic mode ....................20 3-2. Instrument Information screen ....................21 Data source type ........................22 Status information .........................22... - Page 5 About infrared communication ....................55 7-2. Display of communication ready status..................55 7-2-1. Task bar icon when the operating system recognizes RX-8500/8700 ......55 7-2-2. Task bar icon when communication between the data logger program and the RX-8500/8700 main unit is in progress ................56 File Structure..........................57...
-
Page 6: Installation And Uninstallation
2 Installation and Uninstallation 2-1. Precautions on operating environment Installation and Uninstallation 2-1. Precautions on operating environment This program can be used on Microsoft operating systems Windows 7, Windows 8 and Windows 10. Please note that it cannot be used on other operating systems. This program requires a maximum of 40 MB hard disk when it is installed. -
Page 7: Installation Procedure
2 Installation and Uninstallation 2-3. Installation procedure 2-3. Installation procedure ● Start the setup After inserting the CD-ROM or starting setup.exe, the following screen is displayed. program Click the Next button. ● Accept the The following screen is displayed. license agreement Click the Next button to continue the installation, or the Cancel button to abort the installation. - Page 8 2 Installation and Uninstallation 2-3. Installation procedure ● Customer Click the Next button to display the following screen. Information Click the Next button. ● Destination Folder Click the Next button.
- Page 9 2 Installation and Uninstallation 2-3. Installation procedure ● Start setup Click the Next button to start installation. ● Complete When the setup process is completed, the following screen is displayed. The program can be used immediately after setup.
- Page 10 2 Installation and Uninstallation 2-3. Installation procedure CAUTION Save past data for reinstallation Please note the following when reinstalling the software: Uninstall the software before reinstallation. If the software is uninstalled after some operation, some files will remain on the PC. Of these files, RX8500_8600_8700.mdb is a database file.
-
Page 11: Uninstallation
2 Installation and Uninstallation 2-4. Uninstallation 2-4. Uninstallation ● Startup To uninstall the software, from the Start menu of the Windows bar, click Settings and then start Control Panel. Control Panel (example) Start this. From the Control Panel, double-click Programs and Features to start. - Page 12 Start uninstallation with this button. ● Start deletion Select RX-8500/8600/8700 and click the Uninstall button. Click Yes to start the uninstallation. CAUTION: A message, "Do you want to remove the shared file?" might be displayed during uninstallation. Select No to All. Selecting Yes to All might affect other applications.
-
Page 13: How To Operate
3 How to Operate 3-1. Download screen How to Operate Double-click the RX-8500/8700 desktop shortcut, or click the Start Menu, select Programs and click the RX-8500/8700 program icon. 3-1. Download screen After the splash screen, the download screen is displayed. - Page 14 3-1. Download screen To perform data communication, place the RX-8500/8700 main unit to an appropriate position, and with the program activated, turn on the power of the main unit. The program automatically judges whether or not communication is possible. If possible,...
-
Page 15: Download Data From Rx-8500/8700
Turn on the RX-8500/8700 main unit. CAUTION: Make sure to turn on the power of RX-8500/8700 after placing it to a position capable of communication. Communication will not be established when it is placed at a position capable of communication with the power turned on. -
Page 16: Download Instrument Information
When the Instrument Information data is downloaded, the content of the Instrument Information area is updated and are enabled. the Download Logger Data and Clear Logger Data buttons The content is updated to show the status of the RX-8500/8700 main unit. The Download Logger Data and Clear Logger Data buttons are enabled. -
Page 17: Download Various Data
3 How to Operate 3-1. Download screen (3) Download various data ● Trend data After the instrument information data is downloaded using the Instrument Information button, ● Event data is enabled. Download Logger Data button Click the button. Download Logger Data Click The download status is displayed in the information area. -
Page 18: Complete Download
3 How to Operate 3-1. Download screen (4) Complete download ● Complete The Complete Download button downloads Instrument Information, Interval Trend, Alarm Trend, download Alarm Events, Trouble Events and Power Events data at once. Click the Complete Download button. Click The download status is displayed in the information area. -
Page 19: Clear Data In The Rx-8500/8700 Main Unit
(6) Turn off the power of the RX-8500/8700 main unit ● Power OFF Use the Power Off button to turn off the power of the RX-8500/8700 main unit and initialize the serial port of the PC. Click the Power Off button. -
Page 20: Switch To Automatic Mode
Click Yes to switch to Automatic Download. Click No to cancel mode change. In this mode, after the RX-8500/8700 main unit is powered on, the PC automatically downloads ● Automatic Data complete data and then turns off the power of the RX-8500/8700 main unit. -
Page 21: Instrument Information Screen
3-2. Instrument Information screen Click the Instrument Information button at the right side of the screen to switch to the following screen. This screen lists instrument information data for the currently connected RX-8500/8700 main unit. (1) Data source type (2) Status information... -
Page 22: Data Source Type
3 How to Operate 3-2. Instrument Information screen (1) Data source type ● Data source When the information of the multi-gas monitor main unit is displayed, the text Connected is displayed. information (2) Status information ● Information details Serial No, Station ID and User ID stored inside the main unit are displayed. CAUTION: This column is read-only. -
Page 23: Calibration History Information
3 How to Operate 3-2. Instrument Information screen (3) Calibration history information ● Calibration history details Contents: : Measured gas name (unit) Calib.Date : Date of last calibration Before : Concentration before last calibration After : Concentration after last calibration/calibration failure A.Cal. -
Page 24: Data Screen
3 How to Operate 3-3. Data screen 3-3. Data screen Click the Data button at the right side of the screen to switch to the following screen and view the list of downloaded data. The data inside the folder is listed. (1) Delete data Click this button (1) Delete data... -
Page 25: Delete Data
3 How to Operate 3-3. Data screen (1) Delete data ● Delete Click to select the data or folder to delete. Right-click there (without moving the mouse). Click The Delete menu is displayed. Click Delete. ● Input password The Password dialog is prompted. Enter the password and press the Continue button. CAUTION: When Continue is pressed without entering the password, the delete operation is canceled. -
Page 26: Summary Pane
Interval trend Name : Data name Sampling Date/Time : Start and end of sampling date/time Serial No./Station ID/User ID : Status of the RX-8500/8700 main unit Data Count : Number of sampled data Interval Time (sec) : Sampling interval (sec) - Page 27 Alarm trend Name : Data name Alarm Date/Time : Date/time when the alarm is occurred Serial No./Station ID/User ID : Status of the RX-8500/8700 main unit Data Count : Number of sampled data Interval Time (sec) : Sampling interval Gas(FullScale)
- Page 28 : Date and time when the event occurred : Naturally occurring or produced gas Event : Event type Trouble events DateTime : Date and time when the event occurred Gas/Body : Naturally occurring or produced gas, or the RX-8500/8700 main unit (Body) Event : Event type...
-
Page 29: Data View Screen
3 How to Operate 3-4. Data View screen 3-4. Data View screen This screen displays the details of each data in a table or a graph. (1) Switch between table and graph views (2) Output to a printer (3) Save to a file (4) To view data summary simultaneously □... - Page 30 3 How to Operate 3-4. Data View screen In case of WARNING, ALARM, OVER The separate screen displayed in case of WARNING, ALARM, OVER. Click the Return button to turn off the screen. * In the table for the Alarm Trend data, the data where the alarm occurred is painted in red.
-
Page 31: Switch Between Table And Graph Views
3 How to Operate 3-4. Data View screen (1) Switch between table and graph views ● Switch to graph From the Table and Graph radio buttons at the top left of the screen, select Graph. view Check graph Use checkboxes and a combo box at the bottom of the screen to perform various operations on the view. - Page 32 3 How to Operate 3-4. Data View screen CAUTION: A graph is not displayed unless there are five or more normal concentration data. Data that contains only events cannot be drawn as a graph, because no concentration data is included. Among the event data, when the mouse cursor is pointed to WARNING, ALARM or OVER, the cursor changes to the following.
-
Page 33: Output To A Printer
3 How to Operate 3-4. Data View screen (2) Output to a printer ● Print The content currently displayed on the Data View screen can be output to a printer. Click the Print button on the screen. Click Print The Printer List screen is displayed. Select the printer to use and click the OK button. Click the OK button to start the printout. - Page 34 3 How to Operate 3-4. Data View screen Printout example (graph printout) Printout example (table printout) Printout example (calibration history) Printout example (alarm events)
- Page 35 3 How to Operate 3-4. Data View screen Printout example (trouble events) Printout example (snapshot) Notes on printer settings (1) Detailed printer settings depend on the printer used. Please see the operation manual of the printer. (2) This program does not support Print Area setting. Therefore, usage such as printing only part of the selected data is not possible.
-
Page 36: Printing Calibration Report
3 How to Operate 3-4. Data View screen (3) Printing CALIBRATION REPORT The instrument is capable of viewing or printing CALIBRATION REPORT for a passed calibration. ● CALIBRATION REPORT CAUTION: Can not print CALIBRATION REPORT, if the calibration is not performed successfully. - Page 37 3 How to Operate 3-4. Data View screen ●CALIBRATION 1. To open “Report” menu, right-click on the calibration history that you would like to print. REPORT window ① Right-click on the calibration history that you would like to print as CALIBRATION REPORT. ②...
- Page 38 3 How to Operate 3-4. Data View screen 2. Clicking “Report” menu opens CALIBRATION REPORT window. You can enter some information at this page. CAUTION: The information you can enter is ; ・LABORATORY NAME ・LABORATORY ADDRESS ・STANDARD OR REGULATION USED ・TRACEABILITY ・ENVIRONMENTAL CONDITIONS ・OBSERVATIONS...
-
Page 39: Save To A File
3 How to Operate 3-4. Data View screen (4) Save to a file ● Save Click the Save button on the screen. Specify the location and the file name, and click the Save button to store the data. Click the Cancel button to cancel the save operation. CAUTION: When a table is displayed, the content of the table is saved in the Excel CSV format. -
Page 40: To View Data Summary Simultaneously
3 How to Operate 3-4. Data View screen (5) To view data summary simultaneously ● Summary view Click the Summary button on the screen. Click The summary is displayed. When the Summary button is clicked, the summary view is cleared. -
Page 41: Table Details
3 How to Operate 3-4. Data View screen (6) Table details ● Event color The cells that display gas concentration are painted according to the event occurred at that time. The cells are identified by background color. FAIL : Gray Fault WARNING : Orange... -
Page 42: Graph Details
3 How to Operate 3-4. Data View screen (7) Graph details ● Cursor Click the Cursor checkbox to display a cursor on the graph. Cursor Time Gas concentration Check Use the left and right keys to move the cursor left and right, and the up and down keys to move the time and concentration views up and down. -
Page 43: Last Calibration Screen
3 How to Operate 3-5. Last Calibration screen 3-5. Last Calibration screen The expiration dates of the data downloaded in the past can be checked. (1) Change displayed contents (2) Output to a printer (3) Delete data (4) Change password Click this button CAUTION: This table is read-only. -
Page 44: Change Displayed Contents
Click the Calibration Date radio button. ● List view Data for the RX-8500/8700 main units connected in the past is listed. (Of the data with the same serial number, User ID and Station ID, the newest data is displayed.) Click the Calibration Record radio button. -
Page 45: Output To A Printer
3 How to Operate 3-5. Last Calibration screen (2) Output to a printer ● Print The last calibration date of each unit can be printed out using Need Calibration or Calibration Date. The Printer List screen is displayed. Select the printer to use and click the OK button. -
Page 46: Delete Data
3 How to Operate 3-5. Last Calibration screen (3) Delete data ● Delete Move the mouse to the data that needs to be deleted, and right-click the data. Click CAUTION: Deletion of data is available only in Need Calibration and Calibration Date views. It is not available in the Calibration Record view. -
Page 47: Change Password
3 How to Operate 3-5. Last Calibration screen (4) Change password ● Input password Display the Password dialog in the same way as deleting the data, and click Change Password. Enter an appropriate password and click the Current password button. The following message is displayed. -
Page 48: Set Screen
(2) Set time Click this button (3) Send updates to the RX-8500/8700 main unit CAUTION: The data specified and/or changed must be sent to the RX-8500/8700 main unit using the Update button. CAUTION: The font setting is applied on the next startup. -
Page 49: Change Font And Graph Colors
3 How to Operate 3-6. Set screen (1) Change font and graph colors ● Change the font Click the area that displays the font. Click The font setting dialog is displayed. Specify an appropriate font. CAUTION: When an extremely large font is used, the screen might be hard to view. This change will be effective on the next startup. -
Page 50: Change Status Of The Main Unit
Up to 16 characters of alphabets, numerics, spaces, hyphens and asterisks can be entered. * In the RX-8500/8700 main unit, only the first eight characters are displayed. We recommend to use up to eight characters of only upper-case alphabets and/or numerics. -
Page 51: Send Updates To The Rx-8500/8700 Main Unit
Interval Trend Time (Sec) and Station ID (16 Characters) can be selected and changed from the list. The Date/Time Set button can be used to align the internal clock of the RX-8500/8700 main unit (RX-8500/8700 Date/Time) to the set time of the PC (PC Date/Time). -
Page 52: Data Maintenance
To prepare for such unexpected events, a periodical backup of the data is recommended. 4-1. Details of data storage structure Data is stored in the folder specified by "Start in" in the Properties tab of the shortcut created at installation. File name: RX-8500/8700.mdb File type: Microsoft Jet 3.6 database file File name:... -
Page 53: Operating Precautions
Operating Precautions When using the program, take sufficient considerations on the following points: (1) When downloading data, check that RX-8500/8700 is placed at an appropriate position. If the position is not appropriate, download cannot be performed properly. (2) When downloading, avoid similar operations using another application. (For example, performing IR communication during data download) (3) Do not kill the program (for example, by using Ctrl + Alt + Del). -
Page 54: Troubleshooting
Do not move the unit during communication. moved during communication. Something is wrong in the There is a scattered light outside. Eliminate the device that uses IR. communication data. If an error still persists despite the above actions, please contact RIKEN KEIKI. -
Page 55: Irda Specifications
CAUTION: The displayed content might differ depending on the operating system and IrDA driver settings. 7-2-1. Task bar icon when the operating system recognizes RX-8500/8700 IrDA symbol The IrDA symbol is displayed, and when the cursor is pointed over the symbol, the message "RX-8500/8700 is in range" is displayed. -
Page 56: Task Bar Icon When Communication Between The Data Logger Program And The Rx-8500/8700 Main Unit Is In Progress
38400 bps. CAUTION: Due to overhead in internal process of the RX-8500/8700 main unit and/or the data logger program, there is little difference in overall communication time if the communication rate is 38400 bps or above. This is because a relatively long time is required to create data within the RX-8500/8700 main unit and to analyze the downloaded data by the data logger program. -
Page 57: File Structure
File Structure This chapter explains the details about file contents at installation and during operation. 8-1. Current directory immediately after installation File name Details RX8500_8600_8700.exe RX-8500/8700 main unit RkIrDA11.ocx Infrared communication component RKComm.ocx Serial communication component Filemove.avi Animation file that shows that data download is in progress 8-2. -
Page 58: Software Specifications
9 Software Specifications Software Specifications Name of product RX-8500/8700 Data Logger Management Program (name of program) Model SW-RX-8500/8700(EX) Executable file name RX8500_8600_8700.EXE Supported OS Microsoft Windows 7 Windows 8 Windows 10 Program capacity Main program: Approx. 3 MB/Library: Approx. 5.2 MB...
Need help?
Do you have a question about the RX-8500 and is the answer not in the manual?
Questions and answers