
Related Manuals for WhisperKool Platinum Split Version 4


Summary of Contents for WhisperKool Platinum Split Version 4
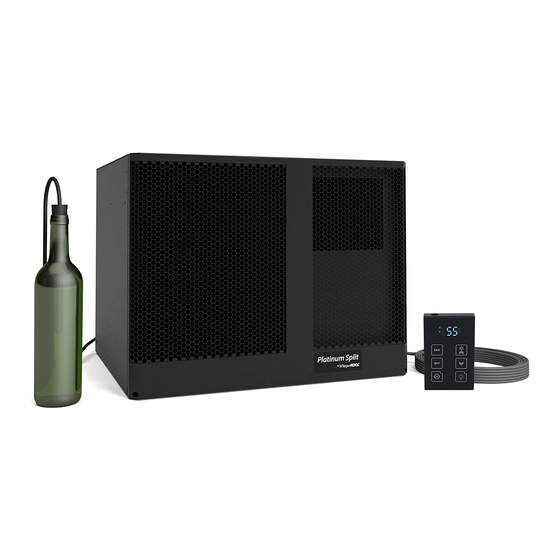
- Page 1 PLATINUM SPLIT VERSION 4 TECHNICIAN’S MANUAL The Coolest Thing In Wine Storage...
- Page 2 WhisperKOOL. Every effort has been made to ensure that the information in this manual is accurate. WhisperKOOL is not responsible for printing or clerical errors.
-
Page 3: Table Of Contents
WhisperKOOL Troubleshooting Guide ........ -
Page 4: Introduction
INTRODUCTION Customer Service Thank you for purchasing a WhisperKOOL cooling system. We strive to provide the highest-quality products and the best possible customer service. If you have any questions about your system, please call us at 1-800-343-9463 or visit WhisperKOOL.com. -
Page 5: Quick Start Guide
WhisperKOOL units utilize a solenoid valve on the liquid line and a low-pressure switch on the suction line. When the thermostat calls for cooling, the solenoid valve opens, permitting the flow of refrigerant. The low-pressure switch then signals the compressor to cycle on. -
Page 6: Before You Start
7. WhisperKOOL requires that all split systems be installed by a certified HVAC-R technician only. NATE or equivalent is recommended. If you encounter a problem with your WhisperKOOL system, please refer to the Troubleshooting Guide. If you have any further questions or concerns, or need assistance, please contact WhisperKOOL’s Customer Service at 1-800-343-9463. Please be sure all testing has been completed prior to contacting Customer Service. -
Page 7: Receiving & Inspecting The System
Allow the condensing unit to sit for 24 hours prior to start-up. The condensing unit can be placed in the installation location, piped, and evacuated during this time. NOTE: WhisperKOOL units are manufactured in the USA and tested prior to shipment. •... -
Page 8: Quick Reference Guide
QUICK REFERENCE GUIDE Front / Side View Evaporator unit Filter grille Rear / Side View Mounting keyholes (4) R E A R V I E W THROUGH THE WALL Option 1 Knockout for wiring Line set knockout Knockout for drain line INSIDE CELLAR Option 2 Knockout for drain line... -
Page 9: 4000 Wall-Mounted Unit Specifications
Can maintain a 55°F temperature differential with up to 110°F condenser air intake temperature Warranty Two-year limited warranty (parts and labor) *Each cellar is unique and has specific cooling requirements. Heat load calculations should always be performed prior to selecting a cooling unit. www.whisperkool.com | Page 7... -
Page 10: 4000 Fully Ducted Unit Specifications
FULLY DUCTED UNIT SPECIFICATIONS Supply air Return air Duct plenum 4000 Evaporator 4000 Condenser Model (Fan Coil Unit) (Air-Cooled Condensing Unit) Cellar Size Approx. 1000 cu. ft., provided cellar is fully insulated and sealed with proper vapor barrier* BTU/h w/85°F air 3120 entering condenser coil Dimensions... -
Page 11: 8000 Wall-Mounted Unit Specifications
Can maintain a 55°F temperature differential with up to 110°F condenser air intake temperature Warranty Two-year limited warranty (parts and labor) *Each cellar is unique and has specific cooling requirements. Heat load calculations should always be performed prior to selecting a cooling unit. www.whisperkool.com | Page 9... -
Page 12: 8000 Fully Ducted Unit Specifications
FULLY DUCTED UNIT SPECIFICATIONS Supply air Return air Duct plenum 8000 Evaporator 8000 Condenser Model (Fan Coil Unit) (Air-Cooled Condensing Unit) Cellar Size Approx. 1750 cu. ft., provided cellar is fully insulated and sealed with proper vapor barrier* BTU/h w/85°F air 3788 entering condenser coil Dimensions... - Page 13 NOTE: Cool temp may indicate liquid in the compressor. Voltage and Amp Draw A. Measure voltage to compressor and amp draw. Condensation Drain Test A. Pour water into the drain pan to assure it drains properly. www.whisperkool.com | Page 11...
-
Page 14: Items To Route Before Installing The Evaporator Unit
ITEMS TO ROUTE BEFORE INSTALLING THE EVAPORATOR UNIT Route the line set from the condensing unit to the desired evaporator unit installation location. Route the display cable from the desired location to the evaporator installation location (see page 20 for more display information). -
Page 15: Preparing The Wall-Mounted Evaporator Unit
Line set and drain line. Remove the insulation from the knockout holes. Drain line For ease of installation, remove the nine (9) screws securing the top and remove the top. Bottle probe connector routing location www.whisperkool.com | Page 13... -
Page 16: Installing The Wall-Mounted Evaporator Unit
INSTALLING THE WALL-MOUNTED EVAPORATOR UNIT Refer to the Wall-Mounted Evaporator Unit Installation Template for more information about mounting the wall-mounted evaporator unit. 1. Locate two (2) wall studs in the desired mounting location spaced 16” on center. 2. Mark vertical lines on each stud 16” apart. 3. - Page 17 18. Install the supplied black strain relief to secure the power supply wires in the housing. 19. Connect the display cable labeled “UNIT” to the wire labeled “UNIT” located in the bottom of the evaporator compartment. Figure 1 46375 www.whisperkool.com | Page 15...
-
Page 18: Preparing The Fully Ducted Evaporator Unit
PREPARING THE FULLY DUCTED EVAPORATOR UNIT Remove the knockouts that you will be using Power to route the line set, power wires, display cable, bottle probe, and drain line. Remove the insulation from the knockout holes. For ease of installation, remove the nine (9) Line set screws securing the top and remove the top. -
Page 19: Installing The Fully Ducted Evaporator Unit
8. Remove the wire nuts from the black, white, and green wires supplied three-inch pieces of cork tape. (For best results, install the cork tape inside of the unit.) located in the lower left corner of the evaporator unit. Figure 1 46375 www.whisperkool.com | Page 17... -
Page 20: Drain Line
DRAIN LINE Condensation Drain Line (not provided, but required) The condensation drain line tube moves excess condensation from the evaporator unit to a proper discharge location. It is important for the drain line tube to be properly connected in order to prevent leakage and other problems associ- ated with excess condensation. -
Page 21: Liquid-Measuring Thermostat (Bottle Probe)
Platinum Split LIQUID-MEASURING THERMOSTAT SYSTEM (BOTTLE PROBE) WhisperKOOL cooling units come with a liquid-temperature-measuring thermostat. The self-calibrating probe con- tains a sensor chip, which communicates back and forth with the thermostat. This results in a consistent temperature setting and accuracy. Wine should be kept at a very precise, controlled temperature and humidity. By measuring the liquid temperature rather than air, the unit will operate 75–80% of the time. -
Page 22: Remote Display Installation
REMOTE DISPLAY: INSTALLATION AND CONFIGURATION Tools needed: 5/16” drill bit, 3/16” drill bit, drywall saw, level, pencil What’s included: Display panel, wall mount bracket, flush mount bracket, flush mount template °F Display panel Wall mount bracket Flush mount bracket Flush mount template WALL MOUNT BRACKET INSTALLATION 1. - Page 23 3. Place bracket against wall, aligning screw holes with drywall anchors. Insert the four supplied Phillips-head screws into the drywall anchors. Tighten the screws to secure the bracket to the wall. www.whisperkool.com | Page 21...
- Page 24 WALL MOUNT BRACKET INSTALLATION, CONTINUED NOTE: Before you continue to Step 4, locate the area where the display will be mounted. You may route the display wire into the housing one of three ways: either through the wall or through one of the holes on the top or bottom edges of the wall mount bracket.
- Page 25 The vibration isolator needs to be pushed up against the outer lip on the top of the risers. Each vibration isolator should be spaced about 17.5” apart. Center the evaporator unit on the vibration isolators. www.whisperkool.com | Page 23 51”...
- Page 26 FLUSH MOUNT BRACKET INSTALLATION, CONTINUED 5. Remove the backing from the double-sided tape on the flush mount bracket. 6. Align magnets with previously drilled holes. Make sure the cut-out portion of the bracket (circled below) is on the bottom. Press the bracket firmly against the wall. WALL HOLE CUTOUT...
- Page 27 8. Place the display on the flush mount bracket as shown, attaching the back of the display panel to the magnets on the mounting bracket. Make sure that the alignment tab on the back of the display panel sits in the notch on the bot- tom of the bracket. WALL www.whisperkool.com | Page 25...
-
Page 28: Platinum Split Evaporator
PLATINUM SPLIT EVAPORATOR WIRING DIAGRAM BLUE BLACK 115V LINE WHITE 115V NEUTRAL GREEN GROUND GREEN GREEN BLACK WHITE WHITE FV-30VQ3 WHITE 021319 Page 26 | 1-800-343-9463... -
Page 29: 4000/8000 Condensing Unit
Platinum Split 4000/8000 CONDENSING UNIT WIRING DIAGRAM www.whisperkool.com | Page 27... -
Page 30: Copeland Cold Weather Start Kit
COPELAND COLD WEATHER START KIT WIRING DIAGRAM For systems manufactured after October 31, 2018 Black Black COPELAND CWSK HEATER 021319 Page 28 | 1-800-343-9463... -
Page 31: Preparing The Condensing Unit
Provide a weatherproof disconnect for the condensing unit if it is located outside. Power surges and spikes can damage sensitive electrical equipment. WhisperKOOL recommends plugging the unit into a surge protector or power conditioner in order to protect your system. As outlined in our terms and conditions, power surges and spikes are not covered under warranty. -
Page 32: Installing The Condensing Unit
INSTALLING THE CONDENSING UNIT The condensing unit can be installed inside a well-ventilated area of the home, but is typically installed outside. Exterior applications will require the use of a protective housing. The amount of sun exposure should be considered when selecting the placement of the condensing unit .The 4000 condensing unit requires a dedicated 15-amp circuit (non-GFI). - Page 33 3. Leave the circuit breaker off until the unit is ready to charge. NOTE: Do not apply power to a system without refrigerant. Copeland Wiring Procedure Step # Use a ¼” nut driver to remove the screw securing the cover to the compressor electrical compartment. www.whisperkool.com | Page 31...
- Page 34 Copeland Wiring Procedure Step # Remove the cover to expose the internal wires. Copeland Wiring Procedure Step # Route the required 115V power wires into the open clamp on the enclosure. 021319 Page 32 | 1-800-343-9463...
- Page 35 Perform the following wire connections: • Insert the Line 115V wire into the “H” lever connector • Insert the Neutral 115V wire into the “N” lever connector • Insert the Ground wire into the “G” lever connector www.whisperkool.com | Page 33...
- Page 36 Copeland Wiring Procedure Step # Push wires back into enclosure. Copeland Wiring Procedure Step # Re-install cover. 021319 Page 34 | 1-800-343-9463...
-
Page 37: Line Set Piping Diagram
P-trap must be used on the suction line at the base of the vertical lift and an inverted P-trap must be used at the top of the vertical lift to ensure proper oil return for the compressor. www.whisperkool.com | Page 35... - Page 38 INSTALLING THE CONDENSING UNIT DO NOT BLOCK airflow through the exterior housing. This will restrict airflow and void the warranty. Refrigerant Piping Overview • Using the charts and illustrations found above, route the line set between the evaporator unit and condensing unit. Be sure to reference the chart for correct line set sizing.
- Page 39 • Confirm that the control is displaying the correct temperature and that no alarms are present. Refer to page 43 for corrective action if alarms are present. Charging Information A. Energize the solenoid valve on the evaporator unit by plugging the unit in and adjusting the thermostat to call for cooling. www.whisperkool.com | Page 37...
-
Page 40: Installing The Ducted Plenum
INSTALLING THE WALL MOUNT KIT 1. If removed, reinstall the top panel of the unit housing. 2. Connect the red wire from the display cable to the upper (+) terminal on the display located on the front grille. 3. Connect the black wire from the display cable to the lower (-) terminal on the display. NOTE: Display cable is packaged with the accessory kit, not with the evaporator. -
Page 41: System Operation
Anti-Frost Cycle will be initiated. This will shut down the compressor, allowing the evaporator fan to run and melt any frost accumulation on the coil. While the Anti-Frost Cycle is running, “dEF” will be displayed on the screen. www.whisperkool.com | Page 39... - Page 42 ° ° DISPLAY LAYOUT Alarm is present Compressor is on Fan is on Anti-Frost Cycle running °F Scroll Button Return to Previous Menu Change Setpoint View/Change Setpoint Scroll Button Enter User Menu Change Setpoint (hold for 3 sec) Unlock Button Power On/Off (hold for 1 sec) 021319...
-
Page 43: Controller Functions
This button confirms changes made to parameters such as the setpoint and returns you to the previous menu. LIGHT The light function is not in use. However, this button can still be used to unlock the display. www.whisperkool.com | Page 41... - Page 44 ICON GLOSSARY Icon Meaning SNOWFLAKE Blinking: The unit is calling for cooling, but must wait five minutes before restarting the com- pressor. This five-minute delay serves as an Anti-Short Cycle for the compressor’s protection. Constant: The unit is in cooling mode and the condensing unit is running. DRIPPING SNOWFLAKE The unit is undergoing an Anti-Frost Cycle.
- Page 45 Platinum Split WHISPERKOOL CONTROLLER ALARM CODES Code Cause Solution The following alarm codes will be displayed on the screen along with the alarm icon. Bottle probe is not connected Attach bottle probe to circular connector Faulty bottle probe connection Locate faulty bottle probe connection by inspecting all wiring connections between the bottle probe and the circuit board.
- Page 46 USER MENU The User Menu is accessed by pressing and holding the SET button for 3 seconds. Use the UP and DOWN ARROW buttons to navigate to desired parameters. Press the SET button again to view these parameters. Press the UP and DOWN ARROW buttons to adjust a parameter.
- Page 47 High pressure trip lock-out alarm Module Failure Number of lock-outs For more information visit EmersonClimate.com/ElectronicUnitController Note: After 15 seconds of inactivity the controller will revert or call 1-888-367-9950 to the default display. www.whisperkool.com | Page 45...
- Page 48 Display Likely Causes Other Possible Causes Controller display remains • Unit power not properly applied - check for proper applied voltage • Power cable miswired – inspect cable, replace if blank after applying power • Power cable harness not plugged in properly or securely into the needed back of the controller –...
-
Page 49: Whisperkool Troubleshooting Guide
If so, contact your installing technician to assist with troubleshooting. System runs constantly Possible cause Solution Leaky door seal or poorly insulated cellar Fix leaky door seal and insulate cellar www.whisperkool.com | Page 47... - Page 50 Unit leaks water Possible cause Solution Evaporator unit is not level Evaporator unit should be level on the wall to prevent leaking Drain line clogged or kinked Check drain line to make sure water can flow freely Drain is clogged, preventing water from escaping Disconnect drain and clear it out, open access door and check drain for blockage Drain line does not have a downward slope...
-
Page 51: Maintenance Schedule
2. Check wiring connections and integrity of cords 3. Pour a 50/50 bleach solution into the drain line every spring *WhisperKOOL recommends filters with a mean efficiency reporting value (MERV) of 4 or better. Filters are not included with the unit. - Page 52 October 2006 AE5-1340 Care and Cleaning of Air Cooled Condensing Units Introduction Proper care is essential to assure good life of condensing Coil cleaning agents must not be allowed to drain into units. Dirty or damaged condensers will reduce the the condensate pan as this may cause damage.
-
Page 53: Bypass Test Procedure
Platinum Split BYPASS TEST PROCEDURE NOTE: If instructed by a WhisperKOOL representative, follow the directions below to test the cooling unit using the bypass plug provided in the accessory kit. 1. Disconnect power from the evaporator unit. 2. Loosen the two (2) screws on the front of the grille or duct plenum. -
Page 54: Technical Assistance & Accessories
TECHNICAL ASSISTANCE WhisperKOOL Customer Service is available Monday through Friday from 6:00 a.m. to 4:00 p.m. Pacific Standard Time. The appointed customer service representative will be able to assist you with your questions and warranty information more effectively if you provide them with the following: •... -
Page 55: Installation Terms And Conditions
WhisperKOOL warrants against defects in material and workmanship as follows: 1. LABOR — For a period of two (2) years commencing on the date of purchase, WhisperKOOL will, at its option and discretion, reimburse up to $250 to the End User for cost incurred for servicing, repairing, removing or installing warranty parts. - Page 56 6. Proof of purchase of the Product in the form of a bill of sale, receipted invoice or serial number, which is evidence that the Product is within the Limited Warranty Period, must be presented by the End User to WhisperKOOL in order to obtain limited warranty service.
- Page 57 WhisperKOOL Customer Service to arrange for replacement under the warranty guidelines. When a claim for warranty is submitted for a condenser skid, the End User must purchase a new condenser skid from WhisperKOOL at retail price. Upon installation of the new condenser skid by a certified HVAC/R Technician, the HVAC/R Technician must complete the Installation Checklist and End User must submit the Installation Checklist to WhisperKOOL Customer Service for approval.
- Page 58 County of San Joaquin, State of California, and all parties, WhisperKOOL, Purchaser and End User, hereby irrevocably submit to the personal jurisdiction of such courts for that purpose. No waiver by WhisperKOOL of any breach or default of the contract of sale (including these Terms and Conditions of Sale) concerning a Product will be deemed to be a waiver of any preceding or subsequent breach or default.
- Page 59 Model ______________________________________ Serial Number __________________________ Installed by __________________________________________ Date __________________________ www.whisperkool.com | Page 57...
- Page 60 WhisperKOOL 1738 E. Alpine Ave Stockton, CA 95205 1-800-343-9463 www.whisperkool.com...
Need help?
Do you have a question about the Platinum Split Version 4 and is the answer not in the manual?
Questions and answers