
Related Manuals for Nohrd WallBars


Summary of Contents for Nohrd WallBars
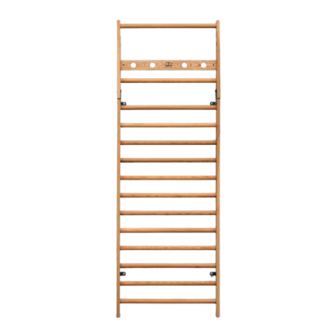
- Page 1 WallBars Aufbauanleitung Owner’s Manual...
-
Page 2: Table Of Contents
Inhalt Seite/n Contents Pages Produktdetails / Hinweise Product Details / General Information Sicherheitshinweise Safety Instructions Handhabung Handling Instructions Montagehinweise / Service General Assembly Information / Service Teileliste 10-11 List of Parts Aufbauanleitung 12-31 Assembly Instructions... - Page 3 Kraft- und Koordination Strength and Coordination Wichtige Hinweise: Important Notes: These wallbars are only safe to use when Das Gerät darf nur mit einer Wand- halterung verwendet werden. properly mounted to a solid stone, concrete Holz ist ein Naturmaterial und kann bei or solid wood wall.
-
Page 4: Sicherheitshinweise
Sicherheitshinweise: Bitte lesen und beachten Sie un- 4. Selbstständige Eingriffe oder Ma- bedingt die folgenden Hinweise nipulationen des Gerätes, können zu zur Handhabung, zum Umgang mit Beschädigungen oder Beeinträchti- dem Gerät, sowie zur Wartung des gungen in der Nutzung führen oder Gerätes. -
Page 5: Safety Instructions
Safety Instructions: Please carefully read the following 5. Wood is a natural material. The safety instructions for the correct use, fixation screws can leave a mark on handling and maintenance of your new the wood. Due to the pliability of the fitness equipment. -
Page 6: Handhabung
Handhabung: 6. Kinder sollten das Gerät niemals Bitte lesen Sie diese Handhabungs- ohne Beaufsichtigung einer erwach- hinweise sorgfältig durch! Die hier senen Person nutzen. Während des genannten Informationen helfen Trainings hat der Trainierende dafür Ihnen, das Gerät richtig zu verwen- zu sorgen, dass keine andere Perso- den und zu warten. -
Page 7: Handling Instructions
(mainly children) interfere or reach into moving parts of the equipment. 1. Do not use the wallbars before fully Moving cables, bungees or other parts assembling, completely reading and can lead to severe physical injuries. - Page 8 Verpackungsmaterial sollte erst nach kompletter Montage und zu- Telefon 0 59 21 - 17 98 400 friedenstellender Inbetriebnahme des Gerätes fachgerecht entsorgt info@nohrd.de werden, da dieses eventuell als www.nohrd.de Transportverpackung für Rücksen- dungen dienen kann. Prüfen Sie die Vollständigkeit der Lieferung.
-
Page 9: General Assembly Information / Service
Use your smart phone to scan the QR code on the first page of this manual (if available) to watch the assembly video. Assemble the wallbars by carefully following the steps in this manual. Double-check all fixtures after having completed the assembly. -
Page 11: Teileliste List Of Parts
/ List of Parts Teileliste abweichend von der Zeichnung links: für 14er Wallbars mit 14 Sprossen Varies from displayed pieces on left for WallBars with 14 bars. Pos. Einzelteile Menge Pos. Parts Amount Wange (links/rechts) für 10er Wallbars Side plank Wange (links/rechts) für 14er Wallbars... - Page 12 U (4x) G (4x)
- Page 13 Schritt 1 Legen Sie die linke Seitenwange (A) mit der Rückseite nach oben auf den Boden und führen Sie 4 x Sprossen (U) ein. Achten Sie dabei darauf, dass das Bohrloch nach oben zeigt. Fixieren Sie die 4 Sprossen (U) mit dem 4mm Inbus-Schlüssel (T) und mit 4 x 50 mm Schrauben (G).
- Page 14 10 Sprossen: U (4x) 14 Sprossen: U (8x) 10 rungs: U (4x) 14 rungs: U (8x) 10 Sprossen: H (4x) 14 Sprossen: H (8x) 10 rungs: H (4x) 14 rungs: H (8x)
- Page 15 Verwenden Sie nun die langen 70 mm Befestigungsschrauben (H). Step 2 Insert the next rungs (U) into the side plank (A). Use the 4 rungs for the 10-bar WallBars and 8 rungs for 14-bar WallBars Use the long bolts (H) to fix the rungs to the side planks.
- Page 16 50 mm...
- Page 17 Schritt 3 Führen Sie nun die letzte Sprosse (U) in die Wange (A) ein. Fixieren Sie diese wieder mit der kurzen 50 mm Befestigungsschraube (G). Step 3 Now insert the last rung (U) into the side plank (A). Fasten this rung with a short bolt (G).
- Page 18 10 Sprossen: G (5x) 10 Sprossen: H (4x) 14 Sprossen: G (5x) 14 Sprossen: H (8x) 10 rungs: G (5x) 10 rungs: H (4x) 14 rungs: G (5x) 14 rungs: H (8x)
- Page 19 ACHTUNG: Die unteren vier Sprossen und die oberste Sprosse werden mit den kurzen 50 mm Befestigungsschrauben (G) montiert. Step 4 Stand the WallBars up on its side. Insert the second side plank (A) into the dowels. Tighten the rungs with the bolts (G) and (H).
- Page 20 ✔...
- Page 21 Schritt 5 Setzen Sie nun den Ausleger wie abgebildet zusammen. In die dafür vorgesehenen Löcher am Querholm (B) werden die beiden metallenen Quergewindebolzen (J) eingesteckt (diese sind bereits vormontiert). Danach befestigen Sie den Querholm (B) an den beiden Kippholmen (V) mit den 60 mm Schrauben (I).
- Page 22 O (4x) N (4x)
- Page 23 Wiederholen Sie den Vorgang für die gegenüberliegende Seite. Step 6 Position the assembled fold-out bar under the wallbars. Fasten the metal plate (P) and the short wall bracket (F) to the side plank (A) by using 4x pan head screws (N) and 4x round nuts (O). Use the second allen key (S) to fasten the screws tight.
- Page 24 ✔...
- Page 25 Schritt 7 Entfernen Sie zuerst die beiden eingesetzten Flachkopfschrauben und Rundmuttern mit den 5er Inbus-Schlüsseln (S). Setzen Sie nun die lange Wandhalterung (E) ein und verschrauben Sie diese wieder mit den in Schritt 7 entfernten Flachkopfschrauben und Rundmuttern. Step 7 First unscrew the two pan head screws and round nuts.
- Page 26 4 x (2 x oben, 2 x unten) 4 x (2 x top, 2 x bottom) 10 mm Bohrloch 10 mm drill hole...
- Page 27 We recommend consulting a construction professional if you have any queries in this respect. Hold the wallbars against the wall and mark the position of the drill holes. Drill the holes for the fixation with a 10 mm drill. Insert the screw anchors.
- Page 30 Das Seil am Ende verknoten. Make a knot at the end. ✔ 10.1 10.2 Das Seil muss straff gespannt sein. The cord must be tight.
- Page 31 Schritt 10 Führen Sie das Sicherungsseil durch den Kippholm (V) und machen Sie einen festen Knoten am Ende des Seils. Stellen Sie sicher, dass die Seilstopper an der Rückseite der Wangen (A) am Loch anschlagen. Sollte dies nicht der Fall sein, lösen Sie die Seilstopper und bringen Sie diese in Position.
- Page 32 Verfügbares Zubehör / WallBars Accessories Preise im Online-Shop ersichtlich: www.nohrd.de Please order online. Prices available in the online shop: www.nohrd.com Multi-Adapter Schrägbank Multi-Adapter Exercise bench 21,5 cm Wallbars Verlängerung 21,5 cm Wallbars extension Ausleger-Arretierung Fold-out bar fixation bracket Combi-Trainer Combi-Trainer WaterRower GmbH ·...
Need help?
Do you have a question about the WallBars and is the answer not in the manual?
Questions and answers