Table of Contents
Advertisement
La Marche Manufacturing Company | www.lamarchemfg.com
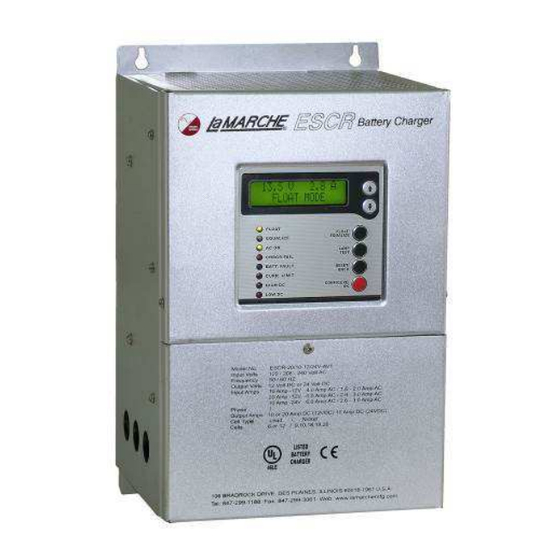
ESCR
Engine Starting Battery Charger
106 Bradrock Dr. Des Plaines 60018-1967
Tel: 847 299 1188
Fax: 847 299 3061
Installation and Operation Manual
CPN 117485
Instruction Drawing Number: P25-LESCR-1
Page 1 of 29
Revision A13
Rev. Date: 05/19
ECN: 22205
Advertisement
Table of Contents
Troubleshooting

Related Manuals for La Marche ESCR Series


Summary of Contents for La Marche ESCR Series
- Page 1 La Marche Manufacturing Company | www.lamarchemfg.com ESCR Engine Starting Battery Charger Installation and Operation Manual 106 Bradrock Dr. Des Plaines 60018-1967 CPN 117485 Instruction Drawing Number: P25-LESCR-1 Page 1 of 29 Tel: 847 299 1188 Fax: 847 299 3061 Revision A13 Rev.
-
Page 2: Electrical Safety
Important Safety Instructions Before using this equipment read all manuals and other documents related to this unit and other equipment connected to this unit. Always have a copy of a unit’s manual on file nearby, in a safe place; if a replacement copy of a manual is needed it can be found at www.lamarchemfg.com. -
Page 3: Unit Location
Prior to unpacking the product, note any damage to the shipping container. Unpack the product and inspect the exterior of product for damage. If any damage is observed, contact the carrier immediately. Contact La Marche for advice on the risk due to any damage before installing the product. Verify that you have all the necessary parts per your order for proper assembly. -
Page 4: Table Of Contents
Table of Contents Important Safety Instructions ........................i Electrical Safety ............................i Mechanical Safety ............................i Battery Safety ............................i Unit Location ............................. ii Check for Damages ........................... ii Returns for Service ............................ ii Inspection Checklist ............................ii Handling ..............................ii Table of Contents ............................ -
Page 5: General Description
0.5% regulation, temperature compensation, battery check, equalize timer, along with adjustable output voltage and current limiting assures longevity and performance for your batteries. This economical solution equipped with advanced features incorporates La Marche quality and reliability. Understanding the Model Number The ESCR model number is coded to describe the charger and the options that are included. -
Page 6: Quick Start Guide
Quick Start Guide • Cell Type 6 Lead Acid (12VDC Mode) 12 Lead Acid (24VDC Mode) 16 Lead Acid (32VDC Mode) • Float Voltage 2.17 Volts per Cell • Equalize Voltage 2.33 Volts per Cell • Equalize Timer 8-hour Equalize Timer Manual Equalize Cycle •... -
Page 7: Configuration Mode Adjustment
Configuration Mode Adjustment Use the up/down arrows to browse the selections. The asterisk next to the selection denotes the selected mode. CONFIG/OK button is used as save or enter key and the RESET/BACK button is used as cancel or step back in the menu. Basic Output •... -
Page 8: Installation
Installation Mounting the ESCR Install the charger so that the flow of air through the ventilators is not obstructed. Table 1 - ESCR Weights and Dimensions Figure 1 - ESCR Mounting Dimensions for D98... - Page 9 Figure 2 - ESCR Mounting Dimensions for D99 Figure 3 - ESCR Mounting Dimensions for D100...
-
Page 10: Ac Input Connections
Electrical Connections AC Input DC Output Model Number Amps Volts Amps Volts 4.0 / 1.6-2.0 120 / 208-240 ESCR-20/10-12/24V-AV1 6.0 / 2.6-3.0 120 / 208-240 6.0 / 2.6-3.0 120 / 208-240 10 / 5.0-5.0 120 / 208-240 ESCR-40/20-12/24V-AV1 10 / 5.0-5.0 120 / 208-240 3.2 / 1.5-1.5 120 / 208-240... -
Page 11: Output Connections
1.2.2 Output Connections Before connecting the Battery and/or DC loads, it is recommended to apply AC power and set the configuration for the correct output. See section 2.3 for the configuration instructions. Once the configuration is set, remove AC power from the main feeder breaker to the charger. -
Page 12: Standard Alarms
1.2.4 Standard Alarms Various alarms are included as a standard feature of the ESCR. Only the following alarms include a set of form ‘C’ contacts: High DC Voltage, Low DC Voltage, Charger Failure, and AC Failure. Having contacts available enables the user to connect remote annunciators. - Page 13 Example for AC Fail Alarm Connections: A customer wants a Green Lamp to be illuminated while the AC power is on, and a Speaker to sound when the AC is lost. Using customer provided equipment, they could connect an external power supply, a speaker, and a green lamp.
-
Page 14: External Temperature Compensation (Option 11W/11Y)
1.2.5 External Temperature Compensation (Option 11W/11Y) The natural voltage of a battery changes as a function of temperature change. As the battery temperature rises, the effective voltage of the battery decreases. Without Temperature Compensation, the battery charger will always produce a set constant output voltage. - Page 15 Figure 11 - S2A-357 Figure 10 - S2A-349 20A ESCR Control Board Top View 40A ESCR Control Board Top View • When an external probe is to be used for temperature compensation, internal temperature compensation must be disabled on the ESCR control circuit board assembly. •...
-
Page 16: Operation
Operation Starting the ESCR All equipment is shipped from the factory fully tested and adjusted based on the factory settings listed below. Before connecting the battery, verify the recommended voltage settings with the battery manufacturer and adjust the output settings accordingly. Failure to match the charger settings with the connected battery may damage or shorten the life of the battery. -
Page 17: The Front Panel Display
The Front Panel Display After the ESCR has completed start up, the “AC ON” LED on the front panel and either the “FLOAT” or “EQUALIZE” LED on the front panel will be lit. The LCD will display the system DC output voltage and DC output current on line one. Line two of the LCD displays the status of ESCR. -
Page 18: Selecting The Charging Mode
Selecting the Charging Mode The ESCR has two different settings for DC output voltage, Float Mode and Equalize Mode. Float charging mode is used for all normal battery charging needs. In the case of the ESCR, the Float Mode can also be used for battery elimination (directly powering the DC load from the ESCR). - Page 19 – Allows selection for the length of the Equalize cycle (in hours) as well as when an Equalize 2.4.4 Equalize Timer cycle is initiated (manual/automatic). 1. Select EQUALIZE TIMER from configuration menu Select EQUALIZE HOURS Set the hours that the charger will be in the EQUALIZE mode. Select EQUALIZE MODE and set for MANUAL or one of the automatic modes: Manual: Equalize cycle is started manually...
-
Page 20: Escr Customer Configuration Menu Structure
2.4.8 Alarm Settings – Allows setting the alarm thresholds for the provided alarms and the alarm time delay 1. Select ALARM SETTING from the configuration menu. In the ALARM SETTING menu select ALARM DELAY Common Delay – Delay can be set from 1 second to 30 seconds. High DC Shutdown –... -
Page 21: Service
Service All work inside the ESCR should be performed by a qualified electrician. La Marche is not responsible for any damages caused by an unqualified technician. Before working inside the ESCR ensure that the AC Power is off at the main breaker box. Disconnect the battery from the charger via the battery disconnect breaker or manually disconnecting the battery cables. -
Page 22: Troubleshooting Procedure
Troubleshooting Procedure Troubleshooting should be performed only by trained service personnel or experienced electricians. Before setting up any complicated testing, give the unit a general inspection. Check the following: 1. Check DC output cables, connections, battery type, and number of cells against the unit’s rating. 2. -
Page 23: Troubleshooting Chart
Troubleshooting Chart Symptom Possible Cause Wrong AC Input Voltage Frequency Out of Range AC Fuse Open (High Input Current) Internal Wiring Failure Defective Component on Rectifier Assembly Internal Wiring Failure Incorrect Battery Connected DC Fuse Open Shorted Output Cables (High Output Current) Battery Cable Polarity Reversed Defective Component on Rectifier Assembly Internal Wiring Failure... -
Page 24: Appendix A: Escr Specifications
Appendix A: ESCR Specifications ELECTRICAL Auto Select 120/208-240 VAC ±10% / 120 VAC ±10% AC Input Frequency Range 50/60Hz 10, 20, 40 ADC @ 12, 24 VDC / 10, 20 ADC @ 32 VDC DC Output Less than 500mV RMS, with connected battery Output Filtering ±... -
Page 26: Appendix B: Manufacturer's Warranty
Should minor adjustments be required, the local La Marche sales representative should be contacted to provide this service only. All sales are final. Only standard La Marche units will be considered for return. A 25% restocking fee is charged when return is factory authorized. Special units are not returnable. -
Page 27: Appendix C: Document Control And Revision History
Appendix C: Document Control and Revision History Part Number: 117485 Instruction Number: P25-LESCR-1 Issue ECN: 18288 – 05/09 21940 – 10/18 22205 – 05/19 21638 – 11/17 21270 – 06/16 21189 - 06/16 20870-1 08/15 20554 – 11/14 20488 – 07/14 20409 –...
Need help?
Do you have a question about the ESCR Series and is the answer not in the manual?
Questions and answers