Table of Contents

Related Manuals for Autonics LSE-4A5R2


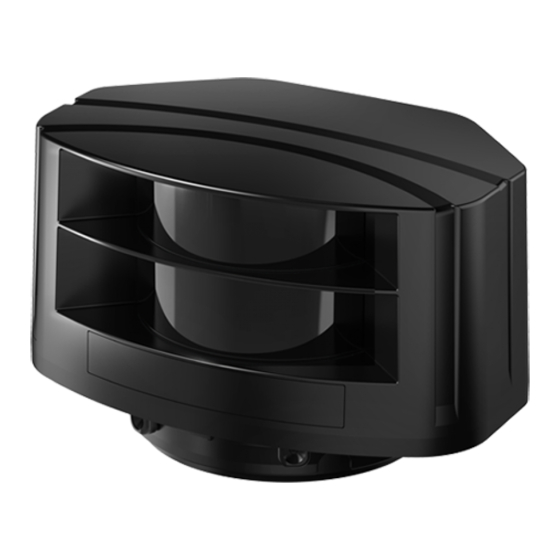
Summary of Contents for Autonics LSE-4A5R2
- Page 1 User Manual LIDAR Sensors LSE-4A5R2 Thank you for purchasing an Autonics product. This user manual contains information about the product and its proper use, and should be kept in a place where it will be easy to access. www.autonics.com...
- Page 2 © Copyright Reserved Autonics Co., Ltd.
-
Page 3: Preface
Preface Preface Thank you for purchasing an Autonics product. Please familiarize yourself with the information contained in the Safety Precautions section before using this product. This user manual contains information about the product and its proper use, and should be kept in a place where it will be easy to access. -
Page 4: User Manual Guide
(www.autonics.com) to download a copy. The manual's content may vary depending on changes to the product's software and other unforeseen developments within Autonics, and is subject to change without prior notice. Upgrade notice is provided through out homepage. ... -
Page 5: User Manual Symbols
Failure to follow instructions can result in serious injury or death. Failure to follow instructions can lead to a minor injury or product damage. An example of the concerned feature's use. ※1 Annotation mark. © Copyright Reserved Autonics Co., Ltd. -
Page 6: Safety Considerations
Do not apply high pressure to the laser scanner to clean it. The above specifications are subject to change and some models may be discontinued without notice. Be sure to follow cautions written in the instruction manual, user manual and the technical descriptions (catalog, homepage). © Copyright Reserved Autonics Co., Ltd. -
Page 7: Caution During Use
Set the wireless network (Wifi) to "Disable" in the network settings of the Windows operating system. This unit may be used in the following environments. ①Indoors/Outdoors (in the environment condition rated in 'Specifications') ②Altitude max. 2,000m ③Pollution degree 2 ④Installation category II © Copyright Reserved Autonics Co., Ltd. - Page 8 Caution during Use viii © Copyright Reserved Autonics Co., Ltd.
-
Page 9: Table Of Contents
Dimensions ....................15 Main unit ......................15 Bracket ....................... 16 Unit Description and Functions ............... 17 Laser scanner (LSE-4A5R2) ................17 4.1.1 Power, I/O cable ..................18 4.1.2 Ethernet cable .................... 18 4.1.3 LED indicator ....................19 Remote control (RMC-LS, sold separately) ............21 Control Input/Output ................. -
Page 10: Table Of Contents
8.6.9 Teaching ..................... 75 8.6.10 Setting initialization ..................76 8.6.11 TCP/IP Setting .................... 76 Changing Program Language ................77 8.7.1 Change Language ..................77 8.7.2 Modifying and Adding Languages .............. 78 Troubleshooting ..................79 © Copyright Reserved Autonics Co., Ltd. -
Page 11: Product Introduction
Easy parameter setting via the remote control Emitting property: CLASS1, wavelength band (905nm), max. pulse output power: 75W Small size (W125×H80.3×L88mm) for various installation environment Protection structure: IP67 (IEC standard) © Copyright Reserved Autonics Co., Ltd. -
Page 12: Components And Accessories
Components and accessories 1.2.1 Components Make sure all of the above components are included with your product package before use. If a component is missing or damaged, please contact Autonics or your distributor. 1.2.2 Sold separately Remote control (RMC-LS) The remote control is available to set parameters of laser scanner. -
Page 13: Specifications
Normal operation with max. 30% contamination of one material ※ 5 Ethernet Communication interface Life expectancy Max. 6.8years (60,000 hours) Insulation resistance Over 5MΩ (at 500VDC megger) Dielectric strength 500VAC 50/60Hz for 1 min. © Copyright Reserved Autonics Co., Ltd. - Page 14 ※6. Ambient temperature in power supplied status is -30 to 60℃ and in power cut status is -10 to 60℃. ※7. The weight includes packaging. The weight in parenthesis is for unit only. ※ The temperature or humidity mentioned in Environment indicates a non freezing or condensation. © Copyright Reserved Autonics Co., Ltd.
-
Page 15: Dimensions
3 Dimensions Dimensions Main unit (unit: mm) © Copyright Reserved Autonics Co., Ltd. -
Page 16: Bracket
3 Dimensions Bracket (unit: mm) © Copyright Reserved Autonics Co., Ltd. -
Page 17: Unit Description And Functions
(7) LED indicators ① Ethernet connection indicator (green) ② Power indicator (green) ③ Remote control operation indicator (green) ④ Operation indicator (red) ⑤ Error indicator (orange) ※For more operation, refer to ‘4.1.3 LED indicator’. © Copyright Reserved Autonics Co., Ltd. -
Page 18: Power, I/O Cable
※ The input/output signals can operate in both direction regardless of the polarity. ※ When the photocoupler input is not used, do not wire both end of input terminal, or supply power under 3VDC. 4.1.2 Ethernet cable The laser scanner communicates with atLidar. Pin no. Signal © Copyright Reserved Autonics Co., Ltd. -
Page 19: Led Indicator
(flashing in every every 1 sec 1 sec for 35 sec) for 35 sec) ◑ Output test ● ● mode (every 0.05 sec) ※' - ' means nothing to ‘ : ON, ●: OFF, ◑: Flash'. © Copyright Reserved Autonics Co., Ltd. - Page 20 : Flashing of error indicator besides voltage error and temperature error means occurrence of internal error. ※When error occurs, the power indicator (green) and the remote control operation indicator (green) turn OFF and the operation indicator (red) turns ON. © Copyright Reserved Autonics Co., Ltd.
-
Page 21: Remote Control (Rmc-Ls, Sold Separately)
Height of the monitoring Sets height of the monitoring zone or zone or concentrated concentrated monitoring zone monitoring zone Familiarizes with the space where the laser Teaching scanner will scan © Copyright Reserved Autonics Co., Ltd. - Page 22 4 Unit Description and Functions (3) Number key : Setting values can be input to each menu, using 0 to 9 number keys. © Copyright Reserved Autonics Co., Ltd.
-
Page 23: Control Input/Output
5 Control Input/Output Control Input/Output Circuit Diagram Photocoupler input 5.1.1 PhotoMOS relay output 5.1.2 © Copyright Reserved Autonics Co., Ltd. -
Page 24: Input / Output Status
※When OUT1, OUT2 ON output setting is N.O., it is closed. When it is N.C., it is open. When it is Pulse, it is closed. ※When power turns OFF, OUT1, OUT2 are closed. ※For 1 sec. right after supplying power, OUT1, OUT2 are closed. © Copyright Reserved Autonics Co., Ltd. -
Page 25: Installation
6 Installation Installation 1st Fix the bracket at the installation position using four allen wrench bolts (M4, min. 5mm). 2nd Pass the power, I/O and Ethernet cable through the holes in the bracket. © Copyright Reserved Autonics Co., Ltd. - Page 26 3rd Align the mark line of the body and one of the three mark lines of the bracket and turn the bracket clockwise to fix. Turn only within the adjustment range. 4th After setting the bracket rotation angle, fix the bracket and laser scanner with the screwdriver. © Copyright Reserved Autonics Co., Ltd.
- Page 27 If necessary, cut the A part and place the cable to be stable. ※When cutting the A part, be cautious of personal injury. © Copyright Reserved Autonics Co., Ltd.
- Page 28 6 Installation © Copyright Reserved Autonics Co., Ltd.
-
Page 29: Remote Control
Sensitivity level Minimum size of the scanning ● ● target ● ● Monitoring time ● ● Output ● ● Teaching ● Password ● Initialization (except password) ● IP initialization Setting value initialization ● (except IP) © Copyright Reserved Autonics Co., Ltd. -
Page 30: Function Setting And Checking Sv Via Remote Control
7 Remote control Function Setting and Checking SV via Remote Control 7.1.1 Function setting © Copyright Reserved Autonics Co., Ltd. -
Page 31: Checking Sv
7 Remote control 7.1.2 Checking SV After checking setting and press the key twice to return scanning mode. © Copyright Reserved Autonics Co., Ltd. -
Page 32: Functions
In case of left or right installation, setting value of monitoring zone width (W) and height (H) must be entered. In case of center installation, monitoring zone width (W), height (H) is not changeable. © Copyright Reserved Autonics Co., Ltd. - Page 33 7 Remote control [Platform screen door (PSD)] Bottom view, right installation Top view, left installation © Copyright Reserved Autonics Co., Ltd.
-
Page 34: Activated Channel (S)
3rd The remote control operation indicator and the operation indicator flash once. 4th The power indicator, the remote control operation indicator, the operation indicator, and the error indicator flash once. © Copyright Reserved Autonics Co., Ltd. -
Page 35: Monitoring Zone Width (W), Height (H)
When the set channel for width (W), height (H) is 0, 0 means all channels. Monitoring zone may be different by the reflectivity of obstacles. For the stable detection, the monitoring zone is set up to 6m. © Copyright Reserved Autonics Co., Ltd. -
Page 36: Concentrated Monitoring Zone
(0 to 3). When the set channel for width (W), height (H) is 0, 0 means all channels. In case of left or right sensor install position, the concentrated zone is available to set. © Copyright Reserved Autonics Co., Ltd. -
Page 37: Sensitivity Level
Factory default: Level 1 Setting method Checking SV method The remote control operation indicator and the operation indicator flash in the corresponding times of the set sensitivity level (1 to 4). © Copyright Reserved Autonics Co., Ltd. -
Page 38: Minimum Size Of The Scanning Target
Factory default: Approx. 5cm Setting method Checking SV method The remote control operation indicator and the operation indicator flash in the corresponding times of the set minimum size of the scanning target (0 to 4). © Copyright Reserved Autonics Co., Ltd. -
Page 39: Monitoring Time
Factory default: 100ms Setting method Checking SV method The remote control operation indicator and the operation indicator flash in the corresponding times of the set monitoring time (0 to 9). © Copyright Reserved Autonics Co., Ltd. -
Page 40: Output
(0 to 5). In case of OUT2 (error status output) as pulse, it repeats open-close operation for 1 sec at the normal operation and it closes at error status. © Copyright Reserved Autonics Co., Ltd. -
Page 41: Teaching
For re-install the unit teaching already at no teaching required area, initial the unit. Do not re-teaching it. Operate teaching in the environment free from snow, rain, fog, hail, or mutual interference of another laser scanner. © Copyright Reserved Autonics Co., Ltd. -
Page 42: Password
Please use the password function for preventing mutual interference of several units or malfunction. If any key is not entered for 1 sec after entering the key, the laser scanner is scanning mode. For function settings, Password is set, Password is not set, © Copyright Reserved Autonics Co., Ltd. -
Page 43: Factory Default Initialization
The laser scanner’s settings: sensor position, monitoring zone width (W), height (H), activated channel (s), etc. and IP, except password initializes as facotry default. Setting method 7.2.12 IP initialization The laser scanner’s IP address initializes as factory default. Setting method © Copyright Reserved Autonics Co., Ltd. - Page 44 7 Remote control © Copyright Reserved Autonics Co., Ltd.
-
Page 45: Laser Scanner Program [Atlidar]
8 Laser Scanner Program [atLidar] Laser Scanner Program [atLidar] Overview atLidar is laser scanner management program that can be used with laser scanner LSE-4A5R2. atLidar is the management program for laser scanner installation, parameter settings, status information and monitoring data, etc. -
Page 46: Features
Data files (*.lld) open at Data File of atLidar for graph printing and analysis. Data screen is saved as image files (*.bmp, *.wmf) at Lidar Viewer. (5) Multilingual Support Supports Korean, English. To add a different language, modify the files in the Lang folder rename, and save. © Copyright Reserved Autonics Co., Ltd. -
Page 47: Installing The Program
Resolution: 1024×768 or higher 8.3.2 Preparations 1st Download atLidar program at Autonics’ web page (www.autonics.com). 2nd Close all programs before you start atLidar installation. Double-click atLidar setup.exe to start installation. 3rd Installer Language window appears. Select the language and click OK button. - Page 48 Please click the “I Agree” button to agree the agreement and the installation is continued. 6th Choose Install Location window appears. Default installation path is as below. 32bit operation system: C:\Program Files\ Autonics\ atLidar 64bit operation system: C:\Program Files (x86)\Autonics\ atLidar Click Install button to choose the default path for installation.
- Page 49 7th Click Browse button to change the installation path. In the Browse Folder window, select the desired destination folder and then click OK to start installation. 8th Installation progress is displayed in the status window as follows. © Copyright Reserved Autonics Co., Ltd.
- Page 50 If the check box in the Installation Complete window is checked, atLidar runs upon completion of installation. You can now run atLidar by double-clicking the atLidar icon on the desktop. When running the program for the first time, the initial screen displays the following. © Copyright Reserved Autonics Co., Ltd.
-
Page 51: Installation Folder Structure
Select “Start > Program > atLidar > Uninstall” or select “Start > Setting > Control Panel > Add/Remove a Program > atLidar”. If you select Remove, a confirmation window will appear. Click Yes to remove atLidar from the computer. © Copyright Reserved Autonics Co., Ltd. -
Page 52: Network Settings
4th Click the [Add] button of IP Address and add the laser scanner IP address. ※For adding IP address, refer to the below table. IP address 192.168.0.*** (***: 3 to 254) Subnet mask 255.255.255.0 © Copyright Reserved Autonics Co., Ltd. -
Page 53: Start And Exit
Lidar Viewer laser scanner. Set parameters of the connected unit for setting list, lidar viewer, Property message windows. Obstacle List Displays obstacle detection list. Records events. Message It displays communication connection and disconnection, errors. © Copyright Reserved Autonics Co., Ltd. -
Page 54: Menu
: At monitoring status, [Log] button is activated. : Click the [Log] button and scan data is saved at the data file of atLidar. During logging the data, you can check the ‘Log Start Time’ and ‘Elapsed Time’. © Copyright Reserved Autonics Co., Ltd. - Page 55 The below dialog box appears. Click the [OK] button to import the parameter values for the laser scanner. Obstacle When connecting laser scanner, displays obstacle detection status in real-time. [obstacle is not detected] [obstacle is detect] © Copyright Reserved Autonics Co., Ltd.
- Page 56 Delete: Select the saved layout and delete it. Default: Changes docking screen layout to default layout. Tool : Opens Prpperties, Setting List, Message, Obstacle Linst, Data File windows. Obstacle Refer to 8.5.1 Menu > (1) Home> 4)Obstacle’. © Copyright Reserved Autonics Co., Ltd.
- Page 57 Set the displayed graph channels and channels’ color at Lidar Viewer. Teaching graph Set the displayed teaching graph channels and channels’ color at Lidar Viewer. You can change the color for each channel for scan graph, teaching graph by double-clicking the color. © Copyright Reserved Autonics Co., Ltd.
- Page 58 8 Laser Scanner Program [atLidar] [Scan graph] Scan graph of Ch1, Ch2 with checking Grid and Dot mode Scan graph of Ch1, Ch2 with checking Distance, Coordinate and unchecked Dot mode (as Line mode) © Copyright Reserved Autonics Co., Ltd.
-
Page 59: Setting List
You can change, add, or delete the sensor information. Double-click the desired sensor to read the information. (1) Add Folder Click the [Add Folder] and the below dialog box appears. Enter the desired folder name. Click the [OK] button and the folder is added. © Copyright Reserved Autonics Co., Ltd. - Page 60 Enter the desired name and click the [OK] button to change the folder name. Change Select the sensor to change information and click the [Change]. The below dialog box appears. Enter sensor name, description and click the [OK] button to change information. © Copyright Reserved Autonics Co., Ltd.
- Page 61 At Setting List, double-click the sensor and sensor setting is changed automatically at Home menu. (4) Delete Select the desired folder or sensor and click [Delete] to delete it. The below dialog box appears. Click the [OK] button. © Copyright Reserved Autonics Co., Ltd.
-
Page 62: Data File
The log data is available to check the information at Data File. “Home > Open” and select the desired log data file. Click the time at Data File and the scan graph displays at Lidar Viewer. © Copyright Reserved Autonics Co., Ltd. -
Page 63: Lidar Viewer
④ Save screen On the graph, click the right mouse button and the pop-up menu appears. You can save the screen as image files. Select the desired save method: Save to Clipboard, or Save to File. © Copyright Reserved Autonics Co., Ltd. -
Page 64: Obstacle List
Displays obstacle detection list (detection start time, end time) Delete all Click the button to clear the obstacle list. 8.5.6 Message Records events (communication status (start/stop communication, error), log status (start/stop log), etc.) during running the program. © Copyright Reserved Autonics Co., Ltd. -
Page 65: Property
Property For the proper laser scanner operation, you should set the parameters for the desired system. Property consists of parameters and setting values. Setting values are set as selection, edit, combo, or run type. © Copyright Reserved Autonics Co., Ltd. -
Page 66: Functions
Sensitivity level Minimum size of the scanning ● ● target ● ● Monitoring time ● ● Output ● ● Teaching ● Password ● Initialization (except password) ● IP initialization Setting value initialization ● (except IP) © Copyright Reserved Autonics Co., Ltd. -
Page 67: Sensor Position
In case of left or right installation, setting value of monitoring zone width (W) and height (H) must be entered. In case of center installation, monitoring zone width (W), height (H) is not changeable. © Copyright Reserved Autonics Co., Ltd. - Page 68 8 Laser Scanner Program [atLidar] [Platform screen door (PSD)] Bottom view, right installation Top view, left installation © Copyright Reserved Autonics Co., Ltd.
-
Page 69: Activated Channel (S)
The laser scanner has 4 channels (Ch1, Ch2, Ch3, Ch4). Activate the channel (s) for obstacle detection. Factory default: Ch1, Ch2, Ch3, Ch4 activated Setting method Check the channel to activate at [Property] window. © Copyright Reserved Autonics Co., Ltd. -
Page 70: Monitoring Zone Width (W), Height (H)
When the mouse is close to the setting box, the setting range appears. Monitoring zone may be different by the reflectivity of obstacles. For the stable detection, the monitoring zone is set up to 6m. © Copyright Reserved Autonics Co., Ltd. -
Page 71: Concentrated Monitoring Zone
Click the desired value or pressing Alt + direction keys, from combo box or double-click the combo box and enter the value at [Property] window. In case of left or right sensor install position, the concentrated zone is available to set. © Copyright Reserved Autonics Co., Ltd. -
Page 72: Sensitivity Level
It is able to set the object scanning sensitivity of the laser scanner. Setting range is from level 1 (most sensitive, indoor installation) to level 4 (most insensitive, installation in an environment subject to snow or rain). Factory default: Level 1 Setting method © Copyright Reserved Autonics Co., Ltd. -
Page 73: Minimum Size Of The Scanning Target
If the minimum size of the scanning target is set to OFF, the size of the scannable object is as follows. At detection distance of 3m: approx. W2.1ⅹH2.1ⅹL2.1cm At detection distance of 5m: approx. W3.5ⅹH3.5ⅹL3.5cm Factory default: Approx. 5cm Setting method © Copyright Reserved Autonics Co., Ltd. -
Page 74: Monitoring Time
Normally open Pulse N.C. / Pulse Normally closed Pulse In case of OUT2 (error status output) as pulse, it repeats open-close operation for 1 sec at the normal operation and it closes at error status. © Copyright Reserved Autonics Co., Ltd. -
Page 75: Teaching
For re-install the unit teaching already at no teaching required area, initial the unit. Do not re-teaching it. Operate teaching in the environment free from snow, rain, fog, hail, or mutual interference of another laser scanner. © Copyright Reserved Autonics Co., Ltd. -
Page 76: Setting Initialization
Click the right […] button and the appropriate dialog box appears. 8.6.11 TCP/IP Setting IP address, gate way, subnet mask settings of TCP/IP are available to change. Setting method Click the right […] button and the appropriate dialog box appears. © Copyright Reserved Autonics Co., Ltd. -
Page 77: Changing Program Language
Change Language Changes the program language. Default language is the program installation language. Select “Help > Language” from the main menu. Language option is applied immediately and the program is displyed in the selected language. © Copyright Reserved Autonics Co., Ltd. -
Page 78: Modifying And Adding Languages
Change the title of language In <local>English</local> section in English. (highlighted with a square in the image below), change the English contents to your desired language and save. For example, to change to Korean: Change ‘File’ to ‘파일’. © Copyright Reserved Autonics Co., Ltd. -
Page 79: Troubleshooting
9 Troubleshooting Troubleshooting Check the normal operation status of LSE-4A5R2 periodically. Error Causes Troubleshooting Supply the power voltage. Check the rated power supply. Power indicator Wrong polarity connection of Check the Connection diagram when wiring (green) OFF power supply the unit. - Page 80 * Dimensions or specifications on this manual are subject to change and some models may be discontinued without notice. MSO-LSE4A5R2U1-V1.1-1901US...
Need help?
Do you have a question about the LSE-4A5R2 and is the answer not in the manual?
Questions and answers