Advertisement
Quick Links
Advertisement

Related Manuals for VIRTUFIT CTR 1.0


Summary of Contents for VIRTUFIT CTR 1.0
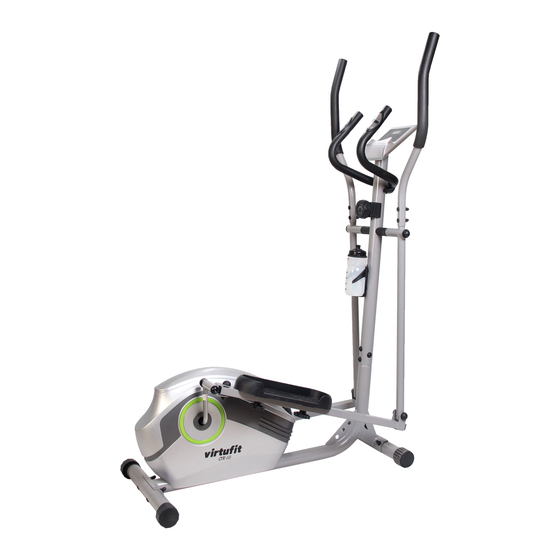
- Page 1 CTR 1.0 Crosstrainer User manual...
-
Page 2: Table Of Contents
INDEX Important safety notice Assembly instructions Maintenance Operating Guide Technical drawing Parts list VirtuFit CTR 1.0 Crosstrainer... -
Page 3: Important Safety Notice
Ensure that those present are aware of possible hazards, e.g. movable parts during training. Warning: incorrect/excessive training can cause health injuries. Consult your physician before starting with any exercise program. He or she can advise on the kind of training and which impact is suitable. VirtuFit CTR 1.0 Crosstrainer... -
Page 4: Assembly Instructions
In this way you prevent the head of the socket head from being turned. STEP 1 – Attach the Front Stabilizer (35) and the Rear Stabilizer (36) to the Main Frame (40) with Carriage Bolt (33), Domed Nut (23) and Arc Washer (22). VirtuFit CTR 1.0 Crosstrainer... - Page 5 – Connect the Sensor 16 and 38,and Tension Control wire 53 and 39 as shown above, fix the Upright Post (15) with the Main Frame (40) with Bolt (26), Arc Washer (22). Fasten tightly. Note: Tighten the Screw (27) and the Arc Washer (22) after the STEP 3. VirtuFit CTR 1.0 Crosstrainer...
- Page 6 – Fix the Pedal Tubes (42L/R) with the Pedal Crank by Pedal Hinge Bolt (46L/R)Curved Washer (50), and Nylon Nut (51L/R). Install the Pedal (44) on the Pedal Tube (42L/R) with Hex Head Bolt(43), Knob (27). VirtuFit CTR 1.0 Crosstrainer...
- Page 7 – Install the Middle handlebar (4) on the Upright Post (15) with bolt (8) Arc Waser (9); – Fix the Handlebar ( 11 L / R ) to the Lower Handle Bar ( 25 L / R ) with Bolt (21), Arc Washer (85) and Domed Nut (23). VirtuFit CTR 1.0 Crosstrainer...
- Page 8 CAUTION: MAKE SURE YOU HAVE TIGHTENED ALL THE BOLTS AND NUTS WELL BEFORE BE GINNING YOUR WORKOUT. NOTE: THE END CAP ON THE FRONT STABILIZER TUBE IS MOVABLE, WHICH IT IS EASY FOR YOU TO MOVE YOUR ELIPTICALL. VirtuFit CTR 1.0 Crosstrainer...
-
Page 9: Maintenance
3. If you have a lot of calluses on your hands, it is more difficult for the sensors to measure, when this is the case a chest strap is recommended. VirtuFit CTR 1.0 Crosstrainer... -
Page 10: Operating Guide
Press “MODE” button until “SCAN” appears, monitor will rotate through all the 6 (2) SCAN functions: Time, speed, distance, ODO, calorie, pulse. Each display will be hold 5 seconds. (3) TIME Count the total time from exercise start to end. (4) SPEED Display current speed. VirtuFit CTR 1.0 Crosstrainer... - Page 11 3. The monitor will be auto-powered on when starting to exercise push button w/signal in. 4. The monitor will automatically start calculating when you start to exercise and will stop calculating when you stop exercising for 4 seconds . VirtuFit CTR 1.0 Crosstrainer...
- Page 12 TRIP DISTANCE 0.0 ~9999 (ML)KM CALORIES 0.0 ~9999 kCAL 0.0 ~9999 (ML)KM PULSE RATE 40 ~240 BPM BATTERY TYPE 2pcs of SIZE –AAA or UM –4 OPERATING 0°C ~ +40°C TEMPERATURE STORAGE -10°C ~ +60°C TEMPERATURE VirtuFit CTR 1.0 Crosstrainer...
-
Page 13: Technical Drawing
TECHNICAL DRAWING 1b 1a 85 23 52 51R 49L 50 VirtuFit CTR 1.0 Crosstrainer... - Page 14 TECHNICAL DRAWING VirtuFit CTR 1.0 Crosstrainer...
-
Page 15: Parts List
Chain cover ( L / R ) Knob M10 End cap S17 Washer Bolt M10x60 Left collar housing Bushing φ14x12.5Xφ10.1 Collar ball Washer D10Xφ20x2 Collar housing Nylon nut M10 Right collar housing Carriage Bolt M8X60 Washer VirtuFit CTR 1.0 Crosstrainer... - Page 16 Spring washer d6 Crank Bolt Washer d6 Bracket Srap ring d12 Open-end wrench S13 14 15 Axle of magnetic board Hex wrench S6 Bottle holder Hex wrench S8 Crosshead screw M5*15 Open-end wrench S17 18 19 100 Bottle VirtuFit CTR 1.0 Crosstrainer...
- Page 17 For questions or missing parts please contact your dealer.
Need help?
Do you have a question about the CTR 1.0 and is the answer not in the manual?
Questions and answers